
1. ആമുഖം
This manual provides detailed instructions for the setup, operation, and maintenance of your Akko TAC75 HE 8K RGB Magnetic Gaming Keyboard. Please read this manual thoroughly before using the product to ensure optimal performance and longevity.
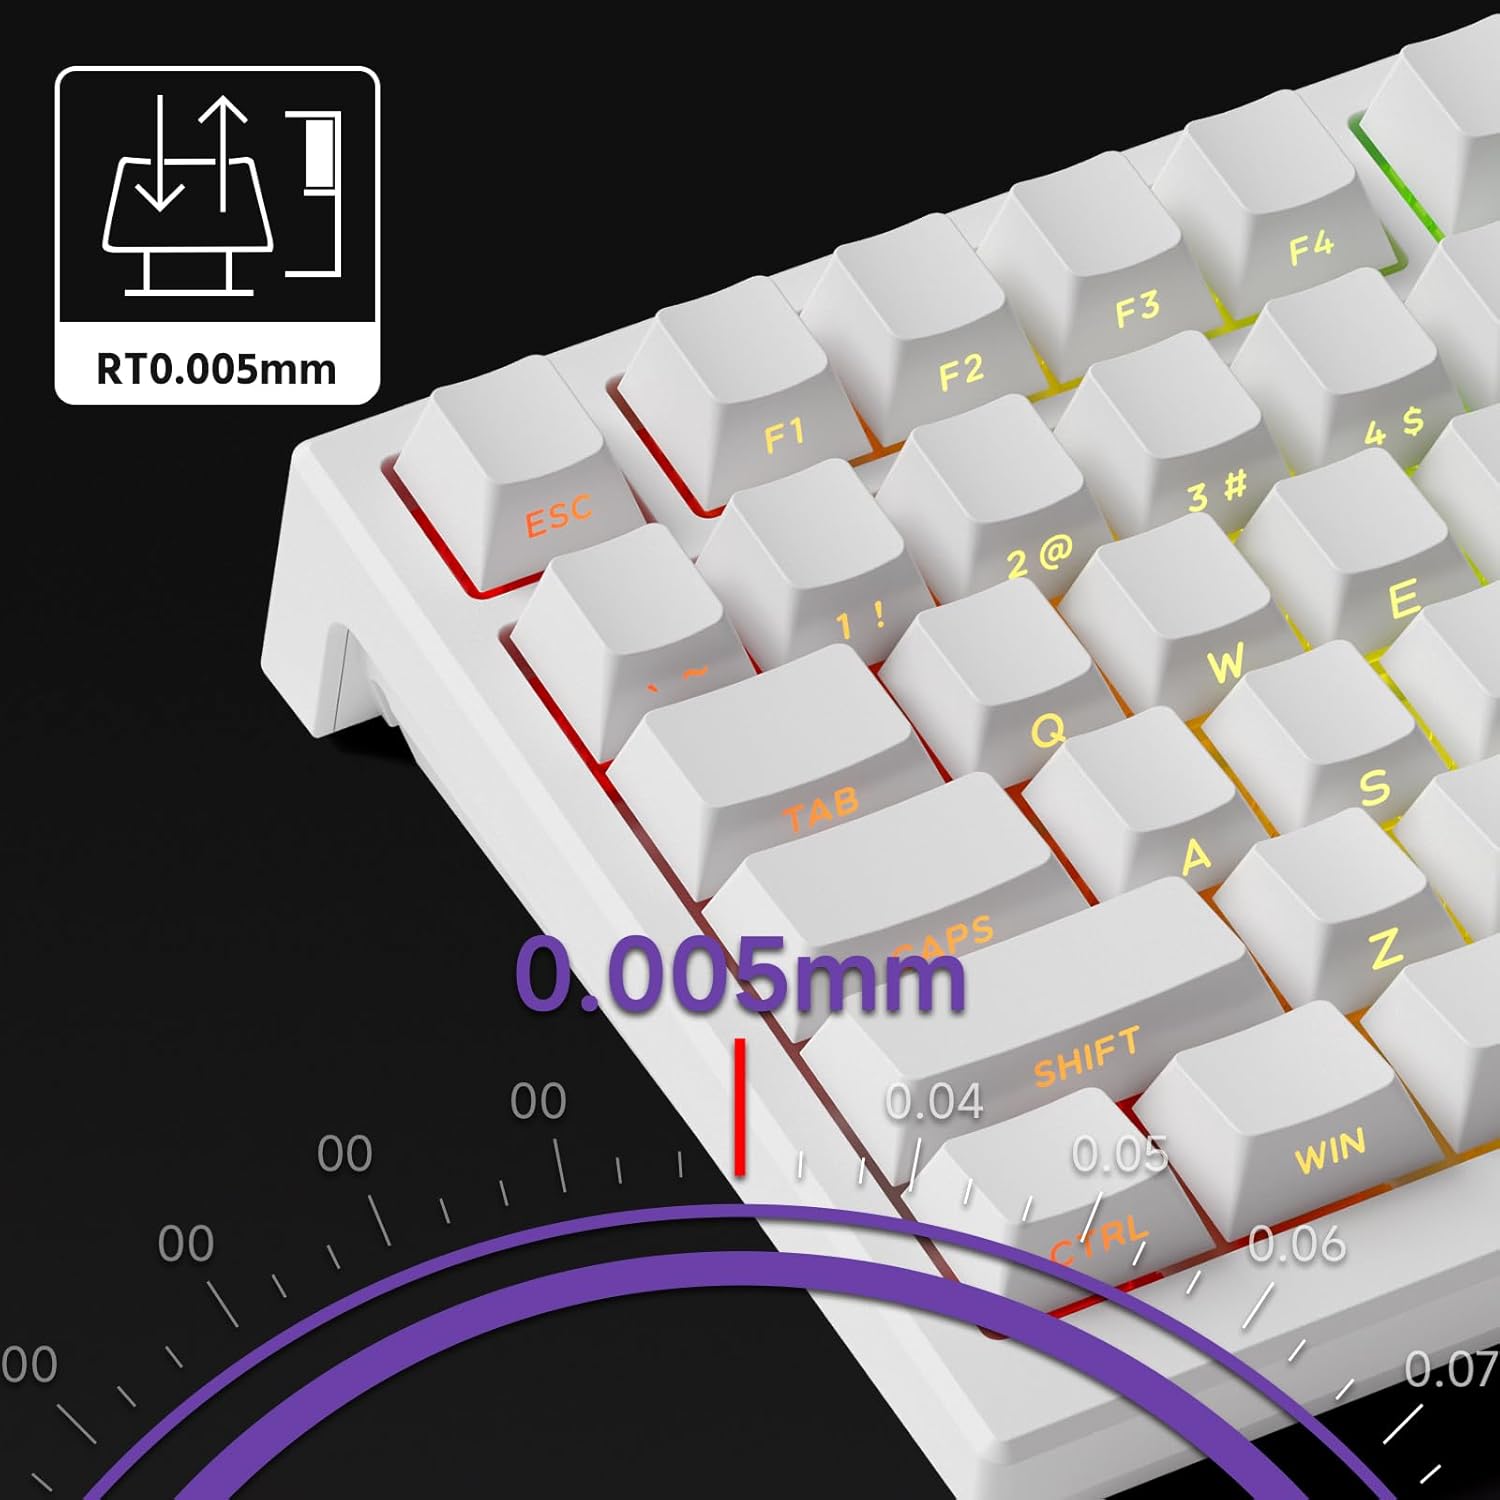
Image 1.1: Akko TAC75 HE 8K RGB Magnetic Gaming Keyboard. This image displays the full keyboard from a top-down perspective, showcasing its 75% layout and RGB lighting.
2. പാക്കേജ് ഉള്ളടക്കം
പാക്കേജിൽ എല്ലാ ഇനങ്ങളും ഉണ്ടെന്ന് ഉറപ്പാക്കുക:
- Akko TAC75 HE 8K RGB Magnetic Gaming Keyboard
- യുഎസ്ബി ടൈപ്പ്-സി കേബിൾ
- ഉപയോക്തൃ മാനുവൽ (ഈ പ്രമാണം)
- Keycap Puller (may vary by region)
- Switch Puller (may vary by region)
3. സജ്ജീകരണം
3.1 കീബോർഡ് ബന്ധിപ്പിക്കുന്നു
- Unpack the keyboard and USB Type-C cable from the box.
- Connect the USB Type-C end of the cable to the port on the back of the keyboard.
- നിങ്ങളുടെ കമ്പ്യൂട്ടറിൽ ലഭ്യമായ ഒരു USB പോർട്ടിലേക്ക് കേബിളിന്റെ സ്റ്റാൻഡേർഡ് USB-A അറ്റം ബന്ധിപ്പിക്കുക.
- The keyboard will automatically be detected by your operating system.

Image 3.1: Keyboard with integrated cable routing channels. This image highlights the cable management grooves on the underside of the keyboard, allowing for organized cable placement.
3.2 Software Installation (Akko Driver)
For full customization and advanced features, download and install the Akko Driver software. The software allows you to configure key bindings, RGB lighting, actuation points, and other magnetic switch settings.
- Visit the official Akko webസൈറ്റ്: https://web.akkogear.com/
- Navigate to the "Driver" or "Software" section.
- നിങ്ങളുടെ ഓപ്പറേറ്റിംഗ് സിസ്റ്റത്തിന് അനുയോജ്യമായ ഡ്രൈവർ ഡൗൺലോഡ് ചെയ്യുക.
- ഇൻസ്റ്റാളേഷൻ പൂർത്തിയാക്കാൻ ഓൺ-സ്ക്രീൻ നിർദ്ദേശങ്ങൾ പാലിക്കുക.
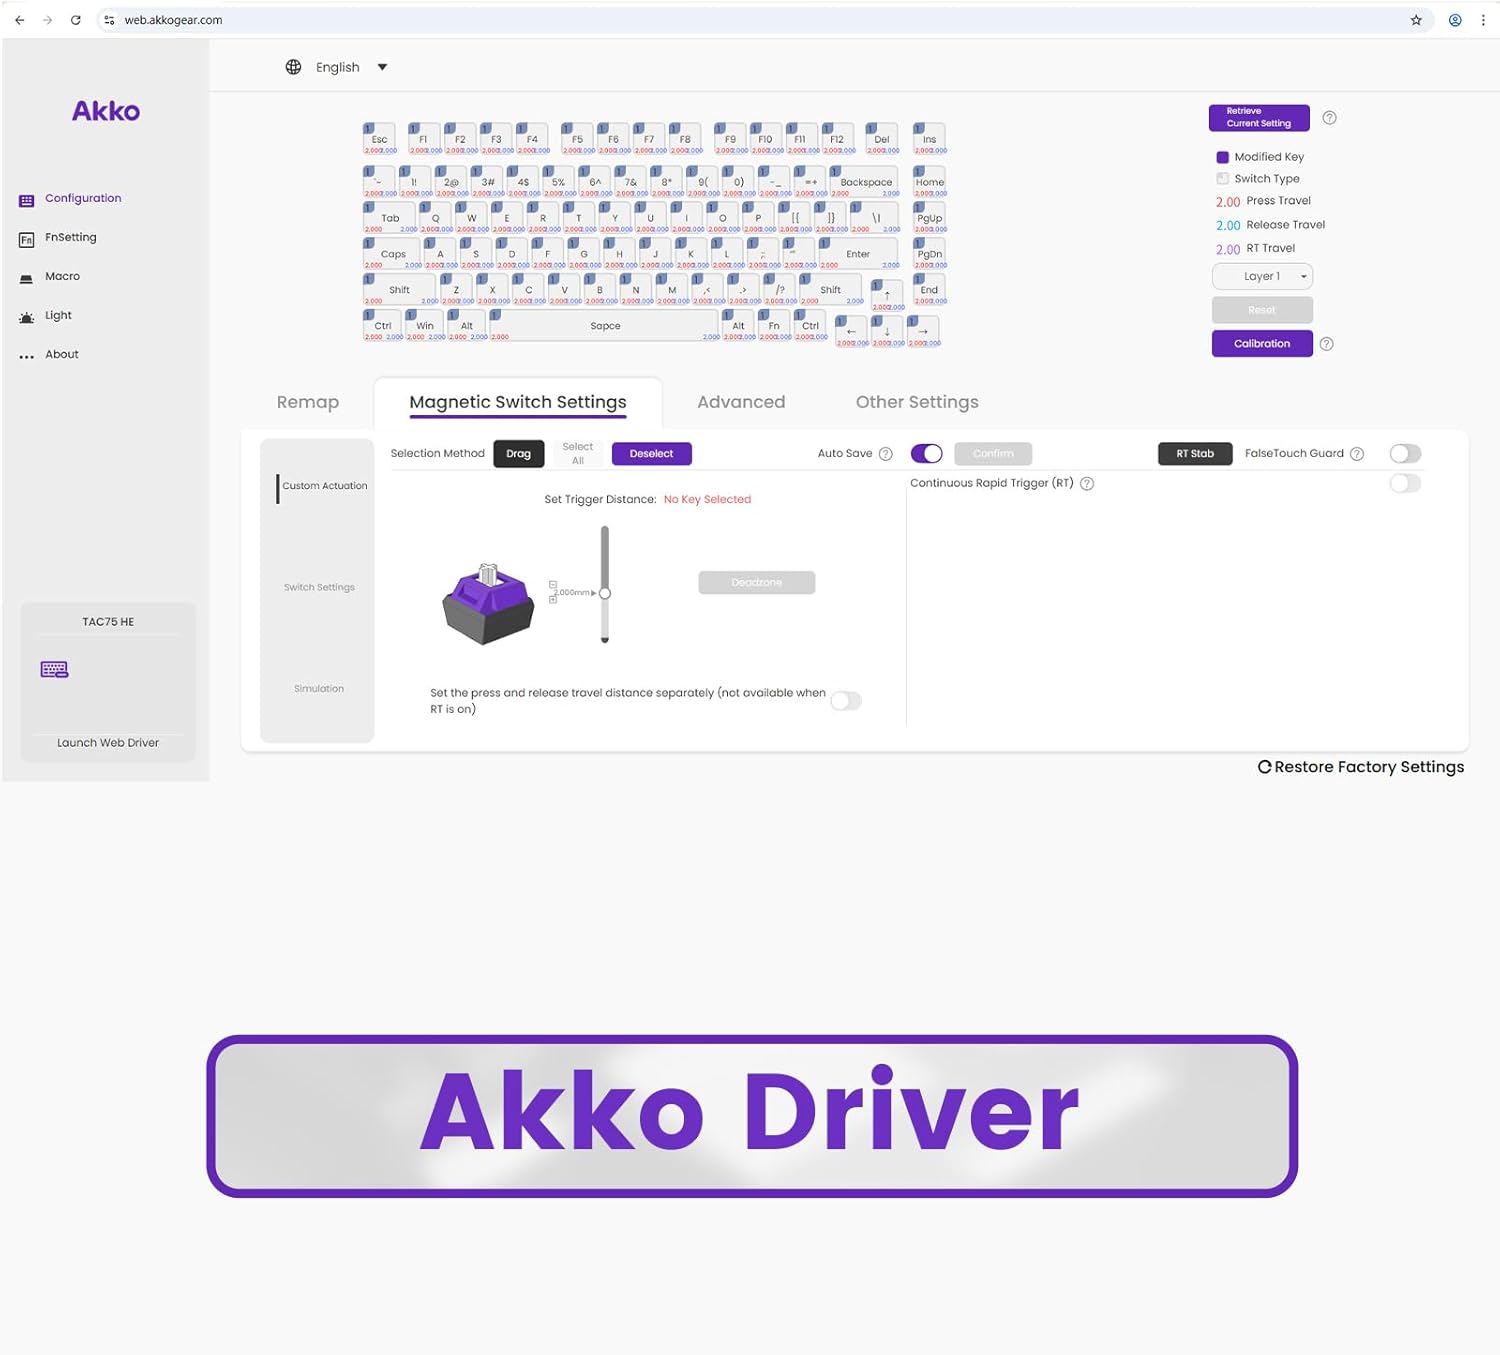
Image 3.2: Screenshot of the Akko Driver software interface. This image shows the web-based driver with options for configuration, remapping, magnetic switch settings, and advanced settings.
4. പ്രവർത്തന നിർദ്ദേശങ്ങൾ
4.1 അടിസ്ഥാന കീബോർഡ് പ്രവർത്തനങ്ങൾ
The Akko TAC75 HE functions as a standard 75% ANSI layout keyboard. All standard keys operate as expected. Function keys (F1-F12) are accessible via the Fn കീ കോമ്പിനേഷൻ.
4.2 Magnetic Switch Features
Your keyboard is equipped with advanced magnetic switches, offering features like adjustable actuation, Rapid Trigger, SOCD, and DKS.
4.2.1 ക്രമീകരിക്കാവുന്ന ആക്ച്വേഷൻ
The actuation distance of each key can be precisely adjusted in increments of 0.005mm using the Akko Driver software. This allows you to customize the key sensitivity to your preference, from light touches to deeper presses.

Image 4.1: Graphic illustrating 0.005mm adjustable actuation. This image shows a close-up of keyboard keys with a diagram indicating the precise 0.005mm actuation adjustment capability.
4.2.2 Rapid Trigger (RT)
Rapid Trigger allows keys to actuate and reset based on movement rather than a fixed point. This means a key can register a new press as soon as it begins to move upwards, and reset as soon as it begins to move downwards, enabling faster repeated inputs. Configure RT settings via the Akko Driver.
4.2.3 Dynamic Key Strokes (DKS) / Mod Tap
DKS, also known as Mod Tap, allows a single key to perform different actions based on how it is pressed. For example, a quick tap might register one key, while holding it down registers another. This feature can be configured through the Akko Driver software.
4.2.4 Simultaneous Opposing Cardinal Directions (SOCD)
SOCD cleaning is a feature primarily used in gaming to prevent conflicting directional inputs. For instance, if both 'left' and 'right' are pressed simultaneously, SOCD cleaning can prioritize one direction or cancel both, depending on the configured mode. This is configurable within the Akko Driver.
4.3 RGB ലൈറ്റിംഗ് നിയന്ത്രണം
The Akko TAC75 HE features customizable RGB backlighting. Lighting effects, colors, and brightness can be adjusted using the Akko Driver software. Some basic lighting modes might be accessible via Fn key combinations (refer to the software for specific key combinations).

Image 4.3: Akko TAC75 HE keyboard displaying vibrant RGB lighting. This image showcases the keyboard's customizable backlighting across its keys.
4.4 High Performance Features
The keyboard boasts an 8000Hz polling rate and 16000Hz scan rate, minimizing input latency and ensuring rapid response times for competitive gaming.

Image 4.4: Graphic indicating 8K Polling Rate and 16K Universal Scan. This image highlights the high-performance specifications of the keyboard, emphasizing its low latency capabilities.
5. പരിപാലനം
5.1 കീബോർഡ് വൃത്തിയാക്കൽ
കീബോർഡിന്റെ രൂപഭാവവും പ്രവർത്തനക്ഷമതയും നിലനിർത്താൻ:
- വൃത്തിയാക്കുന്നതിനുമുമ്പ് നിങ്ങളുടെ കമ്പ്യൂട്ടറിൽ നിന്ന് കീബോർഡ് വിച്ഛേദിക്കുക.
- മൃദുവായ, ലിൻ്റ് രഹിത തുണി ഉപയോഗിക്കുകampകീക്യാപ്പുകളും കെയ്സും തുടയ്ക്കാൻ വെള്ളമോ നേരിയ ക്ലീനിംഗ് ലായനിയോ ഉപയോഗിച്ച് നനയ്ക്കുക.
- കീക്യാപ്പുകൾക്കിടയിലുള്ള പൊടിയും അവശിഷ്ടങ്ങളും ഉണ്ടെങ്കിൽ, കംപ്രസ് ചെയ്ത വായു ഉപയോഗിക്കുക.
- കഠിനമായ രാസവസ്തുക്കൾ, ഉരച്ചിലുകൾ അല്ലെങ്കിൽ ലായകങ്ങൾ ഉപയോഗിക്കുന്നത് ഒഴിവാക്കുക.
5.2 കീക്യാപ്പ് നീക്കം ചെയ്യലും മാറ്റിസ്ഥാപിക്കലും
The keyboard features durable PBT Double-shot keycaps. If you need to remove or replace keycaps:
- Use a keycap puller to gently remove keycaps. Pull straight up to avoid damaging the switch stem.
- When replacing, align the keycap with the switch stem and press down gently until it clicks into place.

Image 5.1: Diagram showing Cherry Profile keycap heights. This image illustrates the varying heights of keycaps across different rows, characteristic of the Cherry profile.
6. പ്രശ്നപരിഹാരം
6.1 കീബോർഡ് പ്രതികരിക്കുന്നില്ല
- യുഎസ്ബി ടൈപ്പ്-സി കേബിൾ കീബോർഡിലേക്കും കമ്പ്യൂട്ടറിലേക്കും സുരക്ഷിതമായി ബന്ധിപ്പിച്ചിട്ടുണ്ടെന്ന് ഉറപ്പാക്കുക.
- നിങ്ങളുടെ കമ്പ്യൂട്ടറിലെ മറ്റൊരു USB പോർട്ടിലേക്ക് കീബോർഡ് ബന്ധിപ്പിക്കാൻ ശ്രമിക്കുക.
- സിസ്റ്റം-നിർദ്ദിഷ്ട പ്രശ്നങ്ങൾ ഒഴിവാക്കാൻ മറ്റൊരു കമ്പ്യൂട്ടറിൽ കീബോർഡ് പരിശോധിക്കുക.
- നിങ്ങളുടെ കമ്പ്യൂട്ടർ പുനരാരംഭിക്കുക.
6.2 RGB ലൈറ്റിംഗ് പ്രവർത്തിക്കുന്നില്ല
- Check the Akko Driver software to ensure RGB lighting is enabled and configured correctly.
- Ensure no conflicting software is running that might interfere with RGB control.
- Try resetting the keyboard to factory defaults via the Akko Driver software.
6.3 Software Not Detecting Keyboard
- Ensure the Akko Driver software is the latest version. Re-download from https://web.akkogear.com/ ആവശ്യമെങ്കിൽ.
- ഡ്രൈവറെ ബ്ലോക്ക് ചെയ്യുന്ന ഏതെങ്കിലും ആന്റിവൈറസ് അല്ലെങ്കിൽ ഫയർവാൾ സോഫ്റ്റ്വെയർ താൽക്കാലികമായി പ്രവർത്തനരഹിതമാക്കുക.
- Ensure the keyboard is directly connected to the computer and not through a USB hub.
7 സ്പെസിഫിക്കേഷനുകൾ
| ഫീച്ചർ | വിശദാംശങ്ങൾ |
|---|---|
| മോഡൽ | Akko TAC75 HE |
| സ്വിച്ചുകൾ | Akko Glare Linear Magnetic Switches |
| ആക്ച്വേഷൻ | Magnetic, Adjustable (0.005mm increments) |
| ലേഔട്ട് | 75% ANSI |
| പോളിംഗ് നിരക്ക് | 8000 Hz |
| സ്കാൻ നിരക്ക് | 16000 Hz |
| കണക്റ്റിവിറ്റി | യുഎസ്ബി ടൈപ്പ്-സി (വയർഡ്) |
| കീകാപ്പുകൾ | PBT Double-shot, Side-printed Shine-through |
| ലൈറ്റിംഗ് | RGB |
| കേസ് മെറ്റീരിയൽ | എബിഎസ് പ്ലാസ്റ്റിക് |
| കേബിൾ നീളം | 1.5 മീ |
| അളവുകൾ (ഏകദേശം) | 330 x 76 x 135 മിമി |
| ഭാരം (ഏകദേശം) | 700 ഗ്രാം |
| അനുയോജ്യമായ ഉപകരണങ്ങൾ | പിസി, ഗെയിമിംഗ് കൺസോൾ |
| പ്രത്യേക സവിശേഷതകൾ | Hall Effect, SOCD, Rapid Trigger, DKS Mod Tap, Adjustable Height |
8. വാറൻ്റിയും പിന്തുണയും
8.1 വാറൻ്റി വിവരങ്ങൾ
The Akko TAC75 HE 8K RGB Magnetic Gaming Keyboard comes with a 12 മാസ വാറൻ്റി from the date of purchase, covering manufacturing defects. Please retain your proof of purchase for warranty claims. The warranty does not cover damage caused by misuse, accidents, unauthorized modifications, or normal wear and tear.
8.2 ഉപഭോക്തൃ പിന്തുണ
For technical assistance, warranty claims, or further inquiries, please contact Akko customer support through their official webസൈറ്റ്:
You may also find FAQs and additional resources on their support pages.