
1. ആമുഖം
Welcome to the Acer OHR632 Wireless Gaming Headsets user manual. This guide provides essential information for setting up, operating, and maintaining your new gaming headset. Please read this manual thoroughly before use to ensure optimal performance and longevity of your device.
The Acer OHR632 offers versatile connectivity options including 2.4GHz wireless, Bluetooth 5.3, and a 3.5mm wired connection, making it compatible with a wide range of devices such as PS5, PS4, PC, and Nintendo Switch. Enjoy immersive stereo sound, a noise-canceling microphone, and extended battery life for an enhanced gaming experience.
2. എന്താണ് ഉൾപ്പെടുത്തിയിരിക്കുന്നത്
Carefully unpack your Acer OHR632 Wireless Gaming Headset package. The following items should be included:
- Acer OHR632 Wireless Gaming Headset
- Detachable Omni-directional Noise-reduction Microphone
- 2.4GHz USB-A Wireless Dongle (with USB-C adapter)
- USB-A മുതൽ USB-C വരെ ചാർജിംഗ് കേബിൾ
- 3.5 എംഎം ഓഡിയോ കേബിൾ
- ഉപയോക്തൃ മാനുവൽ (ഈ പ്രമാണം)

ചിത്രം 2.1: പാക്കേജ് ഉള്ളടക്കം
3. ഉൽപ്പന്ന സവിശേഷതകൾ
- ട്രൈ-മോഡ് വയർലെസ് കണക്റ്റിവിറ്റി: Seamlessly switch between 2.4GHz wireless, Bluetooth 5.3, and 3.5mm wired connections for ultimate flexibility across various devices.
- ഇമ്മേഴ്സീവ് സ്റ്റീരിയോ സൗണ്ട്: Equipped with powerful 50mm drivers and ultra-low latency (≤20ms) for high-fidelity audio, providing a competitive edge in gaming.
- നോയ്സ്-റദ്ദാക്കൽ മൈക്രോഫോൺ: Detachable omni-directional microphone with noise reduction ensures clear voice communication during gaming or calls.
- സാർവത്രിക അനുയോജ്യത: Designed for plug-and-play functionality with PS5, PS4, PC, Nintendo Switch, and other compatible devices.
- Extended Comfort & Battery Life: Lightweight design, adjustable headband, and memory foam ear cushions provide comfort for long sessions. Up to 40 hours of gameplay on a single 3-hour charge.

Figure 3.1: Tri-Mode Connectivity Overview
4. സജ്ജീകരണ നിർദ്ദേശങ്ങൾ
4.1 പ്രാരംഭ ചാർജിംഗ്
Before first use, fully charge your headset. Connect the USB-C end of the charging cable to the headset's USB-C port and the USB-A end to a power source (e.g., computer USB port, USB wall adapter). The LED indicator on the headset will show charging status and turn off when fully charged (approximately 3 hours).
4.2 മൈക്രോഫോൺ ഘടിപ്പിക്കൽ
Insert the detachable microphone into the dedicated microphone port on the left earcup. Ensure it is securely seated. The microphone is omni-directional and flexible for optimal positioning.

Figure 4.1: Microphone Attachment
4.3 സുഖസൗകര്യങ്ങൾക്കായി ക്രമീകരിക്കൽ
Adjust the headband to fit comfortably on your head. The earcups feature memory foam cushions designed for extended wear. Ensure the 'L' and 'R' indicators on the inside of the headband correspond to your left and right ears, respectively.

Figure 4.2: Headset Comfort Features
5. പ്രവർത്തന നിർദ്ദേശങ്ങൾ
5.1 പവർ ഓൺ/ഓഫ്
To power on the headset, press and hold the Power button located on the earcup until you hear an audible 'Power On' prompt and the LED indicator illuminates. To power off, press and hold the Power button again until you hear 'Power Off'.
5.2 വോളിയം നിയന്ത്രണം
Use the volume roller/buttons on the earcup to adjust the audio output level. Rotate up to increase volume, and down to decrease.
5.3 മൈക്രോഫോൺ മ്യൂട്ട്
The microphone can be muted/unmuted using the dedicated mute button on the earcup or by flipping the microphone boom upwards (if applicable). Refer to the headset's physical controls for exact functionality.
6. കണക്റ്റിവിറ്റി മോഡുകൾ
6.1 2.4GHz Wireless Connection (for PC, PS5, PS4, Switch Docked)
- Insert the 2.4GHz USB-A wireless dongle into an available USB port on your device. If your device only has USB-C ports, use the provided USB-C adapter.
- Power on your Acer OHR632 headset.
- The headset should automatically pair with the dongle. You will hear an audible 'Connected' prompt.
- Ensure the headset is selected as the audio output and input device in your device's sound settings.
6.2 Bluetooth 5.3 Connection (for Mobile, Switch Handheld, etc.)
- Power on your Acer OHR632 headset.
- Press and hold the Bluetooth pairing button (refer to headset controls for exact location) until the LED indicator flashes, indicating pairing mode.
- On your device, go to Bluetooth settings and select 'Acer OHR632' from the list of available devices.
- Once paired, you will hear an audible 'Connected' prompt.
6.3 3.5mm Wired Connection
- Connect one end of the provided 3.5mm audio cable to the 3.5mm port on your headset.
- Connect the other end of the 3.5mm audio cable to the audio jack of your device (e.g., controller, PC, mobile phone).
- The headset will operate in passive wired mode. Power is not required for audio, but the microphone may require power depending on the device.

Figure 6.1: Headset Connected to PS5
7 സ്പെസിഫിക്കേഷനുകൾ
| ഫീച്ചർ | വിവരണം |
|---|---|
| ബ്രാൻഡ് | ഏസർ |
| മോഡൽ നമ്പർ | EAR632 |
| കണക്റ്റിവിറ്റി ടെക്നോളജി | Wireless (2.4GHz, Bluetooth 5.3), Wired (3.5mm Jack) |
| ചെവി പ്ലേസ്മെൻ്റ് | ചെവിക്ക് മുകളിൽ |
| ഓഡിയോ ഡ്രൈവർ തരം | ഡൈനാമിക് ഡ്രൈവർ (50mm) |
| മൈക്രോഫോൺ | വേർപെടുത്താവുന്ന ഓമ്നി-ദിശാസൂചന നോയ്സ്-റിഡക്ഷൻ |
| ബാറ്ററി ലൈഫ് | 40 മണിക്കൂർ വരെ |
| ബാറ്ററി ചാർജ് സമയം | 3 മണിക്കൂർ |
| അനുയോജ്യമായ ഉപകരണങ്ങൾ | Gaming Consoles (PS5, PS4, Switch), Computers (PC) |
| അധിക സവിശേഷതകൾ | Adjustable Headband, Lightweight, Memory Foam Ear Cushions |
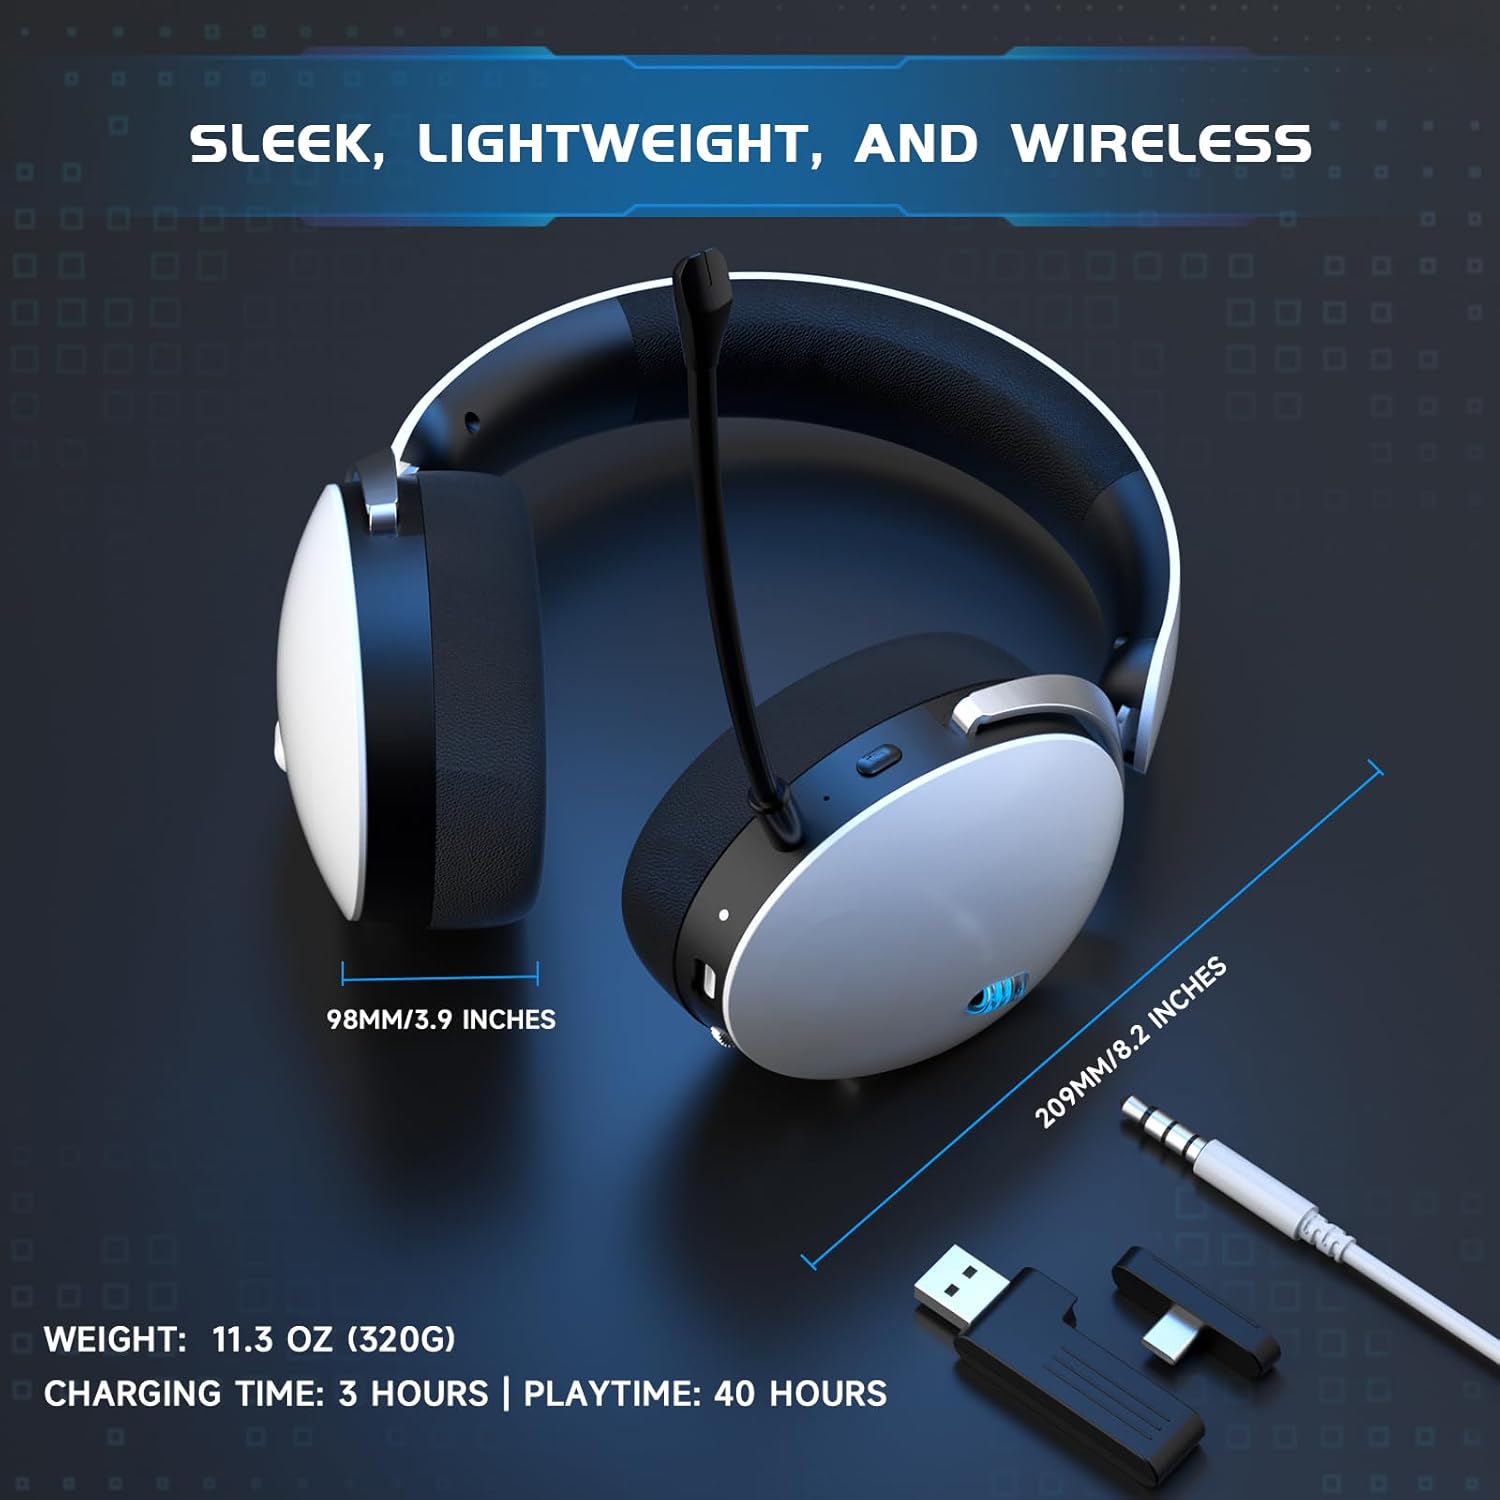
Figure 7.1: Headset Dimensions and Battery Life
8. പരിപാലനം
To ensure the longevity and optimal performance of your Acer OHR632 headset, follow these maintenance guidelines:
- വൃത്തിയാക്കൽ: Use a soft, dry cloth to clean the headset. Avoid using harsh chemicals or abrasive materials. For ear cushions, gently wipe with a damp തുണി, പൂർണ്ണമായും വായുവിൽ ഉണങ്ങാൻ അനുവദിക്കുക.
- സംഭരണം: ഹെഡ്സെറ്റ് നേരിട്ട് സൂര്യപ്രകാശം ഏൽക്കാത്തതും ഉയർന്ന താപനില ഏൽക്കാത്തതുമായ ഒരു തണുത്ത വരണ്ട സ്ഥലത്ത് സൂക്ഷിക്കുക.
- കൈകാര്യം ചെയ്യൽ: Avoid dropping the headset or exposing it to excessive force. Do not twist or bend the cables excessively.
- മൈക്രോഫോൺ കെയർ: When not in use, detach the microphone to prevent damage, or flip it up if the design allows.
9. പ്രശ്നപരിഹാരം
If you encounter any issues with your Acer OHR632 headset, please refer to the following troubleshooting tips:
9.1 ശബ്ദമില്ല / കുറഞ്ഞ ശബ്ദം
- വോളിയം പരിശോധിക്കുക: Ensure the headset's volume control is turned up and not muted. Also, check your device's master volume.
- കണക്റ്റിവിറ്റി: Verify the headset is properly connected via 2.4GHz dongle, Bluetooth, or 3.5mm cable. For wireless connections, ensure the headset is paired and within range.
- ഉപകരണ ക്രമീകരണങ്ങൾ: Confirm that the Acer OHR632 is selected as the default audio output device in your computer or console's sound settings.
- റീബൂട്ട്: Try restarting both your headset and the connected device.
9.2 മൈക്രോഫോൺ പ്രവർത്തിക്കുന്നില്ല
- നിശബ്ദമാക്കുക പരിശോധിക്കുക: Ensure the microphone is not muted on the headset or in your device's software settings.
- കണക്ഷൻ: Verify the detachable microphone is securely inserted into the headset port.
- ഉപകരണ ക്രമീകരണങ്ങൾ: Confirm the Acer OHR632 microphone is selected as the default input device in your computer or console's sound settings. Adjust microphone input levels if necessary.
- അപ്ലിക്കേഷൻ ക്രമീകരണങ്ങൾ: Check microphone settings within the specific game or communication application you are using.
9.3 Pairing Issues (2.4GHz / Bluetooth)
- പവർ സൈക്കിൾ: Turn off and then on both the headset and the dongle/Bluetooth device.
- വീണ്ടും ജോടി: For Bluetooth, unpair the headset from your device and attempt to pair again. For 2.4GHz, ensure the dongle is plugged in and the headset is in pairing mode (if manual pairing is required, refer to specific instructions for your device).
- ഇടപെടൽ: തടസ്സം സൃഷ്ടിച്ചേക്കാവുന്ന മറ്റ് വയർലെസ് ഉപകരണങ്ങളിൽ നിന്ന് മാറുക.
10. വാറൻ്റിയും പിന്തുണയും
Your Acer OHR632 Wireless Gaming Headset is covered by a 1 വർഷത്തെ നിർമ്മാതാവിൻ്റെ വാറൻ്റി വാങ്ങിയ തീയതി മുതൽ. സാധാരണ ഉപയോഗത്തിലുള്ള മെറ്റീരിയലുകളിലെയും വർക്ക്മാൻഷിപ്പുകളിലെയും വൈകല്യങ്ങൾ ഈ വാറന്റി ഉൾക്കൊള്ളുന്നു.
For warranty claims, technical support, or further assistance, please contact Acer Customer Service through their official website or the contact information provided with your product packaging. Please retain your proof of purchase for warranty validation.