
1. ആമുഖം
This manual provides essential information for the setup, operation, and maintenance of your diymore ESP32-C6 1.3-inch LCD Display Development Board. This board integrates a powerful RISC-V single-core processor with Wi-Fi 6 and Bluetooth 5 connectivity, along with a vibrant 1.3-inch ST7789 LCD, making it suitable for a wide range of AIoT and embedded projects.
2. ഉൽപ്പന്നം കഴിഞ്ഞുview
The ESP32-C6 development board is designed for ease of use and versatility. Below is a diagram highlighting the key components of the board.

ചിത്രം 2.1: കഴിഞ്ഞുview of the ESP32-C6 Development Board. This image shows the top-down view of the board, labeling key components such as the ESP32-C6FH4 chip, Micro SD Card Slot, RST Button, BOOT Button, Type-C Interface, and Surface Mount Ceramic Antenna.
- ESP32-C6FH4: The main microcontroller unit.
- മൈക്രോ എസ്ഡി കാർഡ് സ്ലോട്ട്: വികസിപ്പിക്കാവുന്ന സംഭരണത്തിനായി.
- RST ബട്ടൺ: ബോർഡ് പുനഃസജ്ജമാക്കുന്നു.
- ബൂട്ട് ബട്ടൺ: Used for entering bootloader mode for flashing firmware.
- ടൈപ്പ്-സി ഇന്റർഫേസ്: For power supply and data communication (USB-to-serial).
- Surface Mount Ceramic Antenna: Integrated antenna for Wi-Fi and Bluetooth connectivity.
3. സവിശേഷതകൾ
The diymore ESP32-C6 development board offers a robust set of features for various applications:
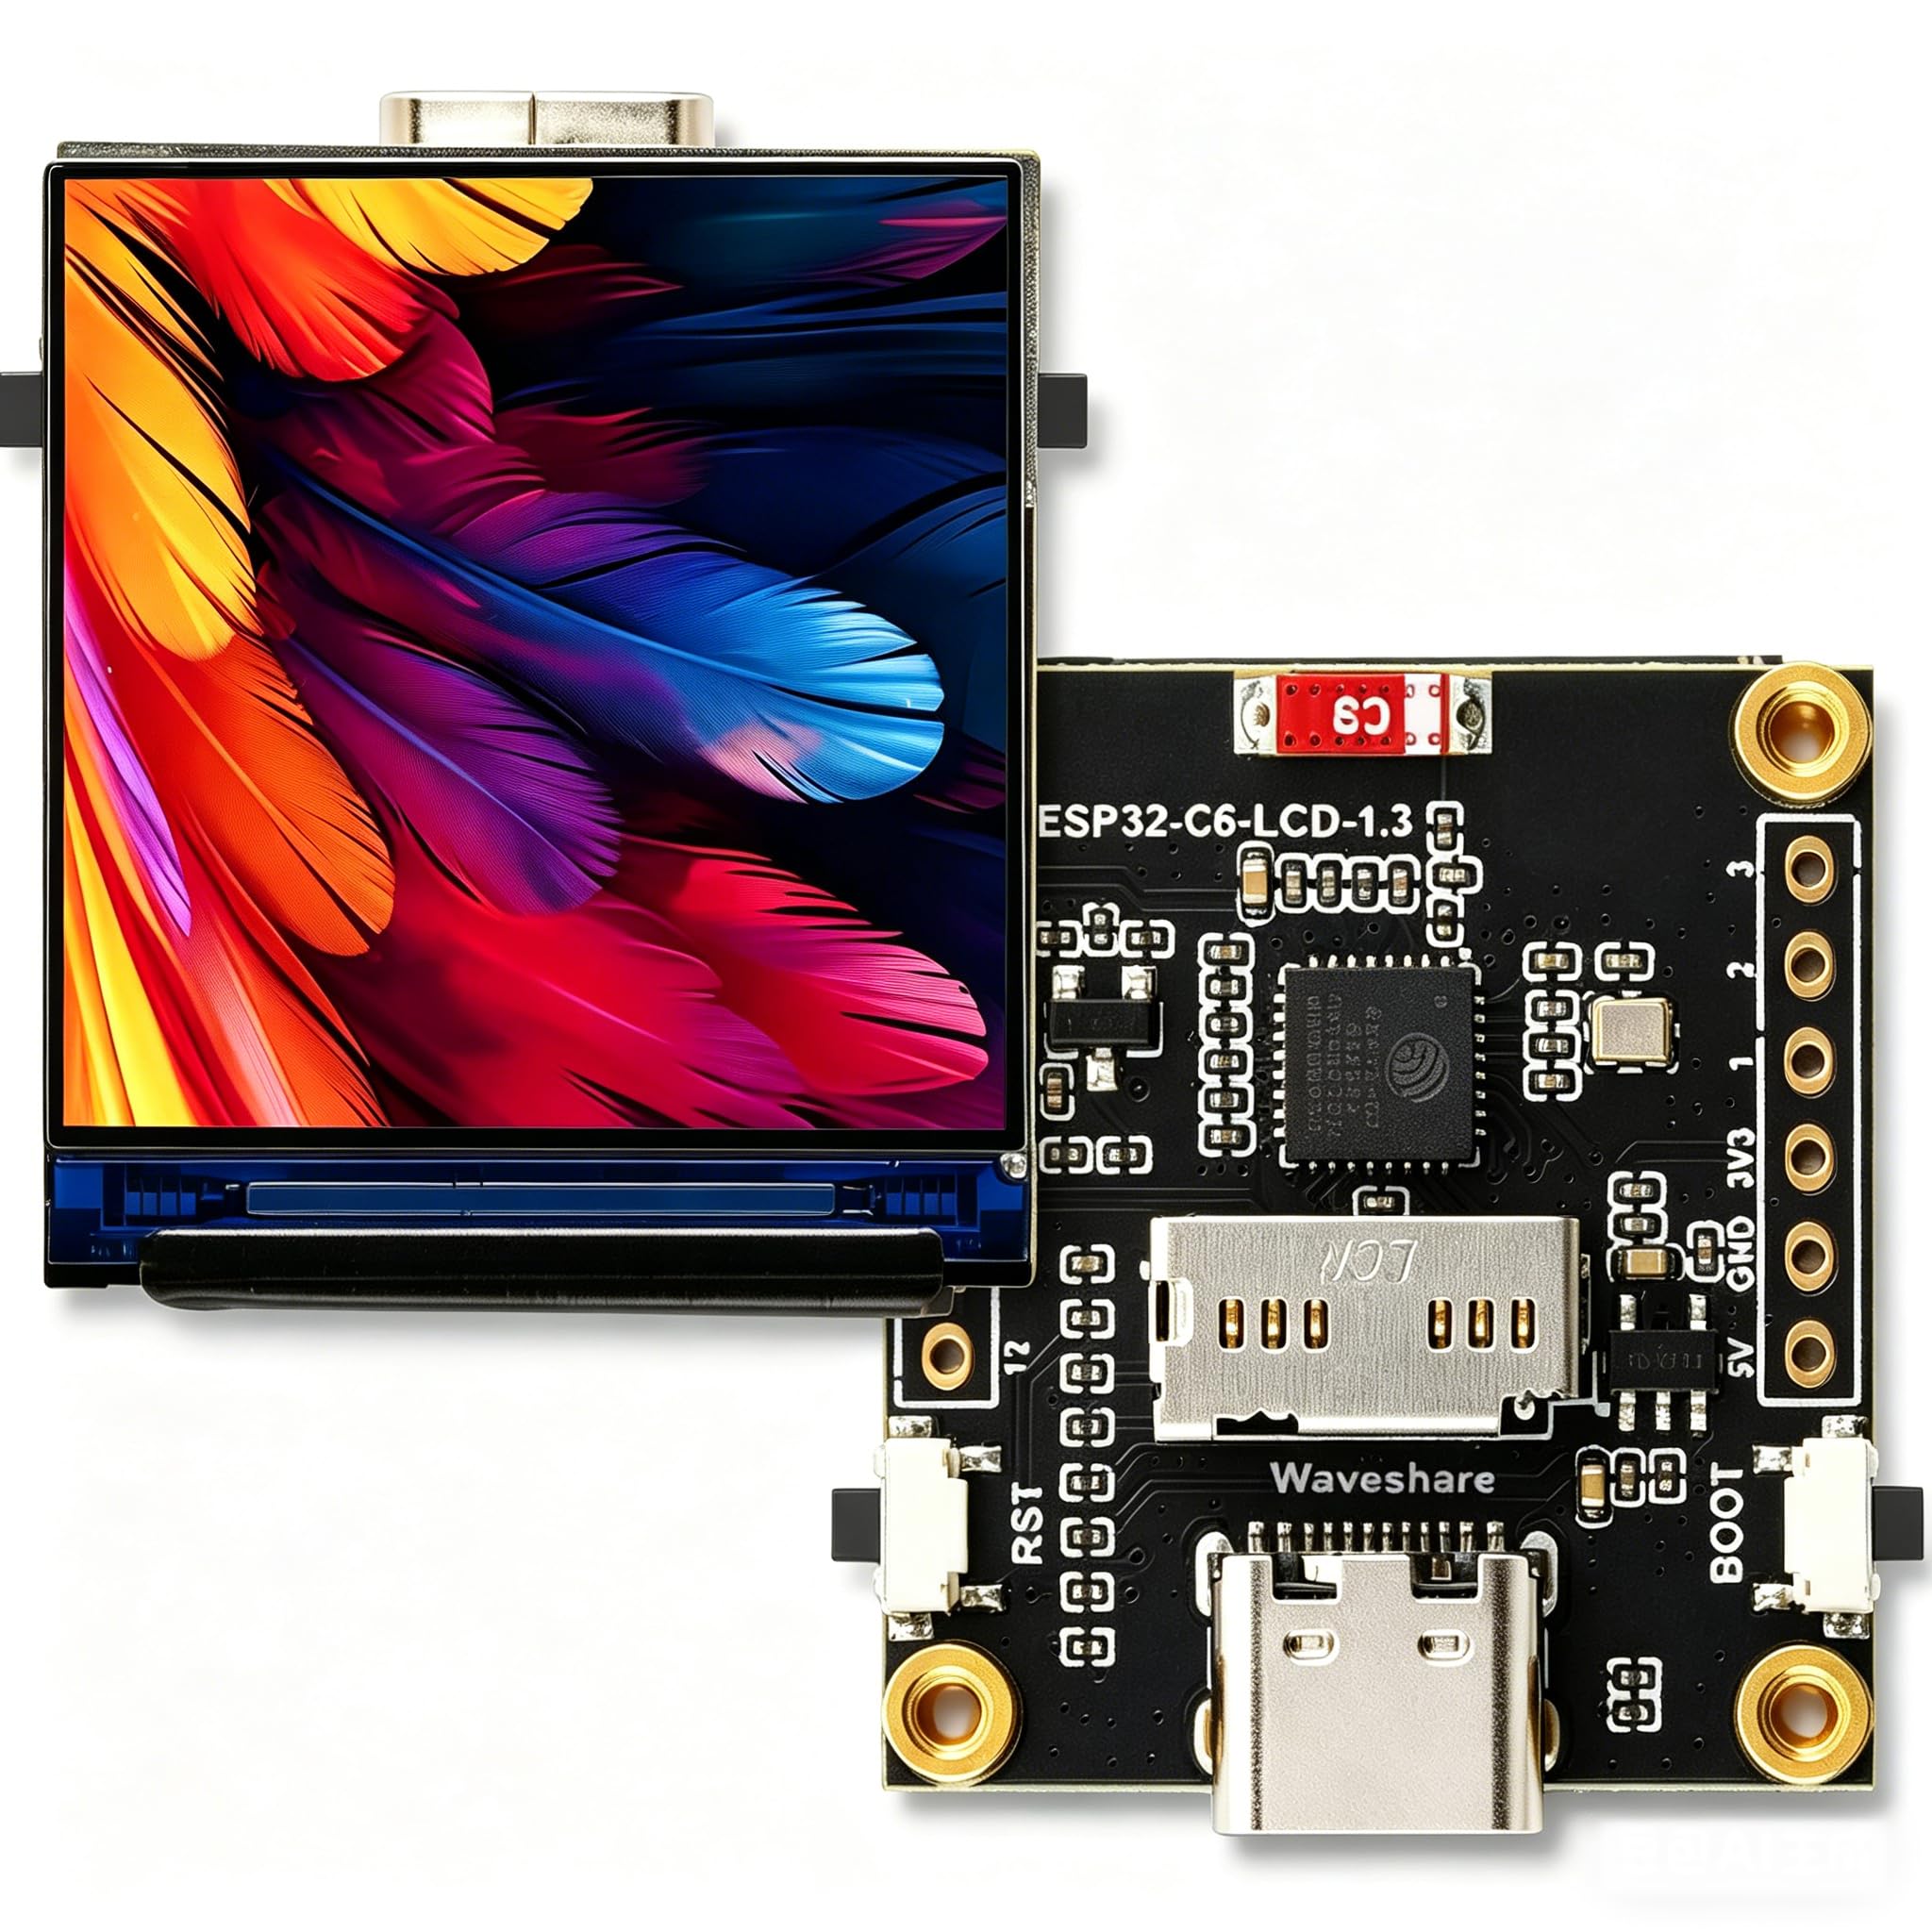
ചിത്രം 3.1: Visual representation of the ESP32-C6 development board's core features, including RISC-V processor, Wi-Fi 6, Bluetooth 5, onboard antenna, Type-C port, 1.3-inch IPS LCD, 240x240 resolution, 262K colors, ST7789 driver, TF Card Slot, and RGB LED.
- പ്രോസസ്സർ: Equipped with a 32-bit RISC-V single-core processor, optimized for low power consumption and high performance.
- വയർലെസ് കണക്റ്റിവിറ്റി: Supports Wi-Fi 6 (802.11 b/g/n) and Bluetooth 5 (LE) with an integrated antenna. It also supports IEEE 802.15.4 (Zigbee 3.0 and Thread).
- സംയോജിത ഡിസ്പ്ലേ: Features a 1.3-inch LCD with 240 × 240 resolution, capable of displaying clear color images. The display uses an ST7789 driver chip.
- Inertial Measurement Unit (IMU): Includes an integrated QMI8658 six-axis IMU (3-axis accelerometer, 3-axis gyroscope) for attitude awareness development.
- ഊർജ്ജനിയന്ത്രണം: Onboard 3.7V MX1.25 lithium battery charging/discharging interface.
- വിപുലീകരണക്ഷമത: Supports secondary development, making it suitable for AIoT applications and smart home projects.
4 സ്പെസിഫിക്കേഷനുകൾ
4.1. General Board Specifications
| ഫീച്ചർ | മൂല്യം |
|---|---|
| നിർമ്മാതാവ് | ഡൈമോർ |
| മോഡലിൻ്റെ പേര് | ESP32 C6 Display |
| പ്രോസസ്സർ | RISC-V 32-bit single-core |
| സിപിയു വേഗത | Up to 160 MHz (2.4 GHz for wireless communication) |
| RAM Installed Size | 16 MB (SRAM) |
| മെമ്മറി സ്റ്റോറേജ് കപ്പാസിറ്റി | 4 MB (ഫ്ലാഷ്) |
| വയർലെസ് കമ്മ്യൂണിക്കേഷൻ സ്റ്റാൻഡേർഡ് | Wi-Fi 6 (802.11 b/g/n), Bluetooth 5 (LE), IEEE 802.15.4 (Zigbee 3.0, Thread) |
| കണക്റ്റിവിറ്റി ടെക്നോളജി | Bluetooth, GPIO, Wi-Fi, Type-C USB |
| നിഷ്ക്രിയ അളവെടുക്കൽ യൂണിറ്റ് | QMI8658 six-axis (3-axis accelerometer, 3-axis gyroscope) |
| ബാറ്ററി ഇന്റർഫേസ് | Onboard 3.7V MX1.25 lithium battery charging/discharging interface |
| ഉൽപ്പന്ന അളവുകൾ (L x W x H) | 8.6 x 5 x 1 സെ.മീ (ഏകദേശം 3.39 x 1.97 x 0.39 ഇഞ്ച്) |
| ഉൽപ്പന്ന ഭാരം | 110 ഗ്രാം (ഏകദേശം 3.88 ഔൺസ്) |
4.2. LCD Screen Specifications
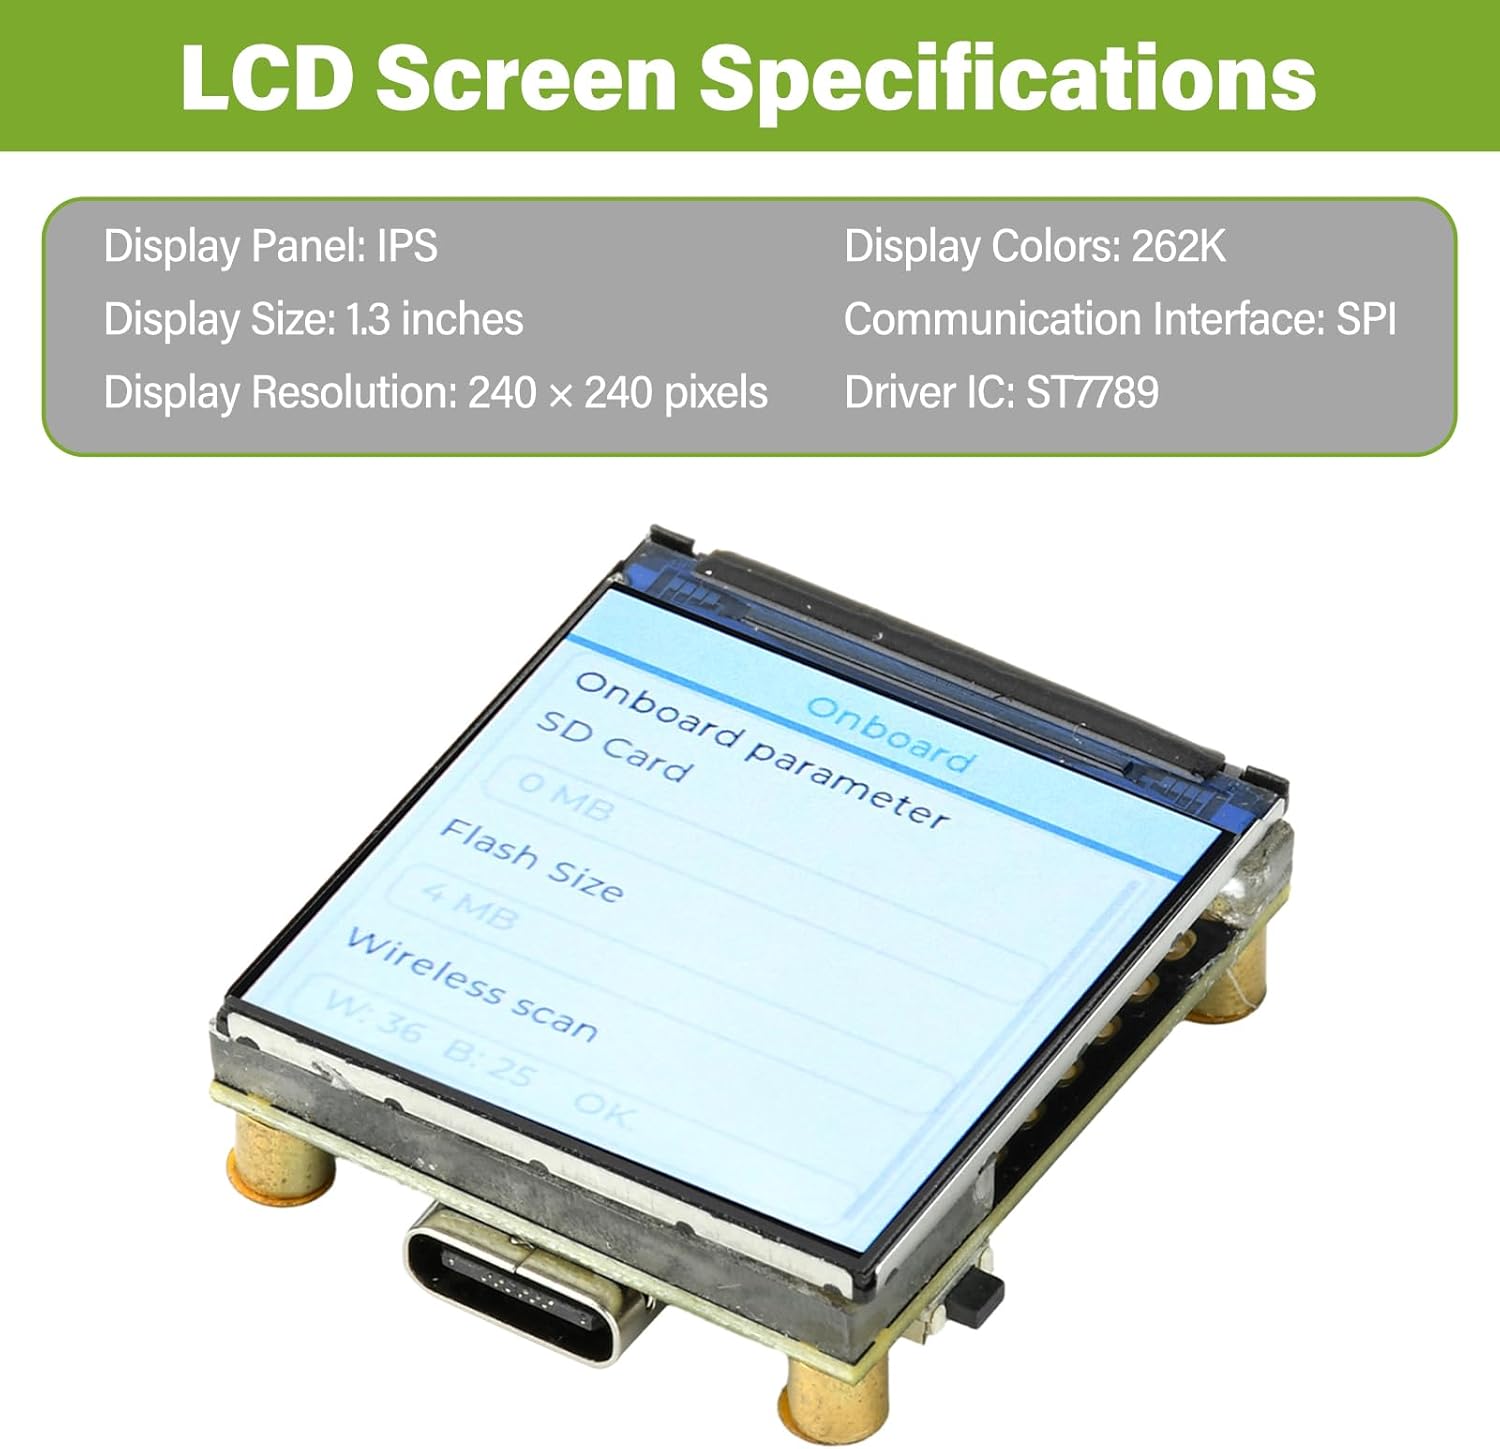
ചിത്രം 4.1: Detailed specifications of the integrated 1.3-inch LCD screen, including display panel type, size, resolution, colors, communication interface, and driver IC.
| ഫീച്ചർ | മൂല്യം |
|---|---|
| ഡിസ്പ്ലേ പാനൽ | ഐ.പി.എസ് |
| ഡിസ്പ്ലേ വലിപ്പം | 1.3 ഇഞ്ച് |
| ഡിസ്പ്ലേ റെസല്യൂഷൻ | 240 x 240 പിക്സലുകൾ |
| ഡിസ്പ്ലേ നിറങ്ങൾ | 262K |
| ആശയവിനിമയ ഇൻ്റർഫേസ് | എസ്.പി.ഐ |
| ഡ്രൈവർ ഐ.സി | ST7789 |
4.3. ഉൽപ്പന്ന അളവുകൾ

ചിത്രം 4.2: Technical drawing showing the precise measurements of the ESP32-C6 development board in millimeters.
5. സജ്ജീകരണം
To begin using your ESP32-C6 development board, follow these steps:
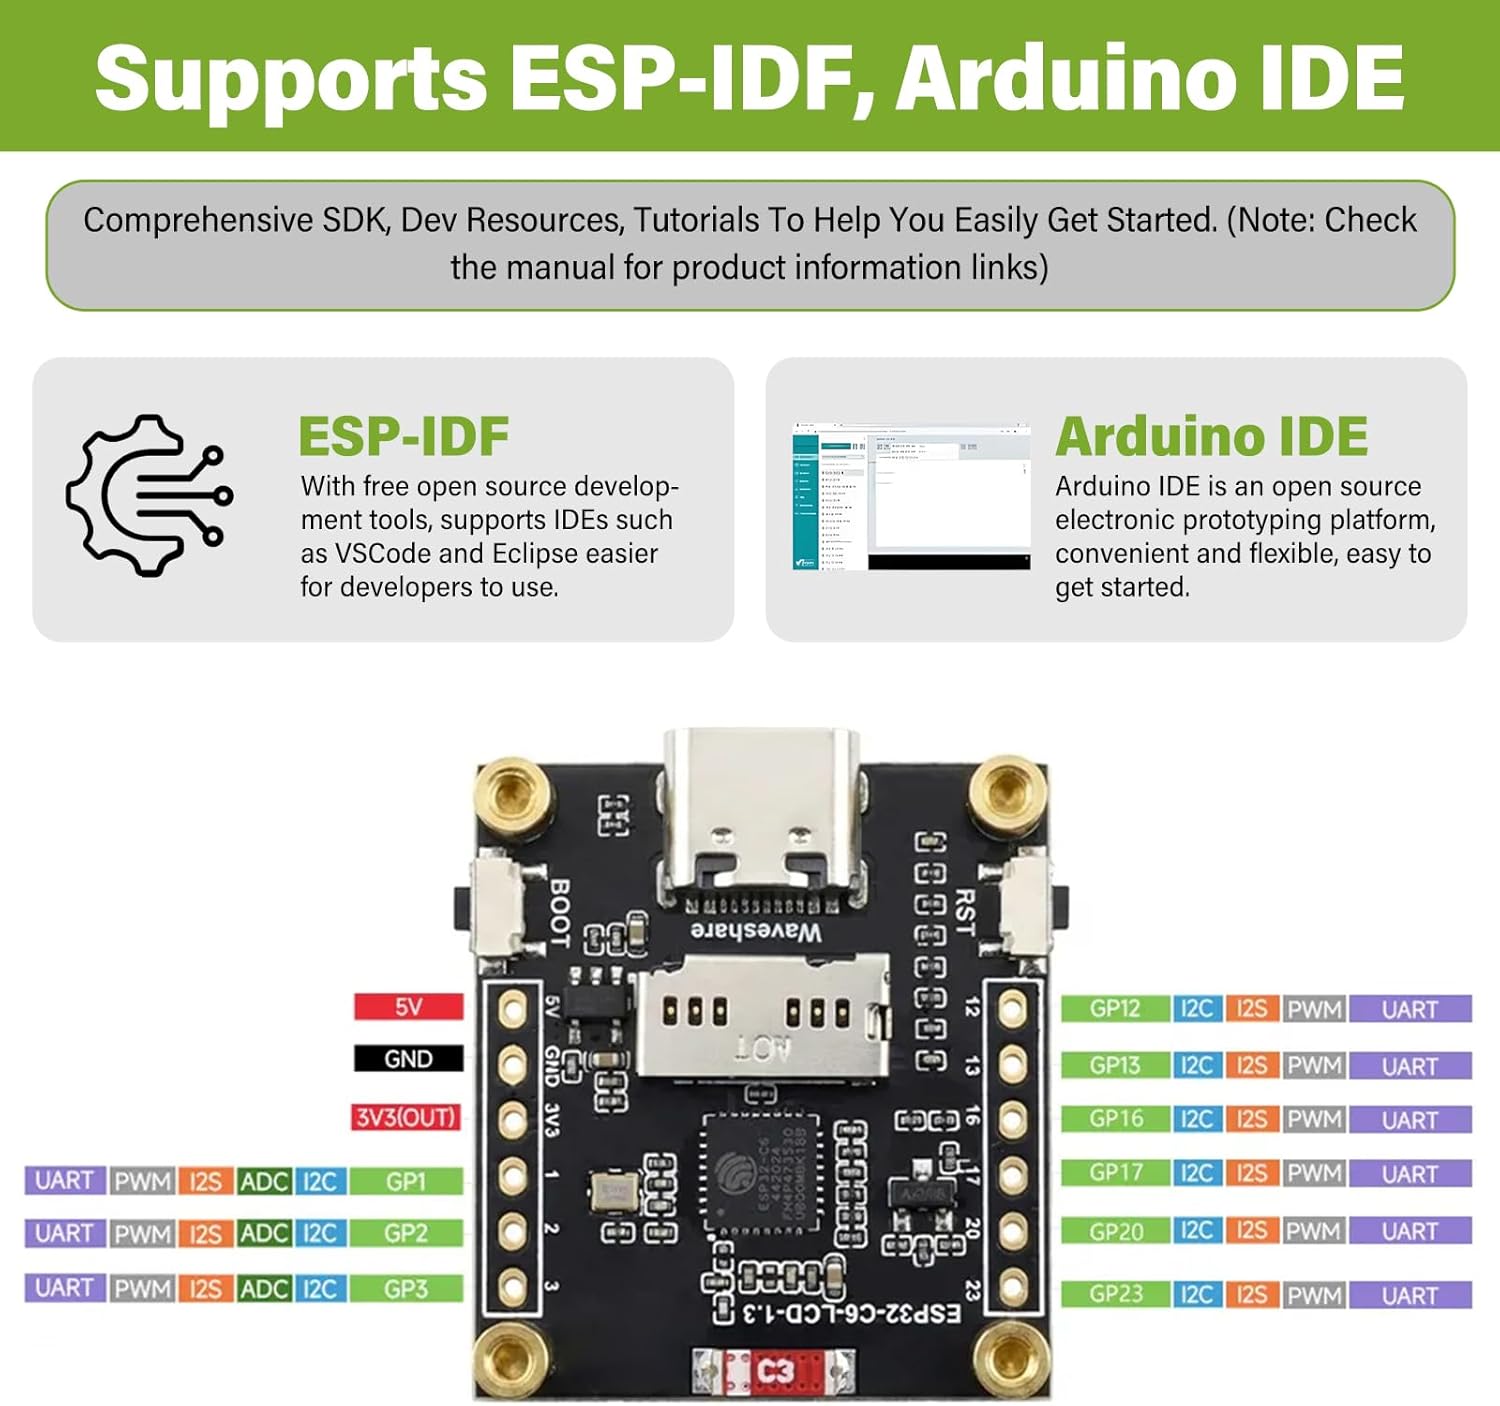
ചിത്രം 5.1: The ESP32-C6 board supports development with both ESP-IDF and Arduino IDE, offering comprehensive SDKs, development resources, and tutorials.
- അർഡ്വിനോ ഐഡിഇ: ഡൗൺലോഡ് ചെയ്ത് ഇൻസ്റ്റാൾ ചെയ്യുക Arduino IDE. Add ESP32 board support through the Board Manager. ഇതിനായി തിരയുക "ESP32" and install the "esp32 by Espressif Systems" package. Select the appropriate board model (e.g., "ESP32-C6 Dev Module") from the Tools > Board menu.
- ഇഎസ്പി-ഐഡിഎഫ്: For more advanced development, install the Espressif IoT Development Framework (ESP-IDF). Follow the official ESP-IDF Get Started Guide for detailed instructions on setting up the toolchain and environment.
6. പ്രവർത്തന നിർദ്ദേശങ്ങൾ
Once your development environment is set up, you can begin programming and interacting with the ESP32-C6 board:
- പ്രോഗ്രാമിംഗ്: Write your code using C/C++ in Arduino IDE or ESP-IDF. Utilize the extensive libraries available for Wi-Fi, Bluetooth, GPIO, SPI (for the LCD), and other peripherals.
- അപ്ലോഡ് കോഡ്: Compile your code and upload it to the board via the Type-C USB connection. If uploading fails, ensure the board is in bootloader mode (hold BOOT button, press and release RST, then release BOOT).
- LCD Display Usage: The 1.3-inch ST7789 LCD can be controlled via SPI. Libraries like Adafruit_GFX and Adafruit_ST7789 are commonly used with Arduino IDE for graphics and text display.
- വയർലെസ് കമ്മ്യൂണിക്കേഷൻ:
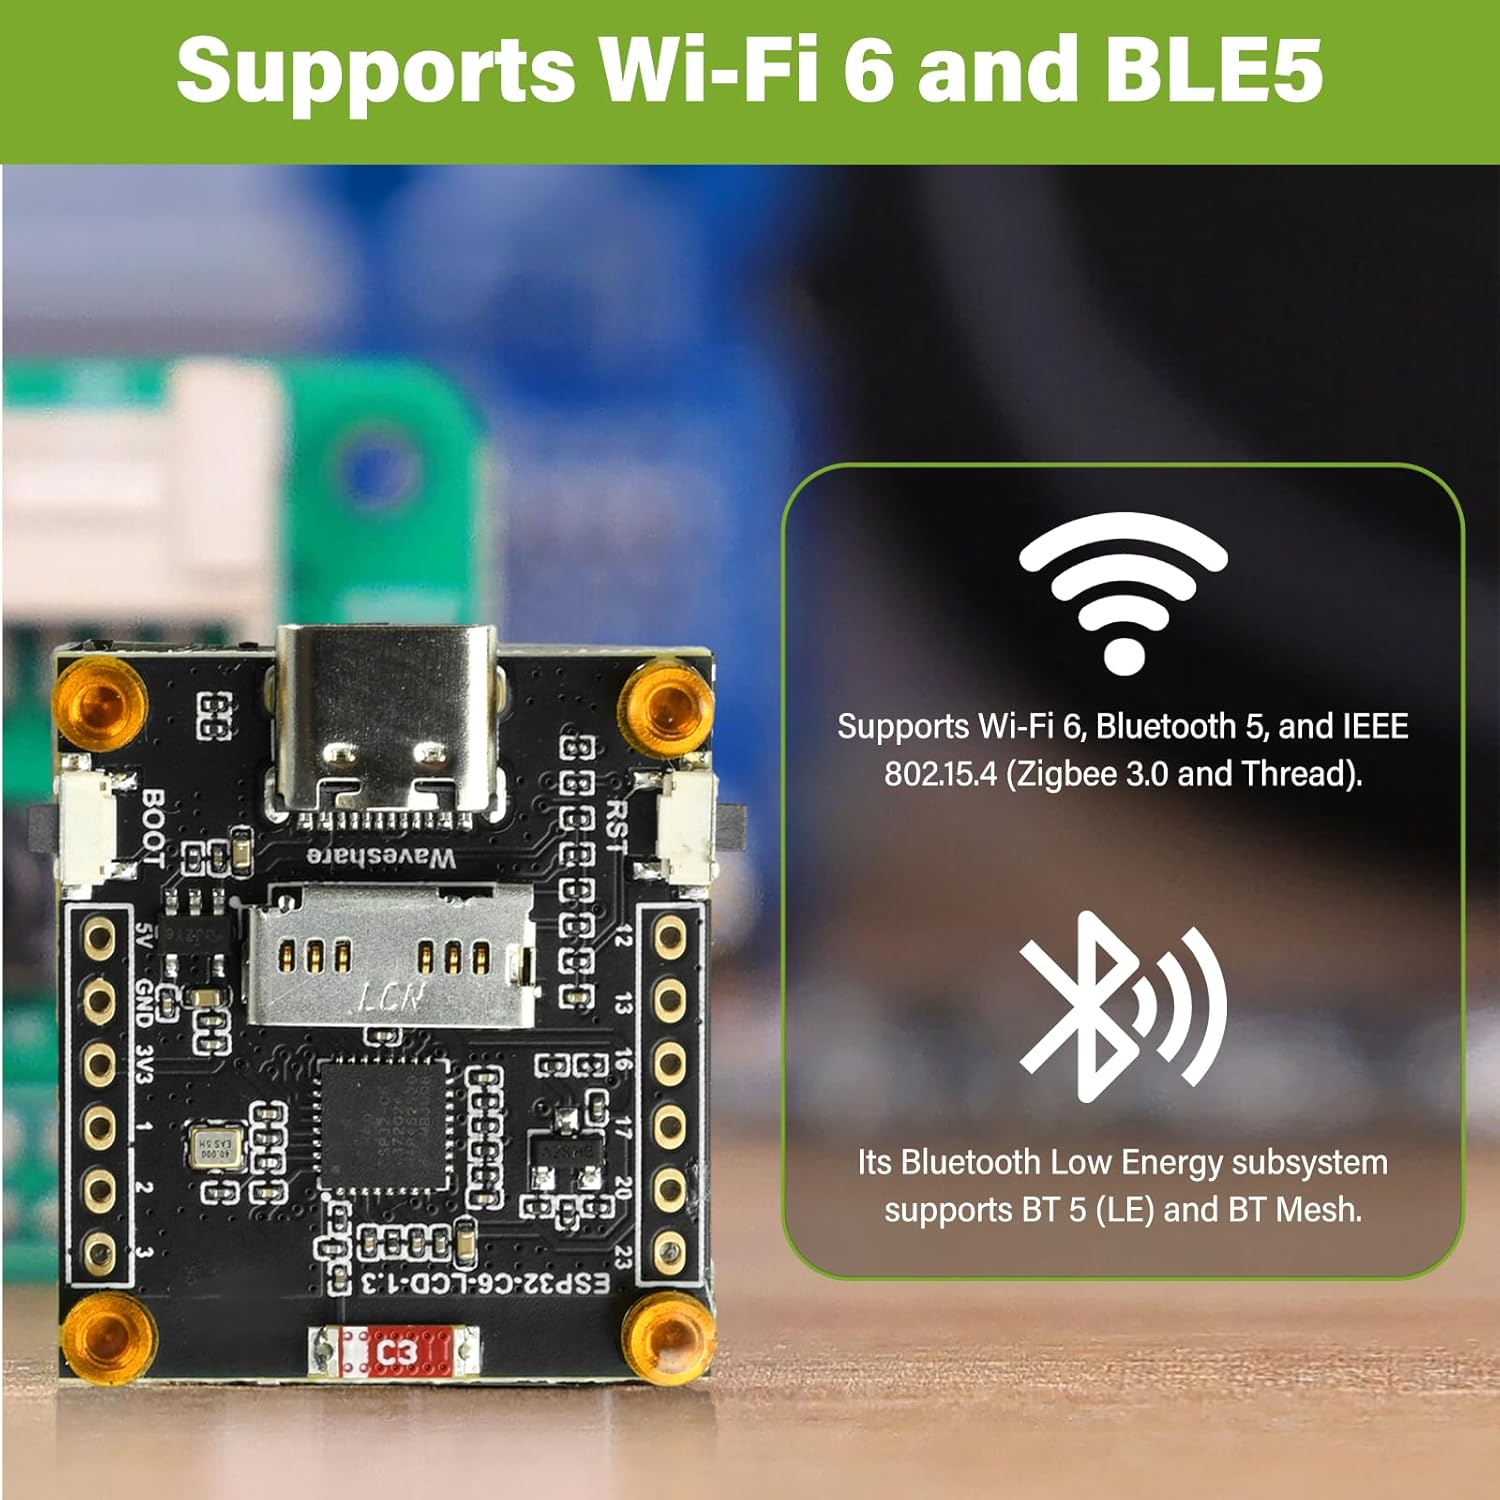
ചിത്രം 6.1: The ESP32-C6 development board provides robust wireless connectivity with Wi-Fi 6 and Bluetooth 5 Low Energy (BLE5) capabilities.
- വൈഫൈ: Use the Wi-Fi libraries to connect to local networks, host access points, or implement Wi-Fi Direct.
- ബ്ലൂടൂത്ത്: Utilize Bluetooth 5 (LE) for low-power communication with other Bluetooth-enabled devices.
- GPIO Usage: The board provides General Purpose Input/Output pins for connecting external sensors, actuators, and other components. Refer to the board's pinout diagram for specific pin functions.
- ബോർഡിനെ ശക്തിപ്പെടുത്തുന്നു: The board can be powered via the Type-C USB port or through the 3.7V MX1.25 lithium battery interface. Ensure correct polarity if using a battery.
7. പരിപാലനം
Proper care and maintenance will ensure the longevity and reliable operation of your ESP32-C6 development board:
- കൈകാര്യം ചെയ്യൽ: Handle the board by its edges to avoid touching components, especially the pins, which can be sensitive to static electricity.
- സംഭരണം: Store the board in an anti-static bag when not in use, in a cool, dry environment away from direct sunlight and extreme temperatures.
- വൃത്തിയാക്കൽ: ആവശ്യമെങ്കിൽ, പൊടി നീക്കം ചെയ്യുന്നതിനായി മൃദുവായതും ഉണങ്ങിയതുമായ ബ്രഷ് അല്ലെങ്കിൽ കംപ്രസ് ചെയ്ത വായു ഉപയോഗിച്ച് ബോർഡ് സൌമ്യമായി വൃത്തിയാക്കുക. ദ്രാവകങ്ങളോ ഉരച്ചിലുകളോ ഉള്ള വസ്തുക്കൾ ഉപയോഗിക്കുന്നത് ഒഴിവാക്കുക.
- വൈദ്യുതി വിതരണം: Always use a stable 5V power supply via the Type-C port or a compatible 3.7V lithium battery. Over-voltage ബോർഡിന് കേടുവരുത്തും.
- ഫേംവെയർ അപ്ഡേറ്റുകൾ: Regularly check for updated firmware or SDKs from Espressif or the community to benefit from bug fixes and new features.
8. പ്രശ്നപരിഹാരം
If you encounter issues with your ESP32-C6 development board, consider the following troubleshooting steps:
- Board Not Detected:
- Ensure the Type-C USB cable is fully inserted and functional.
- Check if USB-to-serial drivers are correctly installed on your computer.
- മറ്റൊരു USB പോർട്ടോ കമ്പ്യൂട്ടറോ പരീക്ഷിക്കുക.
- Code Upload Fails:
- Verify that the correct board and COM port are selected in your IDE.
- Ensure the board is in bootloader mode during upload (hold BOOT, press RST, release RST, release BOOT).
- നിങ്ങളുടെ കോഡിൽ സമാഹരണ പിശകുകൾ ഉണ്ടോയെന്ന് പരിശോധിക്കുക.
- LCD Not Displaying:
- Confirm that the LCD library is correctly initialized with the proper pins and driver (ST7789).
- Check power supply to the board.
- Ensure there are no loose connections if the LCD is separate (though this board has it integrated).
- വൈഫൈ/ബ്ലൂടൂത്ത് കണക്റ്റിവിറ്റി പ്രശ്നങ്ങൾ:
- Verify your network credentials (SSID, password) are correct in your code.
- Ensure the antenna is not obstructed.
- മറ്റ് 2.4GHz ഉപകരണങ്ങളിൽ നിന്നുള്ള ഇടപെടലുകൾ പരിശോധിക്കുക.
- Board Overheating:
- Reduce the workload or frequency of operations if possible.
- ബോർഡിന് ചുറ്റും മതിയായ വായുസഞ്ചാരം ഉറപ്പാക്കുക.
- ഇൻപുട്ട് വോളിയം പരിശോധിക്കുകtagഇ നിർദ്ദിഷ്ട പരിധിക്കുള്ളിലാണ്.
9. വാറൻ്റിയും പിന്തുണയും
This product comes with a standard manufacturer's warranty. For specific warranty terms and conditions, please refer to the documentation provided at the time of purchase or contact diymore customer support directly.
For technical support, resources, and community forums, please visit the official Espressif website for ESP32-C6 documentation or relevant community forums for Arduino and ESP-IDF development.
Manufacturer: diymore