1. ആമുഖം
Thank you for choosing the Minolta Dynax 404si. This manual provides essential information for the proper use, setup, and maintenance of your camera. Please read this manual thoroughly before using your camera to ensure optimal performance and longevity.
2 സുരക്ഷാ വിവരങ്ങൾ
- ബാറ്ററി സുരക്ഷ: Use only recommended batteries. Do not mix old and new batteries or different types. Dispose of batteries properly.
- ഫിലിം കൈകാര്യം ചെയ്യൽ: Load and unload film in subdued light to prevent fogging.
- ലെൻസ് കെയർ: Avoid touching lens surfaces directly. Use a soft, lint-free cloth for cleaning.
- പരിസ്ഥിതി വ്യവസ്ഥകൾ: ഉയർന്ന താപനില, ഈർപ്പം, നേരിട്ടുള്ള സൂര്യപ്രകാശം എന്നിവയ്ക്ക് ക്യാമറ ദീർഘനേരം വിധേയമാക്കരുത്.
- കുട്ടികൾ: Keep the camera and its accessories out of reach of small children.
3. പാക്കേജ് ഉള്ളടക്കം
നിങ്ങളുടെ പാക്കേജിൽ ഇനിപ്പറയുന്ന ഇനങ്ങൾ അടങ്ങിയിട്ടുണ്ടെന്ന് പരിശോധിക്കുക:
- Minolta Dynax 404si Camera Body
- ക്യാമറ സ്ട്രാപ്പ്
- ബോഡി ക്യാപ്
- നിർദ്ദേശ മാനുവൽ (ഈ പ്രമാണം)
Note: Lenses, batteries, and film are typically sold separately.
4. ക്യാമറ ഓവർview
Familiarize yourself with the main components of your Minolta Dynax 404si camera.
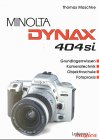
ചിത്രം 4.1: ഫ്രണ്ട് view of the Minolta Dynax 404si camera with a standard lens. This image illustrates the lens mount, built-in flash, and grip area.
- ലെൻസ് മൗണ്ട്: For attaching interchangeable Minolta A-mount lenses.
- ഷട്ടർ റിലീസ് ബട്ടൺ: Activates autofocus and takes a picture.
- മോഡ് ഡയൽ: Selects various shooting modes (e.g., Program, Aperture Priority, Shutter Priority, Manual).
- Viewകണ്ടെത്തുന്നയാൾ: നിങ്ങളുടെ ഷോട്ടുകൾ രചിക്കുന്നതിന്.
- എൽസിഡി പാനൽ: Displays camera settings and information.
- ബിൽറ്റ്-ഇൻ ഫ്ലാഷ്: Provides additional illumination when needed.
5. സജ്ജീകരണം
5.1 ബാറ്ററി ഇൻസ്റ്റാളേഷൻ
- Open the battery compartment cover, usually located at the bottom of the camera.
- Insert the required batteries (e.g., 2x CR2 lithium batteries) according to the polarity indicators (+/-).
- ബാറ്ററി കമ്പാർട്ട്മെൻ്റ് കവർ സുരക്ഷിതമായി അടയ്ക്കുക.
5.2 ഫിലിം ലോഡിംഗ്
- Open the camera back by sliding the latch.
- Place the film cartridge into the film chamber.
- Pull the film leader across to the red index mark on the take-up spool.
- Close the camera back. The camera will automatically advance the film to the first frame.
5.3 ലെൻസ് അറ്റാച്ച്മെന്റ്
- ക്യാമറയിൽ നിന്ന് ബോഡി ക്യാപ്പും ലെൻസിൽ നിന്ന് പിൻ ലെൻസ് ക്യാപ്പും നീക്കം ചെയ്യുക.
- Align the red or white index mark on the lens with the corresponding mark on the camera's lens mount.
- ലെൻസ് ശരിയായ സ്ഥാനത്ത് ക്ലിക്ക് ചെയ്യുന്നത് വരെ ഘടികാരദിശയിൽ തിരിക്കുക.
6. പ്രവർത്തിക്കുന്നു
6.1 പവർ ഓൺ/ഓഫ്
To turn the camera on, rotate the power switch, typically located near the shutter release button, to the 'ON' position. To turn it off, rotate it to 'OFF'.
6.2 അടിസ്ഥാന ഫോട്ടോഗ്രാഫി മോഡുകൾ
Use the mode dial to select your desired shooting mode:
- പി (പ്രോഗ്രാം ഓട്ടോ): The camera automatically sets both aperture and shutter speed for balanced exposure.
- A (അപ്പേർച്ചർ പ്രയോറിറ്റി): You set the aperture, and the camera selects the appropriate shutter speed. Ideal for controlling depth of field.
- എസ് (ഷട്ടർ പ്രയോറിറ്റി): You set the shutter speed, and the camera selects the appropriate aperture. Ideal for controlling motion blur.
- എം (മാനുവൽ): അപ്പർച്ചറും ഷട്ടർ സ്പീഡും നിയന്ത്രിക്കുന്നത് നിങ്ങളാണ്.
6.3 ഫോക്കസിംഗ്
The Minolta Dynax 404si features autofocus. Press the shutter release button halfway down to activate autofocus. The camera will focus on the subject in the active autofocus area. A green light in the viewfinder indicates successful focus.
6.4 എക്സ്പോഷർ നിയന്ത്രണം
In Program, Aperture Priority, and Shutter Priority modes, the camera automatically determines the correct exposure. You can use exposure compensation to lighten or darken your images if desired.
6.5 ഫ്ലാഷ് ഉപയോഗം
The built-in flash can be used in low-light conditions. In some automatic modes, the flash will pop up and fire automatically. You can also manually activate or deactivate the flash using the flash button.
7. പരിപാലനം
7.1 വൃത്തിയാക്കൽ
- ക്യാമറ ബോഡി: ക്യാമറ ബോഡി തുടയ്ക്കാൻ മൃദുവായതും ഉണങ്ങിയതുമായ തുണി ഉപയോഗിക്കുക. കഠിനമായ അഴുക്കിന്, ചെറുതായി dampവെള്ളം കൊണ്ട് തുണി.
- ലെൻസ്: Use a lens brush or blower to remove dust. For smudges, use a specialized lens cleaning solution and a microfiber cloth.
- Viewകണ്ടെത്തുന്നയാൾ: Use a soft brush or air blower to clean the viewഫൈൻഡർ ഐപീസ്.
7.2 സംഭരണം
When not in use, store your camera in a cool, dry place, away from direct sunlight and extreme temperatures. Remove batteries if the camera will not be used for an extended period to prevent leakage.
8. പ്രശ്നപരിഹാരം
- ക്യാമറ പവർ ഓൺ ചെയ്യുന്നില്ല: ബാറ്ററി ഇൻസ്റ്റാളേഷൻ പരിശോധിച്ച് ബാറ്ററികൾ പുതിയതാണെന്ന് ഉറപ്പാക്കുക.
- Film does not advance: Ensure film is loaded correctly and the camera back is securely closed.
- ഓട്ടോഫോക്കസ് പ്രവർത്തിക്കുന്നില്ല: Ensure the lens is properly attached and the autofocus switch on the lens (if present) is set to AF. Check for sufficient light.
- ഫ്ലാഷ് കത്തുന്നില്ല: Check flash settings and ensure batteries have enough power.
For more complex issues, consult a qualified camera technician.
9 സ്പെസിഫിക്കേഷനുകൾ
| ക്യാമറ തരം | 35mm SLR (Single-Lens Reflex) |
| ലെൻസ് മൗണ്ട് | Minolta A-mount |
| ഫിലിം തരം | 35mm DX-coded film |
| ഓട്ടോഫോക്കസ് സിസ്റ്റം | Phase-detection autofocus |
| ഷട്ടർ സ്പീഡ് റേഞ്ച് | Typically 30s to 1/2000s, plus Bulb |
| മീറ്ററിംഗ് സിസ്റ്റം | Multi-segment, center-weighted, spot metering |
| ഫ്ലാഷ് | Built-in pop-up flash |
| പവർ ഉറവിടം | CR2 lithium batteries (quantity may vary) |
Note: These specifications are typical for the Minolta Dynax 404si model. Actual specifications may vary slightly depending on the specific production batch.
10. വാറൻ്റിയും പിന്തുണയും
Minolta products typically come with a limited warranty covering manufacturing defects. Please refer to the warranty card included with your original purchase for specific terms and conditions, including the warranty period and coverage details.
For technical support, service, or inquiries regarding your Minolta Dynax 404si, please contact your local authorized Minolta service center or the retailer from whom you purchased the camera. Keep your proof of purchase for warranty claims.


