1. ആമുഖം
നിങ്ങളുടെ Lanzar VIBE211 Vibe 360 Watt 2 Channel Mosfet-ന്റെ ശരിയായ ഇൻസ്റ്റാളേഷൻ, പ്രവർത്തനം, പരിപാലനം എന്നിവയ്ക്കുള്ള വിശദമായ നിർദ്ദേശങ്ങൾ ഈ മാനുവൽ നൽകുന്നു. Ampലിഫയർ. ഇൻസ്റ്റാൾ ചെയ്യാനോ പ്രവർത്തിപ്പിക്കാനോ ശ്രമിക്കുന്നതിന് മുമ്പ് ദയവായി ഈ മാനുവൽ നന്നായി വായിക്കുക ampഒപ്റ്റിമൽ പ്രകടനവും സുരക്ഷയും ഉറപ്പാക്കാൻ ലിഫയർ.
2 സുരക്ഷാ വിവരങ്ങൾ
ഇൻസ്റ്റാളേഷനും പ്രവർത്തനവും നടത്തുമ്പോൾ ഇനിപ്പറയുന്ന സുരക്ഷാ മുൻകരുതലുകൾ എല്ലായ്പ്പോഴും പാലിക്കുക:
- ഏതെങ്കിലും വയറിംഗ് കണക്ഷനുകൾ സ്ഥാപിക്കുന്നതിന് മുമ്പ് വാഹനത്തിന്റെ നെഗറ്റീവ് ബാറ്ററി ടെർമിനൽ വിച്ഛേദിക്കുക.
- കേടുപാടുകൾ അല്ലെങ്കിൽ ഷോർട്ട് സർക്യൂട്ടുകൾ തടയുന്നതിന് എല്ലാ വയറിംഗും ശരിയായി റൂട്ട് ചെയ്തിട്ടുണ്ടെന്നും സുരക്ഷിതമാക്കിയിട്ടുണ്ടെന്നും ഉറപ്പാക്കുക.
- ഇൻസ്റ്റലേഷൻ വിഭാഗത്തിൽ വ്യക്തമാക്കിയിരിക്കുന്നതുപോലെ പവർ, ഗ്രൗണ്ട് കണക്ഷനുകൾക്ക് ഉചിതമായ ഗേജ് വയറിംഗ് ഉപയോഗിക്കുക.
- മൗണ്ട് ദി ampആവശ്യത്തിന് വായുസഞ്ചാരം അനുവദിക്കുന്നതും ഈർപ്പം, അമിതമായ ചൂട് എന്നിവയിൽ നിന്ന് സംരക്ഷിക്കപ്പെടുന്നതുമായ ഒരു സ്ഥലത്ത് ലിഫയർ സുരക്ഷിതമായി സ്ഥാപിക്കുക.
- പ്രവർത്തിപ്പിക്കരുത് ampലൈഫയർ കേടായാലോ തകരാറിലായാലും ശരിയാകില്ലെങ്കിലും അത് പ്രവർത്തിപ്പിക്കുക. ട്രബിൾഷൂട്ടിംഗ് വിഭാഗം കാണുക അല്ലെങ്കിൽ പ്രൊഫഷണൽ സഹായം തേടുക.
3. ഉൽപ്പന്നം കഴിഞ്ഞുview
ലാൻസർ VIBE211 ഒരു 2-ചാനൽ മോസ്ഫെറ്റ് ആണ്. ampകാർ ഓഡിയോ സിസ്റ്റങ്ങൾക്കായി രൂപകൽപ്പന ചെയ്തിരിക്കുന്ന ലൈഫയർ. ഇത് ഒരു ബ്രിഡ്ജബിൾ ഡിസൈൻ അവതരിപ്പിക്കുന്നു, ഇത് വഴക്കമുള്ള കോൺഫിഗറേഷൻ അനുവദിക്കുന്നു, കൂടാതെ സ്ഥിരതയുള്ള പ്രകടനത്തിനായി ഒരു നിയന്ത്രിത മോസ്ഫെറ്റ് പവർ സപ്ലൈയും ഉൾപ്പെടുത്തിയിട്ടുണ്ട്. വേരിയബിൾ ഹൈ/ലോ പാസ് ക്രോസ്ഓവർ നിയന്ത്രണങ്ങളും ഒരു റിമോട്ട് സബ് വൂഫർ ബാസ് നിയന്ത്രണവും പ്രധാന സവിശേഷതകളിൽ ഉൾപ്പെടുന്നു.
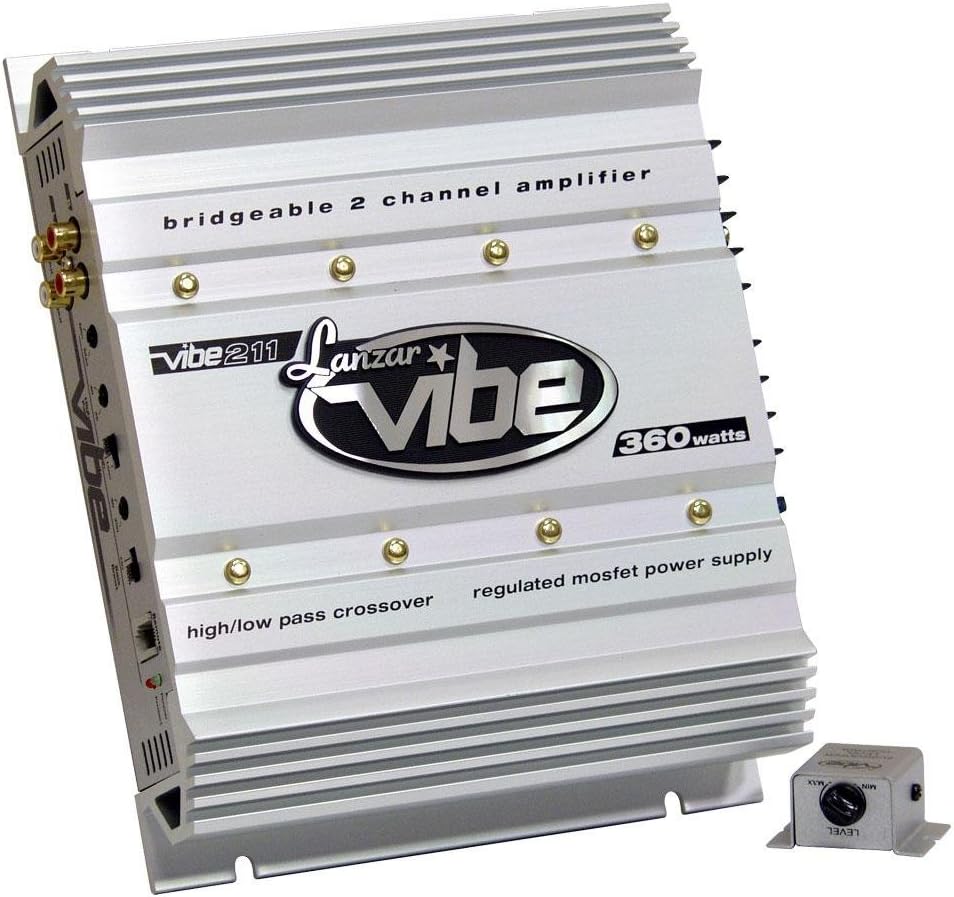
ഒരു കോണാകൃതിയിലുള്ള view വെള്ളി നിറത്തിലുള്ള ലാൻസാർ VIBE211 വൈബ് 360 വാട്ട് 2 ചാനൽ മോസ്ഫെറ്റ് Ampലിഫയർ, ഷോക്asing അതിന്റെ ഫിൻഡ് ഹീറ്റ്സിങ്ക് ഡിസൈൻ, RCA ഇൻപുട്ടുകൾ, നിയന്ത്രണ പാനൽ. amp'ബ്രിഡ്ജ് ചെയ്യാവുന്ന 2 ചാനൽ' സൂചിപ്പിക്കുന്ന വാചകം ലിഫയറിൽ ഉണ്ട്. amp'ലിഫയർ', 'വൈബ് 211', 'ലാൻസർ വൈബ്', '360 വാട്ട്സ്', 'ഹൈ/ലോ പാസ് ക്രോസ്ഓവർ', 'റെഗുലേറ്റഡ് മോസ്ഫെറ്റ് പവർ സപ്ലൈ' എന്നിവ ഇതിൽ ഉൾപ്പെടുന്നു. മുൻവശത്ത് ഒരു ചെറിയ, പ്രത്യേക റിമോട്ട് ബാസ് ലെവൽ കൺട്രോൾ യൂണിറ്റ് ദൃശ്യമാണ്.
4. സജ്ജീകരണവും ഇൻസ്റ്റാളേഷനും
4.1 മൌണ്ട് ചെയ്യുന്നു Ampജീവപര്യന്തം
ചുറ്റും മതിയായ വായുസഞ്ചാരം നൽകുന്ന ഒരു സുരക്ഷിതമായ മൗണ്ടിംഗ് സ്ഥലം തിരഞ്ഞെടുക്കുക. ampലൈഫയറിന്റെ ഹീറ്റ്സിങ്ക്. നേരിട്ടുള്ള സൂര്യപ്രകാശത്തിലോ ഈർപ്പം സാധ്യതയുള്ള സ്ഥലങ്ങളിലോ സ്ഥാപിക്കുന്നത് ഒഴിവാക്കുക. സുരക്ഷിതമാക്കാൻ നൽകിയിരിക്കുന്ന മൗണ്ടിംഗ് ഹാർഡ്വെയർ ഉപയോഗിക്കുക. ampലിഫയർ ഒരു സോളിഡ് പ്രതലത്തിലേക്ക് ദൃഢമായി ഉറപ്പിക്കുക.
4.2 വയറിംഗ് കണക്ഷനുകൾ
ഷോർട്ട് സർക്യൂട്ടുകൾ തടയുന്നതിന് എല്ലാ കണക്ഷനുകളും ഇറുകിയതാണെന്നും ശരിയായി ഇൻസുലേറ്റ് ചെയ്തിട്ടുണ്ടെന്നും ഉറപ്പാക്കുക.
- പവർ (ബി+): വാഹനത്തിന്റെ ബാറ്ററിയുടെ പോസിറ്റീവ് ടെർമിനലിൽ നിന്ന് നേരിട്ട് ഒരു ഹെവി-ഗേജ് വയർ (ഉദാ. 8 AWG അല്ലെങ്കിൽ അതിൽ കൂടുതൽ) ബന്ധിപ്പിക്കുക. ampലിഫയറിന്റെ B+ ടെർമിനൽ. ബാറ്ററിയുടെ 18 ഇഞ്ചിനുള്ളിൽ ഉചിതമായ ഒരു ഫ്യൂസ് (15A) സ്ഥാപിക്കുക.
- ഗ്രൗണ്ട് (GND): പവർ വയറിന്റെ അതേ വലിപ്പത്തിലുള്ള ഒരു ഹെവി-ഗേജ് വയർ ബന്ധിപ്പിക്കുക ampവാഹന ചേസിസിന്റെ വൃത്തിയുള്ളതും പെയിന്റ് ചെയ്യാത്തതുമായ ഒരു ലോഹ പ്രതലത്തിലേക്ക് ലിഫയറിന്റെ GND ടെർമിനൽ ബന്ധിപ്പിക്കുക. നല്ല വൈദ്യുത കണക്ഷൻ ഉറപ്പാക്കുക.
- റിമോട്ട് (REM): ഒരു ചെറിയ ഗേജ് വയർ (ഉദാ. 18 AWG) ബന്ധിപ്പിക്കുക ampനിങ്ങളുടെ ഹെഡ് യൂണിറ്റിന്റെ റിമോട്ട് ടേൺ-ഓൺ ഔട്ട്പുട്ടിലേക്ക് ലിഫയറിന്റെ REM ടെർമിനൽ. ഈ വയർ തിരിയുന്നു ampനിങ്ങളുടെ സ്റ്റീരിയോ ഉപയോഗിച്ച് ലൈഫയർ ഓണും ഓഫും ആക്കുക.
- ആർസിഎ ഇൻപുട്ടുകൾ: നിങ്ങളുടെ ഹെഡ് യൂണിറ്റിന്റെ പ്രീ-യിൽ നിന്ന് RCA ഓഡിയോ കേബിളുകൾ ബന്ധിപ്പിക്കുക.amp ഔട്ട്പുട്ടുകൾ ampലൈഫയറിന്റെ ഗോൾഡ് ആർസിഎ ഇൻപുട്ടുകൾ. ദി ampഡെയ്സി-ചെയിനിംഗിനായി ഇടത്, വലത് ചാനലുകൾക്കുള്ള ലൈൻ ഔട്ട്സുകൾ ലിഫയറിൽ ഉൾപ്പെടുന്നു ampജീവപര്യന്തം.
- സ്പീക്കർ ഔട്ട്പുട്ടുകൾ: നിങ്ങളുടെ സ്പീക്കറുകൾ ഇതിലേക്ക് ബന്ധിപ്പിക്കുക ampലിഫയറിന്റെ സ്പീക്കർ ടെർമിനലുകൾ. ശരിയായ പോളാരിറ്റി നിരീക്ഷിക്കുക (+ മുതൽ + വരെയും - മുതൽ - വരെയും). ampലിഫയർ 2 ഓം സ്റ്റീരിയോ സ്റ്റേബിളും 4 ഓംസിൽ ബ്രിഡ്ജ് ചെയ്യാവുന്നതുമാണ്.
- റിമോട്ട് സബ്വൂഫർ ബാസ് നിയന്ത്രണം: റിമോട്ട് ബാസ് കൺട്രോൾ യൂണിറ്റ് നിയുക്ത പോർട്ടിലേക്ക് ബന്ധിപ്പിക്കുക ampലിഫയർ. എളുപ്പത്തിൽ ക്രമീകരിക്കുന്നതിനായി കൺട്രോൾ യൂണിറ്റ് ആക്സസ് ചെയ്യാവുന്ന സ്ഥലത്ത് സ്ഥാപിക്കുക.
5. പ്രവർത്തന നിർദ്ദേശങ്ങൾ
5.1 പ്രാരംഭ പവർ-അപ്പ്
എല്ലാ കണക്ഷനുകളും ഉണ്ടാക്കിയ ശേഷം, വാഹനത്തിന്റെ നെഗറ്റീവ് ബാറ്ററി ടെർമിനൽ വീണ്ടും ബന്ധിപ്പിക്കുക. നിങ്ങളുടെ ഹെഡ് യൂണിറ്റ് ഓണാക്കുക. ampപോപ്പുകളും ക്ലിക്കുകളും തടയുന്നതിന് സോഫ്റ്റ് ടേൺ ഓൺ/ഓഫ് സർക്യൂട്ടറി ലൈഫയറിൽ ഉണ്ട്. പ്രവർത്തന നില കാണിക്കുന്നതിന് പവർ പ്രൊട്ടക്ഷൻ എൽഇഡി ഇൻഡിക്കേറ്ററുകൾ പ്രകാശിക്കും.
5.2 ഇൻപുട്ട് ലെവൽ നിയന്ത്രണങ്ങൾ ക്രമീകരിക്കൽ
ദി ampലിഫയറിൽ വേരിയബിൾ ഇൻപുട്ട് ലെവൽ നിയന്ത്രണങ്ങൾ ഉണ്ട്. ആരംഭിക്കുക ampലിഫയറിന്റെ ഇൻപുട്ട് ലെവൽ ഏറ്റവും കുറഞ്ഞതായി സജ്ജീകരിച്ചിരിക്കുന്നു. നിങ്ങളുടെ ഹെഡ് യൂണിറ്റിലൂടെ പരമാവധി വോളിയത്തിന്റെ 75% ൽ പരിചിതമായ ഒരു സംഗീത ശകലം പ്ലേ ചെയ്യുക. പതുക്കെ വർദ്ധിപ്പിക്കുക ampനേരിയ വ്യതിയാനം കേൾക്കുന്നതുവരെ ലൈഫയറിന്റെ ഇൻപുട്ട് ലെവൽ നിലനിർത്തുക, തുടർന്ന് അത് ചെറുതായി ഓഫ് ചെയ്യുക. ഇത് ഉറപ്പാക്കുന്നു ampക്ലിപ്പിംഗ് ഇല്ലാതെ തന്നെ ലിഫയറിന് ഒപ്റ്റിമൽ സിഗ്നൽ ലഭിക്കുന്നു.
5.3 ക്രോസ്ഓവർ ക്രമീകരണങ്ങൾ
ദി ampവേരിയബിൾ ഹൈ ലോ പാസ് ക്രോസ്ഓവർ കൺട്രോളുകൾ ലൈഫയറിൽ ഉണ്ട്. നിങ്ങളുടെ സ്പീക്കറുകളിലേക്കോ സബ് വൂഫറുകളിലേക്കോ നിർദ്ദിഷ്ട ഫ്രീക്വൻസികൾ ഫിൽട്ടർ ചെയ്യാൻ ഇവ നിങ്ങളെ അനുവദിക്കുന്നു.
- ഹൈ പാസ് ഫിൽട്ടർ (HPF): കുറഞ്ഞ ഫ്രീക്വൻസികൾ അവയിലേക്ക് എത്തുന്നത് തടയുന്നതിനും വ്യക്തത മെച്ചപ്പെടുത്തുന്നതിനും പൂർണ്ണ ശ്രേണി സ്പീക്കറുകളിൽ ഉപയോഗിക്കുന്നു.
- ലോ പാസ് ഫിൽട്ടർ (LPF): ബാസ് പ്രതികരണം മെച്ചപ്പെടുത്തിക്കൊണ്ട് കുറഞ്ഞ ഫ്രീക്വൻസികൾ മാത്രം കടന്നുപോകാൻ അനുവദിക്കുന്നതിന് സബ് വൂഫറുകൾക്ക് ഉപയോഗിക്കുന്നു.
നിങ്ങളുടെ സ്പീക്കറുകളുടെയും സബ് വൂഫറുകളുടെയും ഫ്രീക്വൻസി പ്രതികരണ സവിശേഷതകളുമായി പൊരുത്തപ്പെടുന്നതിന് ഈ നിയന്ത്രണങ്ങൾ ക്രമീകരിക്കുക.
5.4 ബാസ് ബൂസ്റ്റ് സർക്യൂട്ട്
ബിൽറ്റ്-ഇൻ ബാസ് ബൂസ്റ്റ് സർക്യൂട്ട് നിർദ്ദിഷ്ട ഫ്രീക്വൻസികളിൽ ബാസ് ഔട്ട്പുട്ട് വർദ്ധിപ്പിക്കാൻ അനുവദിക്കുന്നു. ഈ സവിശേഷത മിതമായി ഉപയോഗിക്കുക, നിങ്ങളുടെ ഇഷ്ടത്തിനനുസരിച്ച് ക്രമീകരിക്കുക, അമിതമായ ബൂസ്റ്റിംഗ് ഒഴിവാക്കുക, ഇത് വികലതയിലേക്കോ സ്പീക്കറിന് കേടുപാടുകൾ വരുത്തുന്നതിനോ ഇടയാക്കും.
5.5 ബ്രിഡ്ജ്ഡ് മോഡ് പ്രവർത്തനം
ദി ampരണ്ട് ചാനലുകളുടെയും പവർ ഒരു ഉയർന്ന പവർ ഔട്ട്പുട്ടിലേക്ക് സംയോജിപ്പിക്കുന്നതിന്, സാധാരണയായി ഒരു സബ്വൂഫർ ഓടിക്കുന്നതിന്, 4 ഓംസിൽ ലിഫയർ ബ്രിഡ്ജ് ചെയ്യാൻ കഴിയും. ബ്രിഡ്ജ് ചെയ്യുന്നതിനെക്കുറിച്ചുള്ള നിർദ്ദിഷ്ട നിർദ്ദേശങ്ങൾക്ക് വയറിംഗ് ഡയഗ്രം കാണുക. ampജീവൻ.
6. പരിപാലനം
ലാൻസർ VIBE211 ampലിഫയറിന് കുറഞ്ഞ അറ്റകുറ്റപ്പണികൾ മാത്രമേ ആവശ്യമുള്ളൂ. വയറിംഗ് കണക്ഷനുകളുടെ ഇറുകിയതയ്ക്കും നാശത്തിനും ഇടയ്ക്കിടെ പരിശോധിക്കുക. സൂക്ഷിക്കുക ampശരിയായ തണുപ്പ് ഉറപ്പാക്കാൻ ലിഫയറിന്റെ ഹീറ്റ്സിങ്ക് വൃത്തിയുള്ളതും പൊടിയോ അവശിഷ്ടങ്ങളോ ഇല്ലാതെ വൃത്തിയാക്കിയിരിക്കണം. പുറംഭാഗം വൃത്തിയാക്കാൻ മൃദുവായതും ഉണങ്ങിയതുമായ തുണി ഉപയോഗിക്കുക.
7. പ്രശ്നപരിഹാരം
നിങ്ങളുടെ ഉപകരണത്തിൽ പ്രശ്നങ്ങൾ അനുഭവപ്പെടുകയാണെങ്കിൽ ampപ്രൊഫഷണൽ സേവനം തേടുന്നതിന് മുമ്പ് താഴെ പറയുന്ന പട്ടിക പരിശോധിക്കുക:
| പ്രശ്നം | സാധ്യമായ കാരണം | പരിഹാരം |
|---|---|---|
| ശക്തിയില്ല / ശബ്ദമില്ല | ഊരിപ്പോയ ഫ്യൂസ്; അയഞ്ഞ പവർ/ഗ്രൗണ്ട്/റിമോട്ട് വയർ; തകരാറുള്ള ഹെഡ് യൂണിറ്റ്. | ഫ്യൂസ് പരിശോധിച്ച് മാറ്റിസ്ഥാപിക്കുക; എല്ലാ പവർ, ഗ്രൗണ്ട്, റിമോട്ട് കണക്ഷനുകളും പരിശോധിക്കുക; ഹെഡ് യൂണിറ്റ് പ്രവർത്തനം പരിശോധിക്കുക. |
| വികലമായ ശബ്ദം | ഇൻപുട്ട് ലെവൽ വളരെ കൂടുതലാണ്; സ്പീക്കർ ഇംപെഡൻസ് വളരെ കുറവാണ്; സ്പീക്കറുകൾക്ക് കേടുപാടുകൾ സംഭവിച്ചു. | ഇൻപുട്ട് ലെവൽ ക്രമീകരിക്കുക; സ്പീക്കർ ഇംപെഡൻസ് പരിശോധിക്കുക (2 ഓം സ്റ്റീരിയോ സ്റ്റേബിൾ, 4 ഓം ബ്രിഡ്ജ്ഡ്); സ്പീക്കറുകൾക്ക് കേടുപാടുകൾ ഉണ്ടോ എന്ന് പരിശോധിക്കുക. |
| Ampലൈഫയർ സംരക്ഷണ മോഡിലേക്ക് പോകുന്നു | അമിത ചൂടാക്കൽ; സ്പീക്കർ വയറിങ്ങിൽ ഷോർട്ട് സർക്യൂട്ട്; കുറഞ്ഞ വോളിയംtage. | ആവശ്യത്തിന് വായുസഞ്ചാരം ഉറപ്പാക്കുക; ഷോർട്ട്സുകൾക്കായി സ്പീക്കർ വയറുകൾ പരിശോധിക്കുക; ബാറ്ററി വോളിയം പരിശോധിക്കുക.tagഇ, ചാർജിംഗ് സിസ്റ്റം. |
| സബ്വൂഫറിൽ നിന്ന് ബാസ് ഇല്ല | LPF പ്രവർത്തനക്ഷമമാക്കിയിട്ടില്ല അല്ലെങ്കിൽ വളരെ ഉയർന്നതായി സജ്ജീകരിച്ചിട്ടില്ല; ഫേസ് പ്രശ്നം; റിമോട്ട് ബാസ് നിയന്ത്രണം ഏറ്റവും കുറഞ്ഞതായി സജ്ജീകരിച്ചിരിക്കുന്നു. | എൽപിഎഫ് ക്രമീകരണം ക്രമീകരിക്കുക; സബ് വൂഫർ ഘട്ടം പരിശോധിക്കുക; റിമോട്ട് ബാസ് നിയന്ത്രണ ലെവൽ വർദ്ധിപ്പിക്കുക. |
8 സ്പെസിഫിക്കേഷനുകൾ
ലാൻസാർ VIBE211-നുള്ള സാങ്കേതിക സവിശേഷതകൾ ampജീവപര്യന്തം:
- പവർ ഔട്ട്പുട്ട് (ആർ.എം.എസ് @ 4 ഓംസ്): 2 x 90 വാട്ട്സ്
- പവർ ഔട്ട്പുട്ട് (പരമാവധി @ 4 ഓംസ്): 2 x 180 വാട്ട്സ്
- പവർ ഔട്ട്പുട്ട് (പരമാവധി ബ്രിഡ്ജ്ഡ് @ 4 ഓംസ്): 1 x 360 വാട്ട്സ്
- പവർ ഔട്ട്പുട്ട് (ആർ.എം.എസ് @ 2 ഓംസ്): 2 x 150 വാട്ട്സ്
- Ampജീവിത തരം: 2 ചാനൽ മോസ്ഫെറ്റ്
- ഫ്രീക്വൻസി പ്രതികരണം: 15 Hz - 35 kHz
- സിഗ്നൽ-ടു-നോയ്സ് അനുപാതം (S/N): 90 ഡിബി
- ഫ്യൂസ് റേറ്റിംഗ്: 15 എ
- അളവുകൾ (W x H x L): 10.25 ഇഞ്ച് x 2 ഇഞ്ച് x 8 ഇഞ്ച്
- ഇൻപുട്ട് ലെവൽ നിയന്ത്രണങ്ങൾ: വേരിയബിൾ
- ക്രോസ്ഓവർ നിയന്ത്രണങ്ങൾ: വേരിയബിൾ ഹൈ/ലോ പാസ്
- സ്ഥിരത: 2 ഓം സ്റ്റീരിയോ സ്റ്റേബിൾ, 4 ഓംസിൽ ബ്രിഡ്ജബിൾ
- പ്രൊട്ടക്ഷൻ സർക്യൂട്ട്: അഡ്വാൻസ്ഡ് പവർ പ്രൊട്ടക്ഷൻ LED ഇൻഡിക്കേറ്ററുകൾ
- അധിക സവിശേഷതകൾ: റിമോട്ട് സബ്വൂഫർ ബാസ് കൺട്രോൾ, ഇലക്ട്രോണിക് ക്രോസ്ഓവർ നെറ്റ്വർക്ക്, ബാസ് ബൂസ്റ്റ് സർക്യൂട്ട്, സോഫ്റ്റ് ടേൺ ഓൺ/ഓഫ്
9. വാറൻ്റിയും പിന്തുണയും
9.1 വാറൻ്റി വിവരങ്ങൾ
ലാൻസർ VIBE211 ampലൈഫയർ ഒരു കൂടെ വരുന്നു 1 വർഷം വാങ്ങിയ തീയതി മുതൽ പരിമിതമായ വാറന്റി. സാധാരണ ഉപയോഗത്തിൽ മെറ്റീരിയലുകളിലും നിർമ്മാണത്തിലും ഉണ്ടാകുന്ന തകരാറുകൾ ഈ വാറന്റി ഉൾക്കൊള്ളുന്നു. വാറന്റി ക്ലെയിമുകൾക്കായി നിങ്ങളുടെ വാങ്ങലിന്റെ തെളിവ് സൂക്ഷിക്കുക. അനുചിതമായ ഇൻസ്റ്റാളേഷൻ, അപകടം, ദുരുപയോഗം, ദുരുപയോഗം, അശ്രദ്ധ, അല്ലെങ്കിൽ അനധികൃത പരിഷ്ക്കരണം എന്നിവ മൂലമുണ്ടാകുന്ന നാശനഷ്ടങ്ങൾക്ക് വാറന്റി പരിരക്ഷ നൽകുന്നില്ല.
9.2 ഉപഭോക്തൃ പിന്തുണ
സാങ്കേതിക സഹായത്തിനോ, ഈ മാനുവലിനോ അപ്പുറമുള്ള ട്രബിൾഷൂട്ടിംഗിനോ, വാറന്റി സേവനത്തിനോ, ദയവായി ലാൻസാർ ഉപഭോക്തൃ പിന്തുണയുമായി ബന്ധപ്പെടുക. ഔദ്യോഗിക ലാൻസാർ കാണുക. webനിലവിലെ കോൺടാക്റ്റ് വിവരങ്ങൾക്കായി സൈറ്റ് അല്ലെങ്കിൽ ഉൽപ്പന്ന പാക്കേജിംഗ്.


