1. ആമുഖം
Thank you for choosing the Pelican 4100N Nemo Dive Series Light. This serious dive light is engineered for reliability and performance in demanding underwater environments. It is submersible to 500 feet and constructed with an ABS body, polycarbonate lens, and thermoplastic shroud, ensuring corrosion-proof and chemical-resistant operation. This manual provides essential information for the safe and effective use, setup, operation, and maintenance of your dive light.
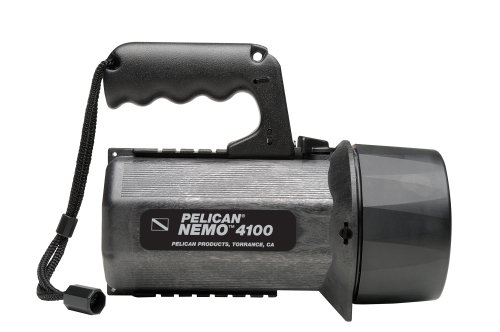
Image 1.1: Pelican 4100N Nemo Dive Series Light. This image shows the overall design of the dive light, featuring its robust construction and ergonomic pistol grip handle.
2 സുരക്ഷാ വിവരങ്ങൾ
Please read all safety instructions before using the Pelican 4100N Nemo Dive Series Light. Failure to follow these instructions may result in injury or damage to the product.
- വെള്ളത്തിൽ മുങ്ങൽ: Ensure all seals and components are properly secured and free from debris before submerging the light. This light is designed for underwater use up to 500 feet (152 meters).
- ബാറ്ററി സുരക്ഷ: Use only 8 D alkaline cells. Do not mix old and new batteries, or different types of batteries. Insert batteries with correct polarity. Remove batteries if the light will not be used for an extended period to prevent leakage.
- Light Beam: Do not stare directly into the light beam, as it can cause temporary vision impairment.
- ചൂട്: The light may become warm during prolonged use. Handle with care.
- പരിപാലനം: Perform regular maintenance as described in this manual to ensure optimal performance and safety.
3. പാക്കേജ് ഉള്ളടക്കം
പാക്കേജിൽ എല്ലാ ഇനങ്ങളും ഉണ്ടെന്ന് ഉറപ്പാക്കുക:
- Pelican 4100N Nemo Dive Series Light
- Modified Spot Reflector (stippled)
- Laser Spot Reflector (smooth)
- ബാക്കപ്പ് എൽamp (stored behind reflector)
Note: 8 D alkaline cells are required for operation and are not included.
4. സജ്ജീകരണം
4.1 ബാറ്ററി ഇൻസ്റ്റാളേഷൻ
- Unscrew the rear cap of the light by turning it counter-clockwise.
- Carefully remove the internal battery module. This module is designed to absorb shock and protect the cells and lamp.
- Insert 8 D alkaline cells into the battery module, ensuring correct polarity (+/-) as indicated inside the module.
- Reinsert the battery module into the light body.
- Screw the rear cap back on clockwise until it is securely tightened. Ensure the O-ring seal is clean and properly seated to maintain waterproof integrity.
4.2 Reflector Installation/Change
The Pelican 4100N comes with two interchangeable reflectors and a stored backup lamp.
- Unscrew the front bezel of the light by turning it counter-clockwise.
- Carefully remove the currently installed reflector. The backup lamp is typically stored behind the reflector.
- Select your desired reflector:
- Modified Spot Reflector: Stippled surface for a wide, diffused beam.
- Laser Spot Reflector: Smooth surface for a tight, collimated beam.
- Place the chosen reflector into the light body. Ensure the backup lamp is properly seated if you wish to keep it stored.
- Screw the front bezel back on clockwise until it is securely tightened. Ensure the O-ring seal is clean and properly seated.
5. പ്രവർത്തന നിർദ്ദേശങ്ങൾ
5.1 Turning the Light On/Off
The Pelican 4100N features a dual-direction switch, designed for easy operation even with thick gloves.
- ലൈറ്റ് തിരിക്കാൻ ON, push the switch forward (away from the handle).
- ലൈറ്റ് തിരിക്കാൻ ഓഫ്, pull the switch backward (towards the handle).
5.2 Locking Slide Feature
The light includes a locking slide feature to prevent accidental activation, which is crucial for preserving battery life and avoiding unintended light exposure.
- ലേക്ക് ലോക്ക് ചെയ്യുക the switch, slide the small locking mechanism (usually a small lever or button near the main switch) into the locked position.
- ലേക്ക് അൺലോക്ക് ചെയ്യുക the switch, slide the locking mechanism back to the unlocked position.
5.3 Pistol Grip/Lantern Handle
The versatile pistol grip/lantern handle can be quickly converted to multiple positions for flexibility in use and carrying.
- Adjust the handle by pressing the release button or rotating the pivot points to achieve the desired position (e.g., pistol grip for handheld use, lantern style for area illumination).
6. പരിപാലനം
Proper maintenance ensures the longevity and reliable performance of your Pelican 4100N Dive Light.
- ഓരോ ഡൈവിനും ശേഷം: Rinse the light thoroughly with fresh water to remove salt, sand, and other debris. Operate the switch several times while rinsing to flush out any trapped particles.
- O-Ring Care: Periodically inspect the O-rings on the rear cap and front bezel for cracks, nicks, or dirt. Clean them with a soft cloth and apply a thin layer of silicone grease to maintain a watertight seal. Replace damaged O-rings immediately.
- ബാറ്ററി കമ്പാർട്ട്മെൻ്റ്: Keep the battery compartment clean and dry. If batteries leak, clean the compartment thoroughly and dispose of the old batteries properly.
- സംഭരണം: Store the light in a cool, dry place away from direct sunlight. Remove batteries if storing for an extended period to prevent corrosion from leakage.
- ലെൻസ് കെയർ: Clean the polycarbonate lens with a soft, damp തുണി. ലെൻസിൽ പോറൽ വീഴ്ത്താൻ സാധ്യതയുള്ള ഉരച്ചിലുകളുള്ള ക്ലീനറുകളോ വസ്തുക്കളോ ഒഴിവാക്കുക.
7. പ്രശ്നപരിഹാരം
If you encounter issues with your Pelican 4100N Dive Light, refer to the following common problems and solutions:
- ലൈറ്റ് ഓണാകുന്നില്ല:
- ബാറ്ററി പോളാരിറ്റി പരിശോധിക്കുക.
- ബാറ്ററികൾ പുതിയതും ശരിയായി ഇൻസ്റ്റാൾ ചെയ്തതുമാണെന്ന് ഉറപ്പാക്കുക.
- Verify the switch is not in the locked position.
- Check for corrosion on battery contacts; clean if necessary.
- Light is Dim or Flickering:
- Replace batteries with a fresh set.
- Ensure battery contacts are clean and making good connection.
- Water Inside Light:
- Immediately remove batteries.
- Disassemble the light and allow all components to dry thoroughly.
- Inspect O-rings for damage or improper seating. Clean and re-grease or replace O-rings as needed.
- Ensure front bezel and rear cap are securely tightened before next use.
If problems persist, contact Pelican customer support.
8 സ്പെസിഫിക്കേഷനുകൾ
| ഫീച്ചർ | സ്പെസിഫിക്കേഷൻ |
|---|---|
| മോഡൽ നമ്പർ | 4100N (4100-007-110X) |
| പ്രകാശ സ്രോതസ്സ് | സെനോൺ |
| തെളിച്ചം | 251 ല്യൂമെൻസ് |
| ബാറ്ററി തരം | 8 x D Alkaline Cells (not included) |
| Battery Burn Time | 12 മണിക്കൂർ |
| സബ്മേഴ്സിബിൾ ഡെപ്ത് | 500 അടി (152 മീറ്റർ) |
| മെറ്റീരിയൽ | അക്രിലോണിട്രൈൽ ബ്യൂട്ടാഡീൻ സ്റ്റൈറൈൻ (ABS), പോളികാർബണേറ്റ് (PC) |
| ഫീച്ചറുകൾ | Dual direction switch, locking slide, pistol grip/lantern handle, shock absorbing internal battery module, backup lamp |
| അളവുകൾ (പാക്കേജ്) | 24.89 x 14.48 x 13.21 സെ.മീ |
| ഭാരം (പാക്കേജ്) | 997.9 ഗ്രാം |
9. വാറൻ്റിയും പിന്തുണയും
Pelican products are known for their durability and reliability, backed by a comprehensive warranty.
9.1 Lifetime Guarantee
Pelican products come with an unconditional lifetime guarantee against defects in workmanship. If you experience any dissatisfaction due to manufacturing defects, your Pelican product will be replaced or you will be refunded through the original dealer.
Important Limitations:
- The lifetime guarantee does അല്ല l മൂടുകamp (bulb) or batteries, as these are consumable items.
- The guarantee does not cover damage resulting from misuse, abuse, or external factors such as shark bites, bear attacks, or damage caused by children under 5 years old.
9.2 ഉപഭോക്തൃ പിന്തുണ
For warranty claims, technical assistance, or further inquiries, please contact your original Pelican dealer or visit the official Pelican webഉപഭോക്തൃ പിന്തുണ വിവരങ്ങൾക്കായുള്ള സൈറ്റ്.


