1. ആമുഖം
വാങ്ങിയതിന് നന്ദി.asing the BOSS Audio Systems ONYX N2000.4 4-Channel MOSFET Power Amplifier. This manual provides detailed instructions for proper installation, operation, and maintenance of your ampലിഫയർ. ഒപ്റ്റിമൽ പ്രകടനവും സുരക്ഷയും ഉറപ്പാക്കാൻ ഇൻസ്റ്റാളേഷനോ പ്രവർത്തനമോ ശ്രമിക്കുന്നതിന് മുമ്പ് ദയവായി ഈ മാനുവൽ നന്നായി വായിക്കുക.
2 സുരക്ഷാ വിവരങ്ങൾ
Improper installation or use can result in serious injury or damage to the amplifier or vehicle. Observe the following safety guidelines:
- പ്രൊഫഷണൽ ഇൻസ്റ്റാളേഷൻ ശുപാർശ ചെയ്യുന്നു: For best results and to avoid damage, installation by a qualified professional is highly recommended.
- വൈദ്യുതി വിച്ഛേദിക്കൽ: Always disconnect the vehicle's negative battery terminal before starting any installation.
- വയറിംഗ്: Ensure all wiring is correctly connected and securely fastened. Use appropriate gauge wiring for power and speaker connections.
- വെൻ്റിലേഷൻ: മൗണ്ട് ദി amplifier in a location that allows for adequate air circulation to prevent overheating. Do not cover the amplifier's heat sinks.
- ഈർപ്പം: മൌണ്ട് ചെയ്യുന്നത് ഒഴിവാക്കുക amplifier in areas exposed to moisture or direct sunlight.
- ഫ്യൂസുകൾ: Always replace fuses with the same type and rating.
3. പാക്കേജ് ഉള്ളടക്കം
നിങ്ങളുടെ പാക്കേജിൽ ഇനിപ്പറയുന്ന ഇനങ്ങൾ അടങ്ങിയിട്ടുണ്ടെന്ന് പരിശോധിക്കുക:
- BOSS Audio Systems ONYX N2000.4 4-Channel Ampജീവപര്യന്തം
- റിമോട്ട് സബ് വൂഫർ ലെവൽ കൺട്രോൾ
- മൗണ്ടിംഗ് ഹാർഡ്വെയർ (സ്ക്രൂകൾ, വാഷറുകൾ)
- ഉപയോക്തൃ മാനുവൽ (ഈ പ്രമാണം)
4 പ്രധാന സവിശേഷതകൾ
The ONYX N2000.4 amplifier is designed to deliver powerful and clear audio performance. Key features include:
- 2000 വാട്ട്സ് പരമാവധി പവർ ഔട്ട്പുട്ട്
- 4-ചാനൽ കോൺഫിഗറേഷൻ
- മോസ്ഫെറ്റ് പവർ സപ്ലൈ
- റിമോട്ട് സബ് വൂഫർ ലെവൽ കൺട്രോൾ
- Variable Low Pass and High Pass Crossovers
- Variable Input Gain Control
- Bridgeable Outputs for 2-Channel Operation
5. സജ്ജീകരണവും ഇൻസ്റ്റാളേഷനും
Before beginning installation, ensure the vehicle's battery is disconnected. Plan your wiring carefully to avoid interference and ensure proper power delivery.
5.1 മൌണ്ട് ചെയ്യുന്നു Ampജീവപര്യന്തം
Choose a mounting location that is dry, well-ventilated, and secure. Avoid mounting on carpet or in enclosed spaces that restrict airflow. Use the provided mounting hardware to secure the ampലിഫയർ ഒരു സോളിഡ് പ്രതലത്തിലേക്ക് ദൃഢമായി ഉറപ്പിക്കുക.
5.2 വയറിംഗ് കണക്ഷനുകൾ
Refer to the diagram below for proper wiring connections. Ensure all connections are tight and insulated to prevent short circuits.
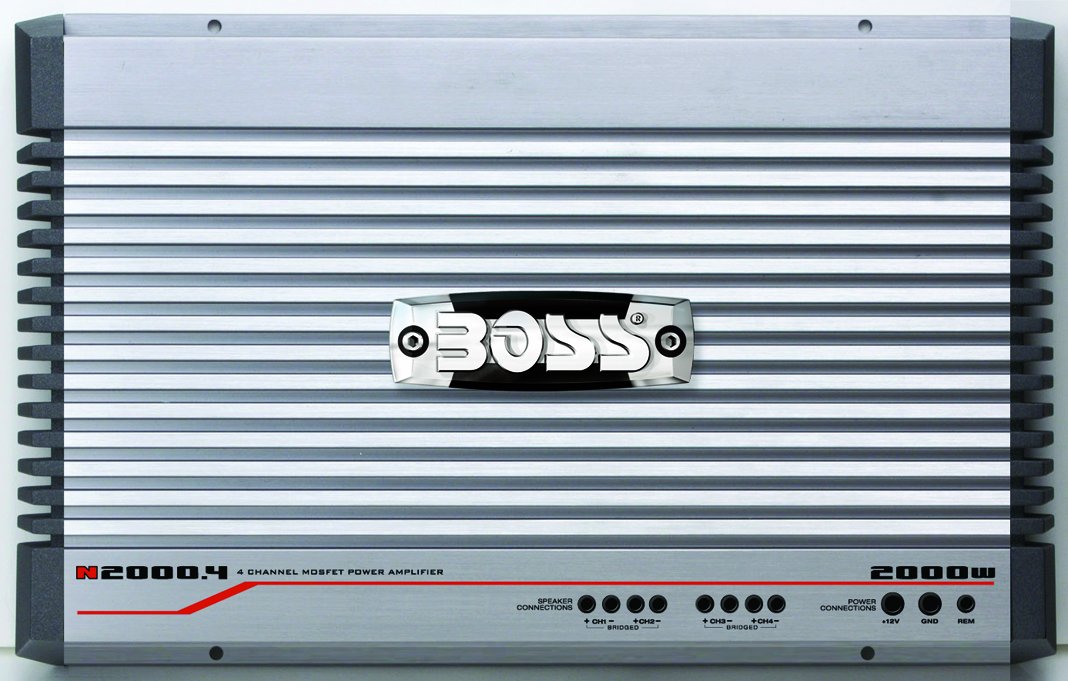
ഫ്രണ്ട് view of the BOSS Audio Systems ONYX N2000.4 amplifier, showing the BOSS logo, model number, power rating, and connection labels for speaker outputs and power input.
5.2.1 പവർ കണക്ഷനുകൾ
- +12V (പവർ): Connect to the positive terminal of the vehicle's battery using a heavy-gauge power cable (e.g., 4 AWG or larger). An inline fuse (not supplied) should be installed within 18 inches of the battery.
- GND (ഗ്രൗണ്ട്): Connect to a clean, unpainted metal surface of the vehicle chassis. Ensure a good electrical connection. Use a heavy-gauge cable of the same size as the +12V wire.
- REM (റിമോട്ട് ടേൺ-ഓൺ): Connect to the remote turn-on output of your head unit. This wire turns the amplifier on and off with your car stereo.
5.2.2 സ്പീക്കർ കണക്ഷനുകൾ
The N2000.4 supports both 4-channel stereo and 2-channel bridged configurations.
- 4-Channel Stereo: Connect each speaker to its corresponding positive (+) and negative (-) terminals (CH1+, CH1-, CH2+, CH2-, CH3+, CH3-, CH4+, CH4-). Ensure correct polarity.
- 2-Channel Bridged: For higher power output to two speakers or subwoofers, bridge channels. Connect the positive (+) terminal of the speaker/subwoofer to CH1+ and the negative (-) terminal to CH2-. Similarly, for the second bridged output, connect to CH3+ and CH4-. Refer to the amplifier's labeling for specific bridged connection points. Minimum impedance for bridged operation is typically 4 ohms.
5.2.3 ഓഡിയോ ഇൻപുട്ട് കണക്ഷനുകൾ
Connect the RCA output cables from your head unit to the amplifier's RCA input jacks (FRONT L/R, REAR L/R).
5.2.4 റിമോട്ട് സബ്വൂഫർ ലെവൽ നിയന്ത്രണം
Connect the remote level control cable to the designated port on the amplifier. Mount the control knob in an accessible location for easy adjustment of subwoofer output.
6. പ്രവർത്തനവും ക്രമീകരണങ്ങളും
Once installed, fine-tune the ampഒപ്റ്റിമൽ ശബ്ദ നിലവാരത്തിനായുള്ള ലൈഫയർ ക്രമീകരണങ്ങൾ.
6.1 ഗെയിൻ കൺട്രോൾ
നേട്ട നിയന്ത്രണം ഇവയുമായി പൊരുത്തപ്പെടുന്നു amplifier's input sensitivity to the output of your head unit. Start with the gain set to minimum. Turn your head unit volume to about 75% of maximum. Slowly increase the amplifier gain until you hear slight distortion, then back off slightly. This ensures maximum clean signal without clipping.
6.2 ക്രോസ്ഓവർ ക്രമീകരണങ്ങൾ (HPF/LPF)
The N2000.4 features variable high-pass (HPF) and low-pass (LPF) crossovers to direct specific frequency ranges to your speakers or subwoofers.
- ഹൈ പാസ് ഫിൽട്ടർ (HPF): Used for full-range speakers to block low frequencies, preventing distortion and improving clarity. Set the HPF to a frequency appropriate for your speakers (e.g., 80Hz-120Hz).
- ലോ പാസ് ഫിൽട്ടർ (LPF): Used for subwoofers to block high frequencies, ensuring only bass notes are reproduced. Set the LPF to a frequency appropriate for your subwoofer (e.g., 80Hz-120Hz).
6.3 ബാസ് ബൂസ്റ്റ്
If equipped, the bass boost control allows you to enhance low-frequency output. Use sparingly to avoid distortion and speaker damage.
6.4 റിമോട്ട് സബ്വൂഫർ ലെവൽ നിയന്ത്രണം
This knob provides convenient adjustment of the subwoofer output level from the driver's seat without affecting other ampലൈഫയർ ക്രമീകരണങ്ങൾ.
7. പരിപാലനം
പതിവ് അറ്റകുറ്റപ്പണികൾ നിങ്ങളുടെ ഉപകരണത്തിന്റെ ദീർഘായുസ്സും പ്രകടനവും ഉറപ്പാക്കുന്നു ampജീവൻ.
- വൃത്തിയാക്കൽ: ഇടയ്ക്കിടെ തുടയ്ക്കുക ampമൃദുവായതും ഉണങ്ങിയതുമായ തുണി ഉപയോഗിച്ച് ലിഫയറിന്റെ പുറംഭാഗം തടവുക. കഠിനമായ രാസവസ്തുക്കളോ അബ്രാസീവ് ക്ലീനറുകളോ ഉപയോഗിക്കരുത്.
- വെൻ്റിലേഷൻ: ഉറപ്പാക്കുക ampശരിയായ താപ വിസർജ്ജനം നിലനിർത്തുന്നതിന് ലിഫയറിന്റെ കൂളിംഗ് ഫിനുകൾ പൊടിയും അവശിഷ്ടങ്ങളും ഇല്ലാതെ തുടരുന്നു.
- ഫ്യൂസ് മാറ്റിസ്ഥാപിക്കൽ: If a fuse blows, replace it only with a fuse of the exact same type and amperage rating. Using an incorrect fuse can cause damage or fire.
8. പ്രശ്നപരിഹാരം
നിങ്ങളുടെ കാര്യത്തിൽ പ്രശ്നങ്ങൾ അനുഭവപ്പെടുകയാണെങ്കിൽ amplifier-നെ ബന്ധപ്പെടുന്നതിന് മുമ്പ്, ഇനിപ്പറയുന്ന ട്രബിൾഷൂട്ടിംഗ് ഗൈഡ് പരിശോധിക്കുക.
| പ്രശ്നം | സാധ്യമായ കാരണം | പരിഹാരം |
|---|---|---|
| വൈദ്യുതിയില്ല / Ampലിഫയർ ഓണാക്കുന്നില്ല |
|
|
| സൗണ്ട് ഔട്ട്പുട്ട് ഇല്ല |
|
|
| വികലമായ ശബ്ദം |
|
|
| Ampലിഫയർ അമിത ചൂടാക്കൽ |
|
|
9 സ്പെസിഫിക്കേഷനുകൾ
| മോഡൽ | N2000.4 |
| ചാനലുകൾ | 4-ചാനൽ |
| Ampജീവിത ക്ലാസ് | മോസ്ഫെറ്റ് |
| പരമാവധി പവർ ഔട്ട്പുട്ട് | 2000 വാട്ട്സ് |
| അളവുകൾ (L x W x H) | 16.42 x 10.19 x 2.22 ഇഞ്ച് |
| ഭാരം | 10.1 പൗണ്ട് |
| റിമോട്ട് സബ് വൂഫർ ലെവൽ കൺട്രോൾ | ഉൾപ്പെടുത്തിയിട്ടുണ്ട് |
| നിർമ്മാതാവ് | ബോസ് ഓഡിയോ |
10. വാറൻ്റിയും പിന്തുണയും
10.1 വാറൻ്റി വിവരങ്ങൾ
The BOSS Audio Systems ONYX N2000.4 ampലൈഫയർ ഒരു കൂടെ വരുന്നു 6 വർഷത്തെ വാറൻ്റി. This includes a 1-year over-the-counter exchange and 5 years for parts and labor. Please retain your proof of purchase for warranty claims.
10.2 ഉപഭോക്തൃ പിന്തുണ
For technical assistance, troubleshooting beyond this manual, or warranty inquiries, please contact BOSS Audio Systems customer support. Refer to the official BOSS Audio Systems webഏറ്റവും പുതിയ ബന്ധപ്പെടാനുള്ള വിവരങ്ങൾക്കായി സൈറ്റ്.
Note: Do not attempt to repair this unit yourself. Unauthorized repairs will void the warranty.


