1. ആമുഖം
The Intermatic EI500WC is a 7-day single-pole digital time switch designed for automated control of lights, fans, pumps, and other medium-duty loads. It offers up to 7 ON and 7 OFF operations per week, providing flexibility for energy savings, security, and convenience. This timer is compatible with incandescent, fluorescent, CFL, and LED lighting.
This manual provides detailed instructions for the safe installation, setup, programming, and maintenance of your EI500WC digital time switch.

Figure 1: Intermatic EI500WC Digital Time Switch installed in a standard wall plate.
2. സുരക്ഷാ മുൻകരുതലുകൾ
Please read and understand all instructions before installing or operating this device. Failure to follow these instructions may result in electrical shock, fire, or serious injury.
- മുന്നറിയിപ്പ്: Risk of Electric Shock. Disconnect power at the circuit breaker or fuse box before installation or servicing.
- എല്ലാ പ്രാദേശിക, ദേശീയ ഇലക്ട്രിക്കൽ കോഡുകൾക്കും അനുസൃതമായി യോഗ്യതയുള്ള ഒരു ഇലക്ട്രീഷ്യനാണ് ഇൻസ്റ്റാളേഷൻ നടത്തേണ്ടത്.
- Do not use this device with loads exceeding its specified electrical ratings.
- എല്ലാ വയർ കണക്ഷനുകളും സുരക്ഷിതമാണെന്നും ശരിയായി ഇൻസുലേറ്റ് ചെയ്തിട്ടുണ്ടെന്നും ഉറപ്പാക്കുക.
- ഈ ഉപകരണം ഇൻഡോർ ഉപയോഗത്തിന് മാത്രമുള്ളതാണ്.
3. പാക്കേജ് ഉള്ളടക്കം
- Intermatic EI500WC 7-Day Digital Time Switch
- വയർ പരിപ്പ്
- നിർദ്ദേശ മാനുവൽ (ഈ പ്രമാണം)
4. ഉൽപ്പന്നം കഴിഞ്ഞുview
The EI500WC features a clear digital display and intuitive buttons for programming. The main ON and OFF buttons are visible on the front, while programming buttons are located behind a hinged cover.

ചിത്രം 2: മുൻഭാഗം view of the EI500WC with the programming button cover open, showing CLK, DAY, PROG, RESET, HOUR, MIN, and MODE buttons.
5. ഇൻസ്റ്റലേഷൻ നിർദ്ദേശങ്ങൾ
5.1. ആവശ്യമായ ഉപകരണങ്ങൾ
- സ്ക്രൂഡ്രൈവർ (ഫിലിപ്സ് കൂടാതെ/അല്ലെങ്കിൽ ഫ്ലാറ്റ്ഹെഡ്)
- വയർ സ്ട്രിപ്പറുകൾ
- വാല്യംtagഇ ടെസ്റ്റർ
- ഇലക്ട്രിക്കൽ ടേപ്പ്
5.2. വയറിംഗ് നിർദ്ദേശങ്ങൾ
- പവർ ഓഫ് ചെയ്യുക: Locate the circuit breaker or fuse that controls the switch you are replacing and turn it OFF. Verify power is off using a voltagഇ ടെസ്റ്റർ.
- പഴയ സ്വിച്ച് നീക്കം ചെയ്യുക: നിലവിലുള്ള വാൾ പ്ലേറ്റ് ശ്രദ്ധാപൂർവ്വം നീക്കം ചെയ്ത് ഇലക്ട്രിക്കൽ ബോക്സിൽ നിന്ന് സ്വിച്ച് ചെയ്യുക.
- വയറുകൾ തിരിച്ചറിയുക: The EI500WC requires a neutral wire. Identify the LINE (hot), LOAD, NEUTRAL, and GROUND wires in your electrical box. If a neutral wire is not present, consult a qualified electrician.
- വയറുകൾ ബന്ധിപ്പിക്കുക: Use the provided wire nuts to connect the EI500WC wires to your household wiring as shown in the diagram below.
- Black wire (LINE): Connect to the incoming hot wire from the circuit breaker.
- Red wire (LOAD): Connect to the wire going to the light fixture or appliance.
- White wire (NEUTRAL): Connect to the neutral wire (typically white) in the electrical box.
- Green wire (GROUND): Connect to the bare copper or green ground wire in the electrical box.
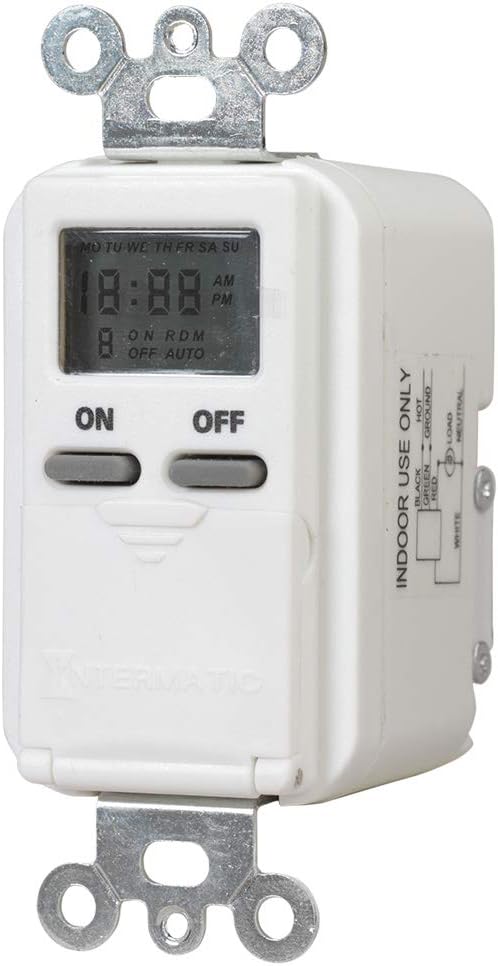
Figure 3: Wiring diagram for the EI500WC, showing connections for LINE (Black), LOAD (Red), NEUTRAL (White), and GROUND (Green).
5.3. മൗണ്ടിംഗ്
- Carefully push the wired timer into the electrical box, ensuring wires are not pinched.
- Secure the timer to the electrical box using the mounting screws.
- Attach the wall plate (not included) over the timer.
- പവർ പുനഃസ്ഥാപിക്കുക: സർക്യൂട്ട് ബ്രേക്കറിൽ വീണ്ടും പവർ ഓൺ ചെയ്യുക.
6. പ്രാരംഭ സജ്ജീകരണം
ആദ്യം പവർ-അപ്പ് ചെയ്യുമ്പോൾ അല്ലെങ്കിൽ പവർ OU ന് ശേഷംtage, the display may show '12:00 AM' and 'MO'. The internal battery maintains settings during brief power interruptions.
6.1. നിലവിലെ സമയവും ദിവസവും ക്രമീകരിക്കുന്നു
- Open the hinged cover to access the programming buttons (refer to Figure 2).
- അമർത്തുക CLK ബട്ടൺ. സമയ ഡിസ്പ്ലേ മിന്നിമറയും.
- അമർത്തുക മണിക്കൂർ button to set the current hour. Observe the AM/PM indicator.
- അമർത്തുക MIN നിലവിലെ മിനിറ്റ് സജ്ജമാക്കുന്നതിനുള്ള ബട്ടൺ.
- അമർത്തുക ദിവസം button to set the current day of the week (MO, TU, WE, TH, FR, SA, SU).
- അമർത്തുക CLK again to save the settings and exit time setting mode.
7. പ്രവർത്തനവും പ്രോഗ്രാമിംഗും
The EI500WC allows for up to 7 ON and 7 OFF programming events per week. Each event can be set for a specific day or combination of days.
7.1. Setting ON/OFF Programs
- അടച്ച കവർ തുറക്കുക.
- അമർത്തുക PROG button. The display will show '1 ON' and the time will flash.
- അമർത്തുക മണിക്കൂർ ഒപ്പം MIN to set the desired ON time for program 1.
- അമർത്തുക ദിവസം to select the day(s) for this program. Options include individual days, weekdays (MO TU WE TH FR), weekends (SA SU), or all days (MO TU WE TH FR SA SU).
- അമർത്തുക PROG again. The display will show '1 OFF' and the time will flash.
- അമർത്തുക മണിക്കൂർ ഒപ്പം MIN to set the desired OFF time for program 1.
- അമർത്തുക ദിവസം to select the day(s) for this OFF program (should match the ON program days).
- Repeat steps 2-7 for additional ON/OFF programs (up to 7 pairs). To skip a program, press PROG repeatedly until you reach the desired program number or exit programming mode.
- അമർത്തുക CLK പ്രോഗ്രാമിംഗ് മോഡിൽ നിന്ന് പുറത്തുകടന്ന് സാധാരണ പ്രവർത്തനത്തിലേക്ക് മടങ്ങാൻ.
7.2. റാൻഡം മോഡ്
The random mode feature varies the ON/OFF schedule by a few minutes, providing a 'lived-in' appearance for enhanced security.
- To activate Random Mode: Press the മോഡ് ഡിസ്പ്ലേയിൽ 'RDM' ദൃശ്യമാകുന്നതുവരെ ബട്ടൺ അമർത്തുക.
- To deactivate Random Mode: Press the മോഡ് button until 'RDM' disappears.
7.3. മാനുവൽ അസാധുവാക്കൽ
You can manually turn the connected load ON or OFF at any time without affecting the programmed schedule.
- വലുത് അമർത്തുക ON button to manually turn the load ON.
- വലുത് അമർത്തുക ഓഫ് button to manually turn the load OFF.
- The timer will revert to its programmed schedule at the next scheduled ON or OFF event.
8. പരിപാലനം
8.1. ബാറ്ററി വിവരങ്ങൾ
The EI500WC includes an internal battery that provides backup power to maintain time and program settings during power outages. This battery is typically long-lasting and not user-replaceable. If the display is blank or settings are lost frequently after power interruptions, the unit may need replacement.
8.2. വൃത്തിയാക്കൽ
Clean the surface of the timer with a soft, damp തുണി. ഉരച്ചിലുകളുള്ള ക്ലീനറുകളോ ലായകങ്ങളോ ഉപയോഗിക്കരുത്.
9. പ്രശ്നപരിഹാരം
- Timer display is blank: Ensure power is supplied to the circuit. Check circuit breaker.
- പ്രോഗ്രാം ചെയ്തതുപോലെ ലോഡ് ഓൺ/ഓഫ് ആകുന്നില്ല:
- Verify current time and day are set correctly.
- Check that ON/OFF programs are set for the correct times and days.
- Ensure the timer is not in manual override mode conflicting with the program.
- Confirm wiring connections are secure.
- Timer loses settings after power outage: The internal backup battery may be depleted. The unit may require replacement.
- റീസെറ്റ് ബട്ടൺ: If the timer behaves erratically, use a pointed object (like a paperclip) to press the recessed പുനഃസജ്ജമാക്കുക button. This will clear all settings and restore default values, requiring you to re-enter time, day, and programs.
10 സാങ്കേതിക സവിശേഷതകൾ
| ഫീച്ചർ | സ്പെസിഫിക്കേഷൻ |
|---|---|
| മോഡൽ നമ്പർ | EI500WC |
| വാല്യംtage | 125 VAC, 60 Hz |
| പരമാവധി ലോഡ് | 15 Amps (1875 Watts) Resistive, 1000 Watts Tungsten |
| മോട്ടോർ ലോഡ് | 1 / 4 HP |
| പ്രോഗ്രാമുകളുടെ എണ്ണം | Up to 7 ON/OFF events per week |
| സ്വിച്ച് തരം | സിംഗിൾ-പോൾ (വൺ-വേ) |
| മൗണ്ടിംഗ് തരം | Decorator Wall Plate/Standard Wall Box |
| അളവുകൾ (H x W x D) | 2.75" x 1.75" x 1.36" |
| നിറം | വെള്ള |
| സർട്ടിഫിക്കേഷനുകൾ | UL ലിസ്റ്റുചെയ്തു |
11. വാറൻ്റി വിവരങ്ങൾ
Intermatic warrants this product to be free from defects in material and workmanship for a period of one (1) year from the date of purchase. This warranty covers replacement of the unit only and does not include labor costs associated with removal or reinstallation.
This warranty does not apply to defects resulting from improper installation, misuse, abuse, accident, or unauthorized modifications. For warranty service, please contact Intermatic customer support.
12. ഉപഭോക്തൃ പിന്തുണ
If you have any questions regarding the installation, operation, or troubleshooting of your Intermatic EI500WC Digital Time Switch, please refer to the Intermatic website or contact their customer support directly. Always have your model number (EI500WC) available when contacting support.


