1. ഉൽപ്പന്നം കഴിഞ്ഞുview
The NZXT Phantom ATX Full Tower Case (PHAN-001WT) is designed to accommodate high-performance computer components, offering extensive cooling capabilities and ample space for system builds. This full tower chassis supports ATX motherboards and provides features for efficient cable management and component installation.
Key features include multiple fan mounting options for optimized airflow, an integrated fan controller, and spacious interior design to support large graphics cards and cooling solutions.
2 സുരക്ഷാ വിവരങ്ങൾ
- ഏതെങ്കിലും ഇൻസ്റ്റാളേഷനോ അറ്റകുറ്റപ്പണികളോ നടത്തുന്നതിന് മുമ്പ് എല്ലായ്പ്പോഴും മതിൽ ഔട്ട്ലെറ്റിൽ നിന്ന് വൈദ്യുതി വിതരണം വിച്ഛേദിക്കുക.
- Handle all components with care to prevent damage from electrostatic discharge. Consider using an anti-static wrist strap.
- അമിതമായി ചൂടാകുന്നത് തടയാൻ കേസിനു ചുറ്റും ശരിയായ വായുസഞ്ചാരം ഉറപ്പാക്കുക.
- ചെറിയ ഭാഗങ്ങളും സ്ക്രൂകളും കുട്ടികളിൽ നിന്ന് അകറ്റി നിർത്തുക.
3. പാക്കേജ് ഉള്ളടക്കം
പാക്കേജിൽ എല്ലാ ഇനങ്ങളും ഉണ്ടെന്ന് ഉറപ്പാക്കുക:
- NZXT Phantom ATX Full Tower Case (PHAN-001WT)
- ആക്സസറി ബോക്സ് (സ്ക്രൂകൾ, സ്റ്റാൻഡ്ഓഫുകൾ, കേബിൾ ടൈകൾ മുതലായവ അടങ്ങിയിരിക്കുന്നു)
- ഉപയോക്തൃ മാനുവൽ (ഈ പ്രമാണം)
4. സജ്ജീകരണവും ഇൻസ്റ്റാളേഷനും
4.1. കേസ് തയ്യാറാക്കൽ
- കേസ് ഒരു സ്ഥിരതയുള്ളതും പരന്നതുമായ പ്രതലത്തിൽ വയ്ക്കുക.
- Locate the six thumb screws on the rear of the case. Loosen and remove the top two and bottom two thumb screws. The middle two screws are spring-loaded; loosen them slightly and push downwards to release the side panels.
- Carefully remove both side panels.
- Open the front panel by swinging it outwards. It can be removed completely by swinging it all the way out until it detaches.
- Locate the accessory box inside the bottom front right SSD slot. Open it and familiarize yourself with the included screws and components.
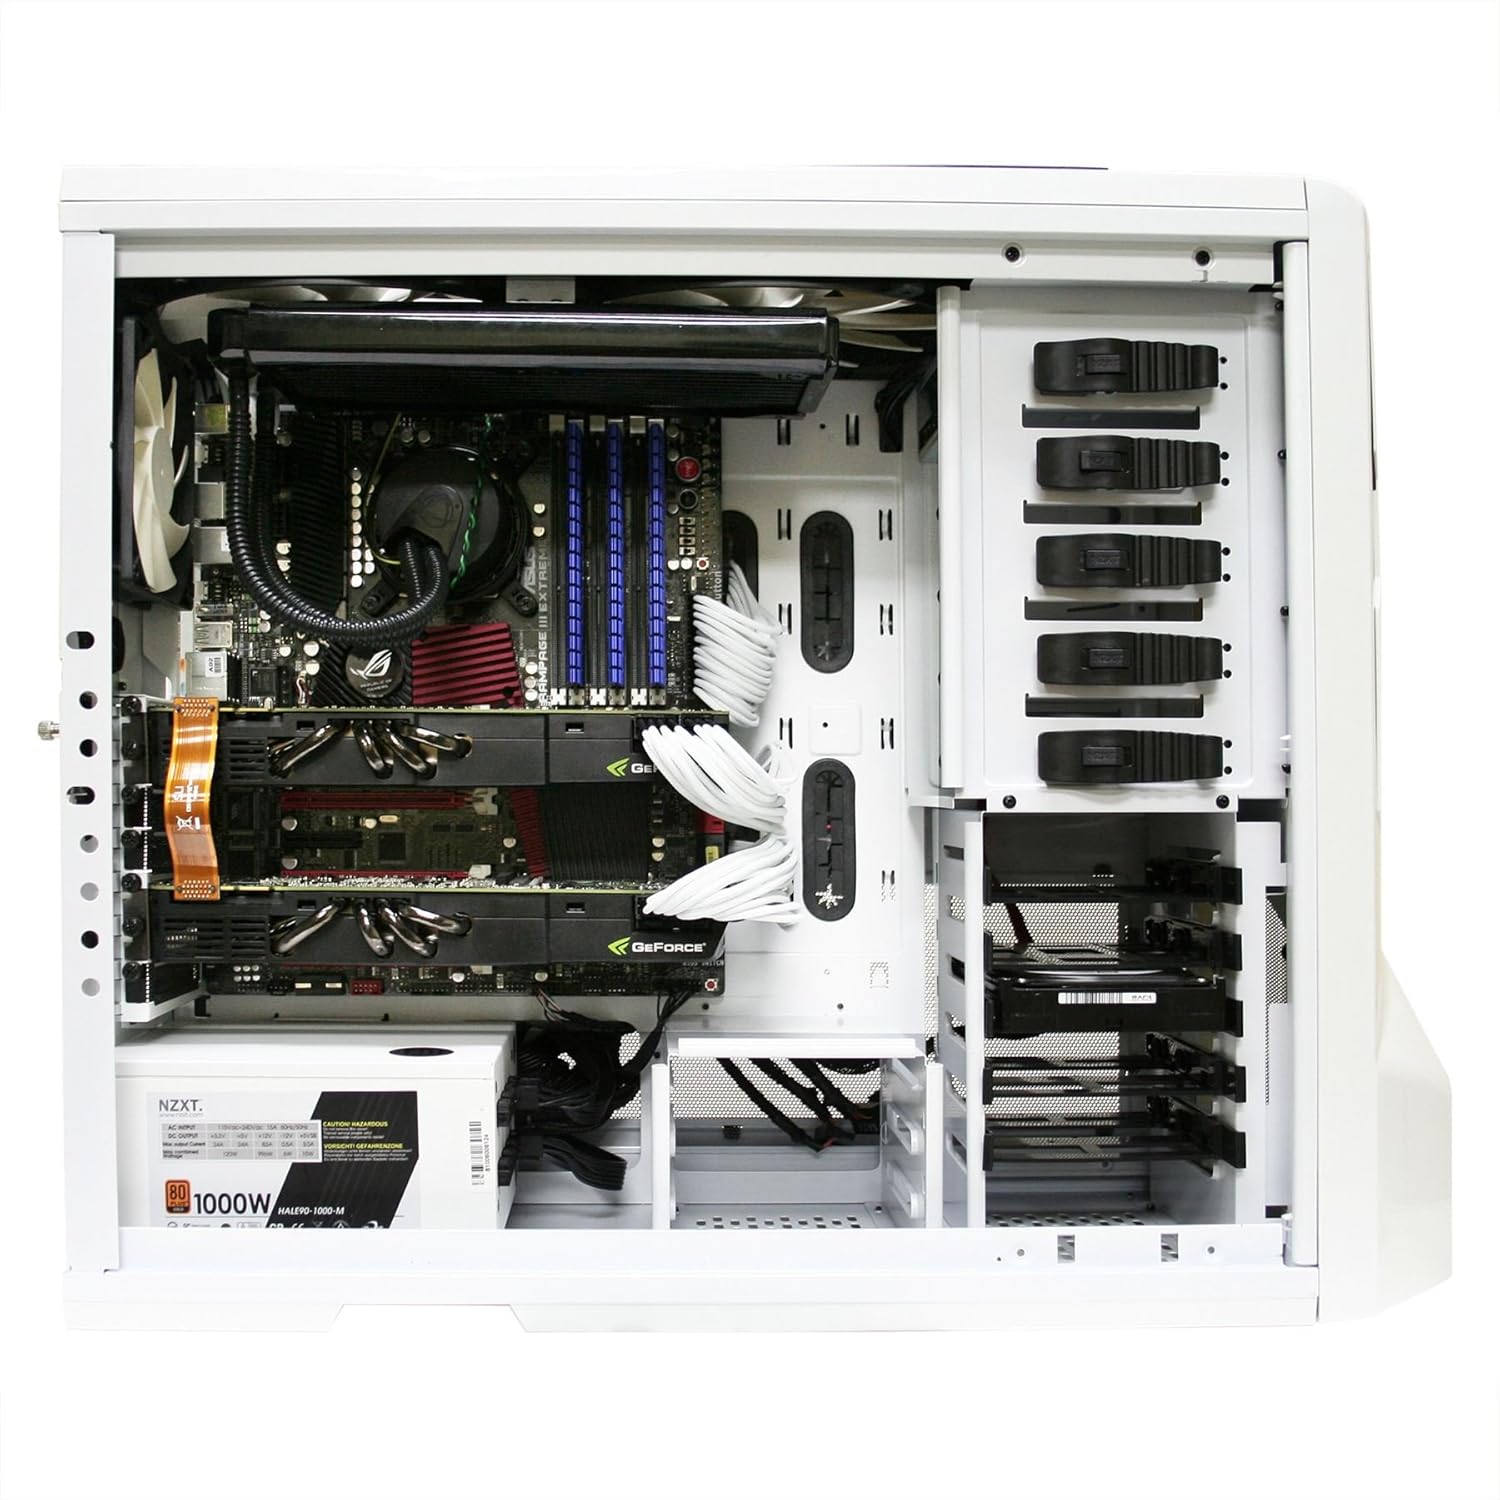
ചിത്രം 1: ഇൻ്റീരിയർ view of the NZXT Phantom case, showing motherboard, graphics cards, power supply, and drive bays.
4.2. മദർബോർഡ് ഇൻസ്റ്റാളേഷൻ
- Identify the correct standoff locations for your motherboard size (e.g., ATX) by referring to the etched notations on the motherboard tray.
- Install the appropriate standoffs into the designated holes.
- Carefully place your motherboard onto the installed standoffs, aligning the screw holes.
- Secure the motherboard with the hexagonal screws provided in the accessory box.
4.3. പവർ സപ്ലൈ യൂണിറ്റ് (പിഎസ്യു) ഇൻസ്റ്റാളേഷൻ
- Position your PSU in the designated bottom mount area.
- Secure the PSU to the rear of the case using screws.
- Route the PSU cables (PCI-E, main motherboard power, SATA power) through the cable management holes and grommets to the back side of the motherboard tray. This helps maintain a clean interior and improves airflow.
4.4. Drive Installation (HDD/SSD/Optical Drives)
- For 3.5" HDDs and 2.5" SSDs, utilize the tool-less drive bays. Slide the drive into the bay until it clicks into place.
- For 5.25" optical drives, remove the front panel cover, slide the drive into the bay, and secure it using the quick-release latches or screws.
- Connect SATA data and power cables to your installed drives.
4.5. എക്സ്പാൻഷൻ കാർഡ് ഇൻസ്റ്റാളേഷൻ
- Remove the necessary PCI slot mesh bars from the rear of the case to match your expansion card (e.g., graphics card, sound card).
- Insert the expansion card into the appropriate PCI-E slot on your motherboard.
- Secure the card with a screw or the provided latch mechanism.
4.6. Connecting Case Cables
- Connect the front panel headers (Power SW, Reset SW, HDD LED, Power LED, USB, Audio) to their corresponding pins on your motherboard. Refer to your motherboard manual for pin assignments.
- Connect the case fans to the integrated fan controller cables. Each cable is labeled for its corresponding fan.
- Connect the standard Molex connector from your PSU to the fan controller to provide power to the fan system.

ചിത്രം 2: വശം view of the NZXT Phantom case, highlighting the mesh panels for fan mounting locations.
5. ഓപ്പറേഷൻ
5.1. പവർ ചെയ്യുന്നു
- Once all components are installed and cables connected, replace the side panels and secure them with the thumb screws.
- നിങ്ങളുടെ മോണിറ്റർ, കീബോർഡ്, മൗസ്, മറ്റ് അനുബന്ധ ഉപകരണങ്ങൾ എന്നിവ ബന്ധിപ്പിക്കുക.
- നിങ്ങളുടെ പൊതുമേഖലാ സ്ഥാപനത്തിലേക്കും ഒരു വാൾ ഔട്ട്ലെറ്റിലേക്കും പവർ കേബിൾ ബന്ധിപ്പിക്കുക.
- Press the power button on the top panel of the case to start your system.
5.2. ഫാൻ നിയന്ത്രണം
The NZXT Phantom case features an integrated fan controller located on the top panel. Use the sliders to adjust the speed of the connected case fans. Adjusting fan speed will also dim the LEDs on fans that support this feature.

Figure 3: Integrated fan controller on the top panel, allowing adjustment of fan speeds.
5.3. Front Panel Ports
The top panel of the case provides convenient access to:
- USB 2.0 പോർട്ടുകൾ (2x)
- USB 3.0 port (1x, depending on model revision)
- ഹെഡ്ഫോൺ ജാക്ക്
- മൈക്രോഫോൺ ജാക്ക്
6. പരിപാലനം
6.1. വൃത്തിയാക്കൽ
- പുറം: ഒരു സോഫ്റ്റ് ഉപയോഗിക്കുക, ഡിamp പുറംഭാഗങ്ങൾ തുടയ്ക്കാൻ തുണി ഉപയോഗിക്കുക.
- ഇൻ്റീരിയർ: Periodically open the case and use compressed air to remove dust buildup from components and fan blades. Ensure the system is powered off and unplugged before cleaning.
- പൊടി ഫിൽട്ടറുകൾ: The case features mesh panels that act as dust filters. Regularly remove and clean these filters to maintain optimal airflow and cooling performance.
7. പ്രശ്നപരിഹാരം
7.1. സിസ്റ്റം ഓണാക്കുന്നില്ല
- പവർ കേബിൾ പൊതുമേഖലാ സ്ഥാപനത്തിലേക്കും വാൾ ഔട്ട്ലെറ്റിലേക്കും സുരക്ഷിതമായി ബന്ധിപ്പിച്ചിട്ടുണ്ടെന്ന് ഉറപ്പാക്കുക.
- PSU സ്വിച്ച് 'ഓൺ' സ്ഥാനത്താണെന്ന് ഉറപ്പാക്കുക.
- Check that the front panel 'Power SW' header is correctly connected to the motherboard.
- Confirm all major power cables (24-pin ATX, CPU, GPU) are securely seated.
7.2. Fan Issues
- If fans are not spinning, check their connections to the integrated fan controller and ensure the Molex power connector for the controller is plugged into the PSU.
- Adjust fan speeds using the top panel sliders.
- Excessive fan noise may indicate dust buildup or a faulty fan. Clean fans or consider replacement if noise persists.
7.3. Side Panel Latch Issues
- If the side panel latches are difficult to secure or frequently dislodge, ensure they are properly aligned. As an alternative, the side panels can be secured solely with the thumb screws.
7.4. Component Fitment
- When installing large CPU air coolers or liquid cooling radiators, verify clearance with the side panel fan mounts. In some configurations, it may be necessary to adjust or remove certain side panel fans to accommodate oversized components.
8 സ്പെസിഫിക്കേഷനുകൾ
| ഫീച്ചർ | സ്പെസിഫിക്കേഷൻ |
|---|---|
| ബ്രാൻഡ് | NZXT |
| പരമ്പര | PHAN-001WT |
| മോഡലിൻ്റെ പേര് | PHAN-001WT |
| കേസ് തരം | ഫുൾ ടവർ |
| മദർബോർഡ് അനുയോജ്യത | ATX |
| നിറം | വെള്ള |
| മെറ്റീരിയൽ | അലോയ് സ്റ്റീൽ, പ്ലാസ്റ്റിക് |
| ഇനത്തിൻ്റെ ഭാരം | 24.2 പൗണ്ട് |
| ഉൽപ്പന്ന അളവുകൾ (LxWxH) | 24.6 x 8.7 x 21.35 ഇഞ്ച് |
| പവർ സപ്ലൈ മൗണ്ടിംഗ് തരം | താഴെയുള്ള മൗണ്ട് |
| തണുപ്പിക്കൽ രീതി | വായു |
| ഫാൻ വലിപ്പം | 200 Millimeters (various fan sizes supported) |
| USB 2.0 പോർട്ടുകളുടെ എണ്ണം | 2 |
| Audio-out Ports | 1 |
9. വാറൻ്റിയും പിന്തുണയും
For detailed warranty information and technical support, please visit the official NZXT website. The warranty period and terms may vary by region and product. Ensure you retain your proof of purchase for warranty claims.
ഓൺലൈൻ ഉറവിടങ്ങൾ:
- NZXT Official Webസൈറ്റ്: www.nzxt.com
- Support Portal: Refer to the NZXT website for their dedicated support section.


