ആമുഖം
This manual provides detailed instructions for the safe and efficient operation of your Utilitech Mechanical Residential Plug-In Timer. Please read this manual thoroughly before use and retain it for future reference.
The Utilitech Mechanical Residential Plug-In Timer is designed to automate the on/off cycles of electrical devices, helping to conserve energy and enhance convenience. It features up to 48 on/off settings per day and includes 4 outlets for connecting multiple devices.
ഉൽപ്പന്നം കഴിഞ്ഞുview
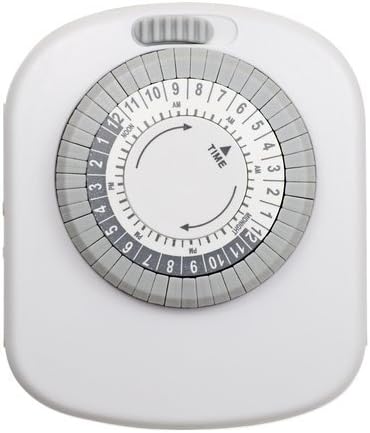
ചിത്രം 1: മുൻഭാഗം view of the Utilitech Mechanical Residential Plug-In Timer, showing the central dial with time markings and surrounding pins.
The timer features a circular dial with hour markings (AM/PM) and a series of push-down pins around its circumference. These pins control the on/off cycles. A manual override switch is typically located on the top or side of the unit.
പ്രധാന സവിശേഷതകൾ:
- Up to 48 on/off settings per 24-hour period.
- Non-removable pins for easy programming.
- Designed for energy saving.
- Equipped with 4 outlets for multiple device connections.
- Simple plug-in installation.
സജ്ജമാക്കുക
പ്രാരംഭ സജ്ജീകരണം:
Unpack the Timer: Carefully remove the timer from its packaging. Inspect for any damage.
പ്ലഗ് ഇൻ: Plug the timer into a standard 120V AC wall outlet. Ensure the outlet is easily accessible.
Charge Battery (if applicable): Although this model does not require batteries for operation, some timers may have an internal battery for timekeeping during power outages. If so, allow it to charge for at least 30 minutes before programming.
നിലവിലെ സമയം സജ്ജമാക്കുക: Rotate the entire dial clockwise until the current time aligns with the "TIME" arrow indicator on the timer's face. The dial is marked with AM and PM hours (e.g., 12 PM for Noon, 12 AM for Midnight).
Figure 2: Detail of the timer dial, highlighting the "TIME" arrow and the 24-hour markings for setting the current time.
പ്രവർത്തന നിർദ്ദേശങ്ങൾ
Programming On/Off Times:
The timer uses push-down pins around the dial to set the on/off intervals. Each pin represents a 30-minute segment.
Identify Pins: Locate the small, grey pins around the outer edge of the dial. Each pin corresponds to a 30-minute interval.
Set "ON" Times: Push down the pins corresponding to the time periods you want the connected device to be ON. When a pin is pushed down, it activates the power during that 30-minute segment as the dial rotates.
Set "OFF" Times: Leave the pins in the "up" position for the time periods you want the connected device to be ഓഫ്. When a pin is in the up position, it deactivates the power during that 30-minute segment.
ചിത്രം 3: വിശദമായി view of the timer's outer ring with individual pins, illustrating how to push them down for "ON" periods.
മാനുവൽ ഓവർറൈഡ് സ്വിച്ച്: The timer typically has a manual override switch (often a slider or button) located on the top or side. This switch allows you to bypass the programmed settings and keep the device either continuously ON or OFF. Ensure this switch is in the "Timer" or "Auto" position for programmed operation.
ഉപകരണം ബന്ധിപ്പിക്കുക: Plug the device you wish to control into one of the 4 outlets on the timer. Ensure the device's own power switch is set to the "ON" position.
Example Programming:
To turn a lamp on from 6:00 PM to 10:00 PM:
- Locate the 6 PM mark on the dial.
- Push down all pins from 6 PM to 10 PM.
- Ensure all other pins are in the "up" position.
- Set the current time on the dial.
- എൽ പ്ലഗ് ചെയ്യുകamp into the timer.
മെയിൻ്റനൻസ്
The Utilitech Mechanical Residential Plug-In Timer requires minimal maintenance.
വൃത്തിയാക്കൽ: Disconnect the timer from the power outlet before cleaning. Wipe the exterior with a soft, dry cloth. Do not use liquid cleaners or abrasive materials.
സംഭരണം: If storing the timer for an extended period, ensure it is clean and dry. Store in a cool, dry place away from direct sunlight and extreme temperatures.
പരിശോധന: Periodically inspect the timer and its cord for any signs of damage, such as frayed wires or cracked casing. If damage is found, discontinue use immediately and replace the unit.
ട്രബിൾഷൂട്ടിംഗ്
| പ്രശ്നം | സാധ്യമായ കാരണം | പരിഹാരം |
|---|---|---|
| പ്രോഗ്രാം ചെയ്തതുപോലെ ഉപകരണം ഓൺ/ഓഫ് ചെയ്യുന്നില്ല. |
|
|
| ടൈമർ ഡയൽ കറങ്ങുന്നില്ല. |
|
|
| Timer makes a rattling or loud noise. |
|
|
സ്പെസിഫിക്കേഷനുകൾ
| ആട്രിബ്യൂട്ട് | വിശദാംശങ്ങൾ |
|---|---|
| മോഡൽ നമ്പർ | 358707 |
| ഭാഗം നമ്പർ | TM20DHBL |
| ബ്രാൻഡ് | യൂട്ടിലിടെക് |
| ടൈപ്പ് ചെയ്യുക | Mechanical Residential Plug-In Timer |
| ഔട്ട്ലെറ്റുകളുടെ എണ്ണം | 4 |
| Daily Settings | Up to 48 on/off settings (30-minute intervals) |
| മൗണ്ടിംഗ് തരം | പ്ലഗ്-ഇൻ മൗണ്ട് |
| നിറം | വെള്ള |
| ഇനത്തിൻ്റെ ഭാരം | 6.4 ഔൺസ് |
| പാക്കേജ് അളവുകൾ | 6.7 x 4.1 x 2.1 ഇഞ്ച് |
| ബാറ്ററികൾ ആവശ്യമാണ് | ഇല്ല |
| യു.പി.സി | 070686507131 |
സുരക്ഷാ വിവരങ്ങൾ
Please read and follow all safety instructions to prevent injury or damage.
ഇൻഡോർ ഉപയോഗത്തിന് മാത്രം: This timer is designed for indoor use in dry locations only. Do not expose to water or moisture.
ഇലക്ട്രിക്കൽ റേറ്റിംഗ്: Do not exceed the electrical rating of the timer. Overloading can cause overheating and fire.
ഗ്രൗണ്ടിംഗ്: Ensure the timer is plugged into a properly grounded outlet if applicable. This model is a 2-prong device.
കുട്ടികളും വളർത്തുമൃഗങ്ങളും: കുട്ടികൾക്കും വളർത്തുമൃഗങ്ങൾക്കും ലഭ്യമാകാതെ സൂക്ഷിക്കുക.
വിച്ഛേദിക്കൽ: Always unplug the timer from the wall outlet before cleaning or when not in use for extended periods.
നന്നാക്കൽ: Do not attempt to open or repair the timer yourself. Refer all servicing to qualified personnel.
വാറൻ്റിയും പിന്തുണയും
For warranty information or technical support, please refer to the product packaging or contact Utilitech customer service. Keep your purchase receipt for warranty claims.
Note: Specific warranty terms and contact information may vary. Please consult the documentation included with your product.


