1. ആമുഖം
നിങ്ങളുടെ DB ഇലക്ട്രിക്കൽ ADR0139 ആൾട്ടർനേറ്ററിന്റെ ഇൻസ്റ്റാളേഷൻ, പ്രവർത്തനം, പരിപാലനം എന്നിവയ്ക്കുള്ള അവശ്യ വിവരങ്ങൾ ഈ നിർദ്ദേശ മാനുവൽ നൽകുന്നു. ശരിയായ പ്രവർത്തനവും സുരക്ഷയും ഉറപ്പാക്കാൻ ഇൻസ്റ്റാളേഷനോ ഉപയോഗമോ തുടരുന്നതിന് മുമ്പ് ദയവായി ഈ മാനുവൽ നന്നായി വായിക്കുക. നിർദ്ദിഷ്ട ഹോണ്ട, അക്യൂറ മോഡലുകൾക്ക് നേരിട്ടുള്ള പകരക്കാരനായാണ് ഈ ആൾട്ടർനേറ്റർ രൂപകൽപ്പന ചെയ്തിരിക്കുന്നത്.
2. ഉൽപ്പന്നം കഴിഞ്ഞുview
നിങ്ങളുടെ വാഹനത്തിന്റെ സിസ്റ്റങ്ങൾക്ക് വിശ്വസനീയമായ വൈദ്യുതി നൽകുന്ന, OEM സ്പെസിഫിക്കേഷനുകൾ പാലിക്കുന്നതിനായി രൂപകൽപ്പന ചെയ്തിരിക്കുന്ന ഒരു പുതിയ ആഫ്റ്റർ മാർക്കറ്റ് ആൾട്ടർനേറ്ററാണ് DB ഇലക്ട്രിക്കൽ ADR0139. 12 വോൾട്ടിൽ പ്രവർത്തിക്കുകയും 105 പവർ ഉത്പാദിപ്പിക്കുകയും ചെയ്യുന്ന ഒരു ഡെൽകോ CS130D ഫാമിലി ഡിസൈൻ ഇതിൽ ഉൾപ്പെടുന്നു. amps.

ചിത്രം 2.1: മുൻഭാഗം view DB ഇലക്ട്രിക്കൽ ADR0139 ആൾട്ടർനേറ്ററിന്റെ, പുള്ളി, മെയിൻ ഹൗസിംഗ് എന്നിവ കാണിക്കുന്നു.
3. വാഹന അനുയോജ്യത
ഈ ആൾട്ടർനേറ്റർ താഴെപ്പറയുന്ന വാഹന മോഡലുകളുമായും വർഷങ്ങളുമായും പൊരുത്തപ്പെടുന്നു:
- അക്യൂറ സിഎൽ: 1997, 1998, 1999 (3.0L V6 മോഡലുകൾ)
- ഹോണ്ട അക്കോർഡ്: 1998, 1999, 2000, 2001, 2002 (3.0L V6 മോഡലുകൾ, EX, LX ട്രിമ്മുകൾ ഉൾപ്പെടെ)
ശരിയായ ഫിറ്റ്മെന്റ് ഉറപ്പാക്കാൻ, സെക്ഷൻ 4-ൽ നൽകിയിരിക്കുന്ന സ്പെസിഫിക്കേഷനുകൾക്കൊപ്പം നിങ്ങളുടെ വാഹനത്തിന്റെ നിർദ്ദിഷ്ട ആവശ്യകതകളും നിലവിലുള്ള പാർട്ട് നമ്പറുകളും പരിശോധിക്കുക.
4 സാങ്കേതിക സവിശേഷതകൾ
| ഫീച്ചർ | സ്പെസിഫിക്കേഷൻ |
|---|---|
| ആൾട്ടർനേറ്റർ കുടുംബം | ഡെൽകോ CS130D |
| വാല്യംtage | 12 വോൾട്ട് |
| Ampഉന്മേഷം | 105 Amps |
| അവസ്ഥ | പുതിയ ആഫ്റ്റർ മാർക്കറ്റ് |
| റെഗുലേറ്റർ ക്ലോക്ക് സ്ഥാനം | 2:00 |
| ഫാൻ ലൊക്കേഷൻ | ആന്തരികം |
| റെഗുലേറ്റർ സ്ഥാനം | ആന്തരികം |
| ടെർമിനൽ ഐഡി 2 | B+ |
| ടെർമിനൽ 2 വലുപ്പം | M6x1.00 |
| പോളാരിറ്റി | നെഗറ്റീവ് |
| മോഡൽ നമ്പർ | 400-12146 |
| ഇനത്തിൻ്റെ ഭാരം | 11.44 പൗണ്ട് |
| ഉൽപ്പന്ന അളവുകൾ | 5.71 x 4.78 x 4.2 ഇഞ്ച് |
OEM പാർട്ട് നമ്പറുകൾ മാറ്റിസ്ഥാപിക്കുന്നു:
- എസി ഡെൽകോ ടൂൾസ്: 321-1765
- ആരോഹെഡ്: ADR0139
- ബോഷ്: AL1277N, AL1277X
- ഡെൽകോ: 10463963, 10464417, 10480228, 10480453, 321-1765
- ഡെൻസോ: 210-5233
- Honda: 31100-P8A-A01, 31100P8A-A01, 31100-P8A-A02, 31100P8A-A02, 31100-P8C-A02, 31100P8C-A02
- ജെ & എൻ ഇലക്ട്രിക്കൽ ഉൽപ്പന്നങ്ങൾ: 400-12146
- ജാൻകോ: 400-12146R
- ലെസ്റ്റർ: 8220
5 സുരക്ഷാ വിവരങ്ങൾ
നിങ്ങളുടെ വാഹനത്തിന്റെ ഇലക്ട്രിക്കൽ സിസ്റ്റത്തിൽ പ്രവർത്തിക്കുമ്പോൾ ഇനിപ്പറയുന്ന സുരക്ഷാ മുൻകരുതലുകൾ എല്ലായ്പ്പോഴും പാലിക്കുക:
- വൈദ്യുതാഘാതമോ ഷോർട്ട് സർക്യൂട്ടുകളോ തടയുന്നതിന്, വൈദ്യുത സംവിധാനത്തിൽ എന്തെങ്കിലും ജോലി ആരംഭിക്കുന്നതിന് മുമ്പ് നെഗറ്റീവ് ബാറ്ററി ടെർമിനൽ വിച്ഛേദിക്കുക.
- സുരക്ഷാ ഗ്ലാസുകളും കയ്യുറകളും ഉൾപ്പെടെയുള്ള ഉചിതമായ വ്യക്തിഗത സംരക്ഷണ ഉപകരണങ്ങൾ ധരിക്കുക.
- വാഹനം സ്ഥിരതയുള്ളതും നിരപ്പായതുമായ പ്രതലത്തിലാണെന്നും ലിഫ്റ്റിംഗ് ആവശ്യമാണെങ്കിൽ ജാക്ക് സ്റ്റാൻഡുകൾ ഉപയോഗിച്ച് ശരിയായി പിന്തുണയ്ക്കുന്നുണ്ടെന്നും ഉറപ്പാക്കുക.
- എഞ്ചിൻ ഘടകങ്ങളിൽ പ്രവർത്തിക്കുന്നതിന് മുമ്പ് എഞ്ചിൻ പൂർണ്ണമായും തണുക്കാൻ അനുവദിക്കുക.
- ഇൻസ്റ്റലേഷൻ പ്രക്രിയയുടെ ഏതെങ്കിലും ഘട്ടത്തെക്കുറിച്ച് നിങ്ങൾക്ക് ഉറപ്പില്ലെങ്കിൽ, യോഗ്യതയുള്ള ഒരു ഓട്ടോമോട്ടീവ് ടെക്നീഷ്യനെ സമീപിക്കുക.
6. ഇൻസ്റ്റാളേഷൻ ഗൈഡ്
ഒരു ആൾട്ടർനേറ്റർ മാറ്റിസ്ഥാപിക്കുന്നത് സങ്കീർണ്ണമായേക്കാം. പ്രൊഫഷണൽ ഇൻസ്റ്റാളേഷൻ ശുപാർശ ചെയ്യുന്നു. നിങ്ങൾ സ്വയം മുന്നോട്ട് പോകാൻ തീരുമാനിക്കുകയാണെങ്കിൽ, ഈ പൊതുവായ ഘട്ടങ്ങൾ പാലിക്കുക. വാഹന മോഡലിനെ ആശ്രയിച്ച് നിർദ്ദിഷ്ട നടപടിക്രമങ്ങൾ വ്യത്യാസപ്പെടാം; വിശദമായ നിർദ്ദേശങ്ങൾക്ക് നിങ്ങളുടെ വാഹനത്തിന്റെ സർവീസ് മാനുവൽ പരിശോധിക്കുക.
6.1. ഉപകരണങ്ങളും തയ്യാറെടുപ്പും
- സോക്കറ്റ് സെറ്റും റെഞ്ചുകളും (മെട്രിക്)
- സെർപന്റൈൻ ബെൽറ്റ് ഉപകരണം അല്ലെങ്കിൽ പ്രൈ ബാർ
- ബാറ്ററി ടെർമിനൽ റെഞ്ച്
- ടെർമിനലുകൾ വൃത്തിയാക്കുന്നതിനുള്ള വയർ ബ്രഷ്
- സുരക്ഷാ ഗ്ലാസുകളും കയ്യുറകളും
- നെഗറ്റീവ് ബാറ്ററി കേബിൾ വിച്ഛേദിക്കുക.
- ആൾട്ടർനേറ്റർ കണ്ടെത്തി എല്ലാ ഇലക്ട്രിക്കൽ കണക്ഷനുകളും മൗണ്ടിംഗ് ബോൾട്ടുകളും തിരിച്ചറിയുക.
6.2. പഴയ ആൾട്ടർനേറ്റർ നീക്കംചെയ്യൽ
- സെർപെന്റൈൻ ബെൽറ്റിലെ പിരിമുറുക്കം ഒഴിവാക്കി ആൾട്ടർനേറ്റർ പുള്ളിയിൽ നിന്ന് അത് നീക്കം ചെയ്യുക.
- ആൾട്ടർനേറ്ററിൽ നിന്ന് മെയിൻ പവർ വയർ (B+) വിച്ഛേദിക്കുക. ഇത് സാധാരണയായി ഒരു നട്ട് ഉപയോഗിച്ച് ഉറപ്പിച്ചിരിക്കുന്ന ഒരു വലിയ ഗേജ് വയർ ആണ്.
- ആൾട്ടർനേറ്ററിൽ നിന്ന് മറ്റ് ഏതെങ്കിലും ഇലക്ട്രിക്കൽ കണക്ടറുകൾ (ഉദാ: റെഗുലേറ്റർ പ്ലഗ്) വിച്ഛേദിക്കുക.
- ആൾട്ടർനേറ്റർ എഞ്ചിൻ ബ്രാക്കറ്റിൽ ഉറപ്പിക്കുന്ന മൗണ്ടിംഗ് ബോൾട്ടുകൾ നീക്കം ചെയ്യുക. അവയുടെ സ്ഥാനങ്ങൾ ശ്രദ്ധിക്കുക.
- എഞ്ചിൻ ബേയിൽ നിന്ന് പഴയ ആൾട്ടർനേറ്റർ ശ്രദ്ധാപൂർവ്വം നീക്കം ചെയ്യുക. ഇതിന് മറ്റ് ഘടകങ്ങൾക്ക് ചുറ്റും നീങ്ങേണ്ടി വന്നേക്കാം.

ചിത്രം 6.1: പിൻഭാഗം view ആൾട്ടർനേറ്ററിന്റെ, B+ ടെർമിനലും ഇലക്ട്രിക്കൽ കണക്ടറും ഹൈലൈറ്റ് ചെയ്യുന്നു.
6.3. പുതിയ ആൾട്ടർനേറ്റർ സ്ഥാപിക്കൽ
- പുതിയ DB ഇലക്ട്രിക്കൽ ADR0139 ആൾട്ടർനേറ്റർ എഞ്ചിൻ ബേയിൽ സ്ഥാപിച്ച് മൗണ്ടിംഗ് ബ്രാക്കറ്റുകളുമായി വിന്യസിക്കുക.
- മൗണ്ടിംഗ് ബോൾട്ടുകൾ ഘടിപ്പിച്ച് നിർമ്മാതാവിന്റെ നിർദ്ദേശങ്ങൾക്കനുസരിച്ച് അവയെ മുറുക്കുക. അമിതമായി മുറുക്കരുത്.
- എല്ലാ ഇലക്ട്രിക്കൽ കണക്ടറുകളും വീണ്ടും ബന്ധിപ്പിക്കുക, അവ സുരക്ഷിതമാണെന്നും നാശത്തിൽ നിന്ന് മുക്തമാണെന്നും ഉറപ്പാക്കുക. ആവശ്യമെങ്കിൽ വയർ ബ്രഷ് ഉപയോഗിച്ച് ടെർമിനലുകൾ വൃത്തിയാക്കുക.
- മെയിൻ പവർ വയർ (B+) വീണ്ടും ബന്ധിപ്പിച്ച് അതിന്റെ നട്ട് സുരക്ഷിതമായി മുറുക്കുക.
- സെർപെന്റൈൻ ബെൽറ്റ് ആൾട്ടർനേറ്റർ പുള്ളിയിലേക്ക് തിരികെ വയ്ക്കുക, നിങ്ങളുടെ വാഹനത്തിന്റെ സ്പെസിഫിക്കേഷനുകൾക്കനുസരിച്ച് ടെൻഷൻ പ്രയോഗിക്കുക. എല്ലാ പുള്ളികളിലും ബെൽറ്റ് ശരിയായി ഘടിപ്പിച്ചിട്ടുണ്ടെന്ന് ഉറപ്പാക്കുക.
- നെഗറ്റീവ് ബാറ്ററി കേബിൾ വീണ്ടും ബന്ധിപ്പിക്കുക.
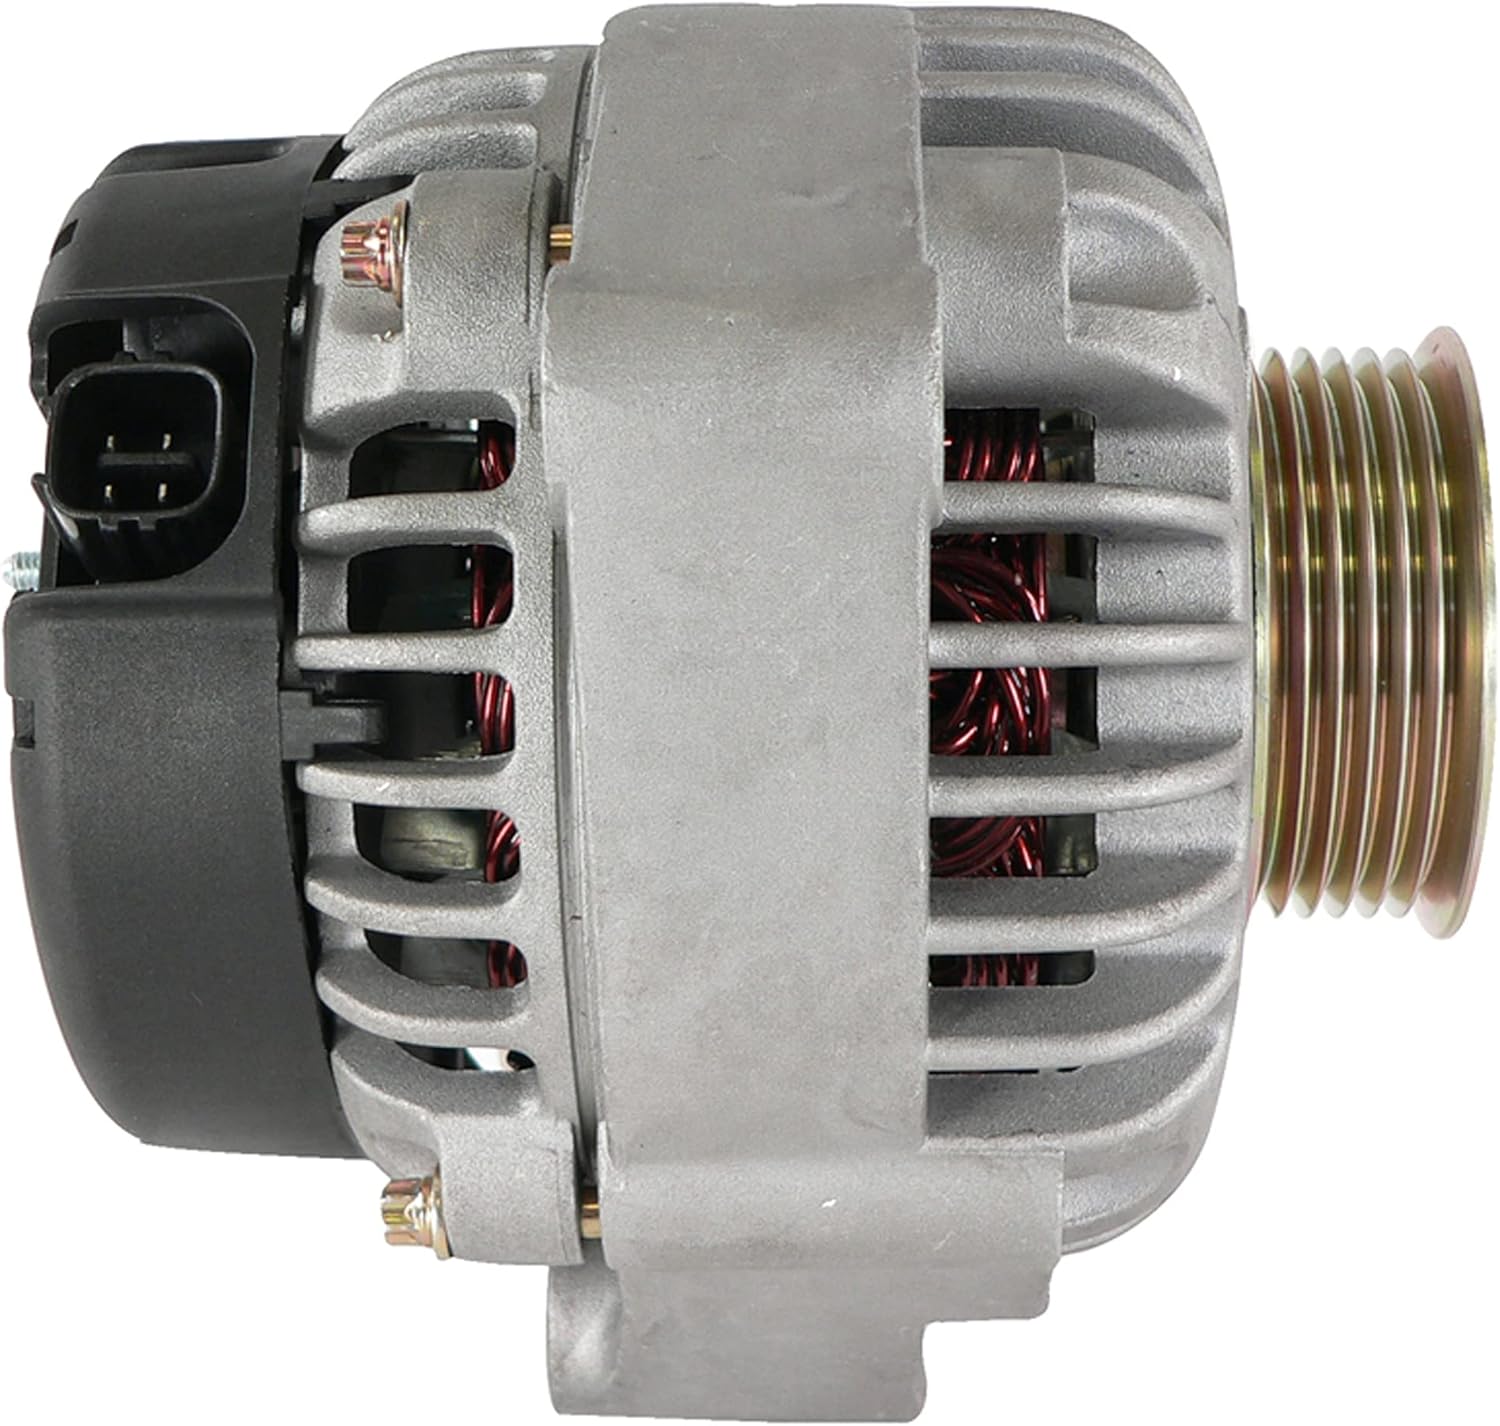
ചിത്രം 6.2: വശം view ആൾട്ടർനേറ്ററിന്റെ, മൗണ്ടിംഗ് പോയിന്റുകളും മൊത്തത്തിലുള്ള അളവുകളും കാണിക്കുന്നു.
7. ഓപ്പറേഷൻ
ഇൻസ്റ്റാൾ ചെയ്തതിനു ശേഷം വാഹനം സ്റ്റാർട്ട് ചെയ്ത് ഡാഷ്ബോർഡ് മുന്നറിയിപ്പ് ലൈറ്റുകൾ നിരീക്ഷിക്കുക. എഞ്ചിൻ സ്റ്റാർട്ട് ചെയ്ത ഉടൻ തന്നെ ബാറ്ററി ലൈറ്റ് ഓഫ് ആകണം. വാഹനത്തിന്റെ വോള്യം പരിശോധിക്കുക.tagചാർജിംഗ് സിസ്റ്റം ശരിയായി പ്രവർത്തിക്കുന്നുണ്ടെന്ന് ഉറപ്പാക്കാൻ ഇ ഗേജ് (സജ്ജീകരിച്ചിട്ടുണ്ടെങ്കിൽ) അല്ലെങ്കിൽ ഒരു മൾട്ടിമീറ്റർ ഉപയോഗിക്കുക, സാധാരണയായി നിഷ്ക്രിയമായിരിക്കുമ്പോൾ 13.5V നും 14.8V നും ഇടയിൽ.
ഇൻസ്റ്റാളേഷൻ കഴിഞ്ഞയുടനെ ഒരു ചെറിയ ഞരക്കം കേൾക്കാം, പുതിയ ഘടകങ്ങൾ ശരിയായി പ്രവർത്തിക്കുമ്പോൾ ഇത് പലപ്പോഴും ഒരു ചെറിയ കാലയളവിനുശേഷം അപ്രത്യക്ഷമാകും. ബാറ്ററി ലൈറ്റ് ഓണായിരിക്കുകയോ മിന്നിമറയുകയോ ചെയ്താൽ, അല്ലെങ്കിൽ അസാധാരണമായ ശബ്ദങ്ങൾ തുടരുകയാണെങ്കിൽ, ട്രബിൾഷൂട്ടിംഗ് വിഭാഗം പരിശോധിക്കുക.
8. പരിപാലനം
DB ഇലക്ട്രിക്കൽ ADR0139 ആൾട്ടർനേറ്റർ ദീർഘകാല, അറ്റകുറ്റപ്പണികളില്ലാത്ത പ്രവർത്തനത്തിനായി രൂപകൽപ്പന ചെയ്തിരിക്കുന്നു. എന്നിരുന്നാലും, വാഹനങ്ങളുടെ പതിവ് അറ്റകുറ്റപ്പണി രീതികൾ അതിന്റെ ദീർഘായുസ്സിന് കാരണമാകുന്നു:
- സെർപെന്റൈൻ ബെൽറ്റിൽ തേയ്മാനം, വിള്ളലുകൾ, ശരിയായ ടെൻഷൻ എന്നിവയ്ക്കായി ഇടയ്ക്കിടെ പരിശോധിക്കുക. തേഞ്ഞുപോയതോ അയഞ്ഞതോ ആയ ബെൽറ്റ് ആൾട്ടർനേറ്റർ പ്രകടനത്തെ ബാധിച്ചേക്കാം.
- നല്ല വൈദ്യുതചാലകത നിലനിർത്താൻ ബാറ്ററി ടെർമിനലുകൾ വൃത്തിയുള്ളതും ഇറുകിയതുമാണെന്ന് ഉറപ്പാക്കുക.
- ആൾട്ടർനേറ്ററിൽ അമിതമായ ഈർപ്പം അല്ലെങ്കിൽ മാലിന്യങ്ങൾ ഉണ്ടാകുന്നത് ഒഴിവാക്കുക.
9. പ്രശ്നപരിഹാരം
| ലക്ഷണം | സാധ്യമായ കാരണം | പരിഹാരം |
|---|---|---|
| സ്റ്റാർട്ട് ചെയ്തതിനു ശേഷവും ബാറ്ററി ലൈറ്റ് ഓണായി തന്നെ തുടരും | അയഞ്ഞതോ ദ്രവിച്ചതോ ആയ ബാറ്ററി/ആൾട്ടർനേറ്റർ കണക്ഷനുകൾ, തകരാറുള്ള ബെൽറ്റ്, ആന്തരിക ആൾട്ടർനേറ്റർ പ്രശ്നം. | എല്ലാ കണക്ഷനുകളിലും ഇറുകിയതും തുരുമ്പെടുത്തതും പരിശോധിക്കുക. സെർപെന്റൈൻ ബെൽറ്റ് പരിശോധിക്കുക. ഒരു മൾട്ടിമീറ്റർ ഉപയോഗിച്ച് ആൾട്ടർനേറ്റർ ഔട്ട്പുട്ട് പരിശോധിക്കുക. |
| മങ്ങിയ ഹെഡ്ലൈറ്റുകൾ അല്ലെങ്കിൽ ഇന്റീരിയർ ലൈറ്റുകൾ | കുറഞ്ഞ വോളിയംtagആൾട്ടർനേറ്ററിൽ നിന്നുള്ള ഇ ഔട്ട്പുട്ട്, ദുർബലമായ ബാറ്ററി. | ബാറ്ററിയുടെയും ആൾട്ടർനേറ്റർ ഔട്ട്പുട്ടിന്റെയും പരിശോധന നടത്തുക. ശരിയായ ബെൽറ്റ് ടെൻഷൻ ഉറപ്പാക്കുക. |
| ആൾട്ടർനേറ്ററിൽ നിന്ന് പൊടിക്കുന്നതോ മൂളുന്നതോ ആയ ശബ്ദം | ബെയറിംഗ് പരാജയം, അയഞ്ഞ പുള്ളി, തെറ്റായ ബെൽറ്റ് ടെൻഷൻ. | ബെൽറ്റ് ടെൻഷൻ പരിശോധിക്കുക. ശബ്ദം തുടരുകയാണെങ്കിൽ, പ്രൊഫഷണൽ പരിശോധന ശുപാർശ ചെയ്യുന്നു. (കുറിപ്പ്: തുടക്കത്തിൽ ഒരു ചെറിയ ഞരക്കം സാധാരണമായിരിക്കാം). |
| ബാറ്ററി ചാർജ് ചെയ്യുന്നില്ല | ആൾട്ടർനേറ്റർ തകരാർ, വയറിംഗ് പ്രശ്നം, ഫ്യൂസ് പൊട്ടി. | ചാർജിംഗ് സിസ്റ്റവുമായി ബന്ധപ്പെട്ട ഫ്യൂസുകൾ പരിശോധിക്കുക. ആൾട്ടർനേറ്റർ ഔട്ട്പുട്ട് പരിശോധിക്കുക. വയറിംഗ് ഹാർനെസ് പരിശോധിക്കുക. |
ട്രബിൾഷൂട്ടിംഗ് ഘട്ടങ്ങൾ പ്രശ്നം പരിഹരിക്കുന്നില്ലെങ്കിൽ, ഒരു സാക്ഷ്യപ്പെടുത്തിയ ഓട്ടോമോട്ടീവ് ടെക്നീഷ്യന്റെ സഹായം തേടാൻ ശുപാർശ ചെയ്യുന്നു.
10. വാറൻ്റിയും പിന്തുണയും
DB ഇലക്ട്രിക്കൽ ADR0139 ആൾട്ടർനേറ്റർ ഒരു 1 വർഷത്തെ വാറൻ്റി വാങ്ങിയ തീയതി മുതൽ. സാധാരണ ഉപയോഗത്തിലും സേവനത്തിലും മെറ്റീരിയലുകളിലും ജോലിയിലും ഉണ്ടാകുന്ന തകരാറുകൾ ഈ വാറന്റി ഉൾക്കൊള്ളുന്നു.
വാറന്റി കാലയളവിനുള്ളിൽ നിങ്ങളുടെ ഉൽപ്പന്നത്തിൽ എന്തെങ്കിലും പ്രശ്നങ്ങൾ നേരിടുന്നുണ്ടെങ്കിൽ, ദയവായി DB ഇലക്ട്രിക്കൽ ഉപഭോക്തൃ പിന്തുണയുമായി ബന്ധപ്പെടുക. ആവശ്യമെങ്കിൽ പ്രശ്നപരിഹാരത്തിനോ പകരം വയ്ക്കൽ ക്രമീകരണത്തിനോ അവർ നിങ്ങളെ സഹായിക്കും.
വാറന്റി ക്ലെയിമുകൾക്കോ സാങ്കേതിക സഹായത്തിനോ, വാങ്ങുന്ന സ്ഥലത്തോ അവരുടെ ഔദ്യോഗിക വിലാസത്തിലോ DB ഇലക്ട്രിക്കൽ നൽകിയിട്ടുള്ള കോൺടാക്റ്റ് വിവരങ്ങൾ പരിശോധിക്കുക. webസൈറ്റ്.
11. ബന്ധപ്പെടാനുള്ള വിവരങ്ങൾ
കൂടുതൽ സഹായത്തിനോ അന്വേഷണങ്ങൾക്കോ, ദയവായി ഔദ്യോഗിക ഡിബി ഇലക്ട്രിക്കൽ സന്ദർശിക്കുക. webസൈറ്റ് അല്ലെങ്കിൽ അവരുടെ ഉപഭോക്തൃ സേവന വിഭാഗവുമായി ബന്ധപ്പെടുക.
ഡിബി ഇലക്ട്രിക്കൽ
കിംഗ്സ്പോർട്ട്, ടെന്നസി, യുഎസ്എ
കുറിപ്പ്: നിർമ്മാതാവിന്റെ ഔദ്യോഗിക ചാനലുകളിൽ ലഭ്യമായ ഏറ്റവും പുതിയ കോൺടാക്റ്റ് വിശദാംശങ്ങൾ എപ്പോഴും പരിശോധിക്കുക.


