1. ആമുഖവും അവസാനവുംview
Thank you for choosing the Ryobi RPD500-G 500W 13mm Hammer Drill. This manual provides essential information for the safe and effective use of your new power tool. Please read these instructions carefully before operation and retain them for future reference. The Ryobi RPD500-G is a versatile corded hammer drill designed for drilling in wood, metal, and masonry with its powerful 500W motor and hammer function.

Image 1.1: The Ryobi RPD500-G 500W 13mm Hammer Drill, showcasing its compact design and auxiliary handle.
2 സുരക്ഷാ വിവരങ്ങൾ
തീ, വൈദ്യുതാഘാതം, വ്യക്തിപരമായ പരിക്കുകൾ എന്നിവ കുറയ്ക്കുന്നതിന് വൈദ്യുത ഉപകരണങ്ങൾ ഉപയോഗിക്കുമ്പോൾ എല്ലായ്പ്പോഴും അടിസ്ഥാന സുരക്ഷാ മുൻകരുതലുകൾ പാലിക്കുക.
- വർക്ക് ഏരിയ സുരക്ഷ: ജോലിസ്ഥലം വൃത്തിയുള്ളതും നല്ല വെളിച്ചമുള്ളതുമായി സൂക്ഷിക്കുക. അലങ്കോലമായതോ ഇരുണ്ടതോ ആയ പ്രദേശങ്ങൾ അപകടങ്ങൾ ക്ഷണിച്ചുവരുത്തുന്നു. കത്തുന്ന ദ്രാവകങ്ങൾ, വാതകങ്ങൾ അല്ലെങ്കിൽ പൊടി എന്നിവയുടെ സാന്നിധ്യം പോലുള്ള സ്ഫോടനാത്മകമായ അന്തരീക്ഷത്തിൽ വൈദ്യുതി ഉപകരണങ്ങൾ പ്രവർത്തിപ്പിക്കരുത്.
- ഇലക്ട്രിക്കൽ സുരക്ഷ: പവർ ടൂൾ പ്ലഗുകൾ ഔട്ട്ലെറ്റുമായി പൊരുത്തപ്പെടണം. പ്ലഗിൽ ഒരിക്കലും ഒരു തരത്തിലും മാറ്റം വരുത്തരുത്. പൈപ്പുകൾ, റേഡിയേറ്ററുകൾ, റേഞ്ചുകൾ, റഫ്രിജറേറ്ററുകൾ തുടങ്ങിയ മണ്ണ് പുരണ്ടതോ നിലം പതിച്ചതോ ആയ പ്രതലങ്ങളുമായുള്ള ശരീര സമ്പർക്കം ഒഴിവാക്കുക.
- വ്യക്തിഗത സുരക്ഷ: എപ്പോഴും കണ്ണിന് സംരക്ഷണം നൽകുക. ഉപകരണം ദീർഘനേരം പ്രവർത്തിപ്പിക്കുമ്പോൾ ശ്രവണ സംരക്ഷണം ഉപയോഗിക്കുക. ഉചിതമായ വസ്ത്രങ്ങൾ ധരിക്കുക; അയഞ്ഞ വസ്ത്രങ്ങളോ ആഭരണങ്ങളോ ഒഴിവാക്കുക. നീളമുള്ള മുടി സുരക്ഷിതമായി കെട്ടുക.
- ഉപകരണ ഉപയോഗവും പരിചരണവും: പവർ ടൂൾ നിർബന്ധിച്ച് ഉപയോഗിക്കരുത്. നിങ്ങളുടെ ആപ്ലിക്കേഷന് അനുയോജ്യമായ പവർ ടൂൾ ഉപയോഗിക്കുക. എന്തെങ്കിലും ക്രമീകരണങ്ങൾ നടത്തുന്നതിനോ, ആക്സസറികൾ മാറ്റുന്നതിനോ, പവർ ടൂളുകൾ സൂക്ഷിക്കുന്നതിനോ മുമ്പ് പവർ സ്രോതസ്സിൽ നിന്ന് പ്ലഗ് വിച്ഛേദിക്കുക.
- സുരക്ഷിത വർക്ക്പീസ്: എപ്പോഴും clamp or secure the workpiece to prevent movement during drilling.
3. ഉൽപ്പന്ന ഘടകങ്ങളും സവിശേഷതകളും
The Ryobi RPD500-G is engineered for efficiency and user comfort, featuring:
- 500W മോട്ടോർ: നൽകുന്നു ample power for various drilling tasks.
- 13mm Keyless Chuck: Allows for quick and easy bit changes without a chuck key, accommodating a wide range of drill bit sizes.
- Variable Speed Control (0-3000 RPM): Enables precise speed adjustment for different materials and applications.
- Hammer Function (0-50,000 BPM): Engages for efficient drilling into masonry and concrete.
- Gripzone Technology: Integrated soft-grip areas for enhanced user comfort and reduced vibration during prolonged use.
- ഫോർവേഡ്/റിവേഴ്സ് സ്വിച്ച്: For driving and removing screws, and for freeing jammed drill bits.
- സഹായ ഹാൻഡിൽ: അധിക നിയന്ത്രണവും സ്ഥിരതയും നൽകുന്നു.
- ഡെപ്ത് സ്റ്റോപ്പ്: ഡ്രില്ലിംഗ് ആഴത്തിൽ കൃത്യമായ നിയന്ത്രണത്തിനായി.

ചിത്രം 3.1: മുൻഭാഗം view of the Ryobi RPD500-G, highlighting the 13mm keyless chuck and auxiliary handle attachment point.

ചിത്രം 3.2: വശം view of the Ryobi RPD500-G, showing the main handle with trigger and mode selector.
4. സജ്ജീകരണം
4.1 ഓക്സിലറി ഹാൻഡിൽ ഘടിപ്പിക്കൽ
The auxiliary handle provides improved control and safety. To attach, loosen the handle by rotating it counter-clockwise. Slide it over the chuck and onto the front of the drill body. Rotate the handle clockwise to tighten it securely in the desired position.
4.2 ഡ്രിൽ ബിറ്റുകൾ ചേർക്കലും നീക്കം ചെയ്യലും
- പവർ സ്രോതസ്സിൽ നിന്ന് ഡ്രിൽ അൺപ്ലഗ് ചെയ്തിട്ടുണ്ടെന്ന് ഉറപ്പാക്കുക.
- Rotate the front collar of the keyless chuck counter-clockwise to open the chuck jaws.
- ഡ്രിൽ ബിറ്റ് പൂർണ്ണമായും ചക്കിലേക്ക് തിരുകുക, അത് മധ്യത്തിലാണെന്ന് ഉറപ്പാക്കുക.
- Rotate the front collar clockwise to tighten the chuck jaws firmly around the drill bit. Hand-tighten only; do not use tools.
- To remove, reverse the tightening process.
4.3 ഡെപ്ത് സ്റ്റോപ്പ് ക്രമീകരിക്കുന്നു
The depth stop allows for consistent drilling depth. Loosen the auxiliary handle, slide the depth stop rod through the hole in the handle, and adjust it to the desired depth. Retighten the auxiliary handle to secure the depth stop.
5. പ്രവർത്തന നിർദ്ദേശങ്ങൾ
5.1 പവർ കണക്ഷൻ
Connect the drill's power cord to a suitable power outlet. Ensure the voltage ഉപകരണത്തിന്റെ ആവശ്യകതകളുമായി പൊരുത്തപ്പെടുന്നു.
5.2 Selecting Drill Mode
A switch on the top or side of the drill allows selection between rotary drilling and hammer drilling modes. Select rotary mode for wood, metal, and plastics. Select hammer drill mode for masonry and concrete.
5.3 Variable Speed Control and Forward/Reverse
- ട്രിഗർ സ്വിച്ച്: The drilling speed is controlled by the pressure applied to the trigger switch. Press lightly for slower speeds and harder for faster speeds.
- ലോക്ക്-ഓൺ ബട്ടൺ: തുടർച്ചയായ പ്രവർത്തനത്തിന്, ട്രിഗർ പൂർണ്ണമായും അമർത്തിയിരിക്കുമ്പോൾ ലോക്ക്-ഓൺ ബട്ടൺ അമർത്തുക. റിലീസ് ചെയ്യാൻ, ട്രിഗർ വീണ്ടും അമർത്തുക.
- ഫോർവേഡ്/റിവേഴ്സ് സ്വിച്ച്: Located near the trigger, this switch changes the direction of rotation. Use forward for drilling and reverse for removing screws or freeing jammed bits. Always ensure the drill has come to a complete stop before changing direction.
5.4 ഡ്രില്ലിംഗ് ടെക്നിക്കുകൾ
- പൊതുവായ ഡ്രില്ലിംഗ്: Apply steady, even pressure. Allow the drill to do the work. Do not force the drill.
- മരം കുഴിക്കൽ: Use wood-specific drill bits. Start with a slower speed and increase as needed.
- മെറ്റൽ ഡ്രില്ലിംഗ്: Use HSS (High-Speed Steel) drill bits. Use cutting oil to cool the bit and improve drilling efficiency. Start with a pilot hole for larger diameters.
- Masonry Drilling: Use carbide-tipped masonry drill bits and select the hammer drill mode. Apply firm, consistent pressure.

Image 5.1: A user demonstrating drilling into a wall with the Ryobi RPD500-G, wearing appropriate safety glasses.
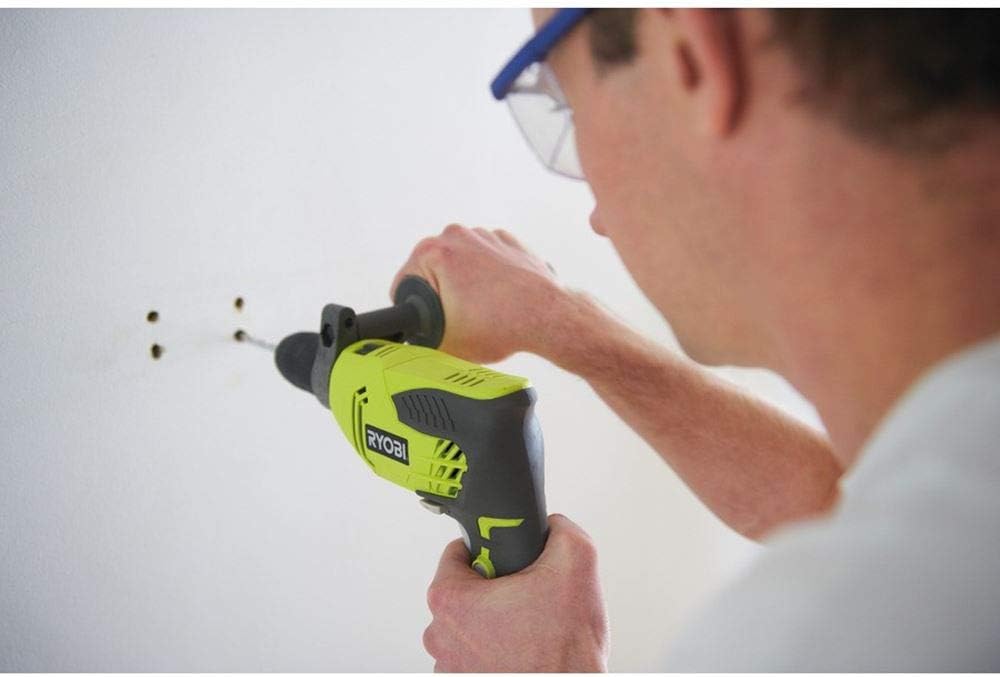
ചിത്രം 5.2: ഒരു ക്ലോസപ്പ് view of the Ryobi RPD500-G in use, showing the drill bit engaging with the wall surface.
6. പരിപാലനം
പതിവ് അറ്റകുറ്റപ്പണികൾ നിങ്ങളുടെ ഡ്രില്ലിന്റെ ദീർഘായുസ്സും സുരക്ഷിതമായ പ്രവർത്തനവും ഉറപ്പാക്കുന്നു.
- വൃത്തിയാക്കൽ: ഓരോ ഉപയോഗത്തിനു ശേഷവും, ഉപകരണം മൃദുവായ, ഡി-ടച്ച് ഉപയോഗിച്ച് വൃത്തിയാക്കുക.amp തുണി. കഠിനമായ രാസവസ്തുക്കളോ അബ്രസീവ് ക്ലീനറുകളോ ഉപയോഗിക്കരുത്. വായുസഞ്ചാര ദ്വാരങ്ങൾ പൊടിയും അവശിഷ്ടങ്ങളും ഇല്ലാതെ വൃത്തിയായി സൂക്ഷിക്കുക.
- പവർ കോർഡ് പരിശോധന: പവർ കോർഡിന് എന്തെങ്കിലും കേടുപാടുകൾ, മുറിവുകൾ, അല്ലെങ്കിൽ പൊട്ടൽ എന്നിവയുടെ ലക്ഷണങ്ങൾ ഉണ്ടോ എന്ന് പതിവായി പരിശോധിക്കുക. കേടുപാടുകൾ സംഭവിച്ചിട്ടുണ്ടെങ്കിൽ, യോഗ്യതയുള്ള ഒരു സർവീസ് ടെക്നീഷ്യനെക്കൊണ്ട് അത് നന്നാക്കുക.
- ചക്ക് മെയിന്റനൻസ്: ഡ്രിൽ ബിറ്റുകൾ ശരിയായി പിടിപെടുന്നുണ്ടെന്ന് ഉറപ്പാക്കാൻ ചക്കിന്റെ താടിയെല്ലുകൾ വൃത്തിയായും അവശിഷ്ടങ്ങൾ ഇല്ലാതെയും സൂക്ഷിക്കുക.
- സംഭരണം: കുട്ടികൾക്ക് എത്താൻ കഴിയാത്ത, ഉണങ്ങിയതും സുരക്ഷിതവുമായ സ്ഥലത്ത് ഡ്രിൽ സൂക്ഷിക്കുക.
7. പ്രശ്നപരിഹാരം
If you encounter issues with your Ryobi RPD500-G, refer to the following common problems and solutions:
| പ്രശ്നം | സാധ്യമായ കാരണം | പരിഹാരം |
|---|---|---|
| ഡ്രിൽ ആരംഭിക്കുന്നില്ല | No power supply; Faulty power cord; Trigger switch issue | Check power outlet and cord; Consult a qualified technician for repair. |
| മോശം ഡ്രില്ലിംഗ് പ്രകടനം | Dull drill bit; Incorrect drill mode; Insufficient pressure | Replace or sharpen drill bit; Select appropriate mode (e.g., hammer for masonry); Apply steady, firm pressure. |
| അമിത ചൂടാക്കൽ | Overloading; Blocked ventilation; Prolonged use | Reduce load; Clear ventilation slots; Allow tool to cool down. |
| ഡ്രിൽ ബിറ്റ് ജാമുകൾ | Incorrect speed; Hitting an obstruction; Excessive force | Use appropriate speed; Use reverse function to free bit; Reduce force. |
8 സ്പെസിഫിക്കേഷനുകൾ
Key technical specifications for the Ryobi RPD500-G Hammer Drill:
- മോഡൽ: RPD500-G
- റഫറൻസ് നമ്പർ: 5133002244
- പവർ ഇൻപുട്ട്: 500 W
- ചക്ക വലിപ്പം: 13 എംഎം കീലെസ്സ്
- നോ-ലോഡ് വേഗത: 0-3000 RPM (മിനിറ്റിൽ വിപ്ലവങ്ങൾ)
- ആഘാത നിരക്ക്: 0-50,000 BPM (blows per minute)
- പരമാവധി ടോർക്ക്: 9.1 Nm (ന്യൂട്ടൺ-മീറ്റർ)
- ഊർജ്ജ സ്രോതസ്സ്: കോർഡഡ് ഇലക്ട്രിക്
- വാല്യംtage: 800 Volts (Note: This value appears unusually high for a standard power tool. Please verify with product labeling.)
- Ampകോപം: 15 എ
- ഭാരം: 2.1 കി.ഗ്രാം
- അളവുകൾ (L x W x H): 26.4 x 70 x 245 cm (Note: These dimensions appear unusually large. Please verify with product labeling.)
- മെറ്റീരിയൽ: ലോഹം
9. വാറൻ്റിയും പിന്തുണയും
Specific warranty details for the Ryobi RPD500-G are not provided in this manual. For comprehensive warranty information, service, or technical support, please refer to the documentation included with your purchase or visit the official Ryobi website for your region. Always ensure any repairs or servicing are carried out by authorized service centers to maintain product safety and warranty validity.


