1. ആമുഖം
The iHome iP90 is a dual alarm clock radio designed for use with compatible iPhone and iPod models. It allows users to charge their device while waking up or falling asleep to their device's music, a custom playlist, or AM/FM radio. The unit features a Time Sync button to quickly synchronize the clock with a docked iPhone, leveraging cellular network time. It supports two independent alarms with a 7-5-2 day setting feature, 12 AM/FM radio presets, EQ controls, and Reson8 sound technology for enhanced audio quality.
2 പ്രധാന സവിശേഷതകൾ
- ഡ്യുവൽ അലാറം സിസ്റ്റം: Set two independent alarms with options to wake to iPhone/iPod, custom playlists, AM/FM radio, or a buzzer.
- Integrated Dock: Plays and charges compatible iPhone and docking iPod models. (Note: Not compatible with iPhone 5 or newer models requiring a Lightning connector without an adapter.)
- Reson8 Speakers: Features Reson8 ported cabinet stereo speakers for clear, deep, and powerful audio.
- സമയ സമന്വയം: Synchronizes the unit's clock with a docked iPhone/iPod for accurate time setting.
- AM/FM റേഡിയോ: Includes 12 programmable presets for your favorite AM and FM stations.
- EQ നിയന്ത്രണങ്ങൾ: Adjust audio equalization for personalized sound.
- സഹായ ഇൻപുട്ട്: Line-in jack for connecting and playing audio from other external audio sources.
3. സജ്ജീകരണ ഗൈഡ്
3.1 അൺപാക്കിംഗും പ്ലേസ്മെന്റും
Carefully remove the iP90 from its packaging. Place the unit on a stable, flat surface away from direct sunlight, heat sources, or excessive dust. Ensure adequate ventilation around the unit.
3.2 പവർ കണക്ഷൻ
- Connect the AC adapter to the DC jack on the back of the iP90.
- ഒരു സാധാരണ വാൾ ഔട്ട്ലെറ്റിലേക്ക് എസി അഡാപ്റ്റർ പ്ലഗ് ചെയ്യുക.
- Install 2 AA batteries (not included) into the battery compartment for backup power in case of a power outage. This will maintain time and alarm settings.
3.3 ആന്റിന കണക്ഷൻ
- എഫ്എം ആന്റിന: Extend the FM wire antenna fully for best FM reception. Do not strip, alter, or attach to other antennas.
- എഎം ആന്റിന: Connect the supplied AM loop antenna to the AM antenna jack on the back of the unit. Position the antenna for optimal AM reception.
3.4 പ്രാരംഭ ക്ലോക്ക് ക്രമീകരണം
Upon first power-up, the clock display will flash. You can set the time manually or use the Time Sync feature with a docked iPhone.
3.4.1 Time Sync (Recommended with iPhone)
- Ensure your iPhone is connected to a cellular network and its time is accurate.
- Carefully dock your iPhone onto the iP90's universal dock connector.
- അമർത്തുക സമയ സമന്വയം button (usually located near the dock). The iP90 will automatically set its clock to match your iPhone's time.
3.4.2 മാനുവൽ സമയ ക്രമീകരണം
- അമർത്തിപ്പിടിക്കുക സമയം സെറ്റ് button (refer to your unit's specific button layout, often combined with another function).
- ഉപയോഗിക്കുക +/- buttons (or similar navigation buttons) to adjust the hour. Press സമയം സെറ്റ് സ്ഥിരീകരിക്കാൻ വീണ്ടും.
- ഉപയോഗിക്കുക +/- മിനിറ്റ് ക്രമീകരിക്കാൻ ബട്ടണുകൾ. അമർത്തുക സമയം സെറ്റ് സ്ഥിരീകരിക്കാൻ വീണ്ടും.
- Adjust the year, month, and day if prompted, confirming each step with the സമയം സെറ്റ് ബട്ടൺ.
4. പ്രവർത്തന നിർദ്ദേശങ്ങൾ
4.1 പവർ ഓൺ/ഓഫ്
അമർത്തുക ശക്തി യൂണിറ്റ് ഓണാക്കാനോ ഓഫാക്കാനോ ഉള്ള ബട്ടൺ.
4.2 വോളിയം നിയന്ത്രണം
ഉപയോഗിക്കുക വോളിയം +/- buttons (or a rotary knob) to adjust the audio output level.
4.3 റേഡിയോ പ്രവർത്തനം
- അമർത്തുക റേഡിയോ AM അല്ലെങ്കിൽ FM റേഡിയോ മോഡിലേക്ക് മാറാൻ ബട്ടൺ.
- അമർത്തുക ബാൻഡ് button (if available) to switch between AM and FM bands.
- ഉപയോഗിക്കുക ട്യൂൺ +/- ഒരു സ്റ്റേഷനിലേക്ക് സ്വമേധയാ ട്യൂൺ ചെയ്യാൻ ബട്ടണുകൾ അമർത്തിപ്പിടിക്കുക. ലഭ്യമായ അടുത്ത സ്റ്റേഷനായി യാന്ത്രികമായി സ്കാൻ ചെയ്യാൻ അമർത്തിപ്പിടിക്കുക.
- പ്രീസെറ്റുകൾ സജ്ജമാക്കുന്നു: Tune to your desired station. Press and hold a പ്രീസെറ്റ് നമ്പർ button (1-6 for each band) until the display confirms the preset is saved.
- പ്രീസെറ്റുകൾ തിരിച്ചുവിളിക്കുന്നു: അമർത്തുക പ്രീസെറ്റ് നമ്പർ button briefly to recall a saved station.
4.4 iPod/iPhone Docking and Playback
- Ensure your iPhone/iPod is compatible with the 30-pin dock connector.
- Carefully dock your device onto the connector. The iP90 will begin charging the device.
- അമർത്തുക ഐപോഡ് / ഐഫോൺ button (or similar) to switch to docking mode.
- ഉപയോഗിക്കുക പ്ലേ/താൽക്കാലികമായി നിർത്തുക, അടുത്ത ട്രാക്ക്, ഒപ്പം മുമ്പത്തെ ട്രാക്ക് buttons on the iP90 to control playback.
4.5 അലാറങ്ങൾ സജ്ജീകരിക്കൽ
The iP90 features two independent alarms (Alarm 1 and Alarm 2).
- അമർത്തിപ്പിടിക്കുക അലാറം 1 or അലാറം 2 ബട്ടൺ. അലാറം സമയം മിന്നിമറയും.
- ഉപയോഗിക്കുക +/- buttons to adjust the alarm hour. Press the respective അലാറം സ്ഥിരീകരിക്കാനുള്ള ബട്ടൺ.
- ഉപയോഗിക്കുക +/- buttons to adjust the alarm minute. Press the respective അലാറം സ്ഥിരീകരിക്കാനുള്ള ബട്ടൺ.
- Select the alarm source (iPod/iPhone, Playlist, Radio, or Buzzer) using the +/- ബട്ടണുകൾ. ബന്ധപ്പെട്ടത് അമർത്തുക അലാറം സ്ഥിരീകരിക്കാനുള്ള ബട്ടൺ.
- Select the 7-5-2 day setting (Every Day, Weekdays, Weekends) using the +/- ബട്ടണുകൾ. ബന്ധപ്പെട്ടത് അമർത്തുക അലാറം button to confirm and activate the alarm.
4.6 Snooze and Sleep Functions
- സ്നൂസ്: അലാറം മുഴങ്ങുമ്പോൾ, അമർത്തുക സ്നൂസ് ചെയ്യുക button to temporarily silence it for a set period (usually 9 minutes).
- ഉറക്കം: അമർത്തുക ഉറങ്ങുക button to activate the sleep timer. Repeatedly press to cycle through available sleep times (e.g., 120, 90, 60, 30, 15 minutes, or Off). The unit will automatically turn off after the selected duration.
4.7 EQ നിയന്ത്രണങ്ങൾ
അമർത്തുക EQ button to cycle through different equalizer presets (e.g., Flat, Rock, Pop, Jazz, Classic) or to adjust bass and treble levels if available.
4.8 Auxiliary Audio Input
Connect an external audio device (e.g., MP3 player, CD player) to the ഓക്സ്-ഇൻ jack on the back of the iP90 using a 3.5mm audio cable. Press the ഓക്സ് button (or cycle through modes) to select the auxiliary input.
5. പരിപാലനം
- വൃത്തിയാക്കൽ: യൂണിറ്റിന്റെ പുറംഭാഗം വൃത്തിയാക്കാൻ മൃദുവായതും ഉണങ്ങിയതുമായ തുണി ഉപയോഗിക്കുക. ലിക്വിഡ് ക്ലീനറുകളോ ഉരച്ചിലുകളുള്ള വസ്തുക്കളോ ഉപയോഗിക്കരുത്.
- ഡോക്ക് കണക്റ്റർ: Periodically inspect the dock connector for dust or debris and clean gently with a soft brush if necessary.
- ബാറ്ററി മാറ്റിസ്ഥാപിക്കൽ: Replace backup batteries annually or when the low battery indicator appears.
6. പ്രശ്നപരിഹാരം
| പ്രശ്നം | സാധ്യമായ പരിഹാരം |
|---|---|
| യൂണിറ്റ് പവർ ഓണാക്കുന്നില്ല. | Ensure the AC adapter is securely plugged into both the unit and a working wall outlet. Check the power outlet with another device. |
| ഐപോഡ്/ഐഫോണിൽ നിന്ന് ശബ്ദമൊന്നുമില്ല. | Ensure the device is properly docked. Check the volume level on both the iP90 and your device. Make sure the iP90 is in iPod/iPhone mode. |
| മോശം റേഡിയോ സ്വീകരണം. | Adjust the position of the FM wire antenna or AM loop antenna. Try moving the unit to a different location. Ensure the antenna is fully extended. |
| അലാറം മുഴങ്ങുന്നില്ല. | Verify that the alarm is set and activated (check for the alarm icon on the display). Ensure the alarm volume is not set to minimum. Check the alarm source selection. |
| iPhone/iPod not charging. | Ensure the device is correctly seated in the dock connector. Check for any debris in the connector. Confirm device compatibility. |
| Static or clicking noise during playback. | This can sometimes occur due to interference from other electronic devices. Try moving the unit or other devices further apart. |
7 സ്പെസിഫിക്കേഷനുകൾ
- മോഡൽ: iP90
- ഉൽപ്പന്ന അളവുകൾ: 3.27 x 10.64 x 3.27 ഇഞ്ച്
- ഇനത്തിൻ്റെ ഭാരം: 2 പൗണ്ട്
- ശക്തി: AC Adapter (included), 2 x AA batteries (for backup, not included)
- റേഡിയോ ബാൻഡുകൾ: AM/FM
- ഡോക്ക് കണക്റ്റർ: 30-pin (for compatible iPod/iPhone models)
- സഹായ ഇൻപുട്ട്: 3.5 എംഎം ഓഡിയോ ജാക്ക്
8. ഉൽപ്പന്ന ചിത്രങ്ങൾ
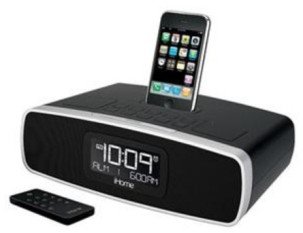
ചിത്രം 1: ഫ്രണ്ട് view of the iHome iP90 Dual Alarm Clock Radio, displaying the digital clock and top-panel controls.
9. വാറൻ്റിയും പിന്തുണയും
For warranty information, technical support, or service inquiries, please refer to the warranty card included with your product or visit the official iHome webവാറന്റി ക്ലെയിമുകൾക്കുള്ള വാങ്ങലിന്റെ തെളിവായി നിങ്ങളുടെ വാങ്ങൽ രസീത് സൂക്ഷിക്കുക.