1. ആമുഖം
This manual provides instructions for the Smatree S-LB4 Replacement Battery (3 Pack) and 3-Channel Charger. This product is specifically designed for use with the GoPro Hero 4 Action Camera ONLY. It is not compatible with other GoPro Hero camera models.
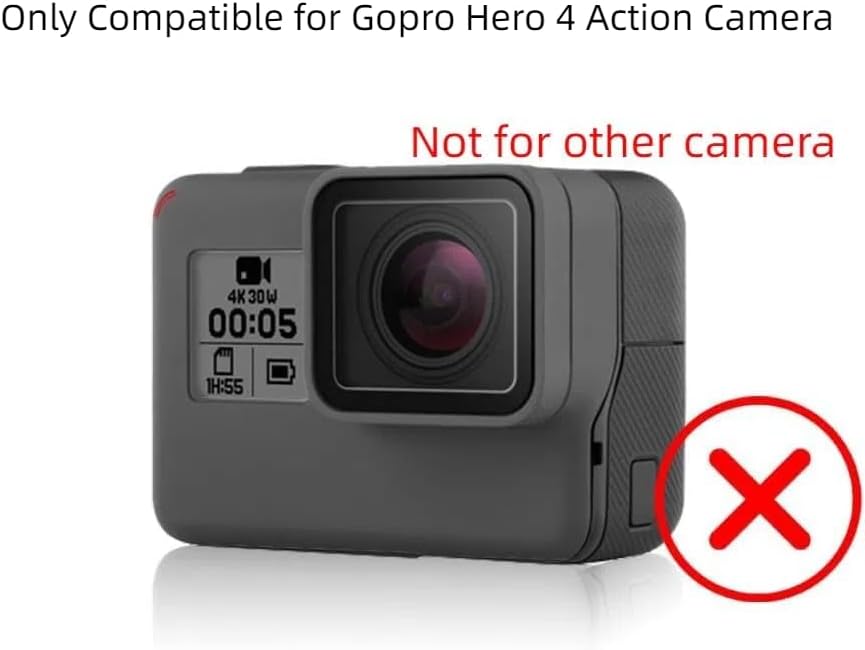
ചിത്രം 1.1: Compatibility indication for GoPro Hero 4 camera. This product is exclusively designed for the GoPro Hero 4 and is not compatible with other camera models, as visually represented by the green checkmark on the Hero 4 and a red cross on a different camera model.
2. പാക്കേജ് ഉള്ളടക്കം
താഴെ ലിസ്റ്റ് ചെയ്തിരിക്കുന്ന എല്ലാ ഇനങ്ങളും നിങ്ങളുടെ പാക്കേജിൽ ഉൾപ്പെടുത്തിയിട്ടുണ്ടെന്ന് ദയവായി പരിശോധിക്കുക:
- 3 x Smatree S-LB4 Replacement Batteries
- 1 x Smatree 3-Channel Battery Charger
- 1 x USB ചാർജിംഗ് കേബിൾ

ചിത്രം 2.1: All components included in the Smatree Replacement Battery and Charger kit. This image displays the three Smatree batteries, the 3-channel charger unit, and the accompanying USB charging cable, representing the complete package contents.
3. സജ്ജീകരണം
3.1 Battery Installation (into Camera)
To install a Smatree battery into your GoPro Hero 4 camera:
- Open the battery compartment door on your GoPro Hero 4 camera.
- കോൺടാക്റ്റുകൾ പൊരുത്തപ്പെടുന്നുണ്ടെന്ന് ഉറപ്പാക്കിക്കൊണ്ട്, കമ്പാർട്ടുമെന്റുമായി ബാറ്ററി വിന്യസിക്കുക.
- സുരക്ഷിതമായി ക്ലിക്കുചെയ്യുന്നത് വരെ ബാറ്ററി പതുക്കെ അതിലേക്ക് തള്ളുക.
- ബാറ്ററി കമ്പാർട്ട്മെൻ്റ് വാതിൽ അടയ്ക്കുക.

ചിത്രം 3.1: Proper insertion of a Smatree battery into the GoPro Hero 4 camera. The image illustrates the correct orientation and method for placing the battery into the camera's battery slot.
3.2 ചാർജർ കണക്ഷൻ
To prepare the 3-channel charger for use:
- Connect the smaller end of the provided USB charging cable to the micro-USB port on the Smatree 3-Channel Charger.
- Connect the larger end of the USB cable to a compatible USB power source (e.g., a USB wall adapter, computer USB port, or power bank).

ചിത്രം 3.2: The Smatree 3-channel charger with its USB cable connected. This image demonstrates how the USB cable plugs into the charger, ready for connection to a power source.
4. പ്രവർത്തന നിർദ്ദേശങ്ങൾ
4.1 ചാർജിംഗ് പ്രക്രിയ
The Smatree 3-Channel Charger allows you to charge up to three batteries simultaneously.
- Ensure the charger is connected to a power source (as described in Section 3.2).
- Insert the Smatree batteries into the charging slots of the charger. Ensure they are correctly oriented with the contacts facing down.
- The smart LED indicator light for each slot will illuminate ചുവപ്പ് when a battery is charging.
- Once a battery is fully charged, its corresponding LED indicator will turn പച്ച.
- Remove batteries once charging is complete.

ചിത്രം 4.1: Smatree 3-channel charger in operation, showing batteries inserted and charging indicators. The image displays the charger with three batteries in their slots, and the red LED lights indicating that charging is in progress for each battery.
5. പരിപാലനം
To ensure the longevity and optimal performance of your Smatree batteries and charger:
- സംഭരണം: Store batteries and charger in a cool, dry place away from direct sunlight and extreme temperatures.
- വൃത്തിയാക്കൽ: Use a soft, dry cloth to clean the charger and battery contacts. Do not use liquid cleaners or solvents.
- നീക്കം ചെയ്യൽ: Dispose of old or damaged lithium-ion batteries responsibly according to local regulations. Do not dispose of them in general waste.
- അമിത ഡിസ്ചാർജ് ഒഴിവാക്കുക: Do not completely drain batteries before recharging them, as this can reduce their lifespan.
- ശാരീരിക നാശം ഒഴിവാക്കുക: Protect batteries and charger from drops, impacts, and punctures.
6. പ്രശ്നപരിഹാരം
പൊതുവായ പ്രശ്നങ്ങളും അവയുടെ പരിഹാരങ്ങളും അറിയാൻ താഴെയുള്ള പട്ടിക കാണുക:
| പ്രശ്നം | സാധ്യമായ കാരണം | പരിഹാരം |
|---|---|---|
| Batteries not charging (LEDs off or not red) | Charger not powered; battery not inserted correctly; faulty battery/charger. | Ensure USB cable is securely connected to a working power source. Re-insert batteries, ensuring proper contact. Try a different USB port or power adapter. If issue persists, contact support. |
| Batteries not holding charge | Battery degradation; improper charging/storage. | Ensure batteries are fully charged (LED turns green). Follow maintenance guidelines for proper storage. If batteries are old, they may need replacement. |
| Charger LEDs remain red after extended charging | Battery not fully charging; faulty battery. | Remove and re-insert the battery. Try charging a different battery in the same slot to isolate the issue. If only one battery causes this, it may be faulty. |
7 സ്പെസിഫിക്കേഷനുകൾ
| ഫീച്ചർ | വിശദാംശങ്ങൾ |
|---|---|
| മോഡൽ നമ്പർ | S-LB4 |
| ബാറ്ററി തരം | ലി-അയോൺ |
| ബാറ്ററി ശേഷി | 1290 mAh (for longer battery life) |
| Charger Channels | 3 (allows charging 3 batteries simultaneously) |
| ഇൻപുട്ട് വോളിയംtage | 5 Volts (via USB) |
| LED സൂചകങ്ങൾ | Red (Charging), Green (Complete) |
| അനുയോജ്യത | GoPro Hero 4 Action Camera ONLY |
| സർട്ടിഫിക്കേഷനുകൾ | UL, CE, FCC, IEC |
| ഇനത്തിൻ്റെ ഭാരം | 6.4 ഔൺസ് (ആകെ പാക്കേജ്) |
8. വാറൻ്റിയും പിന്തുണയും
Smatree products are designed for reliability and performance. For specific warranty details, product support, or to purchase additional accessories, please visit the official Smatree store or contact Smatree customer service.
കൂടുതൽ വിവരങ്ങളും ബന്ധപ്പെടാനുള്ള വിശദാംശങ്ങളും നിങ്ങൾക്ക് ഇവിടെ കണ്ടെത്താനാകും Smatree Amazon Store.


