1. ഉൽപ്പന്നം കഴിഞ്ഞുview
The Deutsch DT06-6S is a 6-way automotive connector designed for use in harsh environments where connection integrity is critical. These connectors feature thermoplastic housings that provide a wide operating temperature range and silicone rear wire and interface seals, enabling them to withstand extreme temperatures and moisture. The DT series is known for its robust design and reliable performance in demanding applications.
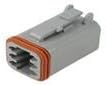
Image 1.1: Deutsch DT06-6S 6-Way Automotive Connector. This image displays the grey thermoplastic housing of the connector, featuring a 6-way cavity arrangement and an orange silicone seal.
2 പ്രധാന സവിശേഷതകൾ
- Cavity Arrangements: Supports 2, 3, 4, 6, 8, and 12 cavity configurations (this specific model is 6-way).
- ഭവന മെറ്റീരിയൽ: Rectangular, thermoplastic housing for durability and wide temperature tolerance.
- കോൺടാക്റ്റ് വലുപ്പം: Accepts contact size 16, rated for up to 13 amps.
- വയർ ഗേജ് അനുയോജ്യത: Suitable for 14-0 AWG wires.
- Contact Retention: Wedgelocks ensure proper contact alignment and retention.
- സീലിംഗ്: Silicone rubber grommet, insert retainer, and receptacle interfacial seal provide excellent protection against moisture and contaminants.
3. സജ്ജീകരണവും ഇൻസ്റ്റാളേഷനും
Proper installation is crucial for the reliable performance of your Deutsch DT connector. Follow these steps carefully:
- വയറുകൾ തയ്യാറാക്കുക: Strip approximately 4-6mm (0.16-0.24 inches) of insulation from the end of each wire. Ensure the stripped wire is clean and free of frayed strands.
- ക്രിമ്പ് കോൺടാക്റ്റുകൾ: Using a suitable crimping tool for Deutsch contacts (size 16), crimp the appropriate Deutsch contacts onto the stripped wire ends. Ensure the crimp is secure and the wire strands are fully enclosed within the contact barrel.
- Insert Contacts: Push the crimped contacts into the rear of the connector housing until a click is heard or felt. Gently pull on the wire to ensure the contact is fully seated and locked into place.
- Install Wedgelock: Once all contacts are inserted, install the appropriate wedgelock into the front of the connector housing. The wedgelock secures the contacts and prevents them from backing out.
- പരിശോധിക്കുക: Visually inspect all connections to ensure contacts are properly seated and the wedgelock is fully engaged.
കുറിപ്പ്: Always use the correct crimping tools and follow manufacturer guidelines for contact crimping to ensure optimal performance and reliability.
4. പ്രവർത്തന നിർദ്ദേശങ്ങൾ
Connecting and disconnecting Deutsch DT connectors is straightforward:
- ഇണചേരൽ കണക്ടറുകൾ: Align the male and female connector halves. Push them together firmly until the locking tab engages with an audible click. Ensure the connection is secure by gently pulling on both halves.
- Unmating Connectors: To disconnect, depress the locking tab on the connector and pull the two halves apart. Do not pull on the wires to disconnect, as this can damage the contacts or wires.
5. പരിപാലനം
Deutsch DT connectors are designed for low maintenance, but periodic inspection can extend their lifespan and ensure continued reliability:
- വിഷ്വൽ പരിശോധന: Periodically inspect the connector for any signs of damage, such as cracks in the housing, corrosion on contacts, or degradation of the silicone seals.
- വൃത്തിയാക്കൽ: If necessary, clean the connector surfaces with a clean, dry cloth. For stubborn dirt, a non-conductive electrical contact cleaner can be used. Ensure the connector is completely dry before re-mating.
- മുദ്ര സമഗ്രത: Check the integrity of the silicone seals. If seals appear damaged or brittle, the connector's environmental protection may be compromised.
6. പ്രശ്നപരിഹാരം
If you encounter issues with your Deutsch DT connector, consider the following:
- കണക്ഷനില്ല/ഇടവിട്ടുള്ള കണക്ഷൻ:
- Ensure contacts are fully seated and locked into the housing.
- Verify the wedgelock is correctly installed.
- Check for proper crimp quality on the contacts.
- Inspect contacts for corrosion or bending.
- Difficulty Mating/Unmating:
- Ensure correct alignment of the connector halves.
- Check for obstructions or damage to the locking mechanism.
- Do not force the connection; inspect for issues first.
- Moisture Ingress:
- Inspect silicone seals for damage or improper seating.
- Ensure the connector halves are fully mated.
7 സ്പെസിഫിക്കേഷനുകൾ
| ആട്രിബ്യൂട്ട് | വിശദാംശങ്ങൾ |
|---|---|
| ബ്രാൻഡ് നാമം | ഡച്ച് |
| മോഡൽ നമ്പർ | DT06-6S |
| ഭാഗം നമ്പർ | DT06-6S |
| Number of Ways/Cavities | 6 |
| കോൺടാക്റ്റ് വലുപ്പം | 16 |
| Max Current Rating | 13 Amps (per contact) |
| ഹൗസിംഗ് മെറ്റീരിയൽ | തെർമോപ്ലാസ്റ്റിക് |
| സീൽ മെറ്റീരിയൽ | സിലിക്കൺ റബ്ബർ |
| ഇനത്തിൻ്റെ ഭാരം | 8.65 കിലോഗ്രാം (Note: This weight seems unusually high for a single connector and might refer to a bulk package. Please verify with supplier if individual unit weight is critical.) |
8 സുരക്ഷാ വിവരങ്ങൾ
When working with electrical connectors, always observe the following safety precautions:
- പവർ വിച്ഛേദിക്കുക: Always ensure power is disconnected from the circuit before installing, maintaining, or troubleshooting electrical connectors.
- ശരിയായ ഉപകരണങ്ങൾ ഉപയോഗിക്കുക: Use only appropriate tools for crimping and handling contacts to prevent damage to the connector or injury.
- ഇൻസുലേഷൻ: Ensure all wires are properly insulated and that no bare wires are exposed after installation.
- പരിസ്ഥിതി വ്യവസ്ഥകൾ: Do not exceed the specified operating temperature or environmental conditions for the connector.
- പ്രൊഫഷണൽ ഇൻസ്റ്റാളേഷൻ: If you are unsure about any aspect of installation or wiring, consult a qualified professional.
9. വാറൻ്റിയും പിന്തുണയും
Specific warranty information for the Deutsch DT06-6S connector is typically provided by the point of purchase or the manufacturer, TE Connectivity. Please refer to your purchase documentation or the official Deutsch/TE Connectivity webവിശദമായ വാറന്റി നിബന്ധനകൾക്കും വ്യവസ്ഥകൾക്കും സൈറ്റ്.
For technical support or further inquiries, please contact your supplier or visit the official Deutsch/TE Connectivity support channels.


