ആമുഖം
This manual provides detailed instructions for the safe installation, operation, and maintenance of your Project Source 6-Pack 10-inch Brushed Nickel Flush Mount Lights. These fixtures feature a brushed nickel finish and frosted glass shades, designed for indoor use. Please read all instructions carefully before beginning installation and retain this manual for future reference.
പ്രധാനപ്പെട്ട സുരക്ഷാ വിവരങ്ങൾ
Always follow basic safety precautions when installing and operating electrical fixtures to reduce the risk of fire, electric shock, and personal injury.
- മുന്നറിയിപ്പ്: Risk of electric shock. Disconnect power at the main circuit breaker or fuse box before installation, servicing, or changing bulbs.
- Consult a qualified electrician if you are unsure about the installation process or have questions regarding electrical wiring.
- പരമാവധി വാട്ട് കവിയരുത്tagബൾബുകൾക്കായി വ്യക്തമാക്കിയ e (ഒരു ബൾബിന് 60 വാട്ട്സ്).
- എല്ലാ വൈദ്യുത കണക്ഷനുകളും സുരക്ഷിതമാണെന്നും ശരിയായി ഇൻസുലേറ്റ് ചെയ്തിട്ടുണ്ടെന്നും ഉറപ്പാക്കുക.
- This fixture is designed for indoor use only and is not water resistant. Do not install in wet locations.
- ഇൻസ്റ്റാളേഷൻ സമയത്ത് സുരക്ഷാ ഗ്ലാസുകൾ ധരിക്കുക.
പാക്കേജ് ഉള്ളടക്കം
Verify that all components are present and undamaged before beginning installation. If any parts are missing or damaged, do not proceed with installation and contact customer service.
- 6 x Flush Mount Light Fixtures (Brushed Nickel)
- 6 x Frosted Glass Shades
- Mounting Hardware (e.g., screws, wire nuts, mounting bracket)
Note: Six (6) A19 60-watt maximum bulbs are required per fixture and are ഉൾപ്പെടുത്തിയിട്ടില്ല.
സജ്ജീകരണവും ഇൻസ്റ്റാളേഷനും
Follow these steps carefully to install your flush mount light fixture. Repeat for each of the six fixtures.
- Step 1: Prepare for Installation. Turn off the power to the junction box at the circuit breaker or fuse box. Ensure the power is off by testing the existing light switch.
- Step 2: Attach Mounting Bracket. Secure the fixture's mounting bracket to the ceiling junction box using the screws provided. Ensure it is firmly attached.
- Step 3: Make Electrical Connections. Carefully connect the wires from the fixture to the corresponding wires from the junction box using the provided wire nuts. Typically, black (hot) to black, white (neutral) to white, and bare copper or green (ground) to bare copper or green. Ensure all connections are tight and secure.
- Step 4: Mount Fixture to Ceiling. Carefully push the wired fixture base up to the ceiling, aligning the screw holes on the fixture with the mounting bracket. Secure the fixture to the bracket using the decorative nuts or screws provided.
- Step 5: Install Bulbs. Screw in six (6) A19 60-watt maximum bulbs (not included) into the sockets of the fixture.
- Step 6: Attach Glass Shade. Carefully place the frosted glass shade onto the fixture. Secure it by screwing the finial onto the threaded rod at the bottom of the fixture until the shade is snug. Do not overtighten.
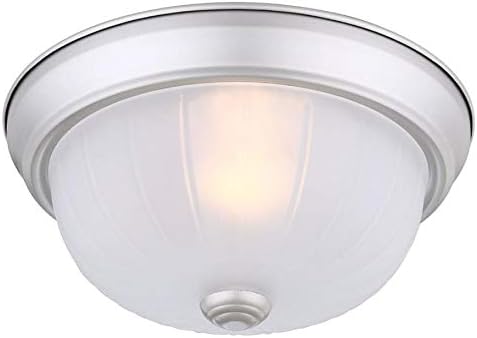
Figure 1: Assembled Flush Mount Light Fixture. This image shows a single 10-inch flush mount light fixture with its brushed nickel base and frosted glass shade, ready for installation.

Figure 2: Fixture Base and Mounting Area. A detailed view of the brushed nickel base of the light fixture, highlighting the rim where the glass shade rests and the mounting points.

Figure 3: Finial for Securing Glass Shade. A close-up of the decorative finial, which is used to secure the frosted glass shade to the light fixture's base.
പ്രവർത്തന നിർദ്ദേശങ്ങൾ
Once all fixtures are securely installed and bulbs are in place, restore power at the main circuit breaker. The flush mount lights are operated by a standard wall switch (not included) connected to the circuit. Simply toggle the wall switch to the 'ON' position for illumination and 'OFF' to turn the lights off.
മെയിൻ്റനൻസ്
Proper maintenance ensures the longevity and optimal performance of your light fixtures.
- വൃത്തിയാക്കൽ: To clean the fixture, ensure the power is turned off at the circuit breaker. Wipe the brushed nickel finish and glass shade with a soft, dry, or slightly damp cloth. Do not use abrasive cleaners, solvents, or polishes as they may damage the finish.
- ബൾബ് മാറ്റിസ്ഥാപിക്കൽ: Before replacing bulbs, turn off the power to the fixture at the circuit breaker and allow the bulbs to cool completely. Unscrew the finial and carefully remove the glass shade. Unscrew the old bulbs and replace them with new A19 60-watt maximum bulbs. Reattach the glass shade and secure it with the finial. Restore power.
ട്രബിൾഷൂട്ടിംഗ്
നിങ്ങളുടെ ലൈറ്റ് ഫിക്ചറിൽ പ്രശ്നങ്ങൾ നേരിടുകയാണെങ്കിൽ, ഇനിപ്പറയുന്ന പൊതുവായ പ്രശ്നങ്ങളും പരിഹാരങ്ങളും പരിശോധിക്കുക:
- ലൈറ്റ് ഓണാക്കുന്നില്ല:
- Check that the power is on at the circuit breaker.
- വാൾ സ്വിച്ച് 'ഓൺ' സ്ഥാനത്താണെന്ന് ഉറപ്പാക്കുക.
- Verify that all wire connections are secure and properly made.
- Confirm that the bulbs are screwed in tightly and are not burnt out.
- ലൈറ്റ് ഫ്ലിക്കറുകൾ:
- Check for any loose wire connections within the fixture or junction box.
- Ensure the bulbs are fully screwed in and are not faulty.
- Verify that the bulbs are compatible with the fixture's specifications.
സ്പെസിഫിക്കേഷനുകൾ
| ബ്രാൻഡ് | പ്രോജക്റ്റ് ഉറവിടം |
| മോഡൽ നമ്പർ | FJ13-012-1 |
| യു.പി.സി | 848507002376 |
| നിറം | ബ്രഷ് ചെയ്ത നിക്കൽ |
| മെറ്റീരിയൽ | ഗ്ലാസ് |
| ശൈലി | പരമ്പരാഗത |
| ഫിക്സ്ചർ ഫോം | സീലിംഗ് |
| മുറിയുടെ തരം | Indoor (Bathroom, Kitchen, Living Room, Bedroom, Dining Room, Office) |
| പവർ ഉറവിടം | കോർഡഡ് ഇലക്ട്രിക് |
| ഇൻസ്റ്റലേഷൻ തരം | ഫ്ലഷ് മ .ണ്ട് |
| പ്രകാശ സ്രോതസ്സ് തരം | Incandescent (compatible with LED) |
| ഷേഡ് മെറ്റീരിയൽ | ഗ്ലാസ് |
| പ്രകാശ സ്രോതസ്സുകളുടെ എണ്ണം | 6 (per fixture) |
| വാല്യംtage | 120 വോൾട്ട് |
| വാട്ട്tage | 60 watts (maximum per bulb) |
| ബൾബ് ബേസ് | E26 |
| നിയന്ത്രണ രീതി | External Wall Switch |
| യൂണിറ്റ് എണ്ണം | 6 എണ്ണം |
| ജല പ്രതിരോധ നില | വാട്ടർ റെസിസ്റ്റൻ്റ് അല്ല |
| ഉൽപ്പന്ന അളവുകൾ | 10 x 10 x 4.45 ഇഞ്ച് |
| ഇനത്തിൻ്റെ ഭാരം | 13.02 പൗണ്ട് (ആകെ 6 പായ്ക്കിന്) |
| സർട്ടിഫിക്കേഷനുകൾ | ETL ലിസ്റ്റുചെയ്തിരിക്കുന്നു |
വാറൻ്റിയും പിന്തുണയും
For technical assistance, warranty claims, or to inquire about replacement parts, please contact Project Source customer service. Refer to your purchase documentation or the retailer's website for specific warranty terms and contact information. Keep your proof of purchase for any warranty claims.


