1. ആമുഖം
This manual provides essential information for the safe and efficient operation of your JVC DLA-NX9 4K Home Theater Projector. The DLA-NX9 is designed to deliver a high-quality cinematic experience, featuring 8K/e-shift technology and native 4K D-ILA devices. Please read this manual thoroughly before using the projector and retain it for future reference.

ചിത്രം 1.1: മുൻഭാഗം view of the JVC DLA-NX9 4K Home Theater Projector, showcasing its central lens and ventilation grilles.
2 സുരക്ഷാ വിവരങ്ങൾ
സുരക്ഷിതമായ പ്രവർത്തനം ഉറപ്പാക്കുന്നതിനും കേടുപാടുകൾ തടയുന്നതിനും, ഇനിപ്പറയുന്ന മുൻകരുതലുകൾ പാലിക്കുക:
- വൈദ്യുതി വിതരണം: നിർദ്ദിഷ്ട പവർ സപ്ലൈ വോള്യം മാത്രം ഉപയോഗിക്കുകtage. Ensure the power cord is securely connected and not damaged.
- വെൻ്റിലേഷൻ: Do not block the ventilation openings. Adequate airflow is crucial to prevent overheating.
- പ്ലേസ്മെൻ്റ്: Place the projector on a stable, level surface. Avoid locations with high humidity, dust, or extreme temperatures.
- പ്രകാശ സ്രോതസ്സ്: l ചെയ്യുമ്പോൾ പ്രൊജക്ടർ ലെൻസിലേക്ക് നേരിട്ട് നോക്കരുത്amp തീവ്രമായ വെളിച്ചം കണ്ണിന് കേടുപാടുകൾ വരുത്തുമെന്നതിനാൽ ഓണാണ്.
- സേവനം: Refer all servicing to qualified service personnel. Do not attempt to open or repair the projector yourself.
3. പാക്കേജ് ഉള്ളടക്കം
പാക്കേജിൽ എല്ലാ ഇനങ്ങളും ഉണ്ടെന്ന് ഉറപ്പാക്കുക:
- JVC DLA-NX9 Projector Unit
- ബാറ്ററികളുള്ള റിമോട്ട് കൺട്രോൾ
- പവർ കോർഡ്
- ലെൻസ് ക്യാപ്
- ഉപയോക്തൃ മാനുവൽ (ഈ പ്രമാണം)
4. സജ്ജീകരണം
4.1 പ്രൊജക്ടർ പ്ലേസ്മെന്റ്
Consider the projector's dimensions (25.25 x 26.25 x 16.38 inches) and weight (48 pounds) when choosing a location. Ensure the surface is sturdy enough to support the unit. Position the projector to achieve the desired screen size and aspect ratio, keeping in mind the throw distance and lens shift capabilities.

ചിത്രം 4.1: കോണാകൃതിയിലുള്ളത് view of the JVC DLA-NX9, showing its robust chassis and lens assembly.
4.2 ഉപകരണങ്ങൾ ബന്ധിപ്പിക്കുന്നു
The DLA-NX9 offers various input and control connectors:
- HDMI ഇൻപുട്ടുകൾ (x2): Connect your video sources (Blu-ray players, streaming devices, gaming consoles). These inputs support 3D, Deep Color, and HDCP 2.2, enabling full-spec 4K signal input with 18Gbps bandwidth (4K60P 4:4:4, 4K60P 4:2:2/36-bit, 4K24P 4:4:4/36-bit).
- RS-232C (D-sub 9pin x1): For external control systems.
- LAN (RJ-45 x1): നെറ്റ്വർക്ക് നിയന്ത്രണത്തിനും ഫേംവെയർ അപ്ഡേറ്റുകൾക്കും.
- Trigger (Mini jack x1): For synchronizing with external devices like motorized screens.
- 3D Sync (Mini-DIN 3pin x1): For connecting an optional 3D emitter.
പ്രൊജക്ടർ ഓൺ ചെയ്യുന്നതിന് മുമ്പ് എല്ലാ കേബിളുകളും സുരക്ഷിതമായി ബന്ധിപ്പിച്ചിട്ടുണ്ടെന്ന് ഉറപ്പാക്കുക.
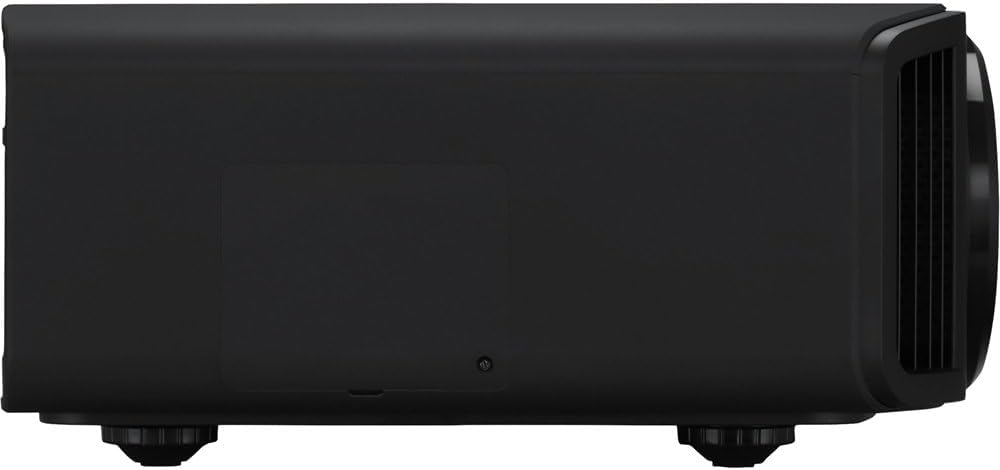
ചിത്രം 4.2: വശം view of the JVC DLA-NX9, illustrating the various input and output ports for connectivity.
4.3 പ്രാരംഭ പവർ-ഓൺ
- Connect the power cord to the projector and a suitable electrical outlet.
- Press the power button on the projector or the remote control. The indicator light will change, and the lamp ജ്വലിപ്പിക്കും.
- Allow the projector to warm up. Adjust focus, zoom, and lens shift as needed using the remote control.
5. പ്രവർത്തന നിർദ്ദേശങ്ങൾ
5.1 അടിസ്ഥാന പ്രവർത്തനം
- പവർ ഓൺ/ഓഫ്: Use the power button on the remote or projector. A second press is usually required to fully power off.
- ഇൻപുട്ട് തിരഞ്ഞെടുക്കൽ: Use the "Input" button on the remote to cycle through connected sources or select directly.
- മെനു നാവിഗേഷൻ: Use the arrow keys and "Enter" button on the remote to navigate the on-screen display (OSD) menu for settings adjustments.
5.2 പ്രധാന സവിശേഷതകൾ
- 8K/e-shift Technology: The DLA-NX9 utilizes JVC's proprietary 8K/e-shift technology to reproduce images with 8K-equivalent resolution (8192 x 4320). This technology enhances both native 4K and lower-resolution content.
- Multiple Pixel Control: This feature converts Full HD and 4K images to high-definition 8K images, optimizing content for the projector's capabilities.
- Auto Tone Mapping: For HDR10 content, the Auto Tone Mapping function automatically adjusts settings based on mastering information, ensuring optimal picture quality. The projector supports HDR10 and HLG content.
- Clear Motion Drive & Motion Enhance: These technologies work together to significantly reduce motion blur, providing smoother fast-moving scenes.
- 3D Formats: The projector supports various 3D formats including Frame Packing, Side-by-Side (Half), and Top and Bottom.
6. പരിപാലനം
6.1 ലെൻസ് ക്ലീനിംഗ്
ഒപ്റ്റിക്കൽ പ്രതലങ്ങൾക്കായി പ്രത്യേകം രൂപകൽപ്പന ചെയ്ത മൃദുവായ, ലിന്റ് രഹിത തുണി ഉപയോഗിച്ച് ലെൻസ് സൌമ്യമായി തുടയ്ക്കുക. അബ്രസീവ് ക്ലീനറുകളോ അമിതമായ ബലമോ ഉപയോഗിക്കരുത്.
6.2 എയർ ഫിൽറ്റർ ക്ലീനിംഗ്
Regularly check and clean the air filters to maintain optimal cooling and prevent dust accumulation inside the projector. Refer to the on-screen menu for filter usage time and replacement indicators.
6.3 എൽamp മാറ്റിസ്ഥാപിക്കൽ
The projector uses an NSH 265 W lamp. എപ്പോൾ എൽamp life is nearing its end, a warning message will appear. Follow the instructions in the full service manual for safe lamp replacement. Ensure the projector is cooled down and unplugged before attempting replacement.
7. പ്രശ്നപരിഹാരം
നിങ്ങൾക്ക് പ്രശ്നങ്ങൾ നേരിടുകയാണെങ്കിൽ, ഇനിപ്പറയുന്ന പൊതുവായ പ്രശ്നങ്ങളും പരിഹാരങ്ങളും പരിശോധിക്കുക:
| പ്രശ്നം | സാധ്യമായ കാരണം | പരിഹാരം |
|---|---|---|
| ചിത്രമൊന്നും പ്രദർശിപ്പിച്ചിട്ടില്ല |
|
|
| ചിത്രം മങ്ങിയതാണ് |
|
|
| പ്രൊജക്ടർ അമിതമായി ചൂടാകുകയും ഓഫാകുകയും ചെയ്യുന്നു |
|
|
For further assistance, please contact JVC customer support.
8 സ്പെസിഫിക്കേഷനുകൾ
| ഫീച്ചർ | വിശദാംശങ്ങൾ |
|---|---|
| മോഡൽ നമ്പർ | DLA-NX9 |
| ഡിസ്പ്ലേ റെസല്യൂഷൻ | 8192 x 4320 (with 8K/e-shift) |
| നേറ്റീവ് റെസല്യൂഷൻ | 3840 x 2160 (Native 4K D-ILA device) |
| പ്രകാശ സ്രോതസ്സ് | NSH 265 W lamp |
| തെളിച്ചം | 2,200 lm |
| ഡൈനാമിക് കോൺട്രാസ്റ്റ് റേഷ്യോ | 1,000,000:1 |
| കണക്റ്റിവിറ്റി ടെക്നോളജി | HDMI |
| HDMI ഇൻപുട്ടുകൾ | 2 (HDCP 2.2, 18Gbps bandwidth) |
| മറ്റ് കണക്ടറുകൾ | RS-232C (D-sub 9pin x1), LAN (RJ-45 x1), Trigger (Mini jack x1), 3D Sync (Mini-DIN 3pin x1) |
| ഉൽപ്പന്ന അളവുകൾ | 25.25 x 26.25 x 16.38 ഇഞ്ച് |
| ഇനത്തിൻ്റെ ഭാരം | 48 പൗണ്ട് |
| ആദ്യ തീയതി ലഭ്യമാണ് | ഫെബ്രുവരി 15, 2019 |
കുറിപ്പ്: അറിയിപ്പുകൾ കൂടാതെ സവിശേഷതകൾ മാറ്റത്തിന് വിധേയമാണ്.
9. വാറൻ്റിയും പിന്തുണയും
For warranty information and technical support, please refer to the warranty card included with your product or visit the official JVC webസൈറ്റ്. നിങ്ങൾക്ക് കൂടുതൽ വിവരങ്ങൾ കണ്ടെത്താനും കഴിയും ആമസോണിലെ ജെവിസി സ്റ്റോർ.
JVC is committed to providing high-quality products and customer service. If you require assistance, please have your model number (DLA-NX9) and purchase details ready.


