ആമുഖം
This manual provides comprehensive instructions for the installation, operation, and maintenance of your new GRIFEMA G4001W Kitchen Tap. Please read these instructions carefully before installation and retain them for future reference. Proper installation and care will ensure optimal performance and longevity of your product.
സുരക്ഷാ വിവരങ്ങൾ
- Ensure the main water supply is turned off before beginning any installation work.
- കയ്യുറകൾ, കണ്ണ് സംരക്ഷണം തുടങ്ങിയ ഉചിതമായ വ്യക്തിഗത സംരക്ഷണ ഉപകരണങ്ങൾ ധരിക്കുക.
- ഇൻസ്റ്റലേഷൻ പ്രക്രിയയുടെ ഏതെങ്കിലും ഭാഗത്തെക്കുറിച്ച് നിങ്ങൾക്ക് ഉറപ്പില്ലെങ്കിൽ, യോഗ്യതയുള്ള ഒരു പ്ലംബറെ സമീപിക്കുക.
- Do not use abrasive cleaners or harsh chemicals on the tap's finish.
പാക്കേജ് ഉള്ളടക്കം
ഇൻസ്റ്റാളേഷൻ ആരംഭിക്കുന്നതിന് മുമ്പ് എല്ലാ ഘടകങ്ങളും നിലവിലുണ്ടെന്ന് ഉറപ്പാക്കുക:
- 1 x GRIFEMA G4001W Kitchen Tap (White finish)
- 2 x 40 cm Flexible Hose Pipes (for hot and cold water connection)
- 1 x Installation Kit (includes mounting hardware, washers, and nuts)
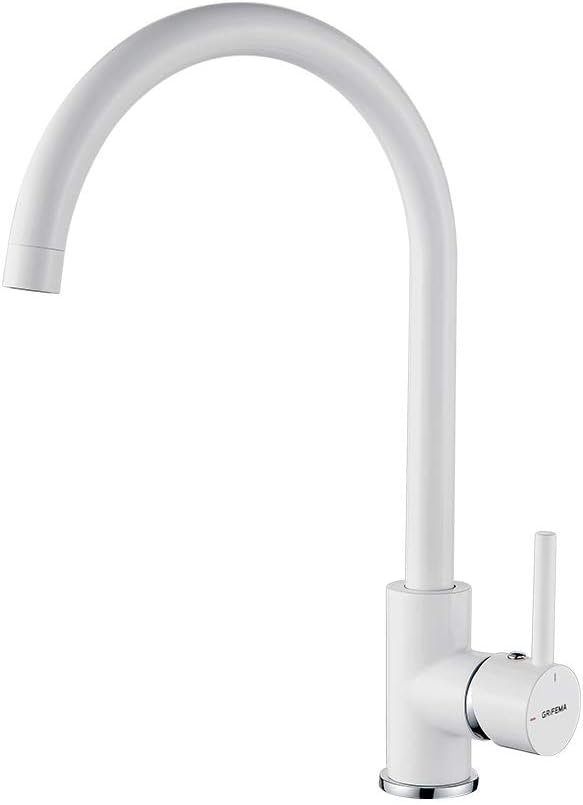
Image: The GRIFEMA G4001W kitchen tap in white, shown with its main components including the tap body, flexible hoses, and mounting hardware.
സ്പെസിഫിക്കേഷനുകൾ
| മോഡൽ നമ്പർ | G4001W |
| മെറ്റീരിയൽ | Solid Brass (body), Ceramic Disc Valve |
| പൂർത്തിയാക്കുക | Polished Chrome / White |
| മൗണ്ടിംഗ് തരം | ഡെക്ക് മൗണ്ട്, സിംഗിൾ ഹോൾ |
| ഹാൻഡിലുകളുടെ എണ്ണം | 1 (ലിവർ) |
| ഹോസ് നീളം | 40 സെ.മീ |
| സ്പ out ട്ട് ഉയരം | 9.7 ഇഞ്ച് (246 മിമി) |
| ഉൽപ്പന്ന അളവുകൾ | 7 x 27 x 44 സെ.മീ; 1.53 കി.ഗ്രാം |
| പ്രത്യേക സവിശേഷതകൾ | Rust-Resistant, Lead Free, 360° Swivel Spout, Cold Start (Kelogic) |

Image: Detailed dimensions of the GRIFEMA G4001W kitchen tap, showing spout height (9.7 inches / 246mm) and overall height (15.1 inches / 383mm).
ഇൻസ്റ്റലേഷൻ നിർദ്ദേശങ്ങൾ
വിജയകരമായ ഇൻസ്റ്റാളേഷനായി ഈ ഘട്ടങ്ങൾ പാലിക്കുക:
- ഇൻസ്റ്റലേഷൻ ഏരിയ തയ്യാറാക്കുക: Turn off the main water supply. Clear the area under the sink and ensure the mounting surface is clean and dry. The tap requires a single hole for mounting.
- Install the Tap Body: Insert the tap body into the mounting hole on your sink or countertop. Ensure the tap is correctly oriented.
- ടാപ്പ് സുരക്ഷിതമാക്കുക: From underneath the sink, slide the rubber washer, metal washer, and then the fixing nut onto the threaded shank of the tap. Tighten the fixing nut securely using the provided tool or an adjustable wrench. Do not overtighten.
- വാട്ടർ ഹോസുകൾ ബന്ധിപ്പിക്കുക: Attach the two flexible hose pipes to the corresponding hot and cold water inlets on the tap body. Ensure a tight seal. Connect the other ends of the flexible hoses to your hot and cold water supply lines. Use appropriate adapters if necessary (e.g., 3/8" to 15mm).
- ചോർച്ച പരിശോധിക്കുക: Once all connections are secure, slowly turn on the main water supply. Check all connections for any signs of leaks. If leaks are present, turn off the water supply and re-tighten the connections.
- ടെസ്റ്റ് ഓപ്പറേഷൻ: Allow water to run through the tap for a few minutes to flush out any debris. Check the hot and cold water flow and the swivel function.

Image: The GRIFEMA G4001W tap dispensing water, highlighting the integrated water-saving aerator (NEOPERL Flow Ready) for efficient water usage.
ഓപ്പറേഷൻ
The GRIFEMA G4001W Kitchen Tap features a single lever handle for controlling both water flow and temperature, along with a 360° swivel spout for convenience.
- ജലപ്രവാഹ നിയന്ത്രണം: Lift the lever handle upwards to increase water flow. Push it downwards to decrease or stop the flow.
- Temperature Control (Cold Start - Kelogic):
The tap incorporates a Cold Start system. When the lever is in the central position, only cold water flows, helping to save energy. To obtain hot water, move the lever to the left. Moving it to the right will increase the cold water flow.

Image: Illustration of the Cold Start (Kelogic) system, showing the lever position for cold water (center) and hot water (left), emphasizing water and energy savings, and low noise operation.
- സ്വിവൽ സ്പൗട്ട്: The spout can rotate 360 degrees, allowing for flexible use across multiple sink bowls or for filling large pots outside the sink area.

Image: The GRIFEMA G4001W kitchen tap demonstrating its 360-degree swivel functionality, showing the spout rotating freely.
പരിപാലനവും പരിചരണവും
Regular cleaning and proper care will help maintain the appearance and functionality of your GRIFEMA G4001W Kitchen Tap.
- ഫിനിഷ് വൃത്തിയാക്കൽ: Clean the tap regularly with a soft cloth and mild soap and water. Rinse thoroughly and dry with a soft cloth to prevent water spots. Avoid abrasive cleaners, scouring pads, or harsh chemicals (e.g., ammonia, bleach, alcohol-based cleaners) as these can damage the finish.
- എയറേറ്റർ പരിപാലനം: If water flow becomes restricted, the aerator may be clogged with debris or mineral deposits. Unscrew the aerator from the end of the spout, clean it under running water, and remove any particles. You can soak it in a vinegar solution to dissolve mineral buildup. Reassemble the aerator securely.
- സെറാമിക് ഡിസ്ക് കാട്രിഡ്ജ്: The tap is equipped with a durable ceramic disc cartridge. In case of persistent drips or leaks from the handle, the cartridge may need replacement. This is typically a task for a qualified plumber.
ട്രബിൾഷൂട്ടിംഗ്
പൊതുവായ പ്രശ്നങ്ങളും അവയുടെ സാധ്യമായ പരിഹാരങ്ങളും അറിയാൻ താഴെയുള്ള പട്ടിക കാണുക:
| പ്രശ്നം | സാധ്യമായ കാരണം | പരിഹാരം |
|---|---|---|
| താഴ്ന്ന ജലപ്രവാഹം | അടഞ്ഞുപോയ എയറേറ്റർ; ഭാഗികമായി അടഞ്ഞ സ്റ്റോപ്പ്കോക്ക്; കുറഞ്ഞ ജലസമ്മർദ്ദം. | Clean or replace aerator; ensure stopcocks are fully open; check household water pressure. |
| Tap Drips or Leaks from Spout | Worn ceramic disc cartridge; loose connections. | Replace ceramic disc cartridge (professional recommended); check and tighten hose connections. |
| Leakage at Base of Tap | Loose mounting nut; improperly seated washers. | Tighten mounting nut; ensure washers are correctly positioned during installation. |
| No Hot or Cold Water | Water supply turned off; blocked hose. | Check if water supply valves are open; inspect hoses for kinks or blockages. |
വാറൻ്റിയും പിന്തുണയും
GRIFEMA products are designed for quality and durability. For specific warranty details and customer support, please refer to the warranty card included with your purchase or visit the official GRIFEMA webസൈറ്റ്. നിങ്ങളുടെ ഉൽപ്പന്നത്തെക്കുറിച്ചുള്ള എന്തെങ്കിലും ചോദ്യങ്ങൾക്കോ ആശങ്കകൾക്കോ സഹായിക്കാൻ ഞങ്ങളുടെ ഉപഭോക്തൃ സേവന ടീം ലഭ്യമാണ്.
For further assistance, please contact GRIFEMA customer support through their official channels.


