1. ആമുഖം
The MARATHON 100 Hour Direct Entry Digital Tabletop Timer is designed to assist with precise time management for various tasks. Featuring a large, easy-to-read LCD display and a direct entry keypad, this timer offers both countdown and count-up functionalities, a clock mode, and memory presets for repetitive events. Its robust design includes a magnetic back and an integrated kickstand for versatile placement.
2. ഉൽപ്പന്നം കഴിഞ്ഞുview
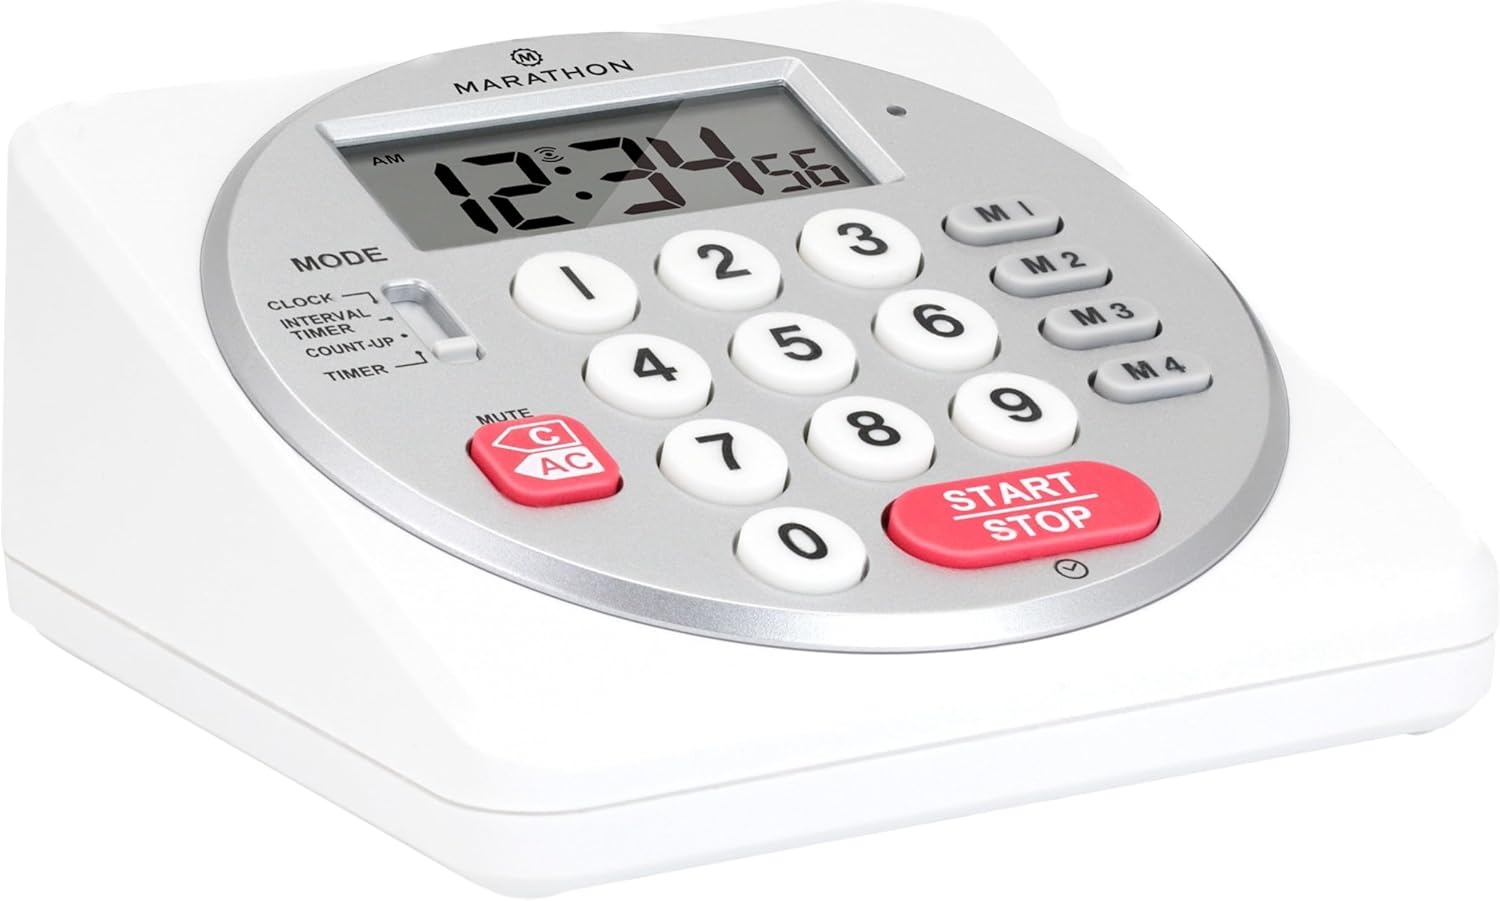
ചിത്രം 1: മുൻഭാഗം view of the Marathon Digital Timer.
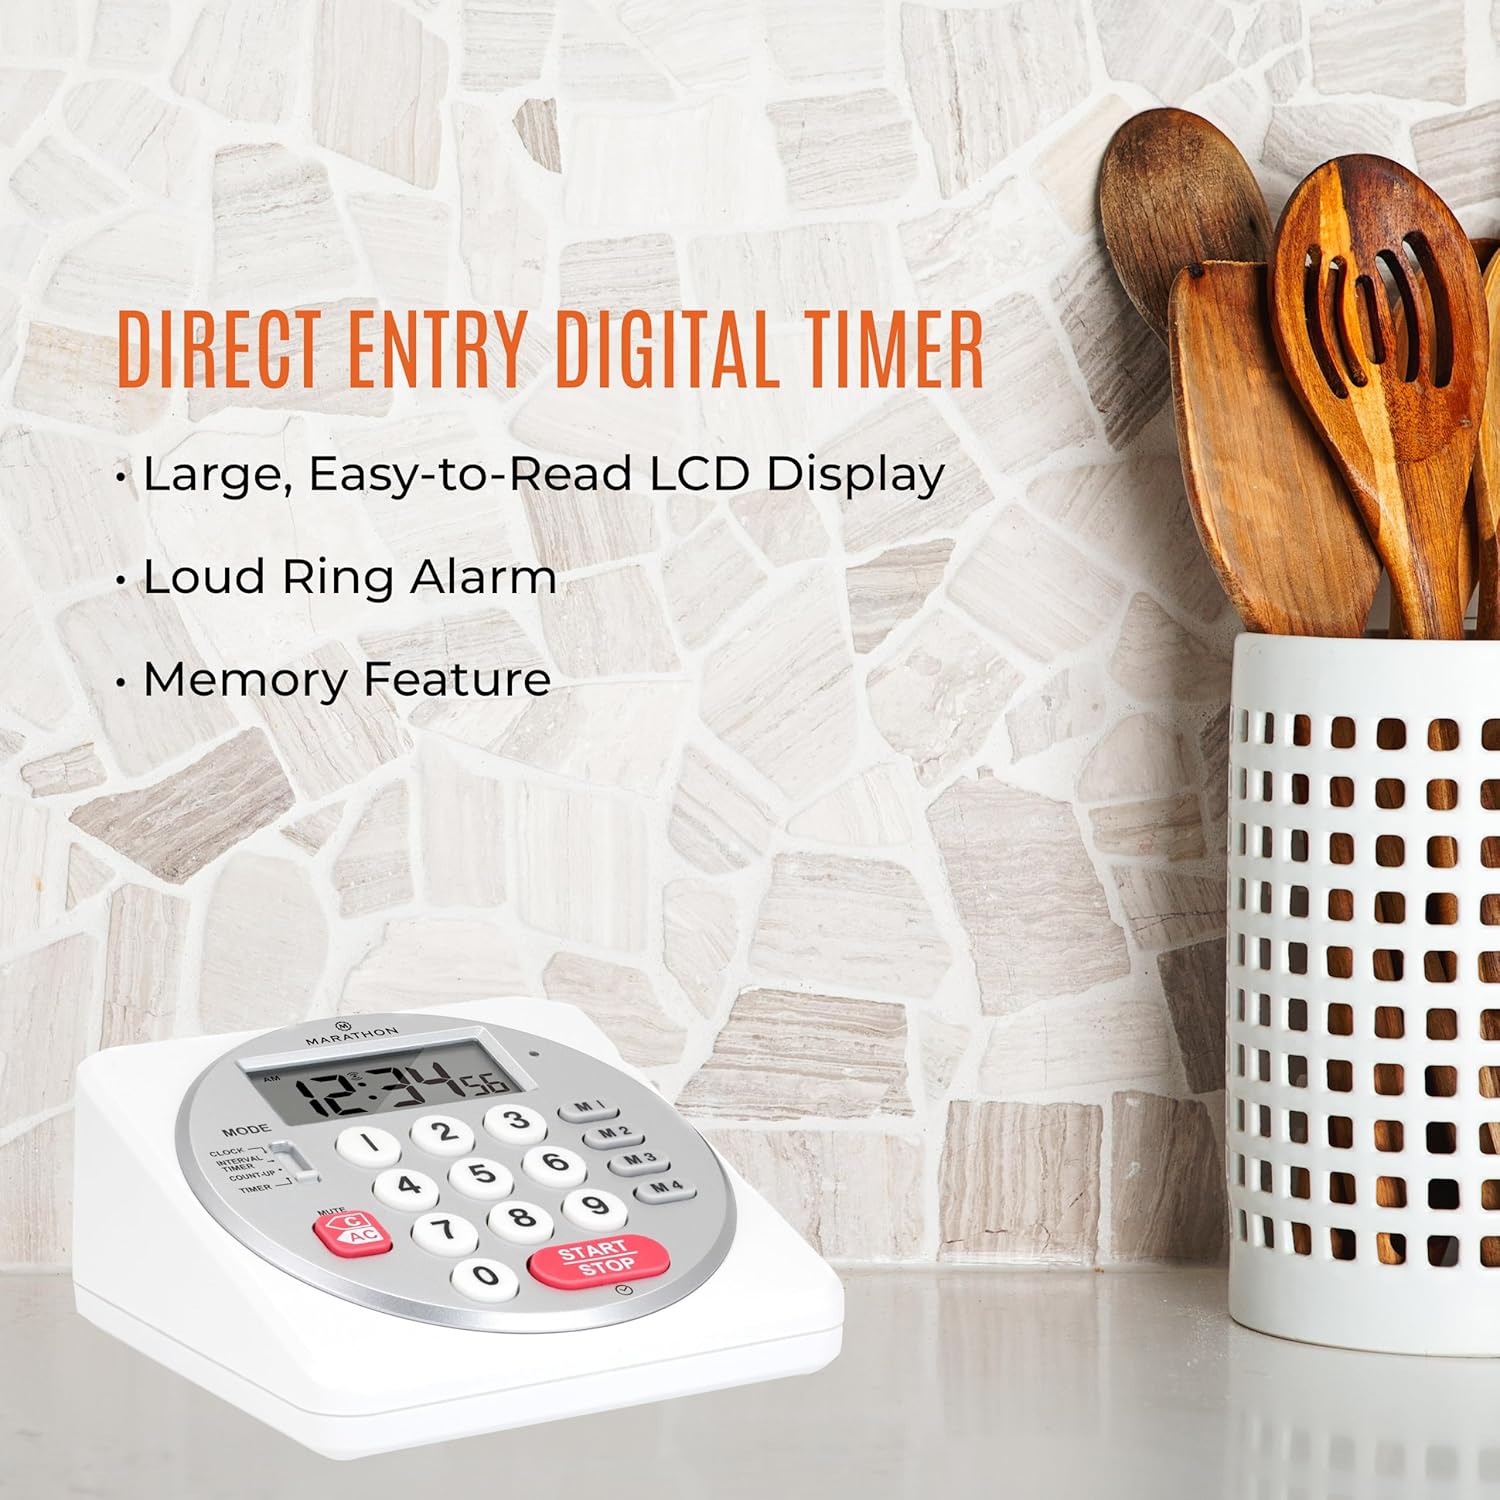
Figure 2: Timer on a kitchen counter, highlighting large display and loud alarm.

Figure 3: Timer showcasing dual function, included batteries, and versatile memory.
പ്രധാന സവിശേഷതകൾ:
- Direct Entry Keypad: For quick and precise time setting.
- വലിയ LCD ഡിസ്പ്ലേ: Easy-to-read numbers for clear visibility.
- Dual Function Alarm: Supports both countdown and count-up timing up to 99 hours, 59 minutes, and 59 seconds.
- Loud Ring Alarm: Audible across a room.
- LED സൂചകം: Flashing light for silent alarm or hearing impairment assistance.
- Clock Feature: Displays time in 12-hour or 24-hour format when not in timer mode.
- Built-in Memory Function: Stores up to four consecutive times for interval timing and four memory presets for repetitive events.
- ബഹുമുഖ പ്ലെയ്സ്മെന്റ്: Integrated kickstand for tabletop use and magnetic back for attachment to metal surfaces.
- ബാറ്ററികൾ ഉൾപ്പെടുന്നു: 2 AA ബാറ്ററികൾക്കൊപ്പം വരുന്നു.
3. സജ്ജീകരണം
3.1. ബാറ്ററി ഇൻസ്റ്റാളേഷൻ
- Locate the battery compartment cover on the back of the timer.
- കവർ തുറക്കുക.
- Insert two (2) AA batteries, ensuring correct polarity (+/-) as indicated inside the compartment. The timer comes with batteries included.
- ബാറ്ററി കമ്പാർട്ട്മെന്റ് കവർ സുരക്ഷിതമായി മാറ്റിസ്ഥാപിക്കുക.

ചിത്രം 4: പിന്നിലേക്ക് view with battery compartment and kickstand.
4. പ്രവർത്തന നിർദ്ദേശങ്ങൾ
4.1. മോഡ് തിരഞ്ഞെടുക്കൽ
ഉപയോഗിക്കുക മോഡ് switch located on the side of the timer to select between different functions:
- ക്ലോക്ക്: നിലവിലെ സമയം പ്രദർശിപ്പിക്കുന്നു.
- INTERVAL TIMER: For setting multiple consecutive timers.
- COUNT-UP: Functions as a stopwatch.
- ടൈമർ: For setting a single countdown timer.

Figure 5: MODE switch for function selection.
4.2. ക്ലോക്ക് സജ്ജമാക്കുന്നു
- സ്ലൈഡ് ചെയ്യുക മോഡ് എന്നതിലേക്ക് മാറുക ക്ലോക്ക്.
- അമർത്തിപ്പിടിക്കുക സെറ്റ് സമയ അക്കങ്ങൾ മിന്നിത്തുടങ്ങുന്നത് വരെ ബട്ടൺ അമർത്തുക.
- Use the number keypad (0-9) to enter the desired time (HH:MM).
- അമർത്തുക സെറ്റ് ക്ലോക്ക് സെറ്റിംഗ് മോഡ് സ്ഥിരീകരിച്ച് പുറത്തുകടക്കാൻ വീണ്ടും.
- 12 മണിക്കൂർ, 24 മണിക്കൂർ ഫോർമാറ്റുകൾക്കിടയിൽ മാറാൻ, അമർത്തുക 12/24എച്ച് button (if available, or refer to specific model instructions).
4.3. Setting a Countdown Timer (TIMER Mode)
- സ്ലൈഡ് ചെയ്യുക മോഡ് എന്നതിലേക്ക് മാറുക ടൈമർ.
- Use the number keypad (0-9) to directly enter the desired countdown time (HH:MM:SS). The timer supports up to 99 hours, 59 minutes, 59 seconds.
- അമർത്തുക ആരംഭിക്കുക/നിർത്തുക കൗണ്ട്ഡൗൺ ആരംഭിക്കാൻ ബട്ടൺ അമർത്തുക.
- To pause the timer, press ആരംഭിക്കുക/നിർത്തുക വീണ്ടും. പുനരാരംഭിക്കാൻ ഒരിക്കൽ കൂടി അതിൽ അമർത്തുക.
- When the countdown reaches zero, the alarm will sound, and the LED indicator will flash. The timer will then automatically begin counting up to show elapsed time since the alarm.
- To stop the alarm and clear the display, press the ക്ലിയർ ബട്ടൺ.
4.4. Using the Count-Up Timer (COUNT-UP Mode)
- സ്ലൈഡ് ചെയ്യുക മോഡ് എന്നതിലേക്ക് മാറുക COUNT-UP.
- Ensure the display shows 00:00:00. If not, press ക്ലിയർ.
- അമർത്തുക ആരംഭിക്കുക/നിർത്തുക button to begin counting up.
- To pause the count-up, press ആരംഭിക്കുക/നിർത്തുക വീണ്ടും. പുനരാരംഭിക്കാൻ ഒരിക്കൽ കൂടി അതിൽ അമർത്തുക.
- To reset the count-up timer to zero, press ക്ലിയർ.
4.5. Using Memory Functions (M1-M4 Presets)
The timer features four memory buttons (M1, M2, M3, M4) for storing and recalling frequently used times or for interval timing.
- In ടൈമർ mode, enter the desired time using the number keypad.
- Press and hold one of the memory buttons (M1-M4) until the display confirms the time has been saved.
- To recall a saved time, simply press the corresponding memory button (M1-M4). The saved time will appear on the display, ready to start.
- For interval timing, set the first interval, save it to M1. Then set the second interval, save it to M2, and so on. You can then cycle through these presets as needed.
4.6. അലാറം വോളിയം ക്രമീകരിക്കുന്നു
The timer features a volume switch, typically located on the side or back, allowing you to select between different alarm levels (e.g., High, Low, Mute) or a flashing LED indicator for silent operation.
5. പരിപാലനം
- ഒരു സോഫ്റ്റ്, ഡി ഉപയോഗിച്ച് ടൈമർ വൃത്തിയാക്കുകamp തുണി. അബ്രാസീവ് ക്ലീനറുകൾ ഉപയോഗിക്കരുത് അല്ലെങ്കിൽ യൂണിറ്റ് വെള്ളത്തിൽ മുക്കരുത്.
- Avoid exposing the timer to extreme temperatures or direct sunlight for prolonged periods.
- If the display becomes dim or the alarm weakens, replace the batteries promptly.
6. പ്രശ്നപരിഹാരം
| പ്രശ്നം | സാധ്യമായ കാരണം | പരിഹാരം |
|---|---|---|
| Timer not turning on. | ബാറ്ററികൾ ഡെഡ് അല്ലെങ്കിൽ തെറ്റായി ഇൻസ്റ്റാൾ ചെയ്തു. | ബാറ്ററി പോളാരിറ്റി പരിശോധിക്കുക അല്ലെങ്കിൽ പുതിയ AA ബാറ്ററികൾ ഉപയോഗിച്ച് മാറ്റിസ്ഥാപിക്കുക. |
| ഡിസ്പ്ലേ മങ്ങിയതാണ്. | കുറഞ്ഞ ബാറ്ററി പവർ. | ബാറ്ററികൾ മാറ്റിസ്ഥാപിക്കുക. |
| അലാറം മുഴങ്ങുന്നില്ല. | Alarm volume is set to mute or low. | Check the alarm volume switch and adjust as needed. |
| Timer not responding to button presses. | Unit may be in a locked state (if applicable) or requires a reset. | Remove and reinsert batteries to perform a hard reset. Check for any lock switches. |
7 സ്പെസിഫിക്കേഷനുകൾ
- മോഡൽ: TI030018WH
- ബ്രാൻഡ്: മാരത്തൺ
- മെറ്റീരിയൽ: പ്ലാസ്റ്റിക്
- അളവുകൾ: 4.45 x 2.64 x 4.45 ഇഞ്ച്
- ഇനത്തിൻ്റെ ഭാരം: 7.1 ഔൺസ്
- ഊർജ്ജ സ്രോതസ്സ്: 2 x AA ബാറ്ററികൾ (ഉൾപ്പെടുത്തിയിരിക്കുന്നു)
- Max Timer Duration: 99 മണിക്കൂർ, 59 മിനിറ്റ്, 59 സെക്കൻഡ്
- ഫീച്ചറുകൾ: Direct Entry, Dual Function (Count-up/Count-down), Clock, Memory Presets, LED Indicator, Magnetic Back, Kickstand
- UPC: 063442000342

ചിത്രം 6: ഉൽപ്പന്ന അളവുകൾ.
8. വാറൻ്റിയും പിന്തുണയും
വാറന്റി വിവരങ്ങൾക്കോ സാങ്കേതിക പിന്തുണയ്ക്കോ, ദയവായി നിർമ്മാതാവിന്റെ ഉദ്യോഗസ്ഥനെ കാണുക. webസൈറ്റിൽ ബന്ധപ്പെടുക അല്ലെങ്കിൽ അവരുടെ ഉപഭോക്തൃ സേവന വിഭാഗവുമായി ബന്ധപ്പെടുക. വാങ്ങിയതിന്റെ തെളിവായി നിങ്ങളുടെ വാങ്ങൽ രസീത് സൂക്ഷിക്കുക.


