1. ആമുഖം
The ARGO Iro Plus is a versatile portable air conditioner designed for year-round comfort, featuring both cooling and heating capabilities. Its minimalist design and intuitive controls make it a perfect addition to any living space. This manual provides essential information for the safe and efficient operation, setup, and maintenance of your ARGO Iro Plus unit.
പ്രധാന സവിശേഷതകൾ:
- Portable air conditioner with heat pump, Energy Class A.
- Four operating modes: Cooling, Heating, Ventilation, and Dehumidification.
- Three fan speeds for customized airflow.
- Motorized top flap with Swing function for wide air distribution.
- Digital 24-hour timer for scheduled operation.
- Sleep function for enhanced comfort during rest.
- Memory function for automatic restart with previous settings after power interruption.
- പരിസ്ഥിതി സൗഹൃദമായ R290 റഫ്രിജറന്റ്.
- Equipped with practical handles and multi-directional wheels for easy portability.
2 സുരക്ഷാ വിവരങ്ങൾ
പരിക്കുകളോ കേടുപാടുകളോ തടയാൻ ഉപകരണം ഉപയോഗിക്കുന്നതിന് മുമ്പ് എല്ലാ സുരക്ഷാ മുന്നറിയിപ്പുകളും നിർദ്ദേശങ്ങളും ശ്രദ്ധാപൂർവ്വം വായിക്കുക. ഭാവിയിലെ റഫറൻസിനായി ഈ മാനുവൽ സൂക്ഷിക്കുക.
- ശരിയായ വോള്യം ഉള്ള ഒരു ഗ്രൗണ്ടഡ് പവർ ഔട്ട്ലെറ്റിലേക്ക് യൂണിറ്റ് എപ്പോഴും ബന്ധിപ്പിക്കുക.tage.
- കേടായ പവർ കോർഡ് അല്ലെങ്കിൽ പ്ലഗ് ഉപയോഗിച്ച് യൂണിറ്റ് പ്രവർത്തിപ്പിക്കരുത്.
- എയർ ഇൻലെറ്റുകളോ ഔട്ട്ലെറ്റുകളോ തടയരുത്. ശരിയായ വായുസഞ്ചാരത്തിനായി യൂണിറ്റിന് ചുറ്റും മതിയായ ക്ലിയറൻസ് ഉറപ്പാക്കുക.
- Do not insert fingers or objects into the air outlets.
- Keep the unit away from water and other liquids. Do not use in bathrooms or very humid environments.
- വൃത്തിയാക്കുന്നതിനോ അറ്റകുറ്റപ്പണികൾ നടത്തുന്നതിനോ മുമ്പ് യൂണിറ്റ് അൺപ്ലഗ് ചെയ്യുക.
- യൂണിറ്റ് സ്വയം നന്നാക്കാനോ പരിഷ്കരിക്കാനോ ശ്രമിക്കരുത്. അറ്റകുറ്റപ്പണികൾക്കായി യോഗ്യതയുള്ള സേവന ഉദ്യോഗസ്ഥരെ ബന്ധപ്പെടുക.
- ഈ ഉപകരണം, അവരുടെ സുരക്ഷയ്ക്ക് ഉത്തരവാദിയായ ഒരു വ്യക്തി ഉപകരണത്തിൻ്റെ ഉപയോഗത്തെ സംബന്ധിച്ച മേൽനോട്ടമോ നിർദ്ദേശമോ നൽകിയിട്ടില്ലെങ്കിൽ, ശാരീരികമോ ഇന്ദ്രിയപരമോ മാനസികമോ ആയ കഴിവുകൾ കുറഞ്ഞതോ അനുഭവത്തിൻ്റെയും അറിവിൻ്റെയും അഭാവം ഉള്ള വ്യക്തികൾക്ക് (കുട്ടികൾ ഉൾപ്പെടെ) ഉപയോഗിക്കാൻ ഉദ്ദേശിച്ചുള്ളതല്ല.
- കുട്ടികൾ ഉപകരണം ഉപയോഗിച്ച് കളിക്കുന്നില്ലെന്ന് ഉറപ്പാക്കാൻ മേൽനോട്ടം വഹിക്കണം.
3. ഉൽപ്പന്ന ഘടകങ്ങൾ
Familiarize yourself with the main parts of your ARGO Iro Plus portable air conditioner.

ചിത്രം 3.1: മുൻഭാഗം view of the ARGO Iro Plus portable air conditioner, showcasing അതിന്റെ മിനുസമാർന്ന വെളുത്ത രൂപകൽപ്പനയും ഒതുക്കമുള്ള ഫോം ഫാക്ടറും.

ചിത്രം 3.2: മറ്റൊരു മുൻഭാഗം view of the ARGO Iro Plus, highlighting the minimalist design.

ചിത്രം 3.3: മുകളിൽ നിന്ന് താഴേക്ക് view of the control panel with digital display and touch-sensitive buttons for various functions like Swing, Timer, Speed, Temperature Up/Down, Mode, Sleep, and Power.

ചിത്രം 3.4: പിൻഭാഗം view of the unit, showing the exhaust air outlet, power cord storage, and air intake grilles.

ചിത്രം 3.5: വശം view of the ARGO Iro Plus, highlighting the integrated handle for easy lifting and portability.

ചിത്രം 3.6: വശം view of the ARGO Iro Plus, showing the exhaust port and side grilles.

Figure 3.7: Technical diagram illustrating the dimensions of the ARGO Iro Plus unit: 770mm height, 470mm width, and 382mm depth.
ഉൾപ്പെടുത്തിയ ആക്സസറികൾ:
- ഫ്ലെക്സിബിൾ എക്സ്ഹോസ്റ്റ് ഹോസ്
- വിൻഡോ അഡാപ്റ്റർ
- Kit for Fixed Glass Installation
- റിമോട്ട് കൺട്രോൾ
4. സജ്ജീകരണവും ഇൻസ്റ്റാളേഷനും
4.1 പ്ലേസ്മെൻ്റ്
Place the ARGO Iro Plus on a flat, stable surface. Ensure there is at least 30 cm (12 inches) of clearance around the unit for proper air circulation. Do not place the unit near heat sources or in direct sunlight.
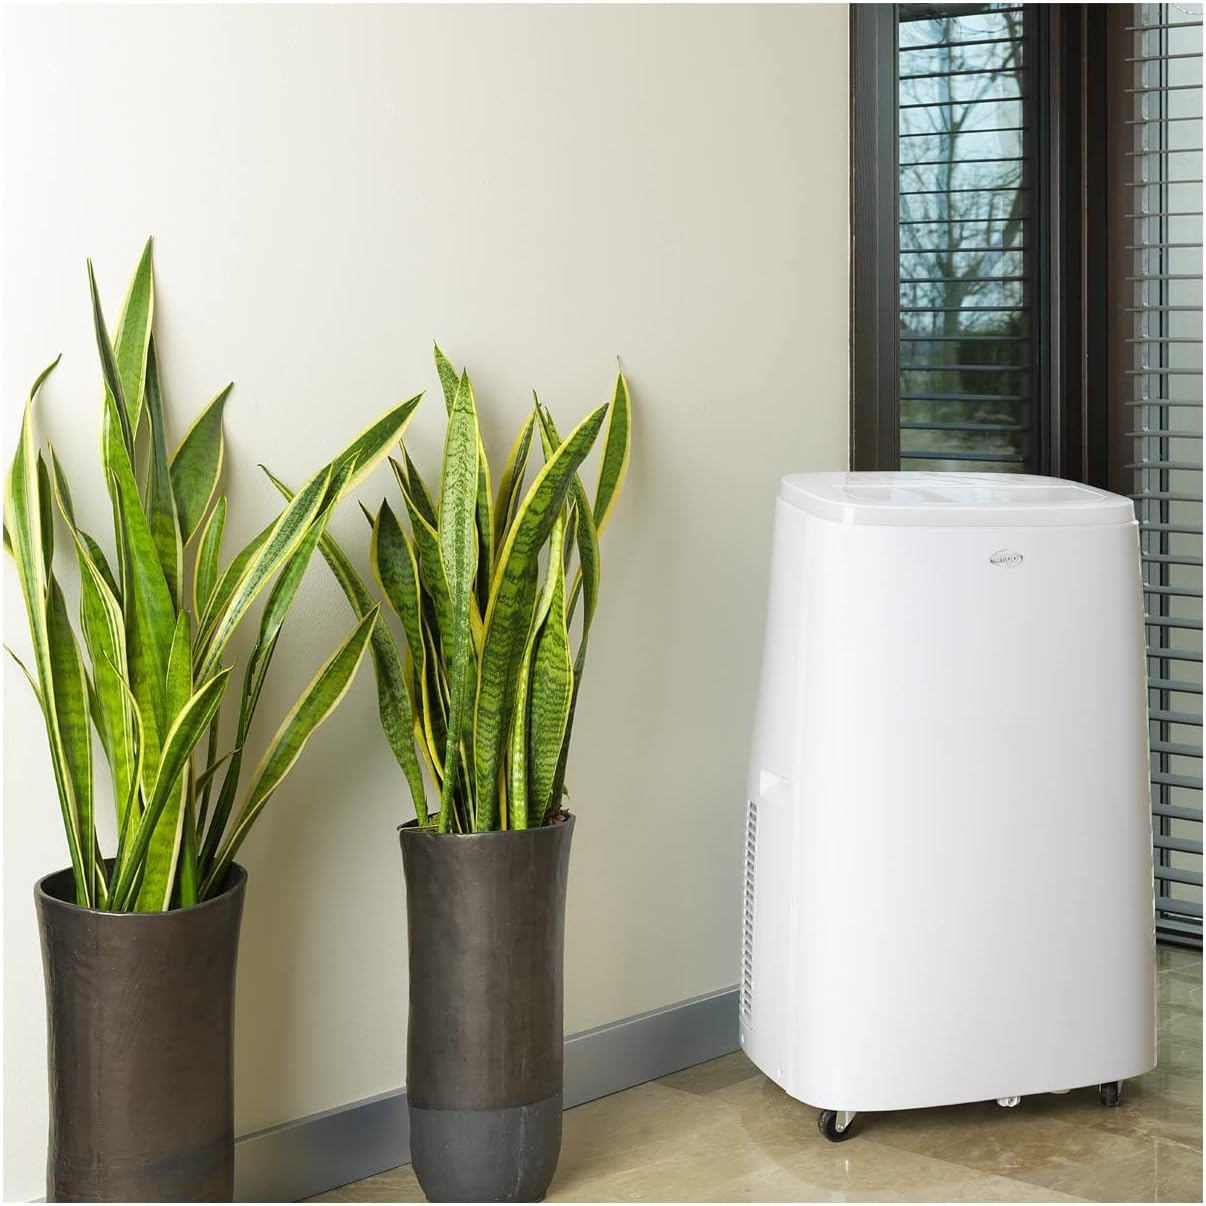
Figure 4.1: The ARGO Iro Plus unit positioned in a room, demonstrating suitable placement near a window for exhaust hose connection.
4.2 എക്സ്ഹോസ്റ്റ് ഹോസ് ഇൻസ്റ്റാളേഷൻ
- Attach one end of the flexible exhaust hose to the air outlet on the back of the unit. Twist clockwise until securely fastened.
- എക്സ്ഹോസ്റ്റ് ഹോസിന്റെ മറ്റേ അറ്റത്ത് വിൻഡോ അഡാപ്റ്റർ ഘടിപ്പിക്കുക.
- Open a window or sliding door and place the window adapter firmly in the opening. Ensure the opening is sealed as much as possible to prevent outside air from entering.
- For fixed glass installations, use the provided kit according to its specific instructions.
പ്രധാനപ്പെട്ടത്: The exhaust hose must be as short and straight as possible to ensure optimal performance. Bends or excessive length will reduce efficiency.
5. പ്രവർത്തന നിർദ്ദേശങ്ങൾ
Your ARGO Iro Plus can be operated using the control panel on the top of the unit or the included remote control.
5.1 കൺട്രോൾ പാനൽ ഓവർview
Refer to Figure 3.3 for the layout of the control panel buttons.
- പവർ ബട്ടൺ: യൂണിറ്റ് ഓണാക്കുകയോ ഓഫാക്കുകയോ ചെയ്യുന്നു.
- മോഡ് ബട്ടൺ: പ്രവർത്തന രീതികളിലൂടെയുള്ള ചക്രങ്ങൾ: കൂൾ, ഹീറ്റ്, ഫാൻ, ഡീഹ്യുമിഡിഫൈ.
- മുകളിലേക്ക്/താഴ്ന്ന ബട്ടണുകൾ: Adjust temperature settings or timer duration.
- സ്പീഡ് ബട്ടൺ: ഫാൻ വേഗത (കുറഞ്ഞ, ഇടത്തരം, ഉയർന്ന) തിരഞ്ഞെടുക്കുന്നു.
- ടൈമർ ബട്ടൺ: ഓട്ടോ-ഓൺ അല്ലെങ്കിൽ ഓട്ടോ-ഓഫ് ടൈമർ സജ്ജമാക്കുന്നു.
- സ്വിംഗ് ബട്ടൺ: Activates or deactivates the automatic swing function of the top flap.
- സ്ലീപ്പ് ബട്ടൺ: Activates Sleep mode for quiet operation and optimized temperature control during sleep.
5.2 ഓപ്പറേറ്റിംഗ് മോഡുകൾ
- കൂളിംഗ് മോഡ്: For cooling the room. Set desired temperature using UP/DOWN buttons.
- ചൂടാക്കൽ മോഡ്: For heating the room (Heat Pump function). Set desired temperature.
- ഫാൻ മോഡ്: തണുപ്പിക്കുകയോ ചൂടാക്കുകയോ ചെയ്യാതെ വായു സഞ്ചാരം നൽകുന്നു. ആവശ്യമുള്ള ഫാൻ വേഗത തിരഞ്ഞെടുക്കുക.
- ഡീഹ്യുമിഡിഫിക്കേഷൻ മോഡ്: Removes moisture from the air. The unit will operate at a low fan speed. Continuous drainage is recommended in this mode.
5.3 ടൈമർ പ്രവർത്തനം
The 24-hour timer allows you to set the unit to turn on or off automatically after a specified period.
- TIMER ബട്ടൺ അമർത്തുക.
- Use the UP/DOWN buttons to set the desired delay time (in hours).
- കുറച്ച് സെക്കൻഡുകൾക്ക് ശേഷം ടൈമർ സജീവമാകും.
6. പരിപാലനം
Regular maintenance ensures optimal performance and extends the lifespan of your ARGO Iro Plus. Always unplug the unit before cleaning.
6.1 എയർ ഫിൽട്ടർ വൃത്തിയാക്കൽ
The air filter should be cleaned every two weeks, or more frequently if the unit is used in a dusty environment.
- യൂണിറ്റ് ഓഫ് ചെയ്ത് അൺപ്ലഗ് ചെയ്യുക.
- Locate the air filter panel (usually on the side or back).
- ഫിൽട്ടർ നീക്കം ചെയ്യുക.
- ഒരു വാക്വം ക്ലീനർ ഉപയോഗിച്ച് ഫിൽട്ടർ വൃത്തിയാക്കുക അല്ലെങ്കിൽ ചെറുചൂടുള്ള വെള്ളവും നേരിയ ഡിറ്റർജന്റും ഉപയോഗിച്ച് സൌമ്യമായി കഴുകുക.
- ഫിൽട്ടർ വീണ്ടും ചേർക്കുന്നതിന് മുമ്പ് പൂർണ്ണമായും ഉണങ്ങാൻ അനുവദിക്കുക.
6.2 വെള്ളം വറ്റിക്കൽ
The unit automatically evaporates most condensation. However, in high humidity conditions or during dehumidification mode, the internal water tank may fill up. The unit will stop operating and display an indicator when the tank is full.
- യൂണിറ്റ് ഓഫ് ചെയ്ത് അൺപ്ലഗ് ചെയ്യുക.
- Place a shallow pan or container under the drainage outlet (usually at the bottom rear of the unit).
- വെള്ളം പുറത്തേക്ക് ഒഴുകാൻ അനുവദിക്കുന്നതിന് ഡ്രെയിൻ പ്ലഗ് നീക്കം ചെയ്യുക.
- Once drained, replace the drain plug firmly.
- For continuous drainage in dehumidification mode, connect a suitable drain hose (not included) to the continuous drainage outlet.
7. പ്രശ്നപരിഹാരം
ഉപഭോക്തൃ പിന്തുണയുമായി ബന്ധപ്പെടുന്നതിന് മുമ്പ്, ഇനിപ്പറയുന്ന പൊതുവായ പ്രശ്നങ്ങളും അവയുടെ പരിഹാരങ്ങളും പരിശോധിക്കുക.
| പ്രശ്നം | സാധ്യമായ കാരണം | പരിഹാരം |
|---|---|---|
| യൂണിറ്റ് ഓണാക്കുന്നില്ല. | No power, power cord loose, circuit breaker tripped. | Check power connection, ensure outlet is working, reset circuit breaker. |
| Unit is running but not cooling/heating. | Exhaust hose blocked/disconnected, room too large, windows/doors open, air filter dirty, temperature setting too high/low. | Ensure exhaust hose is properly installed and unblocked. Close windows/doors. Clean air filter. Adjust temperature setting. |
| യൂണിറ്റ് ശബ്ദമയമാണ്. | Unit not on a flat surface, fan speed too high, internal components loose. | Place unit on a flat surface. Reduce fan speed. If noise persists, contact support. |
| വെള്ളം ചോർച്ച. | Drain plug loose, continuous drainage hose not properly connected, unit tilted. | Ensure drain plug is secure. Check continuous drainage hose connection. Place unit on a level surface. |
| "Full Tank" indicator (or similar) is on. | അകത്തെ വാട്ടർ ടാങ്ക് നിറഞ്ഞിരിക്കുന്നു. | Drain the water tank as described in Section 6.2. |
If the problem persists after trying these solutions, please contact ARGO customer support.
8 സ്പെസിഫിക്കേഷനുകൾ
| മോഡൽ നമ്പർ | ഐആർഒ പ്ലസ് |
| ബ്രാൻഡ് | ARGO |
| ഉൽപ്പന്ന അളവുകൾ (H x W x D) | 77 x 47 x 38 സെ.മീ |
| ഇനത്തിൻ്റെ ഭാരം | 31.5 കി.ഗ്രാം |
| ഫോം ഫാക്ടർ | പോർട്ടബിൾ |
| തണുപ്പിക്കൽ ശേഷി | 13000 BTU/h |
| വാല്യംtage | 216.67 വി |
| ഊർജ്ജ സ്രോതസ്സ് | കോർഡഡ് ഇലക്ട്രിക് |
| ഊർജ്ജ കാര്യക്ഷമത റേറ്റിംഗ് | A |
| പ്രത്യേക സവിശേഷതകൾ | Automatic shutdown, Cooling, Dehumidification, Fan, Heating, Air filter |
| ആദ്യം ലഭ്യമായ തീയതി | 15 ജനുവരി 2020 |
9. വാറൻ്റിയും പിന്തുണയും
9.1 വാറൻ്റി വിവരങ്ങൾ
The ARGO Iro Plus portable air conditioner comes with a 2-year supplier warranty വാങ്ങിയ തീയതി മുതൽ. സാധാരണ ഉപയോഗത്തിലുള്ള മെറ്റീരിയലുകളിലെയും ജോലികളിലെയും വൈകല്യങ്ങൾ ഈ വാറന്റി ഉൾക്കൊള്ളുന്നു. വാറന്റി ക്ലെയിമുകൾക്കായി നിങ്ങളുടെ വാങ്ങിയതിന്റെ തെളിവ് സൂക്ഷിക്കുക.
ഇനിപ്പറയുന്ന കാരണങ്ങളാൽ ഉണ്ടാകുന്ന നാശനഷ്ടങ്ങൾ വാറന്റി കവർ ചെയ്യുന്നില്ല:
- അനുചിതമായ ഇൻസ്റ്റാളേഷൻ അല്ലെങ്കിൽ ഈ മാനുവൽ അനുസരിച്ചല്ലാത്ത ഉപയോഗം.
- Accidents, abuse, neglect, fire, water, lightning, or other acts of nature.
- അനധികൃത അറ്റകുറ്റപ്പണികൾ അല്ലെങ്കിൽ പരിഷ്കാരങ്ങൾ.
- സാധാരണ തേയ്മാനം.
9.2 ഉപഭോക്തൃ പിന്തുണ
For technical assistance, troubleshooting beyond this manual, or warranty claims, please contact ARGO customer support through their official website or the retailer where you purchased the product. Have your model number (IRO PLUS) and purchase date ready.


