1. ആമുഖം
This manual provides comprehensive instructions for the installation, operation, and maintenance of the Hikvision HWT-T323-Z Hiwatch Series 2MP 1080p 4-in-1 Motozoom Dome Camera. Please read this manual carefully before use to ensure proper functionality, prevent damage, and maximize the lifespan of your device. Keep this manual for future reference.
2 സുരക്ഷാ വിവരങ്ങൾ
- Always ensure the power supply is disconnected before performing any installation, maintenance, or cleaning procedures.
- Use only the specified power adapter (DC12V) to avoid damage to the camera.
- Do not attempt to disassemble, modify, or repair the camera yourself. Refer all servicing to qualified personnel.
- Install the camera in a stable location to prevent it from falling.
- Avoid pointing the camera directly at strong light sources, as this may affect image quality and potentially damage the sensor.
- ക്യാമറ അമിതമായി ചൂടാകുന്നത് തടയാൻ ചുറ്റും ശരിയായ വായുസഞ്ചാരം ഉറപ്പാക്കുക.
3. പാക്കേജ് ഉള്ളടക്കം
നിങ്ങളുടെ പാക്കേജിൽ എല്ലാ ഇനങ്ങളും ഉണ്ടെന്ന് ഉറപ്പാക്കുക:
- 1 x Hikvision HWT-T323-Z Dome Camera
- മൗണ്ടിംഗ് ഹാർഡ്വെയർ (സ്ക്രൂകൾ, വാൾ പ്ലഗുകൾ)
- ദ്രുത ആരംഭ ഗൈഡ് (പ്രദേശത്തിനനുസരിച്ച് വ്യത്യാസപ്പെടാം)
ഏതെങ്കിലും ഇനങ്ങൾ നഷ്ടപ്പെട്ടാലോ കേടുപാടുകൾ സംഭവിച്ചാലോ, ഉടൻ തന്നെ നിങ്ങളുടെ വിൽപ്പനക്കാരനെ ബന്ധപ്പെടുക.
4. ഉൽപ്പന്നം കഴിഞ്ഞുview
The Hikvision HWT-T323-Z is a versatile 2MP 1080p dome camera designed for both indoor and outdoor surveillance. It features a 4-in-1 hybrid technology, supporting TVI, AHD, CVI, and CVBS video outputs, making it compatible with various DVR systems. The camera is equipped with a 2.8~13.5mm motorized varifocal lens, allowing for flexible adjustment of the viewing angle. Its IP66 rating ensures resistance against dust and water, suitable for outdoor environments. Advanced features like EXIR 2.0 Smart IR provide clear night vision up to 70 meters.
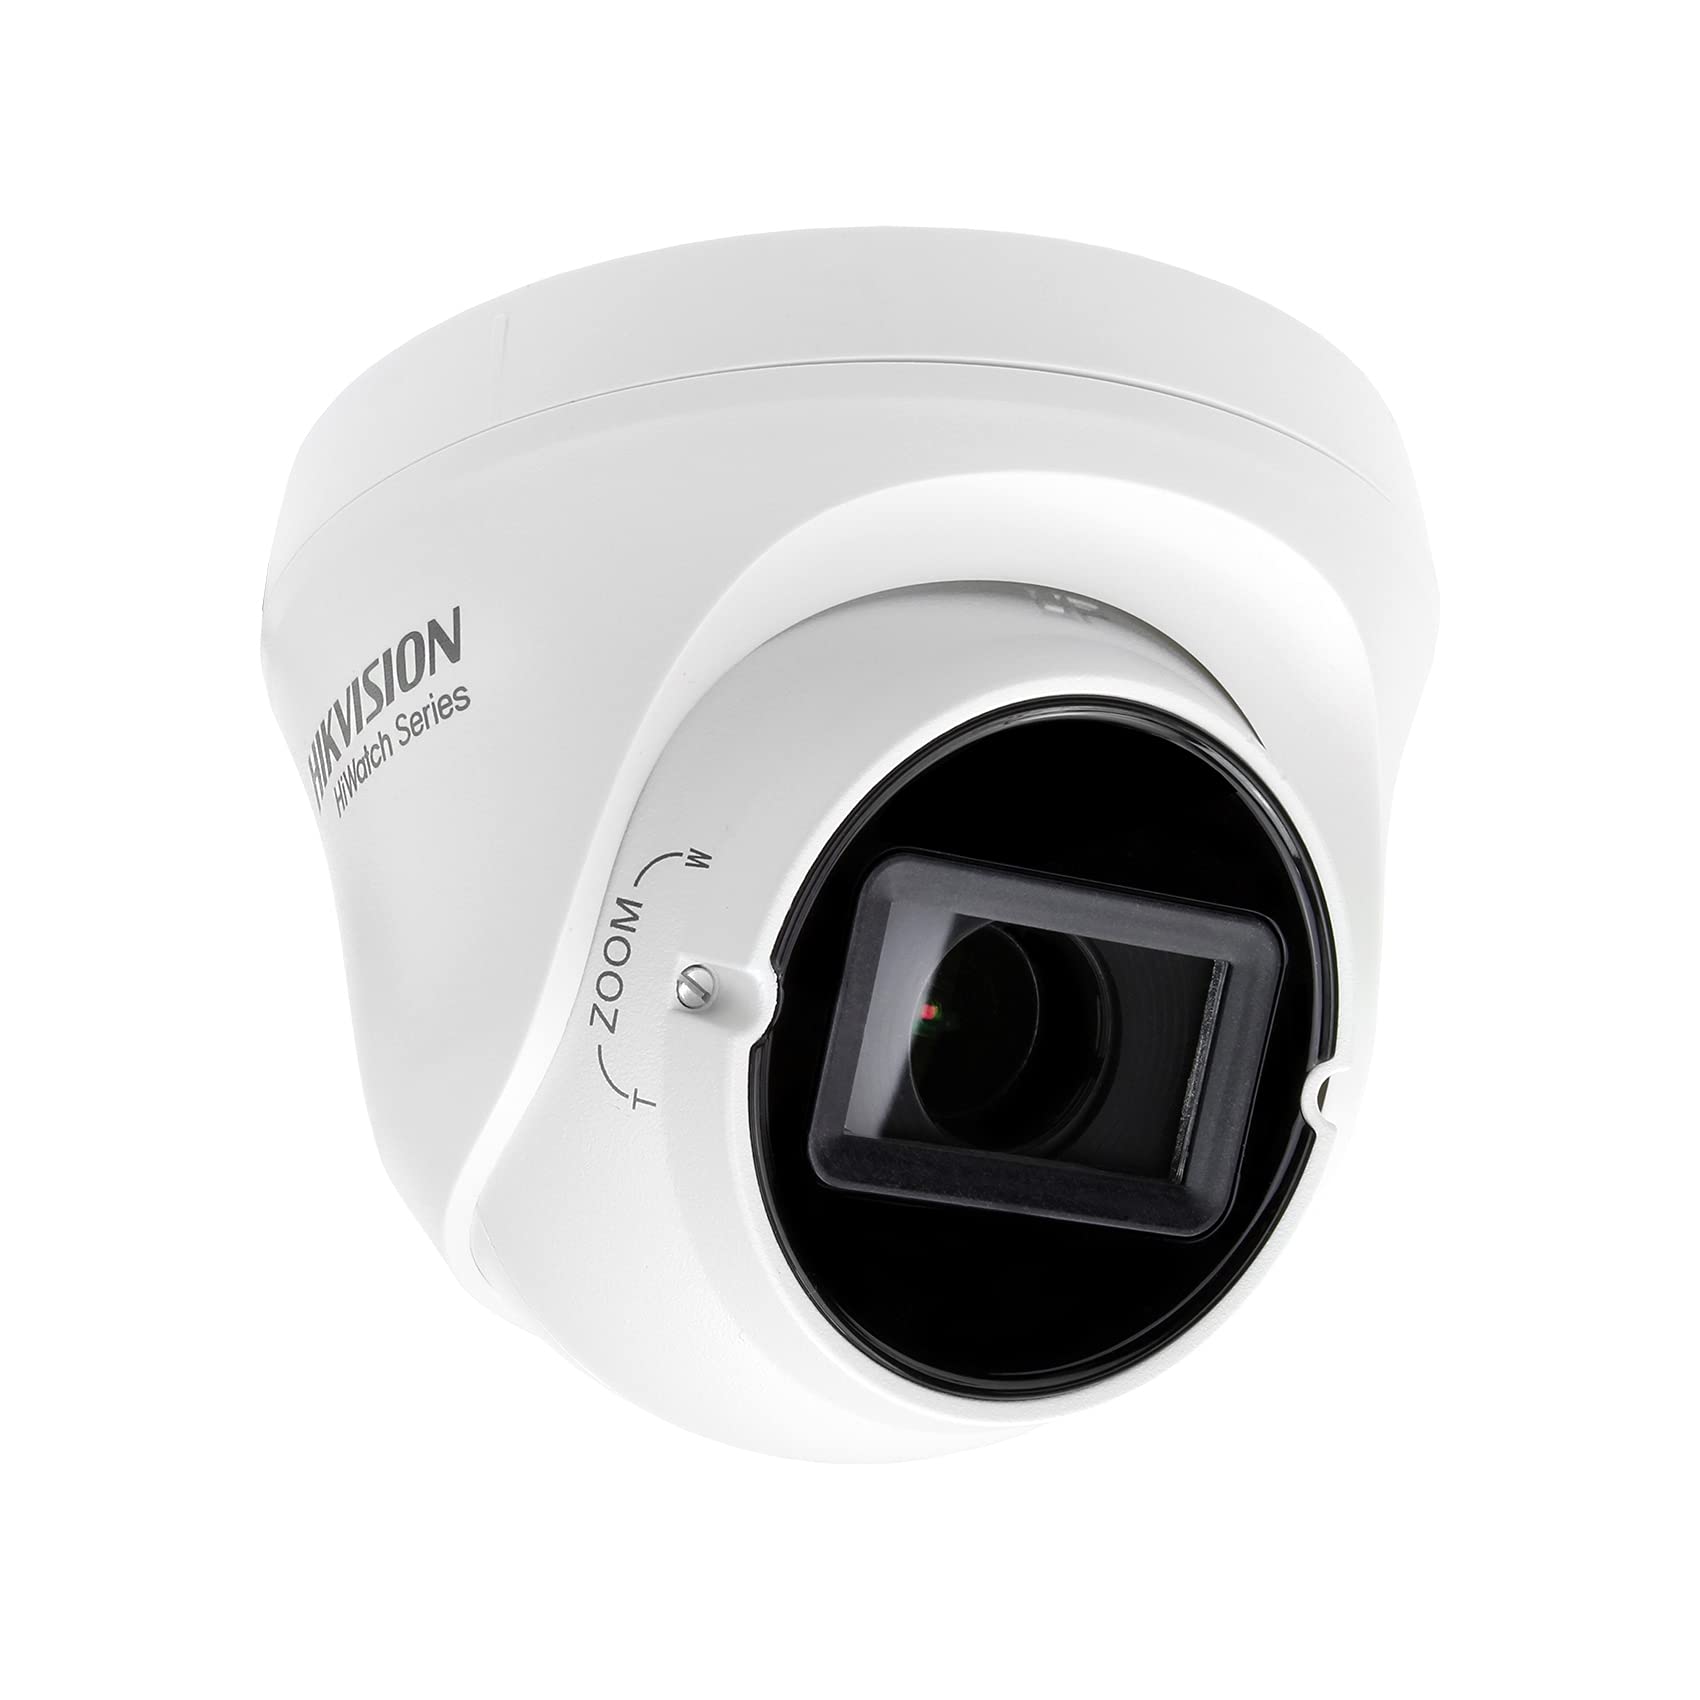
ചിത്രം 4.1: മുൻഭാഗം view of the Hikvision HWT-T323-Z dome camera, showing the lens and 'Hikvision HiWatch Series' branding.

ചിത്രം 4.2: കോണാകൃതിയിലുള്ളത് view of the Hikvision HWT-T323-Z dome camera, highlighting the adjustable focus mechanism.
5. സജ്ജീകരണം
5.1 ക്യാമറ മൗണ്ടിംഗ്
The dome camera can be mounted on a ceiling or wall. Ensure the mounting surface is strong enough to support the camera's weight.
- മൗണ്ടിംഗ് ഉപരിതലം തയ്യാറാക്കുക: Drill pilot holes according to the camera's base plate.
- അടിസ്ഥാനം സുരക്ഷിതമാക്കുക: Use the provided screws and wall plugs to firmly attach the camera base to the mounting surface.
- റൂട്ട് കേബിളുകൾ: Pass the necessary cables (power and video) through the cable entry point on the camera base.
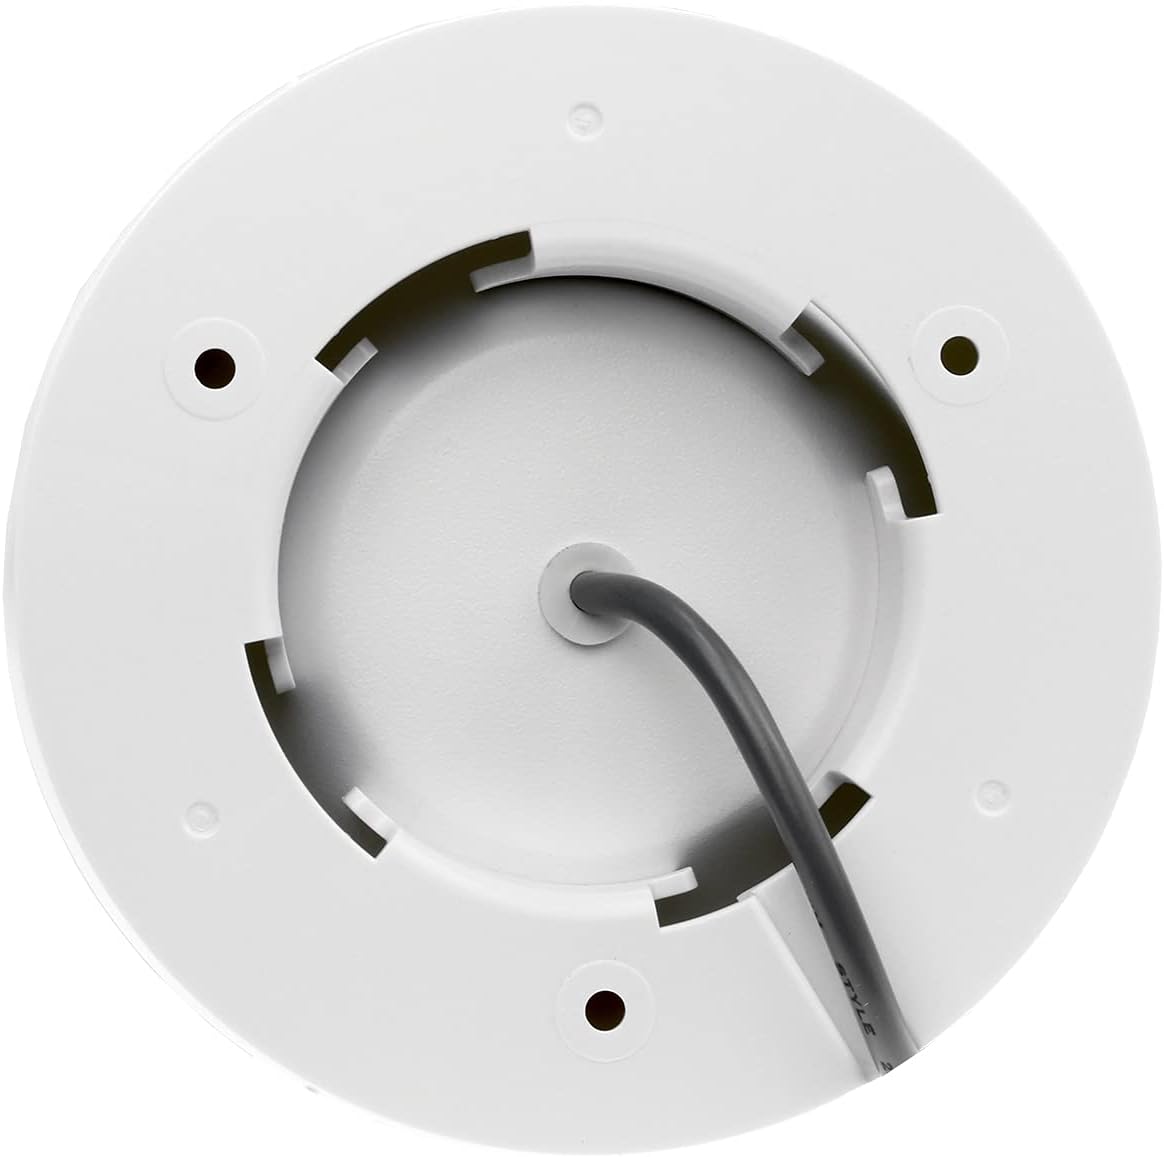
ചിത്രം 5.1: താഴെ view of the Hikvision HWT-T323-Z dome camera, revealing the cable entry point and mounting holes for installation.
5.2 വയറിംഗ് കണക്ഷനുകൾ
Connect the camera to your power supply and video recorder (DVR).
- പവർ കണക്ഷൻ: Connect a DC12V power adapter to the camera's power input.
- വീഡിയോ ഔട്ട്പുട്ട്: Connect the video output cable from the camera to the corresponding input on your DVR.
5.3 Video Output Switching
The camera supports 4-in-1 video output (TVI/AHD/CVI/CVBS). To switch between these formats:
- Locate the small button on the camera's cable or near the video output port.
- Press and hold this button for approximately 5 seconds. The video output format will cycle through TVI, AHD, CVI, and CVBS. Release the button when the desired format is displayed on your monitor.
6. പ്രവർത്തന നിർദ്ദേശങ്ങൾ
6.1 OSD മെനു നാവിഗേഷൻ
The On-Screen Display (OSD) menu allows you to configure various camera settings. Access the OSD menu via your DVR's PTZ control interface (Coaxitron/UTC protocol).
- Use the directional controls (Up/Down/Left/Right) to navigate through the menu options.
- Use the Enter/Iris+ button to select an option or confirm a setting.
6.2 Motozoom Lens Adjustment
The camera features a motorized varifocal lens (2.8~13.5mm) for remote adjustment of zoom and focus.
- Access the OSD menu and navigate to the 'Lens' or 'Zoom/Focus' section.
- Use the controls to adjust the zoom level (wide to telephoto) and focus for a clear image.
6.3 ഇമേജ് ക്രമീകരണങ്ങൾ
Adjust the following settings in the OSD menu for optimal image quality:
- ATW/AWB (Auto White Balance): Adjusts color temperature for accurate color reproduction.
- AGC (ഓട്ടോ ഗെയിൻ കൺട്രോൾ): Boosts signal in low light, but may increase noise.
- ബിഎൽസി (ബാക്ക്ലൈറ്റ് കോമ്പൻസേഷൻ): Improves visibility of objects in strong backlight.
- Real WDR 120 dB (Wide Dynamic Range): Balances very bright and very dark areas in the same scene.
- 3D-DNR (3D Digital Noise Reduction): Reduces image noise, especially in low light.
- Brightness/Clarity: Fine-tune overall image luminance and sharpness.
- കണ്ണാടി: ചിത്രം തിരശ്ചീനമായി ഫ്ലിപ്പുചെയ്യുന്നു.
6.4 നൈറ്റ് വിഷൻ
The camera features EXIR 2.0 Smart IR technology for enhanced night vision up to 70 meters. The Smart IR function automatically adjusts the intensity of the infrared LEDs to prevent overexposure of objects closer to the camera.
7. പരിപാലനം
- വൃത്തിയാക്കൽ: Regularly clean the camera lens and housing with a soft, dry cloth. For stubborn dirt, use a mild detergent solution applied to the cloth, then wipe dry. Do not use strong chemicals or abrasive cleaners.
- ഫേംവെയർ അപ്ഡേറ്റുകൾ: ഇടയ്ക്കിടെ ഹൈക്വിഷൻ ഉദ്യോഗസ്ഥനെ പരിശോധിക്കുക website for available firmware updates to ensure optimal performance and security. Follow the provided instructions carefully for any updates.
- കേബിൾ പരിശോധന: Periodically inspect all cables for signs of wear, damage, or corrosion. Replace damaged cables immediately.
8. പ്രശ്നപരിഹാരം
| പ്രശ്നം | സാധ്യമായ കാരണം | പരിഹാരം |
|---|---|---|
| മോണിറ്ററിൽ ചിത്രമില്ല | No power; Incorrect video format; Loose cable connection | Check power supply; Verify video format (TVI/AHD/CVI/CVBS) matches DVR; Secure all cable connections. |
| Poor image quality (blurry, dark, noisy) | Lens out of focus; Dirty lens; Insufficient lighting; Incorrect OSD settings | Adjust motozoom focus; Clean the lens; Ensure adequate lighting or enable IR; Adjust OSD settings (WDR, DNR, Brightness). |
| IR not working or overexposed night image | IR sensor blocked; Smart IR setting incorrect | Ensure nothing obstructs the IR LEDs; Check Smart IR settings in OSD menu. |
9 സ്പെസിഫിക്കേഷനുകൾ
| ഫീച്ചർ | സ്പെസിഫിക്കേഷൻ |
|---|---|
| മോഡൽ | HWT-T323-Z |
| ഇമേജ് സെൻസർ | 2 Mpx high-performance CMOS |
| റെസലൂഷൻ | 1080p ഫുൾ എച്ച്ഡി (1920 x 1080) |
| ലെൻസ് | 2.8 ~ 13.5 mm motorized varifocal lens |
| വീഡിയോ ഔട്ട്പുട്ട് | 4-in-1 (TVI/AHD/CVI/CVBS switchable) |
| ഐആർ ശ്രേണി | Up to 70 m (EXIR 2.0, Smart IR) |
| OSD മെനു | Supported (ATW, AWB, AGC, BLC, Real WDR 120 dB, 3D-DNR, Brightness, Clarity, Mirror) |
| കാലാവസ്ഥ പ്രതിരോധം | IP66 |
| വൈദ്യുതി വിതരണം | DC12V |
| വൈദ്യുതി ഉപഭോഗം | 4 വാട്ട്സ് |
| മെറ്റീരിയൽ | ലോഹം |
| അളവുകൾ (L x W x H) | 12 x 12 x 10 സെ.മീ |
| ഭാരം | 5 കിലോഗ്രാം |
10. വാറൻ്റിയും പിന്തുണയും
For warranty information, please refer to the terms and conditions provided at the time of purchase or contact your vendor. For technical support, product inquiries, or service requests, please contact your authorized Hikvision dealer or visit the official Hikvision support webസൈറ്റ്.


