1. ആമുഖം
നിങ്ങളുടെ കമ്പ്യൂട്ടറിന്റെ കണക്റ്റിവിറ്റി വികസിപ്പിക്കുന്നതിനാണ് അറ്റോള അലൂമിനിയം 5-പോർട്ട് യുഎസ്ബി 3.0 ഹബ് രൂപകൽപ്പന ചെയ്തിരിക്കുന്നത്, ഇത് നാല് ഹൈ-സ്പീഡ് യുഎസ്ബി 3.0 ഡാറ്റ പോർട്ടുകളും ഒരു സമർപ്പിത യുഎസ്ബി സ്മാർട്ട് ചാർജിംഗ് പോർട്ടും നൽകുന്നു. കാര്യക്ഷമമായ പവർ മാനേജ്മെന്റിനും ഉപകരണ നിയന്ത്രണത്തിനും അനുവദിക്കുന്ന ഓരോ പോർട്ടിനും വ്യക്തിഗത പവർ സ്വിച്ചുകൾ ഈ ഹബ്ബിൽ ഉണ്ട്. ഇതിന്റെ അലുമിനിയം അലോയ് നിർമ്മാണം ഈടുനിൽക്കുന്നതും വിവിധ പരിതസ്ഥിതികൾക്ക് അനുയോജ്യമായ ഒരു മിനുസമാർന്ന രൂപകൽപ്പനയും ഉറപ്പാക്കുന്നു.
പ്രധാന സവിശേഷതകൾ:
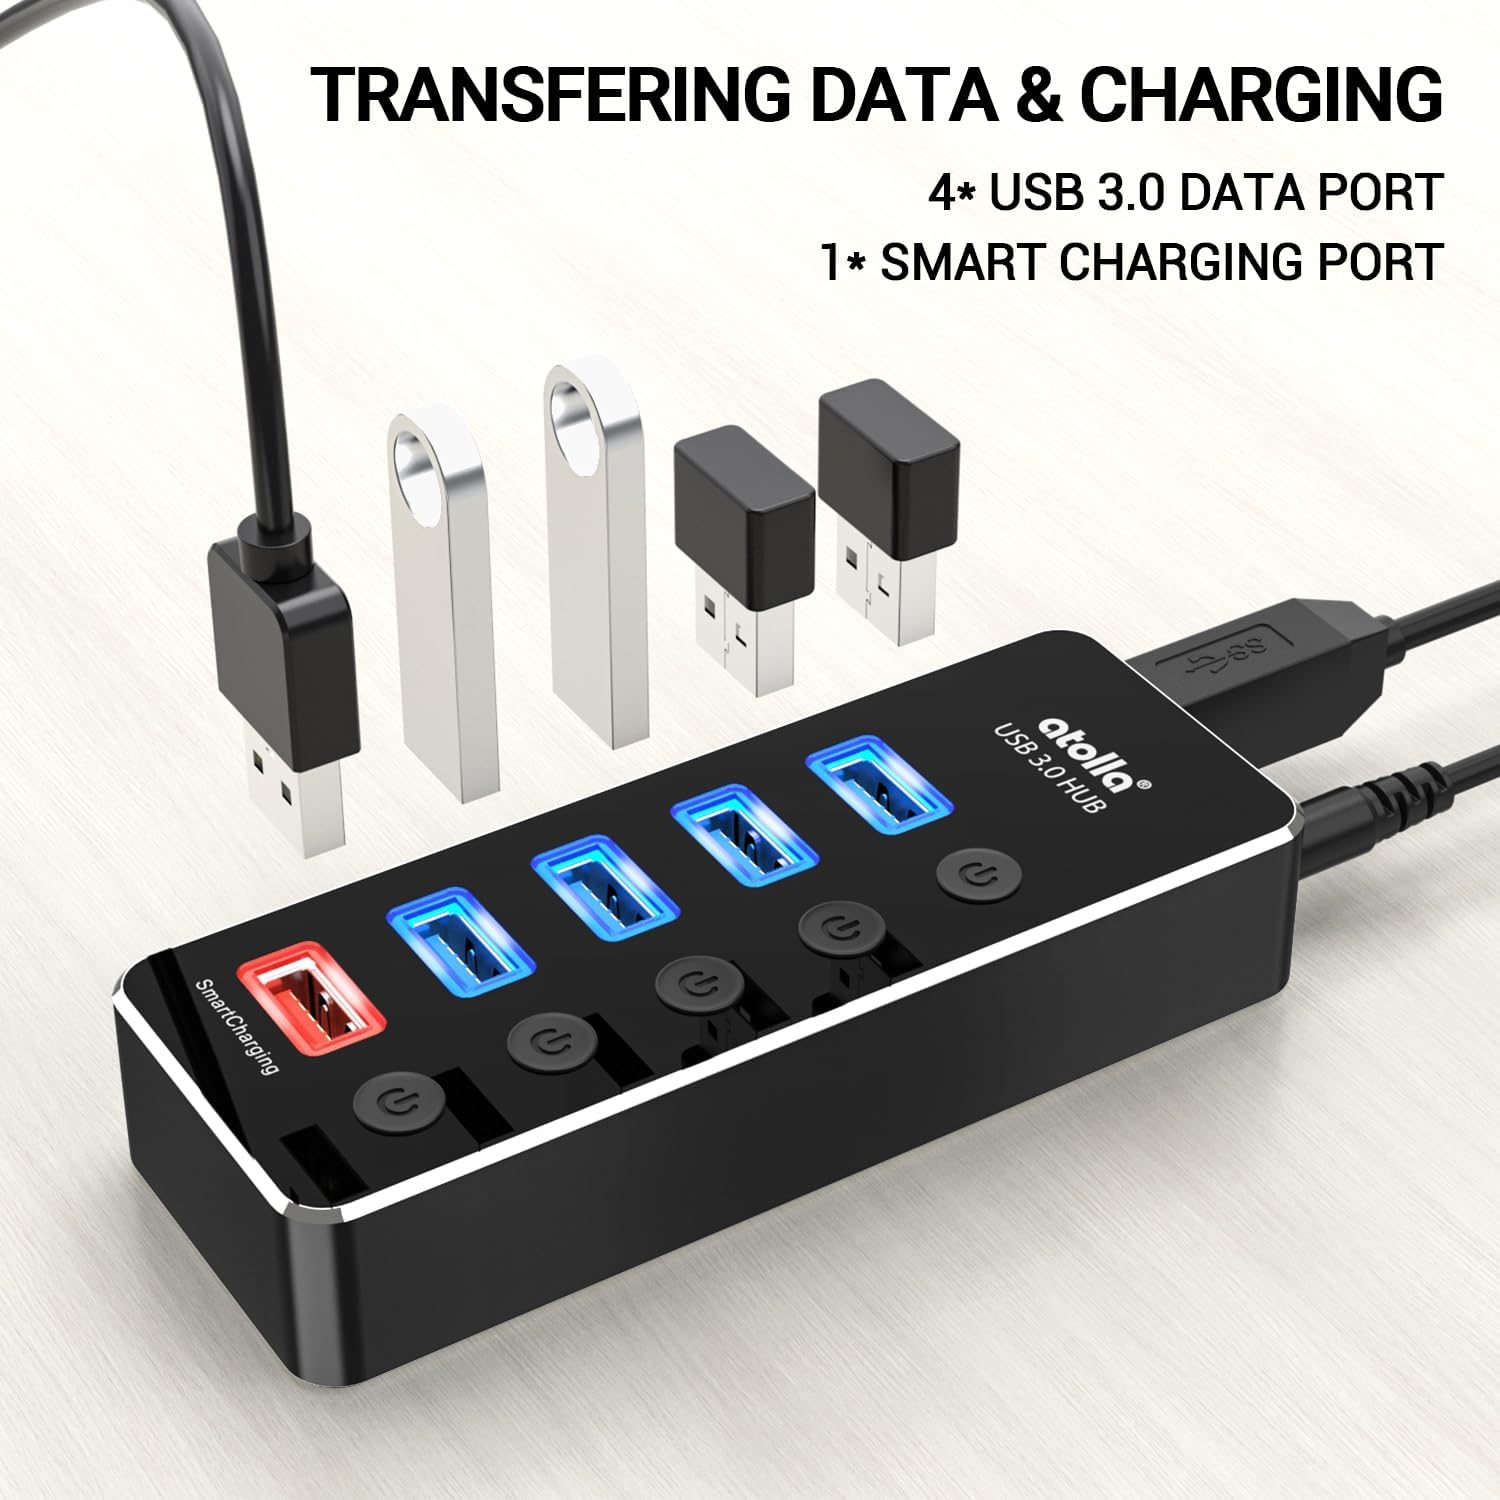
- 4 USB 3.0 ഡാറ്റ പോർട്ടുകൾ: 5Gbps വരെ ഡാറ്റാ ട്രാൻസ്ഫർ വേഗത വാഗ്ദാനം ചെയ്യുന്നു, USB 2.0 ഉപകരണങ്ങളുമായി പിന്നിലേക്ക് പൊരുത്തപ്പെടുന്നു.
- 1 യുഎസ്ബി സ്മാർട്ട് ചാർജിംഗ് പോർട്ട്: 2.4 വരെ വിതരണം ചെയ്യുന്നു Ampസ്മാർട്ട്ഫോണുകൾ, ടാബ്ലെറ്റുകൾ, മറ്റ് യുഎസ്ബി ഉപകരണങ്ങൾ എന്നിവ ചാർജ് ചെയ്യുന്നതിനുള്ള കൾ.
- LED ഉള്ള വ്യക്തിഗത സ്വിച്ചുകൾ: ഓരോ പോർട്ടിലും സ്റ്റാറ്റസിനായി ഒരു LED ഇൻഡിക്കേറ്ററുള്ള ഒരു സ്വതന്ത്ര ഓൺ/ഓഫ് സ്വിച്ച് ഉണ്ട്.
- പ്ലഗ് ആൻഡ് പ്ലേ: മിക്ക ഓപ്പറേറ്റിംഗ് സിസ്റ്റങ്ങൾക്കും ഡ്രൈവർ ഇൻസ്റ്റാളേഷൻ ആവശ്യമില്ല.
- വിശാലമായ അനുയോജ്യത: വിൻഡോസ്, മാക് ഒഎസ് എക്സ്, ലിനക്സ് ഓപ്പറേറ്റിംഗ് സിസ്റ്റങ്ങളെ പിന്തുണയ്ക്കുന്നു.

2. സജ്ജീകരണ നിർദ്ദേശങ്ങൾ
നിങ്ങളുടെ atolla USB 3.0 ഹബ് സജ്ജീകരിക്കാൻ ഈ ഘട്ടങ്ങൾ പാലിക്കുക:
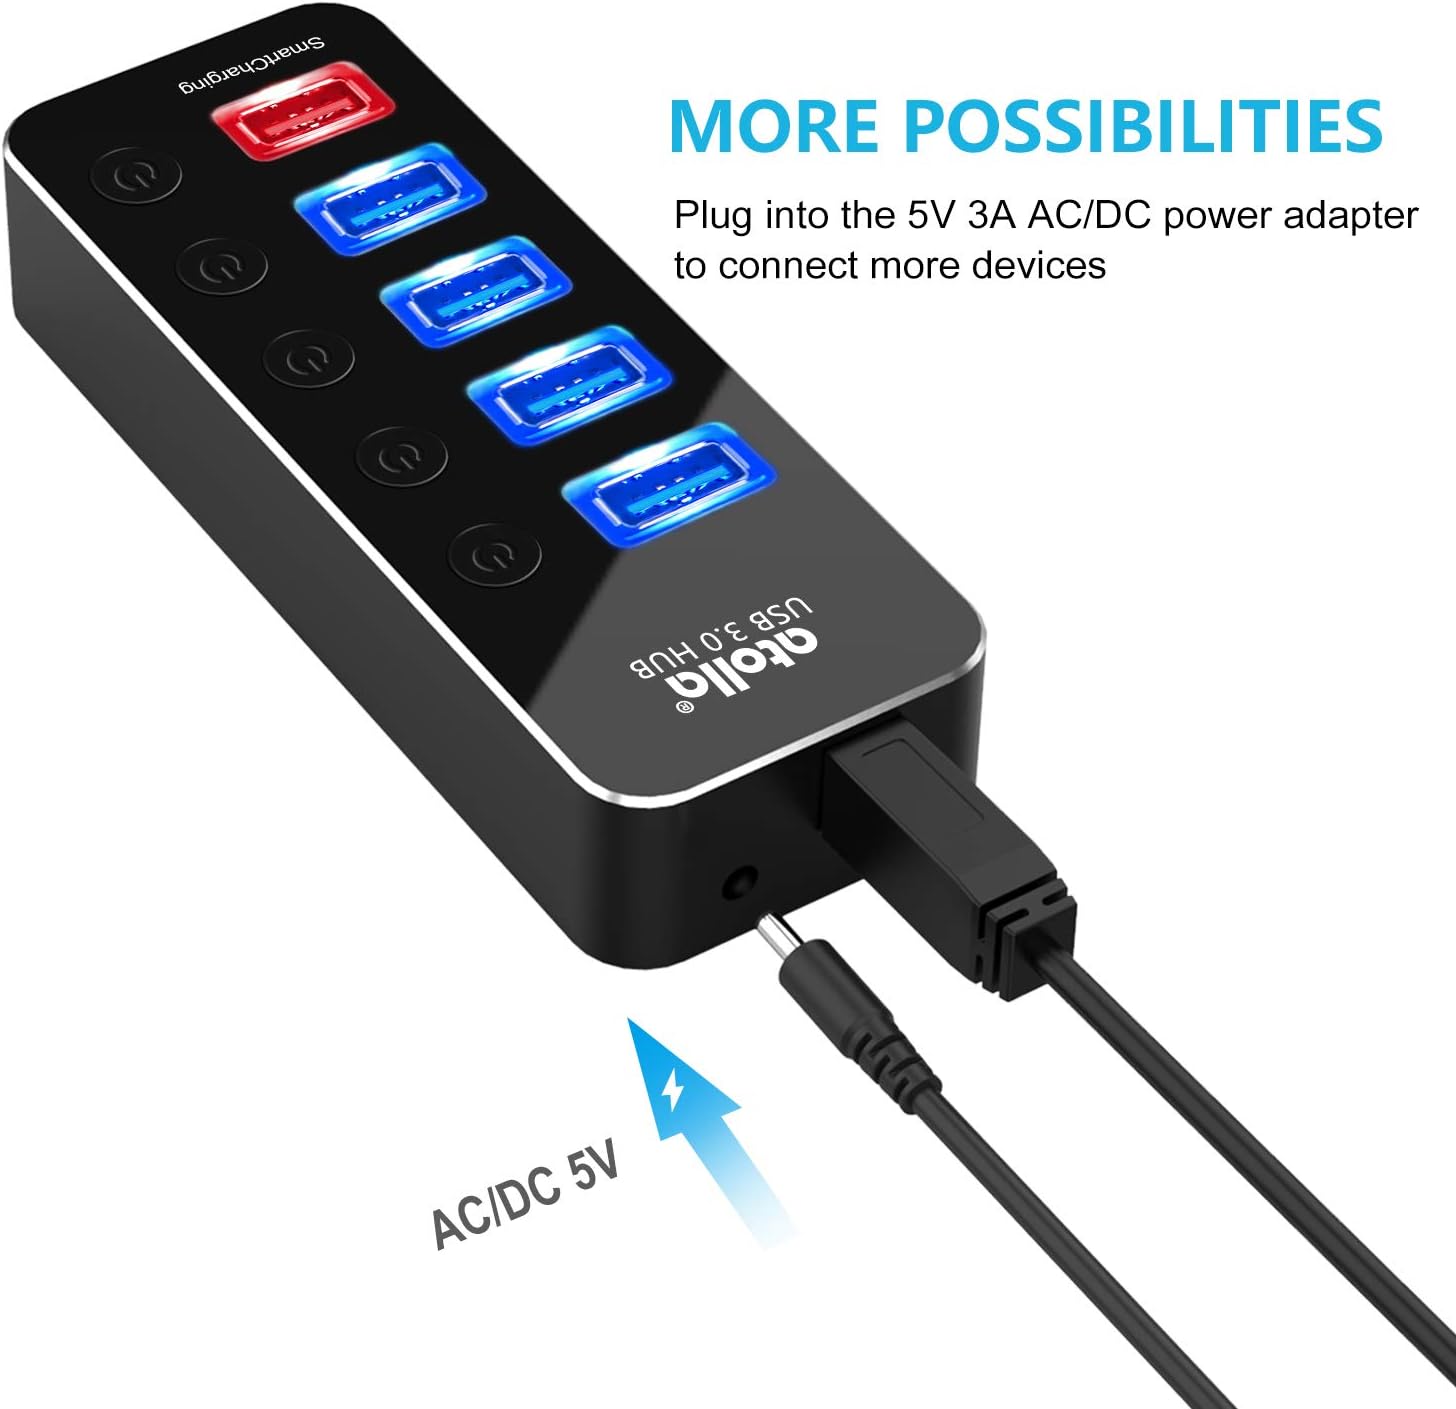
- പവർ അഡാപ്റ്റർ ബന്ധിപ്പിക്കുക: നൽകിയിരിക്കുന്ന 5V/3A പവർ അഡാപ്റ്ററിന്റെ DC പ്ലഗ് അറ്റോള USB ഹബിലെ പവർ ഇൻപുട്ട് പോർട്ടിലേക്ക് തിരുകുക. പവർ അഡാപ്റ്റർ ഒരു വാൾ ഔട്ട്ലെറ്റിലേക്ക് പ്ലഗ് ചെയ്യുക. സ്ഥിരതയുള്ള പ്രവർത്തനത്തിന് ഈ ഘട്ടം നിർണായകമാണ്, പ്രത്യേകിച്ച് ഒന്നിലധികം ഉപകരണങ്ങൾ ബന്ധിപ്പിക്കുമ്പോഴോ സ്മാർട്ട് ചാർജിംഗ് പോർട്ട് ഉപയോഗിക്കുമ്പോഴോ.
- കമ്പ്യൂട്ടറുമായി ബന്ധിപ്പിക്കുക: നിങ്ങളുടെ കമ്പ്യൂട്ടറിലെ ലഭ്യമായ ഒരു USB 3.0 പോർട്ടിലേക്ക് atolla USB ഹബ് ബന്ധിപ്പിക്കുന്നതിന് ഉൾപ്പെടുത്തിയിരിക്കുന്ന USB കോർഡ് ഉപയോഗിക്കുക. ഹബ് പ്ലഗ്-ആൻഡ്-പ്ലേ ആണ്, അതിനാൽ നിങ്ങളുടെ ഓപ്പറേറ്റിംഗ് സിസ്റ്റം ആവശ്യമായ ഡ്രൈവറുകൾ സ്വയമേവ കണ്ടെത്തി ഇൻസ്റ്റാൾ ചെയ്യണം.
- USB ഉപകരണങ്ങൾ ബന്ധിപ്പിക്കുക: നിങ്ങളുടെ USB ഉപകരണങ്ങൾ (ഉദാ: ബാഹ്യ ഹാർഡ് ഡ്രൈവുകൾ, കീബോർഡുകൾ, മൗസുകൾ, ഫ്ലാഷ് ഡ്രൈവുകൾ) ഹബ്ബിലെ നീല USB 3.0 ഡാറ്റ പോർട്ടുകളിലേക്ക് പ്ലഗ് ചെയ്യുക. മൊബൈൽ ഉപകരണങ്ങൾ ചാർജ് ചെയ്യുന്നതിന്, ചുവന്ന സ്മാർട്ട് ചാർജിംഗ് പോർട്ട് ഉപയോഗിക്കുക.
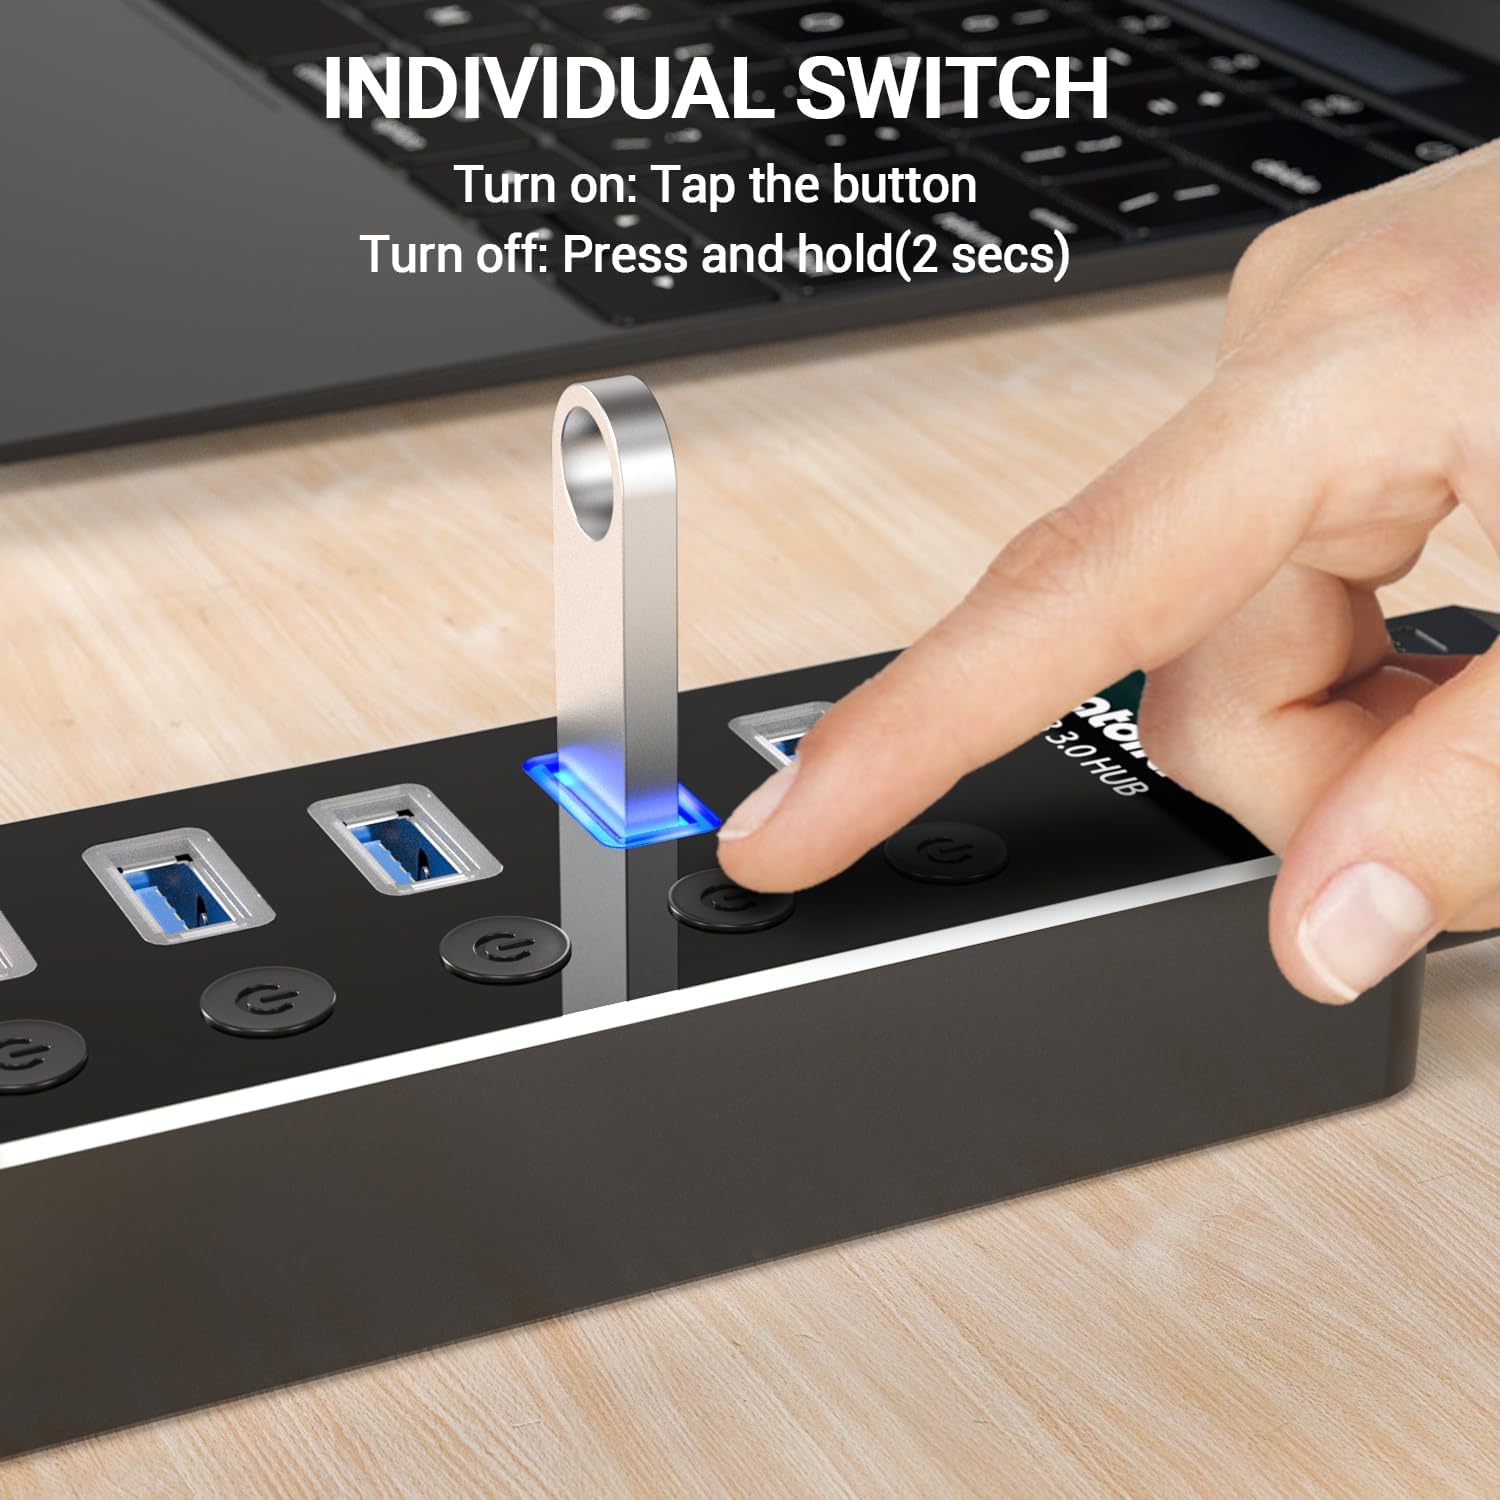
- പോർട്ടുകൾ സജീവമാക്കുക: ഓരോ ഡാറ്റ പോർട്ടിനും ഒരു വ്യക്തിഗത പവർ സ്വിച്ച് ഉണ്ട്. അത് ഓണാക്കാൻ ആവശ്യമുള്ള പോർട്ടിന് അടുത്തുള്ള ബട്ടൺ ടാപ്പുചെയ്യുക. പോർട്ടിന് മുകളിലുള്ള നീല LED ഇൻഡിക്കേറ്റർ പ്രകാശിക്കും, ഇത് പോർട്ട് സജീവമാണെന്ന് സൂചിപ്പിക്കുന്നു.
3. പ്രവർത്തന നിർദ്ദേശങ്ങൾ
എളുപ്പത്തിൽ ഉപയോഗിക്കാവുന്ന തരത്തിലാണ് അറ്റോള യുഎസ്ബി ഹബ് രൂപകൽപ്പന ചെയ്തിരിക്കുന്നത്. അതിന്റെ വിവിധ പ്രവർത്തനങ്ങൾ എങ്ങനെ പ്രവർത്തിപ്പിക്കാമെന്ന് ഇതാ:
3.1. USB 3.0 ഡാറ്റ പോർട്ടുകൾ ഉപയോഗിക്കുന്നു
നാല് നീല USB 3.0 പോർട്ടുകൾ 5Gbps വരെ അതിവേഗ ഡാറ്റാ കൈമാറ്റത്തെ പിന്തുണയ്ക്കുന്നു. ഒപ്റ്റിമൽ പ്രകടനത്തിനായി നിങ്ങളുടെ USB 3.0 അനുയോജ്യമായ ഉപകരണങ്ങൾ ബന്ധിപ്പിക്കുക. ഡാറ്റാ കൈമാറ്റ വേഗത USB 2.0 സ്പെസിഫിക്കേഷനുകളിലേക്ക് പരിമിതപ്പെടുത്തിയിരിക്കുമെങ്കിലും, ഈ പോർട്ടുകൾ USB 2.0 ഉപകരണങ്ങളുമായി ബാക്ക്വേർഡ് കോംപാറ്റിബിൾ ആണ്.

3.2. സ്മാർട്ട് ചാർജിംഗ് പോർട്ട് ഉപയോഗിക്കൽ
"സ്മാർട്ട്ചാർജിംഗ്" എന്ന് ലേബൽ ചെയ്തിരിക്കുന്ന ചുവന്ന പോർട്ട് ഒരു സമർപ്പിത ചാർജിംഗ് പോർട്ടാണ്. ഇത് 2.4 വരെ ചാർജ് നൽകുന്നു Ampസ്മാർട്ട്ഫോണുകൾ, ടാബ്ലെറ്റുകൾ, മറ്റ് യുഎസ്ബി ഉപകരണങ്ങൾ എന്നിവ വേഗത്തിൽ ചാർജ് ചെയ്യുന്നതിന് അനുയോജ്യമാണ്. ആൻഡ്രോയിഡ്, ആപ്പിൾ, സാംസങ് ഉപകരണങ്ങൾ ഉൾപ്പെടെ വിവിധ ഉപകരണ തരങ്ങളിലുടനീളം കാര്യക്ഷമമായ ചാർജിംഗിനായി ഈ പോർട്ട് ഒപ്റ്റിമൈസ് ചെയ്തിരിക്കുന്നു.
3.3. വ്യക്തിഗത പോർട്ട് സ്വിച്ചുകൾ
ഓരോ USB ഡാറ്റ പോർട്ടിലും ഒരു വ്യക്തിഗത ഓൺ/ഓഫ് സ്വിച്ച് ഉണ്ട്. ഇത് പ്രത്യേക ഉപകരണങ്ങളുടെ പവർ അൺപ്ലഗ് ചെയ്യാതെ തന്നെ നിയന്ത്രിക്കാൻ നിങ്ങളെ അനുവദിക്കുന്നു. ഒരു പോർട്ട് ഓണാക്കാൻ, അതിന്റെ അനുബന്ധ ബട്ടൺ ടാപ്പ് ചെയ്യുക. നീല LED പ്രകാശിക്കും. ഒരു പോർട്ട് ഓഫാക്കാൻ, LED ഓഫാകുന്നതുവരെ ഏകദേശം 2 സെക്കൻഡ് ബട്ടൺ അമർത്തിപ്പിടിക്കുക. ഈ സവിശേഷത വൈദ്യുതി ലാഭിക്കാനും കണക്റ്റുചെയ്ത ഉപകരണങ്ങൾ കാര്യക്ഷമമായി കൈകാര്യം ചെയ്യാനും സഹായിക്കുന്നു.

4. പരിപാലനം
നിങ്ങളുടെ അറ്റോള യുഎസ്ബി ഹബ്ബിന്റെ ദീർഘായുസ്സും ഒപ്റ്റിമൽ പ്രകടനവും ഉറപ്പാക്കാൻ, ഈ പരിപാലന മാർഗ്ഗനിർദ്ദേശങ്ങൾ പാലിക്കുക:
- വൃത്തിയാക്കൽ: ഹബ്ബിന്റെ പുറംഭാഗം വൃത്തിയാക്കാൻ മൃദുവായതും ഉണങ്ങിയതുമായ തുണി ഉപയോഗിക്കുക. ലിക്വിഡ് ക്ലീനറുകൾ, എയറോസോളുകൾ അല്ലെങ്കിൽ ലായകങ്ങൾ ഉപയോഗിക്കുന്നത് ഒഴിവാക്കുക, കാരണം ഇവ ഫിനിഷിനോ ആന്തരിക ഘടകങ്ങൾക്കോ കേടുവരുത്തിയേക്കാം.
- സംഭരണം: ഉപയോഗത്തിലില്ലാത്തപ്പോൾ, നേരിട്ടുള്ള സൂര്യപ്രകാശത്തിൽ നിന്നും കടുത്ത താപനിലയിൽ നിന്നും മാറി തണുത്തതും വരണ്ടതുമായ സ്ഥലത്ത് ഹബ് സൂക്ഷിക്കുക.
- കൈകാര്യം ചെയ്യൽ: ഹബ് താഴെയിടുകയോ ശക്തമായ ആഘാതങ്ങൾക്ക് വിധേയമാക്കുകയോ ചെയ്യുന്നത് ഒഴിവാക്കുക. യൂണിറ്റ് ഡിസ്അസംബ്ലിംഗ് ചെയ്യാൻ ശ്രമിക്കരുത്, കാരണം ഇത് വാറന്റി അസാധുവാക്കും.
- വെൻ്റിലേഷൻ: അമിതമായി ചൂടാകുന്നത് തടയാൻ, പ്രത്യേകിച്ച് ഒന്നിലധികം ഉപകരണങ്ങൾ ഉപയോഗിച്ച് ദീർഘനേരം ഉപയോഗിക്കുമ്പോൾ, മതിയായ വായുസഞ്ചാരമുള്ള സ്ഥലത്ത് ഹബ് സ്ഥാപിച്ചിട്ടുണ്ടെന്ന് ഉറപ്പാക്കുക.
5. പ്രശ്നപരിഹാരം
നിങ്ങളുടെ അറ്റോള യുഎസ്ബി ഹബ്ബിൽ പ്രശ്നങ്ങൾ നേരിടുകയാണെങ്കിൽ, ഇനിപ്പറയുന്ന ട്രബിൾഷൂട്ടിംഗ് ഘട്ടങ്ങൾ പരിശോധിക്കുക:
- ഉപകരണം തിരിച്ചറിഞ്ഞിട്ടില്ല:
- നിങ്ങളുടെ കമ്പ്യൂട്ടറിന്റെ USB പോർട്ടിലേക്ക് ഹബ് ശരിയായി ബന്ധിപ്പിച്ചിട്ടുണ്ടെന്ന് ഉറപ്പാക്കുക.
- ബന്ധിപ്പിച്ച പോർട്ടിനായുള്ള വ്യക്തിഗത സ്വിച്ച് ഓണാക്കിയിട്ടുണ്ടോയെന്ന് പരിശോധിക്കുക (LED നീലയായിരിക്കണം).
- ഉപകരണം സ്വതന്ത്രമായി പ്രവർത്തിക്കുന്നുവെന്ന് ഉറപ്പാക്കാൻ അത് നിങ്ങളുടെ കമ്പ്യൂട്ടറിലേക്ക് നേരിട്ട് ബന്ധിപ്പിക്കാൻ ശ്രമിക്കുക.
- നിങ്ങളുടെ കമ്പ്യൂട്ടർ പുനരാരംഭിച്ച് ഹബ് വീണ്ടും ബന്ധിപ്പിക്കുക.
- പവർ അഡാപ്റ്റർ ബന്ധിപ്പിച്ചിട്ടുണ്ടെന്നും ഹബ്ബിലേക്ക് വൈദ്യുതി നൽകുന്നുണ്ടെന്നും ഉറപ്പാക്കുക. ചില ഉപകരണങ്ങൾക്ക് കമ്പ്യൂട്ടറിന്റെ USB പോർട്ട് വഴി മാത്രം നൽകുന്നതിനേക്കാൾ കൂടുതൽ വൈദ്യുതി ആവശ്യമാണ്.
- മന്ദഗതിയിലുള്ള ഡാറ്റാ ട്രാൻസ്ഫർ വേഗത:
- നിങ്ങളുടെ കമ്പ്യൂട്ടറിന്റെ USB പോർട്ടും കണക്റ്റുചെയ്ത ഉപകരണവും USB 3.0 പിന്തുണയ്ക്കുന്നുണ്ടെന്ന് ഉറപ്പാക്കുക. ഏതെങ്കിലും USB 2.0 ആണെങ്കിൽ, വേഗത USB 2.0 ആയി പരിമിതപ്പെടുത്തും.
- ഒരേസമയം വളരെയധികം ഉയർന്ന ബാൻഡ്വിഡ്ത്ത് ഉപകരണങ്ങൾ ബന്ധിപ്പിക്കുന്നത് ഒഴിവാക്കുക.
- ബന്ധിപ്പിച്ചിരിക്കുന്ന എല്ലാ ഉപകരണങ്ങൾക്കും മതിയായ പവർ നൽകുന്നതിന് പവർ അഡാപ്റ്റർ ബന്ധിപ്പിച്ചിട്ടുണ്ടെന്ന് ഉറപ്പാക്കുക.
- ചാർജിംഗ് പ്രശ്നങ്ങൾ (സ്മാർട്ട് ചാർജിംഗ് പോർട്ട്):
- പവർ അഡാപ്റ്റർ ഹബ്ബിലേക്കും പവർ ഔട്ട്ലെറ്റിലേക്കും സുരക്ഷിതമായി ബന്ധിപ്പിച്ചിട്ടുണ്ടെന്ന് ഉറപ്പാക്കുക. സ്മാർട്ട് ചാർജിംഗ് പോർട്ടിന് ബാഹ്യ പവർ ആവശ്യമാണ്.
- ചാർജിംഗ് കേബിളിന് കേടുപാടുകൾ സംഭവിച്ചിട്ടുണ്ടോയെന്ന് പരിശോധിക്കുകയും അത് ഉപകരണത്തിലേക്കും ഹബ്ബിലേക്കും ശരിയായി ബന്ധിപ്പിച്ചിട്ടുണ്ടെന്ന് ഉറപ്പാക്കുകയും ചെയ്യുക.
- ഉപകരണവും കേബിളും പ്രവർത്തിക്കുന്നുണ്ടെന്ന് ഉറപ്പാക്കാൻ ഒരു വാൾ അഡാപ്റ്ററിൽ നിന്ന് നേരിട്ട് ഉപകരണം ചാർജ് ചെയ്യാൻ ശ്രമിക്കുക.
- LED ഇൻഡിക്കേറ്റർ പ്രവർത്തിക്കുന്നില്ല:
- ഒരു വ്യക്തിഗത പോർട്ടിന്റെ LED പ്രകാശിക്കുന്നില്ലെങ്കിൽ, പോർട്ട് സജീവമാക്കാൻ ബട്ടൺ ടാപ്പ് ചെയ്തിട്ടുണ്ടെന്ന് ഉറപ്പാക്കുക.
- ഹബ്ബിന്റെ പ്രധാന പവർ ഇൻഡിക്കേറ്റർ (ഉണ്ടെങ്കിൽ) ഓഫാണെങ്കിൽ, പവർ അഡാപ്റ്റർ കണക്ഷൻ പരിശോധിക്കുക.
6 സ്പെസിഫിക്കേഷനുകൾ
| ഫീച്ചർ | വിശദാംശങ്ങൾ |
|---|---|
| മോഡൽ നമ്പർ | നന്ദി-050300KD |
| ഉൽപ്പന്ന അളവുകൾ | 4.76 x 1.81 x 0.91 ഇഞ്ച് |
| ഇനത്തിൻ്റെ ഭാരം | 8.5 ഔൺസ് |
| USB ഡാറ്റ പോർട്ടുകൾ | 4 x യുഎസ്ബി 3.0 (5Gbps വരെ) |
| ചാർജിംഗ് പോർട്ട് | 1 x യുഎസ്ബി സ്മാർട്ട് ചാർജിംഗ് (2.4A വരെ) |
| പവർ അഡാപ്റ്റർ | 5V/3A |
| ഹാർഡ്വെയർ ഇന്റർഫേസ് | USB, USB 3.0 |
| അനുയോജ്യമായ ഉപകരണങ്ങൾ | ലാപ്ടോപ്പുകൾ, സ്മാർട്ട്ഫോണുകൾ, ടാബ്ലെറ്റുകൾ |
| ഓപ്പറേറ്റിംഗ് സിസ്റ്റങ്ങൾ | വിൻഡോസ് 10, 8.1, 8, 7, വിസ്റ്റ, എക്സ്പി, മാക് ഒഎസ് എക്സ് (10.x അല്ലെങ്കിൽ അതിനുമുകളിലുള്ളത്), ലിനക്സ് |
| മെറ്റീരിയൽ | അലുമിനിയം അലോയ് |
7. വാറൻ്റിയും പിന്തുണയും
അറ്റോള ഒരു നൽകുന്നു 18 മാസത്തെ ഉൽപ്പന്ന വാറന്റി ഈ USB ഹബ്ബിനായി. കൂടാതെ, ഏതെങ്കിലും അന്വേഷണങ്ങൾക്കോ പ്രശ്നങ്ങൾക്കോ നിങ്ങളെ സഹായിക്കുന്നതിന് ആജീവനാന്ത ഉപഭോക്തൃ സേവനവും ലഭ്യമാണ്.
നിങ്ങളുടെ ഉൽപ്പന്നം അറ്റോളയിൽ രജിസ്റ്റർ ചെയ്യുന്നതിലൂടെ വാറന്റി സൗജന്യമായി നീട്ടാൻ നിങ്ങൾക്ക് അർഹതയുണ്ടായിരിക്കാം. ഉൽപ്പന്ന പാക്കേജിംഗ് അല്ലെങ്കിൽ ഔദ്യോഗിക അറ്റോള കാണുക. webവാറന്റി രജിസ്ട്രേഷനെക്കുറിച്ചും പിന്തുണാ കോൺടാക്റ്റ് വിവരങ്ങളെക്കുറിച്ചുമുള്ള വിശദാംശങ്ങൾക്ക് സൈറ്റ് സന്ദർശിക്കുക.
കൂടുതൽ സഹായത്തിന്, ദയവായി ഔദ്യോഗിക അറ്റോള സന്ദർശിക്കുക. webസൈറ്റ് അല്ലെങ്കിൽ അവരുടെ ഉപഭോക്തൃ സേവന ടീമിനെ ബന്ധപ്പെടുക.


