1. ആമുഖം
This manual provides detailed instructions for the installation, operation, and maintenance of the AUTOWIKI Fog Lights Assembly, Model AW30-0072-09S-Z. This product is designed as a direct replacement for the 2006-2007 Mitsubishi Lancer. Please read this manual thoroughly before installation and use to ensure proper function and safety.
2. ഉൽപ്പന്നം കഴിഞ്ഞുview
2.1 പ്രധാന സവിശേഷതകൾ
- Exact OEM Style/Fitment: Designed for direct replacement on 2006-2007 Mitsubishi Lancer.
- മെച്ചപ്പെടുത്തിയ ദൃശ്യപരത: Includes H3 halogen bulbs (12V 55W) for improved illumination in adverse weather conditions.
- നീണ്ടുനിൽക്കുന്ന നിർമ്മാണം: Made from high-quality OEM grade ABS plastic, ensuring resistance to moisture and dust.
- എളുപ്പമുള്ള ഇൻസ്റ്റാളേഷൻ: Direct bolt-on replacement, requiring no modifications.
- സുരക്ഷാ സാക്ഷ്യപ്പെടുത്തിയത്: DOT Certified for compliance with safety standards.
- ക്ലിയർ ലെൻസ്: Provides optimal light output.
2.2 പാക്കേജ് ഉള്ളടക്കം
പാക്കേജിൽ ഇനിപ്പറയുന്ന ഘടകങ്ങൾ ഉൾപ്പെടുന്നു:
- 2 x Fog Light Assemblies (Left and Right)
- 2 x H3 Halogen Bulbs (pre-installed)
- 1 x വയറിംഗ് ഹാർനെസ്
- 1 x സ്വിച്ച്
- 1 x റിലേ
- Zip Ties and other necessary mounting hardware

ചിത്രം 2.2.1: Package contents including fog lights, wiring, and accessories. The fog light dimensions are approximately 11.46 inches wide, 5.03 inches deep, and 6.29 inches high.
3 സുരക്ഷാ വിവരങ്ങൾ
- ഏതെങ്കിലും വൈദ്യുത ജോലി ചെയ്യുന്നതിന് മുമ്പ് എല്ലായ്പ്പോഴും വാഹനത്തിന്റെ ബാറ്ററി വിച്ഛേദിക്കുക.
- ഇൻസ്റ്റാളേഷൻ സമയത്ത് കയ്യുറകൾ, കണ്ണ് സംരക്ഷണം എന്നിവയുൾപ്പെടെ ഉചിതമായ സുരക്ഷാ ഉപകരണങ്ങൾ ധരിക്കുക.
- ഷോർട്ട് സർക്യൂട്ടുകൾ തടയുന്നതിന് എല്ലാ കണക്ഷനുകളും സുരക്ഷിതമാണെന്നും ശരിയായി ഇൻസുലേറ്റ് ചെയ്തിട്ടുണ്ടെന്നും ഉറപ്പാക്കുക.
- Do not touch the halogen bulb glass with bare hands, as oils can cause hot spots and reduce bulb life.
- ഏതെങ്കിലും ഘട്ടത്തെക്കുറിച്ച് ഉറപ്പില്ലെങ്കിൽ, യോഗ്യതയുള്ള ഒരു ഓട്ടോമോട്ടീവ് ടെക്നീഷ്യനെ സമീപിക്കുക.
4. സജ്ജീകരണം (ഇൻസ്റ്റലേഷൻ)
This section outlines the general steps for installing the AUTOWIKI Fog Lights Assembly. Specific vehicle disassembly procedures may vary. Refer to your vehicle's service manual for detailed instructions on bumper removal or access to the fog light housing.
4.1 ടൂളുകൾ ആവശ്യമാണ്
- സോക്കറ്റ് റെഞ്ച് സെറ്റ്
- സ്ക്രൂഡ്രൈവർ സെറ്റ് (ഫിലിപ്സും ഫ്ലാറ്റ്ഹെഡും)
- വയർ സ്ട്രിപ്പറുകൾ/ക്രിമ്പറുകൾ
- ഇലക്ട്രിക്കൽ ടേപ്പ് അല്ലെങ്കിൽ ഹീറ്റ് ഷ്രിങ്ക് ട്യൂബിംഗ്
- സിപ്പ് ബന്ധങ്ങൾ
4.2 ഇൻസ്റ്റലേഷൻ ഘട്ടങ്ങൾ
- വാഹനം തയ്യാറാക്കുക: Park the vehicle on a level surface, engage the parking brake, and turn off the engine. Disconnect the negative terminal of the vehicle's battery.
- Access Fog Light Area: Depending on your vehicle model, you may need to remove the front bumper, fender liner, or splash guard to access the factory fog light housing.
- Remove Old Fog Lights: Disconnect the wiring harness from the existing fog lights. Unscrew or unclip the old fog light assemblies from their mounting brackets.
- Install New Fog Lights: Carefully position the new AUTOWIKI fog light assemblies into the factory mounting locations. Secure them using the original hardware or provided mounting hardware.

ചിത്രം 4.2.1: New fog light assemblies showing the clear lens and mounting points.
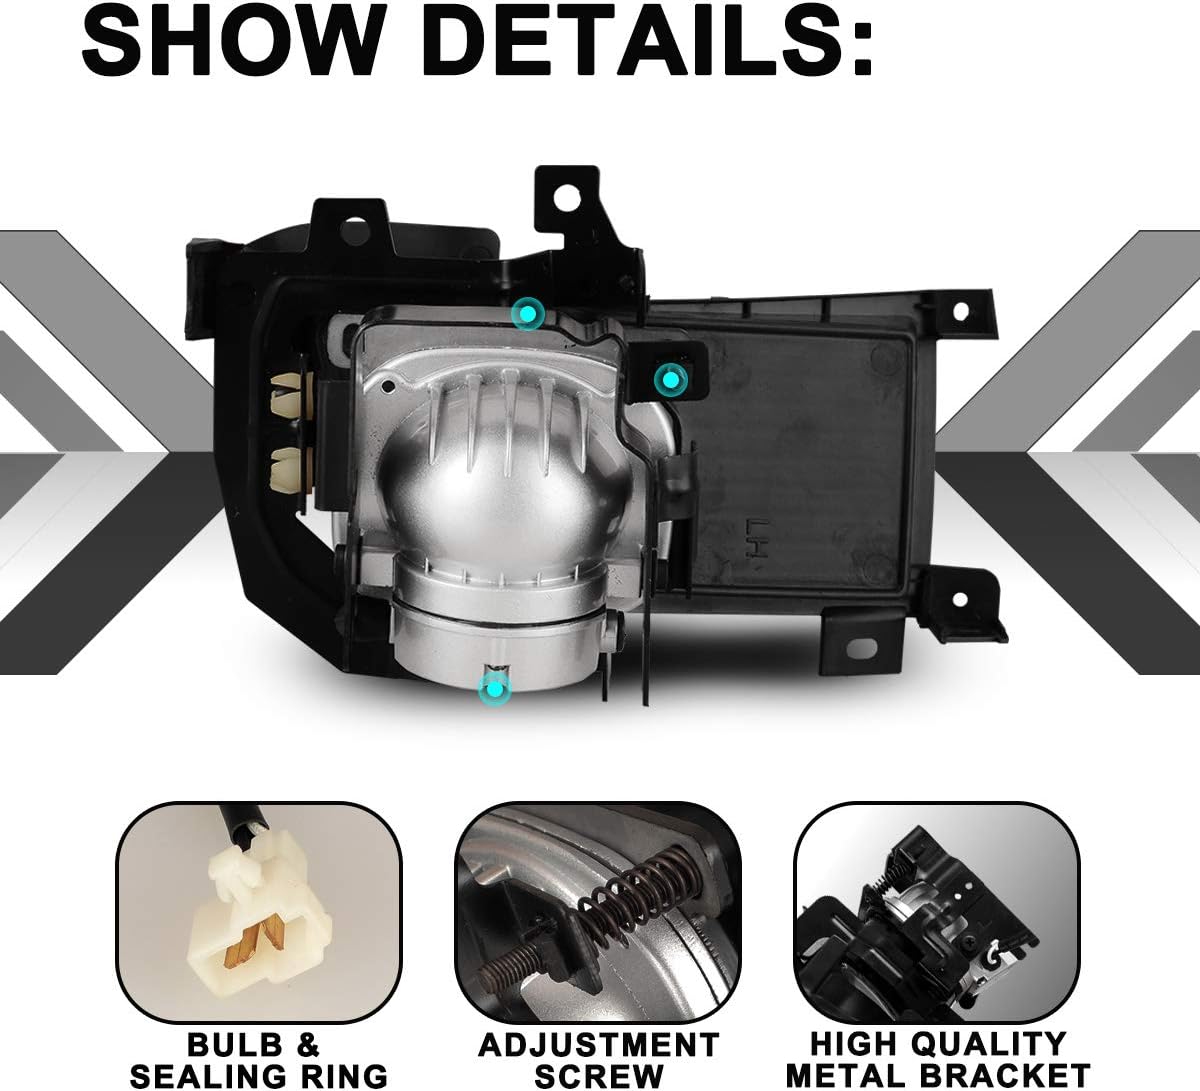
ചിത്രം 4.2.2: വിശദമായി view of the fog light assembly, highlighting the pre-installed H3 bulb and durable ABS construction.

ചിത്രം 4.2.3: പിൻഭാഗം view of the fog light assembly, illustrating the bulb connection, adjustment screw for aiming, and robust metal bracket.
- Wire the Fog Lights:
- Connect the new fog light wiring harness to the fog light assemblies.
- Route the wiring harness through the engine bay, ensuring it is secured away from moving parts and hot surfaces using the provided zip ties.
- Connect the relay to the designated point in the harness.
- Connect the power wire (usually red) to a fused 12V power source (e.g., battery positive terminal or an accessory fuse).
- Connect the ground wire (usually black) to a suitable chassis ground point.
- Route the switch wire into the vehicle's cabin and mount the switch in a convenient location.
- ബാറ്ററി വീണ്ടും ബന്ധിപ്പിക്കുക: വാഹന ബാറ്ററിയുടെ നെഗറ്റീവ് ടെർമിനൽ വീണ്ടും ബന്ധിപ്പിക്കുക.
- ടെസ്റ്റ് പ്രവർത്തനം: Turn on the vehicle and test the fog lights to ensure they illuminate correctly.
- Adjust Aim (if necessary): Use the adjustment screw on the back of the fog light housing to properly aim the light beam. This is typically done against a wall at a specific distance.
- വാഹനം വീണ്ടും കൂട്ടിച്ചേർക്കുക: Reinstall any removed bumper parts, fender liners, or splash guards.
5. പ്രവർത്തന നിർദ്ദേശങ്ങൾ
Once installed, the AUTOWIKI Fog Lights Assembly operates via the included switch. Fog lights are designed to provide additional illumination in conditions of poor visibility, such as fog, heavy rain, or snow, by casting a wide, low beam of light.
- സജീവമാക്കൽ: Press the installed fog light switch to turn the fog lights ON or OFF.
- ഒപ്റ്റിമൽ ഉപയോഗം: Use fog lights in conjunction with your vehicle's low beam headlights during adverse weather conditions. Avoid using fog lights in clear weather, as they can cause glare for oncoming drivers.
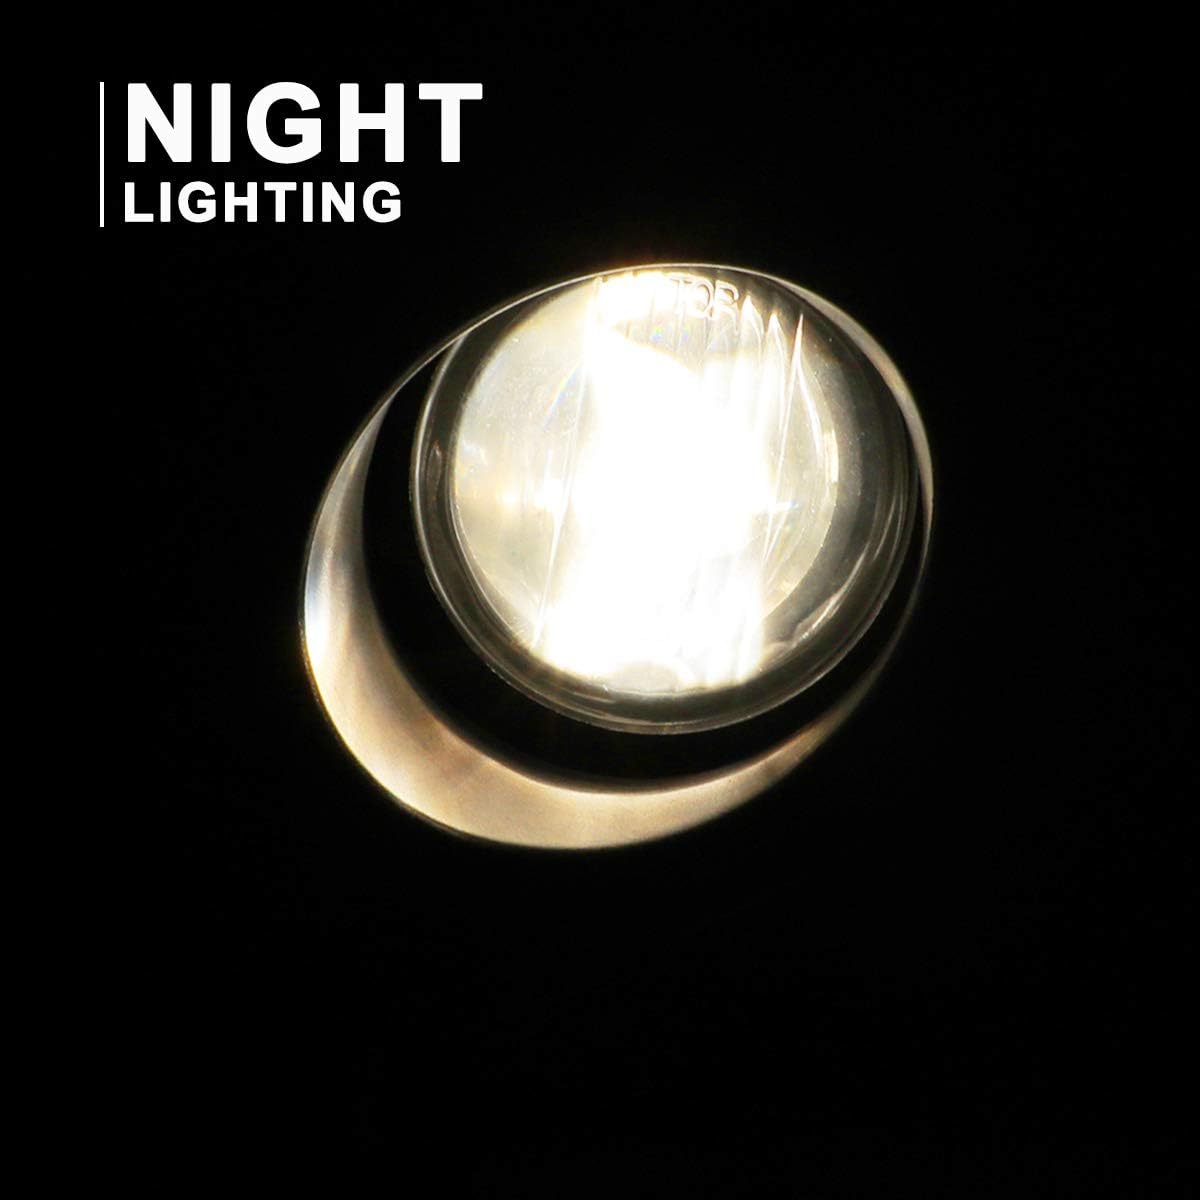
ചിത്രം 5.1: Night illumination provided by the fog light.
6. പരിപാലനം
Regular maintenance ensures the longevity and optimal performance of your fog lights.
- വൃത്തിയാക്കൽ: Periodically clean the fog light lenses with a soft cloth and mild automotive cleaner to remove dirt and debris. Avoid abrasive cleaners that can scratch the lens.
- ബൾബ് മാറ്റിസ്ഥാപിക്കൽ: If a bulb burns out, replace it with an H3 12V 55W halogen bulb. Refer to Section 4.2 for general access steps. Avoid touching the new bulb's glass with bare hands.
- വയറിംഗ് പരിശോധന: Annually inspect the wiring harness for any signs of wear, fraying, or corrosion. Ensure all connections remain secure.
- വാട്ടർപ്രൂഫ് ഇന്റഗ്രിറ്റി: The fog lights are designed to be waterproof. However, if you notice moisture inside the housing, inspect the seals and ensure proper installation.

ചിത്രം 6.1: The fog lights are designed for all-weather performance, featuring waterproof and dustproof construction.
7. പ്രശ്നപരിഹാരം
| പ്രശ്നം | സാധ്യമായ കാരണം | പരിഹാരം |
|---|---|---|
| Fog lights do not turn on. |
|
|
| One fog light is not working. |
|
|
| Moisture inside the fog light housing. |
|
|
8 സ്പെസിഫിക്കേഷനുകൾ
| ഫീച്ചർ | വിശദാംശങ്ങൾ |
|---|---|
| ബ്രാൻഡ് | ഓട്ടോവിക്കി |
| മോഡൽ നമ്പർ | AW30-0072-09S-Z |
| അനുയോജ്യത | 2006-2007 Mitsubishi Lancer |
| പ്രകാശ സ്രോതസ്സ് തരം | Halogen - H3 |
| വാട്ട്tage | 55 വാട്ട്സ് |
| വാല്യംtage | 12 വോൾട്ട് |
| ലെൻസ് നിറം | ക്ലിയർ |
| ലെൻസ് മെറ്റീരിയൽ | എബിഎസ് പ്ലാസ്റ്റിക് |
| പ്രത്യേക സവിശേഷതകൾ | Waterproof, DOT Certified |
| OEM Part Numbers (Left) | MN126815, MN161941 |
| OEM Part Numbers (Right) | MN126816, MN161942 |
| ഇനത്തിൻ്റെ ഭാരം | 4.44 പൗണ്ട് |
| പാക്കേജ് അളവുകൾ | 12.2 x 10 x 6.1 ഇഞ്ച് |
9. വാറൻ്റി വിവരങ്ങൾ
AUTOWIKI offers a 180-day warranty on this product. Additionally, a free return policy is available within 30 days if you are not 100% satisfied. Please retain your proof of purchase for warranty claims.
10. പിന്തുണ
For further assistance or inquiries, please visit the official AUTOWIKI store or contact customer support through the platform where the product was purchased.


