ആമുഖം
This manual provides comprehensive instructions for the setup, operation, and maintenance of your Klipsch Cinema 400 Sound Bar and 8-Inch Wireless Subwoofer. Designed to seamlessly upgrade your television viewing to a home theater experience, this system delivers powerful, clear audio. Please read this manual thoroughly before using your product to ensure proper function and safety.
പ്രധാനപ്പെട്ട സുരക്ഷാ വിവരങ്ങൾ
മുന്നറിയിപ്പ്:
- ഈ ഉപകരണം തുള്ളികളിലേക്കോ തെറിക്കുന്നതിനോ തുറന്നുകാട്ടരുത്.
- പാത്രങ്ങൾ പോലുള്ള ദ്രാവകങ്ങൾ നിറച്ച വസ്തുക്കൾ ഉപകരണത്തിൽ വയ്ക്കരുത്.
- ശരിയായ വായുസഞ്ചാരം ഉറപ്പാക്കുക. വായുസഞ്ചാര ദ്വാരങ്ങളൊന്നും തടയരുത്.
- റേഡിയറുകൾ, ഹീറ്റ് രജിസ്റ്ററുകൾ, സ്റ്റൗകൾ, അല്ലെങ്കിൽ മറ്റ് ഉപകരണങ്ങൾ (ഉൾപ്പെടെ) പോലെയുള്ള താപ സ്രോതസ്സുകൾക്ക് സമീപം ഇൻസ്റ്റാൾ ചെയ്യരുത്. ampലൈഫയറുകൾ) ചൂട് ഉത്പാദിപ്പിക്കുന്നത്.
- പ്രത്യേകിച്ച് പ്ലഗുകൾ, കൺവീനിയൻസ് റെസെപ്റ്റക്കിളുകൾ, ഉപകരണത്തിൽ നിന്ന് പുറത്തുകടക്കുന്ന ഇടം എന്നിവയിൽ നടക്കുകയോ നുള്ളുകയോ ചെയ്യുന്നതിൽ നിന്ന് പവർ കോർഡ് സംരക്ഷിക്കുക.
- നിർമ്മാതാവ് വ്യക്തമാക്കിയ അറ്റാച്ച്മെൻ്റുകൾ/ആക്സസറികൾ മാത്രം ഉപയോഗിക്കുക.
- മിന്നൽ കൊടുങ്കാറ്റുകളുടെ സമയത്തോ ദീർഘനേരം ഉപയോഗിക്കാത്ത സമയത്തോ ഈ ഉപകരണം അൺപ്ലഗ് ചെയ്യുക.
- എല്ലാ സേവനങ്ങളും യോഗ്യതയുള്ള സേവന ഉദ്യോഗസ്ഥർക്ക് റഫർ ചെയ്യുക. പവർ സപ്ലൈ കോർഡ് അല്ലെങ്കിൽ പ്ലഗ് കേടാകുക, ദ്രാവകം ഒഴുകുകയോ ഉപകരണങ്ങൾ ഉപകരണത്തിലേക്ക് വീഴുകയോ ചെയ്യുക, ഉപകരണം മഴയോ ഈർപ്പമോ സമ്പർക്കം പുലർത്തുക, സാധാരണയായി പ്രവർത്തിക്കാത്തത് എന്നിങ്ങനെയുള്ള ഏതെങ്കിലും വിധത്തിൽ ഉപകരണത്തിന് കേടുപാടുകൾ സംഭവിക്കുമ്പോൾ സേവനം ആവശ്യമാണ്. , അല്ലെങ്കിൽ ഉപേക്ഷിച്ചു.
ബോക്സിൽ എന്താണുള്ളത്
- Klipsch Cinema 400 Sound Bar
- 8-ഇഞ്ച് വയർലെസ് സബ്വൂഫർ
- റിമോട്ട് കൺട്രോൾ (2 AA ബാറ്ററികൾ ആവശ്യമാണ്, ഉൾപ്പെടുത്തിയിട്ടില്ല)
- Power Cords (for sound bar and subwoofer)
- HDMI കേബിൾ
- Wall Mounting Hardware (brackets, screws, template)
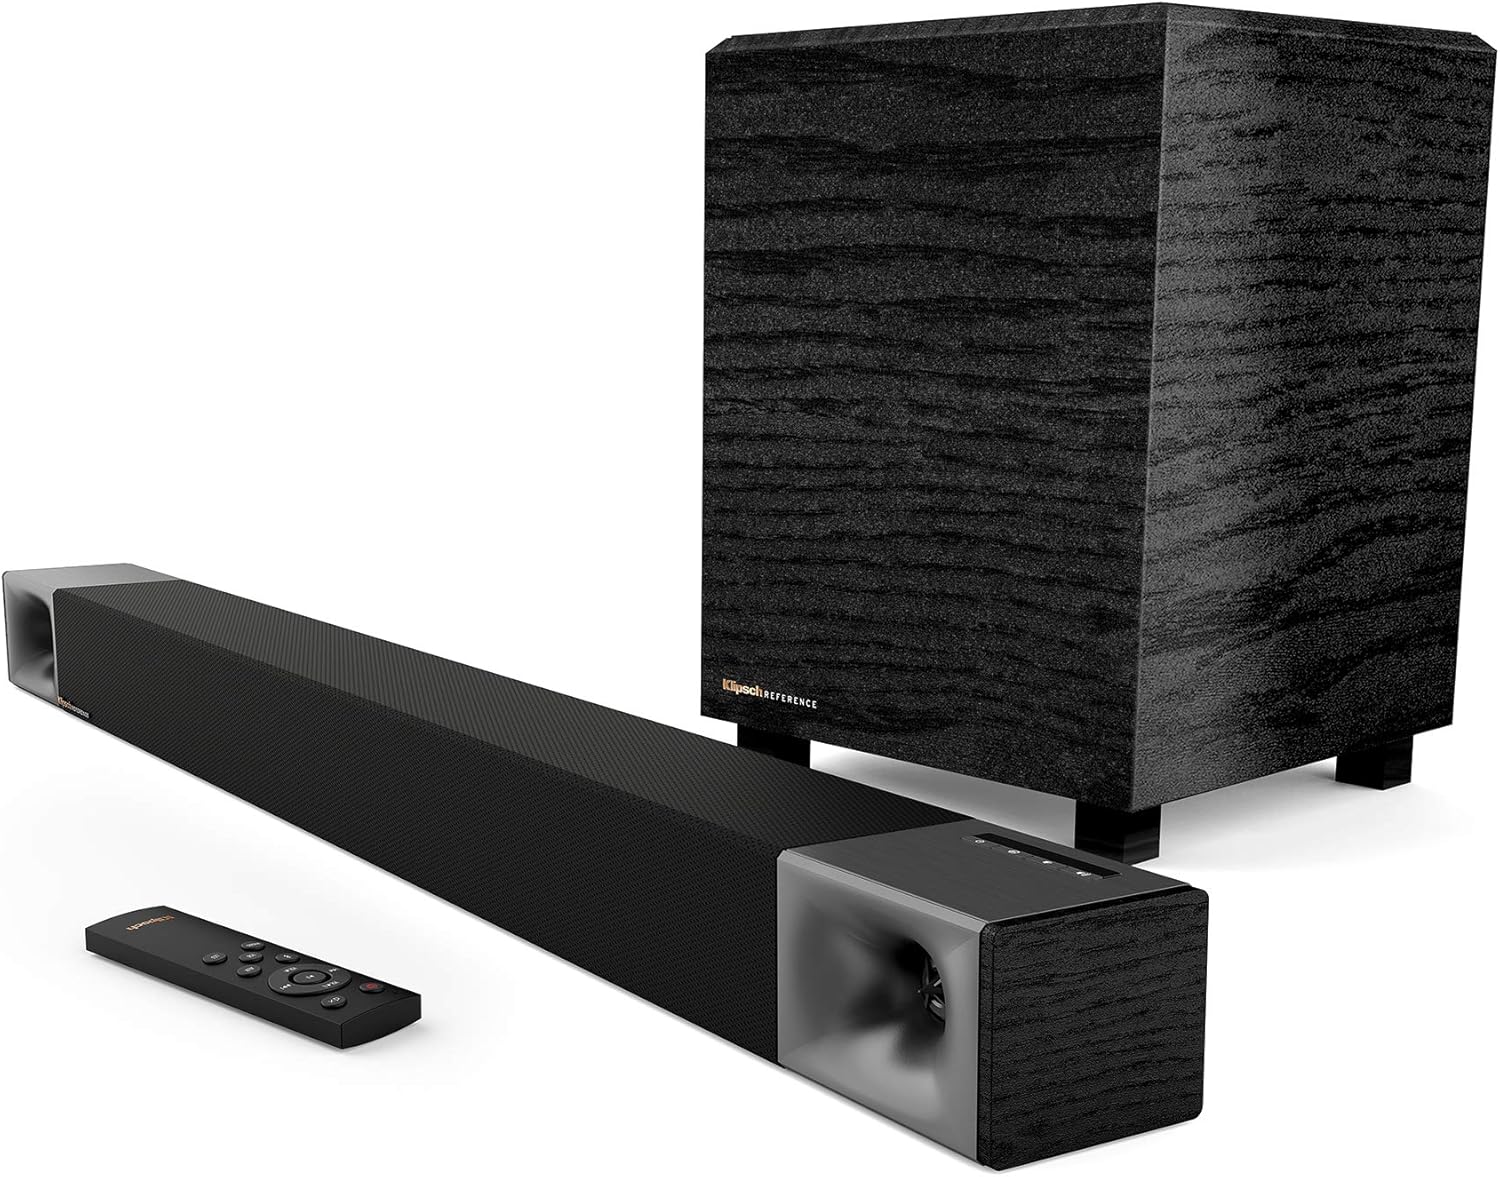
Image: Klipsch Cinema 400 Sound Bar, 8-inch wireless subwoofer, and remote control, showing all main components included in the package.
സജ്ജമാക്കുക
1. പ്ലേസ്മെന്റ്
Place the sound bar directly below your television, centered for optimal sound dispersion. The wireless subwoofer can be placed anywhere in the room, ideally within 30 feet of the sound bar, for best bass response. Avoid placing the subwoofer directly against a wall or in a corner if the bass becomes too boomy.
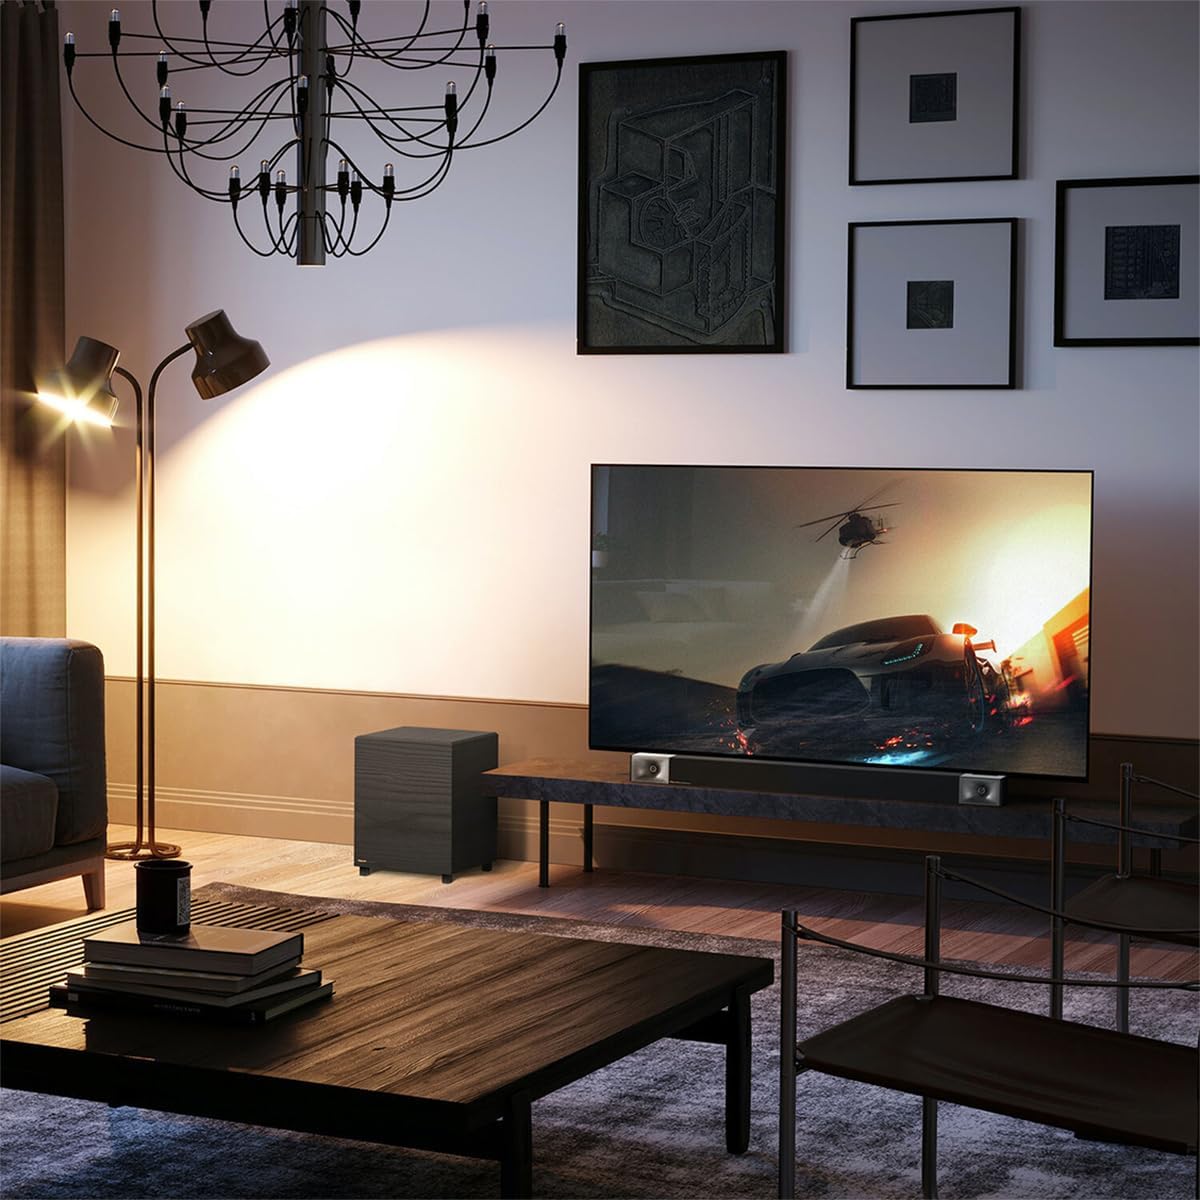
Image: A Klipsch Cinema 400 Sound Bar and Subwoofer integrated into a living room setup, positioned below a television.
2. കണക്ഷനുകൾ
- HDMI ARC കണക്ഷൻ (ശുപാർശ ചെയ്യുന്നത്): Connect one end of the included HDMI cable to the HDMI ARC port on your sound bar and the other end to the HDMI ARC port on your television. This allows for single-cable audio and control.
- ഒപ്റ്റിക്കൽ കണക്ഷൻ (ഇതര): If your TV does not have an HDMI ARC port, connect an optical cable (not included) from your TV's optical output to the OPTICAL input on the sound bar.
- ശക്തി: Connect the power cords to the sound bar and the wireless subwoofer, then plug them into a wall outlet. The sound bar and subwoofer will automatically pair.

ചിത്രം: ഒരു ക്ലോസ്-അപ്പ് view of the Klipsch Cinema 400 Sound Bar's connection panel, highlighting the HDMI input for simple setup.
3. വാൾ മൗണ്ടിംഗ് (ഓപ്ഷണൽ)
The sound bar can be wall-mounted using the included hardware and template. Ensure the wall can support the weight of the sound bar and follow the instructions provided with the mounting kit for secure installation.

Image: The rear panel of the Klipsch Cinema 400 Sound Bar, displaying its various input ports and mounting points for wall installation.
പ്രവർത്തന നിർദ്ദേശങ്ങൾ
1. പവർ ഓൺ/ഓഫ്
Press the power button on the sound bar's top panel or the remote control to turn the system on or off. The LED indicator on the sound bar will illuminate when powered on.

ചിത്രം: വിശദമായ ഒരു ചിത്രം view of the Klipsch Cinema 400 Sound Bar's top-mounted control buttons, including power, input, and volume.
2. ഇൻപുട്ട് തിരഞ്ഞെടുക്കൽ
Press the "Input" button on the sound bar or remote to cycle through available audio sources (HDMI ARC, Optical, Bluetooth).
3. വോളിയം നിയന്ത്രണം
Use the "VOL+" and "VOL-" buttons on the remote control to adjust the master volume. The subwoofer volume can be adjusted independently using the "SUB+" and "SUB-" buttons.
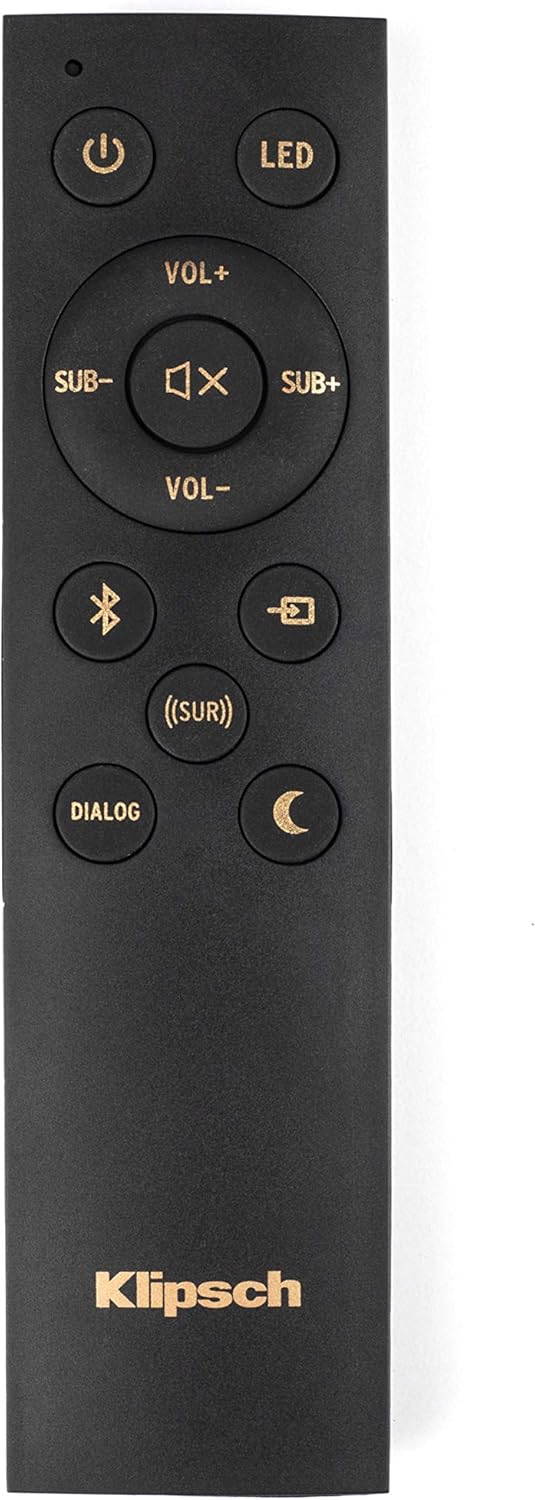
Image: The remote control for the Klipsch Cinema 400 Sound Bar, showing buttons for power, volume, input, and sound modes.
4. സൗണ്ട് മോഡുകൾ
- ഡയലോഗ്: Enhances vocal clarity for movies and TV shows.
- ചുറ്റളവ്: Activates virtualized surround sound for an immersive experience.
- രാത്രി: Reduces dynamic range for late-night listening, minimizing loud sounds.
- ബാസ് ബൂസ്റ്റ്: Increases the low-frequency output for more impactful bass.

Image: The Klipsch Cinema 400 Sound Bar positioned below a television, emphasizing its "True Clarity" and "Dialog Enhancement Mode" features.

Image: A close-up of the Klipsch 8-inch wireless subwoofer, highlighting its "Bigger Bass" capability and the size of its driver.

Image: The Klipsch Cinema 400 Sound Bar and Subwoofer with abstract sound waves emanating, illustrating the "True Entertainment" experience.
5. ബ്ലൂടൂത്ത് ജോടിയാക്കൽ
To pair a new Bluetooth device, press and hold the Bluetooth button on the remote control until the LED on the sound bar flashes. Select "Klipsch Cinema 400" from your device's Bluetooth settings. Once paired, the LED will turn solid blue.
മെയിൻ്റനൻസ്
- വൃത്തിയാക്കൽ: Use a soft, dry cloth to clean the surfaces of the sound bar and subwoofer. Do not use liquid cleaners or aerosols.
- വെൻ്റിലേഷൻ: Ensure that the ventilation openings on the sound bar and subwoofer are not blocked to prevent overheating.
- പവർ കോർഡ്: Regularly inspect the power cords for any damage. If damaged, discontinue use and contact qualified service personnel.
ട്രബിൾഷൂട്ടിംഗ്
| പ്രശ്നം | സാധ്യമായ കാരണം | പരിഹാരം |
|---|---|---|
| ശബ്ദമില്ല |
|
|
| സബ്വൂഫർ ജോടിയാക്കുന്നില്ല |
|
|
| റിമോട്ട് പ്രവർത്തിക്കുന്നില്ല |
|
|
സ്പെസിഫിക്കേഷനുകൾ
- മോഡലിൻ്റെ പേര്: സിനിമാ 400
- സ്പീക്കർ തരം: സൗണ്ട്ബാർ, സബ് വൂഫർ
- സ്പീക്കർ പരമാവധി ഔട്ട്പുട്ട് പവർ: 400 വാട്ട്സ് (പീക്ക്)
- സബ് വൂഫർ വ്യാസം: 8 ഇഞ്ച്
- കണക്റ്റിവിറ്റി ടെക്നോളജി: Optical, HDMI, Wireless (for subwoofer)
- വയർലെസ് കമ്മ്യൂണിക്കേഷൻ ടെക്നോളജി: വയർലെസ്
- ഓഡിയോ putട്ട്പുട്ട് മോഡ്: ചുറ്റുക
- ഉൽപ്പന്ന അളവുകൾ: 9.5"D x 39.9"W x 9.5"H
- ഇനത്തിൻ്റെ ഭാരം: 12.7 കിലോഗ്രാം (27.9 പൗണ്ട്)
- ഉൾപ്പെടുത്തിയ ഘടകങ്ങൾ: Sound Bar and subwoofer
- നിയന്ത്രണ രീതി: റിമോട്ട്
- പവർ ഇൻപുട്ട് വോളിയംtage: 240 വോൾട്ട്
- ഫ്രീക്വൻസി പ്രതികരണം: 35 KHz
- മൗണ്ടിംഗ് തരം: Wall Mount, Bar Mount
- ബാറ്ററികൾ: 2 AA batteries required for remote

Image: The Klipsch 8-inch wireless subwoofer, showcasing its compact design and textured finish.
വാറൻ്റിയും പിന്തുണയും
Klipsch products are designed for years of enjoyment. For detailed warranty information, please refer to the warranty card included with your product or visit the official Klipsch website. For technical support, troubleshooting assistance, or to inquire about service, please contact Klipsch customer support through their official channels.
കൂടുതൽ വിവരങ്ങളും പിന്തുണയും നിങ്ങൾക്ക് ഇവിടെ കണ്ടെത്താനാകും Klipsch Store.


