1. ഉൽപ്പന്നം കഴിഞ്ഞുview
The Meliconi Cleaning Tower is a robust and elegant freestanding support designed to organize your Dyson cordless vacuum cleaner and its accessories. It eliminates the need for wall drilling, providing a stable and convenient storage solution.
പ്രധാന സവിശേഷതകൾ:
- ഫ്രീസ്റ്റാൻഡിംഗ് ഡിസൈൻ: No wall drilling required.
- ആക്സസറി സ്റ്റോറേജ്: Accommodates up to 8 vacuum accessories.
- കേബിൾ മാനേജുമെന്റ്: Integrated cable routing system for a tidy appearance.
- അനുയോജ്യത: Designed for Dyson V6, V7, V8, V10, V11, V12 Slim, and V15 models.
- നീണ്ടുനിൽക്കുന്ന നിർമ്മാണം: Made from high-quality steel and aluminum.
- തറ സംരക്ഷണം: Equipped with protective rubber feet to prevent scratches and ensure stability.

Figure 1: The Meliconi Cleaning Tower in its standalone configuration, showcasing its sleek black design and accessory hooks.
2. പാക്കേജ് ഉള്ളടക്കം
അസംബ്ലി ചെയ്യുന്നതിനുമുമ്പ്, എല്ലാ ഘടകങ്ങളും ഉണ്ടെന്ന് ഉറപ്പാക്കുക:
- അടിസ്ഥാന പ്ലേറ്റ്
- Vertical Support Column
- Accessory Hooks (quantity may vary)
- Mounting Hardware (screws, Allen key)
- നിർദ്ദേശ മാനുവൽ (ഈ പ്രമാണം)
3. സജ്ജീകരണ നിർദ്ദേശങ്ങൾ
Follow these steps to assemble your Meliconi Cleaning Tower. Assembly typically takes approximately 10 minutes.
- Attach Vertical Column to Base: Secure the vertical support column to the base plate using the provided screws and Allen key. Ensure the column is firmly seated and stable.
- Install Accessory Hooks: Attach the accessory hooks to the designated slots on the vertical column. Some hooks may require screws for secure fastening.
- Mount Dyson Charging Dock: The original Dyson charging dock (not included) must be mounted onto the vertical column. Align the dock with the pre-drilled holes and secure it using the appropriate screws. Multiple height options may be available to suit different Dyson models.
- റൂട്ട് പവർ കേബിൾ: Guide the Dyson vacuum's power cable through the integrated cable management channel on the back of the vertical column. This keeps the cable tidy and out of sight.
- സ്റ്റാൻഡ് സ്ഥാപിക്കുക: Place the assembled Cleaning Tower on a flat, stable surface. The protective rubber feet on the base will prevent floor scratches and enhance stability.
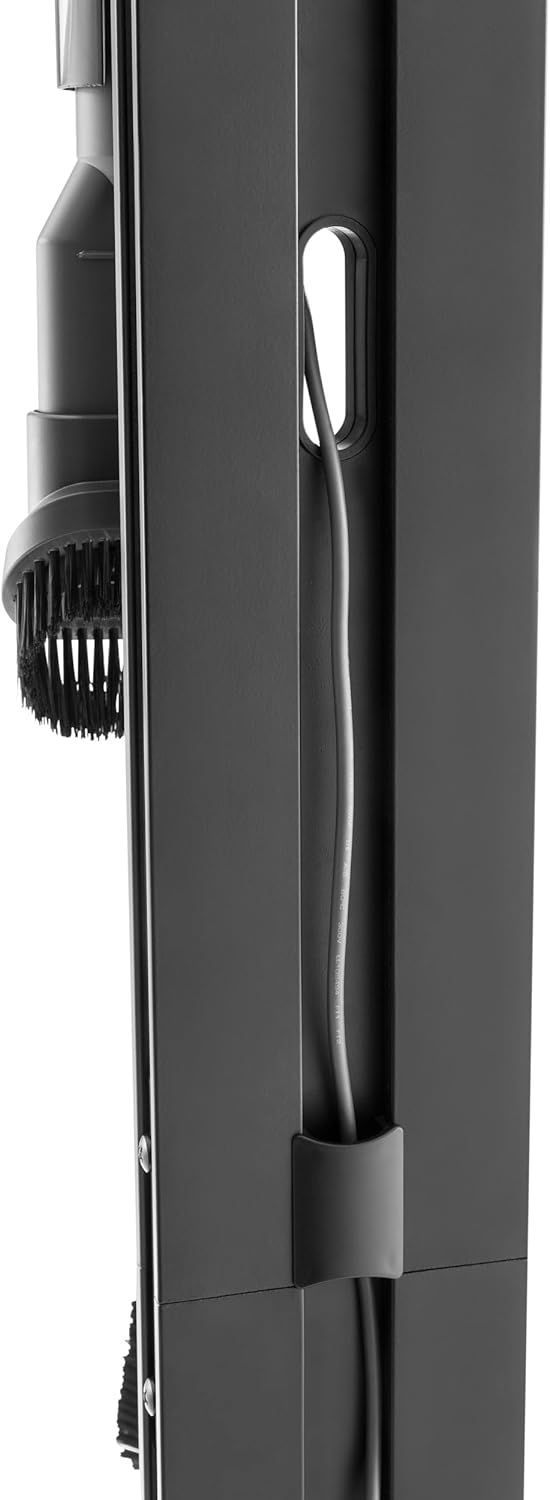
Figure 2: Detail of the integrated cable management system on the rear of the vertical column, designed to keep the power cable organized.

ചിത്രം 3: ക്ലോസപ്പ് view of the accessory hooks, demonstrating how vacuum attachments are securely stored.
4. പ്രവർത്തന നിർദ്ദേശങ്ങൾ
Using the Meliconi Cleaning Tower is straightforward:
- വാക്വം ചാർജ് ചെയ്യുന്നു: Once the Dyson charging dock is installed, simply place your Dyson vacuum onto the dock. Ensure it clicks into place and begins charging.
- സാധനങ്ങൾ സംഭരിക്കുന്നതിന്: Hang your Dyson vacuum accessories on the provided hooks. The stand is designed to hold various brush heads and tools, keeping them readily accessible.
- സ്റ്റാൻഡ് നീക്കൽ: While the stand is stable, exercise caution when moving it, especially with the vacuum attached. Lift from the base to relocate.

Figure 4: The Meliconi Cleaning Tower with a Dyson vacuum cleaner securely docked and accessories organized.
5. പരിപാലനം
To ensure the longevity and appearance of your Cleaning Tower:
- വൃത്തിയാക്കൽ: ഒരു സോഫ്റ്റ്, ഡി തുണി ഉപയോഗിച്ച് സ്റ്റാൻഡ് തുടയ്ക്കുക.amp തുണി. ഫിനിഷിന് കേടുവരുത്തുന്ന ഉരച്ചിലുകളുള്ള ക്ലീനറുകളോ ലായകങ്ങളോ ഒഴിവാക്കുക.
- പരിശോധന: എല്ലാ സ്ക്രൂകളും കണക്ഷനുകളും ഇറുകിയതാണെന്ന് ഉറപ്പാക്കാൻ ഇടയ്ക്കിടെ പരിശോധിക്കുക. ആവശ്യമെങ്കിൽ വീണ്ടും മുറുക്കുക.
- ഓവർലോഡിംഗ് ഒഴിവാക്കുക: Do not exceed the intended capacity for accessories to maintain stability.
6. പ്രശ്നപരിഹാരം
- Issue: Stand feels unstable.
- പരിഹാരം: Ensure all assembly screws are fully tightened. Verify the stand is placed on a flat, level surface. Check that the protective rubber feet are properly installed.
- Issue: Dyson vacuum not charging when docked.
- പരിഹാരം: Confirm the Dyson charging dock is correctly installed and securely connected to its power source. Ensure the vacuum is properly seated in the dock. This issue is typically related to the vacuum or its charging dock, not the stand itself.
- Issue: Accessories do not fit on hooks.
- പരിഹാരം: Ensure you are using genuine Dyson accessories compatible with your vacuum model. The hooks are designed for standard Dyson attachments. If an accessory is unusually shaped, it may not fit optimally.
7 സ്പെസിഫിക്കേഷനുകൾ
| ഫീച്ചർ | വിശദാംശങ്ങൾ |
|---|---|
| ബ്രാൻഡ് | മെലിക്കോണി |
| മോഡൽ | 655271 |
| നിറം | കറുപ്പ് |
| മെറ്റീരിയൽ | Metal (Steel and Aluminum) |
| അനുയോജ്യമായ ഉപകരണങ്ങൾ | Dyson V6, V7, V8, V10, V11, V12 Slim, V15 |
| ഇനത്തിൻ്റെ ഭാരം | 3.5 കിലോഗ്രാം |
| അടിസ്ഥാന അളവുകൾ | 22 x 29.5 cm (approx.) |
| ഉയരം | 128 സെ.മീ (ഏകദേശം) |
8. വാറൻ്റിയും പിന്തുണയും
For warranty information or technical support regarding your Meliconi Cleaning Tower, please refer to the official Meliconi webസൈറ്റിൽ ബന്ധപ്പെടുകയോ അവരുടെ ഉപഭോക്തൃ സേവനവുമായി നേരിട്ട് ബന്ധപ്പെടുകയോ ചെയ്യുക. വാറന്റി ക്ലെയിമുകൾക്കായി നിങ്ങളുടെ വാങ്ങിയതിന്റെ തെളിവ് സൂക്ഷിക്കുക.
Meliconi is committed to providing quality products and customer satisfaction. For further assistance, visit the Meliconi Store on Amazon.


