1. ആമുഖം
This user manual provides comprehensive instructions for the safe and efficient use of your PRIXTON Expert Tablet. Please read this manual thoroughly before operating the device and retain it for future reference. This document covers product overview, സജ്ജീകരണം, പ്രവർത്തനം, പരിപാലനം, ട്രബിൾഷൂട്ടിംഗ്, സാങ്കേതിക സവിശേഷതകൾ.
2. ഉൽപ്പന്നം കഴിഞ്ഞുview
2.1 പ്രധാന സവിശേഷതകൾ
- 10-inch IPS display with 800 x 1280 resolution.
- ആൻഡ്രോയിഡ് 10.0 ഓപ്പറേറ്റിംഗ് സിസ്റ്റം.
- Octa Core Unisoc T618 processor.
- 3 ജിബി റാമും 64 ജിബി ഇന്റേണൽ സ്റ്റോറേജും.
- Supports Micro USB, microSD, and SIM card inputs.
- Integrated Wi-Fi, Bluetooth, and 3G connectivity.
- 6000 mAh battery for extended use.
- Front 5 Mpx camera and rear 8 Mpx camera.
2.2 ഉപകരണ ഘടകങ്ങൾ
നിങ്ങളുടെ ടാബ്ലെറ്റിന്റെ ഭൗതിക ഘടകങ്ങളുമായി പരിചയപ്പെടുക:

ചിത്രം 2.2.1: മുന്നിലും പിന്നിലും view of the PRIXTON Expert Tablet, showcasing its metallic finish and camera placement.
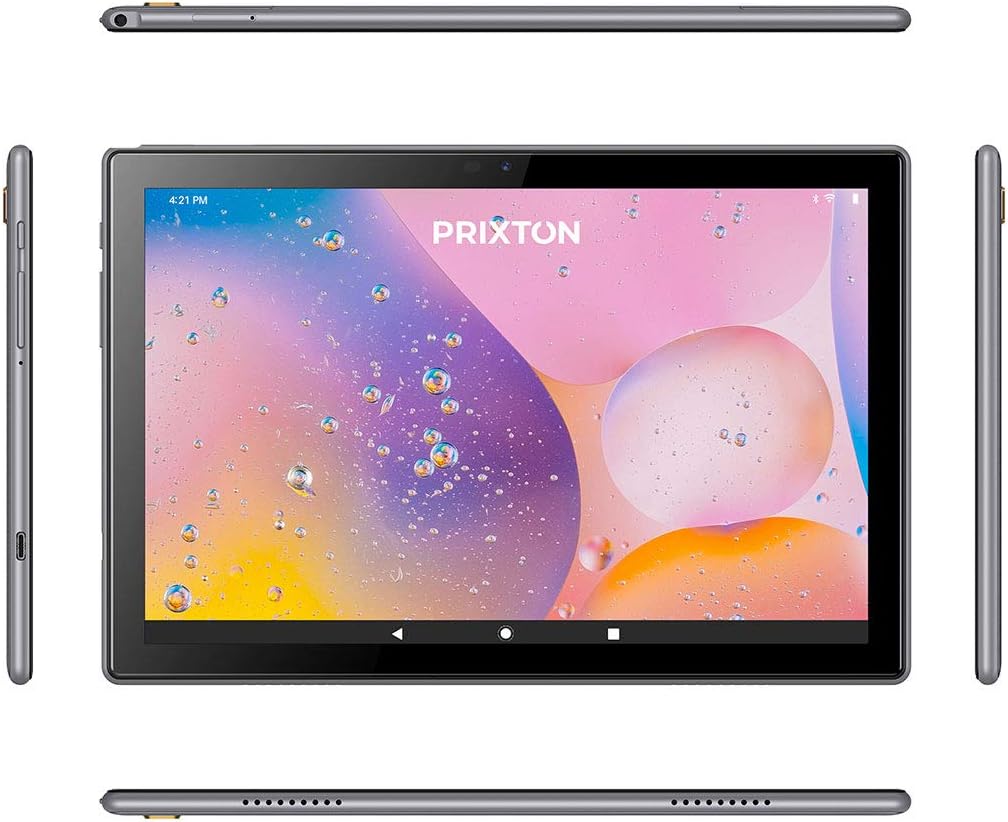
Figure 2.2.2: Various angles of the tablet, illustrating the placement of buttons, ports, and speakers on its sides, top, and bottom.

Figure 2.2.3: Close-up of the tablet's side, detailing the micro USB port, microSD card slot, SIM card slot, and earphone jack.
3. സജ്ജീകരണം
3.1 പ്രാരംഭ ചാർജിംഗ്
Before first use, fully charge the tablet using the provided USB cable and power adapter. Connect the micro USB end to the tablet's charging port and the other end to a power outlet. The battery indicator on the screen will show charging status.
3.2 പവർ ഓൺ/ഓഫ്
- പവർ ഓണാക്കാൻ: Press and hold the Power button (usually located on the side) until the PRIXTON logo appears on the screen.
- പവർ ഓഫ് ചെയ്യാൻ: Press and hold the Power button until a power options menu appears. Select 'Power off' and confirm.
- പുനരാരംഭിക്കാൻ: പവർ ഓപ്ഷനുകൾ മെനുവിൽ നിന്ന്, 'റീസ്റ്റാർട്ട്' തിരഞ്ഞെടുക്കുക.
3.3 സിം കാർഡും മൈക്രോ എസ്ഡി കാർഡും ഇൻസ്റ്റാൾ ചെയ്യൽ
The tablet supports a SIM card for 3G connectivity and a microSD card for expandable storage.
- ടാബ്ലെറ്റിന്റെ വശത്ത് സിം/മൈക്രോ എസ്ഡി കാർഡ് ട്രേ കണ്ടെത്തുക.
- ട്രേ തുറക്കാൻ നൽകിയിരിക്കുന്ന സിം എജക്റ്റർ ഉപകരണം ഉപയോഗിക്കുക.
- Carefully place the SIM card and/or microSD card into their respective slots on the tray, ensuring correct orientation.
- ട്രേ അതിന്റെ സ്ഥാനത്ത് ക്ലിക്കു ചെയ്യുന്നത് വരെ ടാബ്ലെറ്റിലേക്ക് പതുക്കെ തിരികെ തള്ളുക.
3.4 പ്രാരംഭ സജ്ജീകരണ വിസാർഡ്
ആദ്യമായി പവർ-ഓൺ ചെയ്യുമ്പോൾ, ടാബ്ലെറ്റ് ഒരു പ്രാരംഭ സജ്ജീകരണ പ്രക്രിയയിലൂടെ നിങ്ങളെ നയിക്കും. ഓൺ-സ്ക്രീൻ നിർദ്ദേശങ്ങൾ പാലിക്കുക:
- നിങ്ങൾ ഇഷ്ടപ്പെടുന്ന ഭാഷ തിരഞ്ഞെടുക്കുക.
- ഒരു Wi-Fi നെറ്റ്വർക്കിലേക്ക് കണക്റ്റുചെയ്യുക.
- Set up your Google account (optional, but recommended for app downloads).
- തീയതി, സമയം, മറ്റ് അടിസ്ഥാന ക്രമീകരണങ്ങൾ എന്നിവ കോൺഫിഗർ ചെയ്യുക.
4. പ്രവർത്തന നിർദ്ദേശങ്ങൾ
4.1 അടിസ്ഥാന നാവിഗേഷൻ
The tablet features a 10-inch IPS touchscreen for intuitive interaction.

Figure 4.1.1: The tablet's 10-inch IPS screen with 800 x 1280 resolution, displaying a vibrant background.
- ടാപ്പ് ചെയ്യുക: ഒരു ഇനം തിരഞ്ഞെടുക്കാനോ ഒരു ആപ്ലിക്കേഷൻ തുറക്കാനോ സ്ക്രീനിൽ ഒരിക്കൽ സ്പർശിക്കുക.
- സ്പർശിച്ച് പിടിക്കുക: കൂടുതൽ ഓപ്ഷനുകൾക്കായി അല്ലെങ്കിൽ നീക്കാൻ ഒരു ഇനം അമർത്തിപ്പിടിക്കുക.
- സ്വൈപ്പ്: പേജുകൾക്കിടയിൽ സ്ക്രോൾ ചെയ്യാനോ നാവിഗേറ്റ് ചെയ്യാനോ സ്ക്രീനിലുടനീളം നിങ്ങളുടെ വിരൽ വലിച്ചിടുക.
- പിഞ്ച്: ചിത്രങ്ങൾ സൂം ഇൻ ചെയ്യാനോ ഔട്ട് ചെയ്യാനോ രണ്ട് വിരലുകൾ ഉപയോഗിക്കുക, web പേജുകൾ.
4.2 കണക്റ്റിവിറ്റി (വൈ-ഫൈ, ബ്ലൂടൂത്ത്, 3G)
ടാബ്ലെറ്റ് വിവിധ കണക്റ്റിവിറ്റി ഓപ്ഷനുകളെ പിന്തുണയ്ക്കുന്നു:
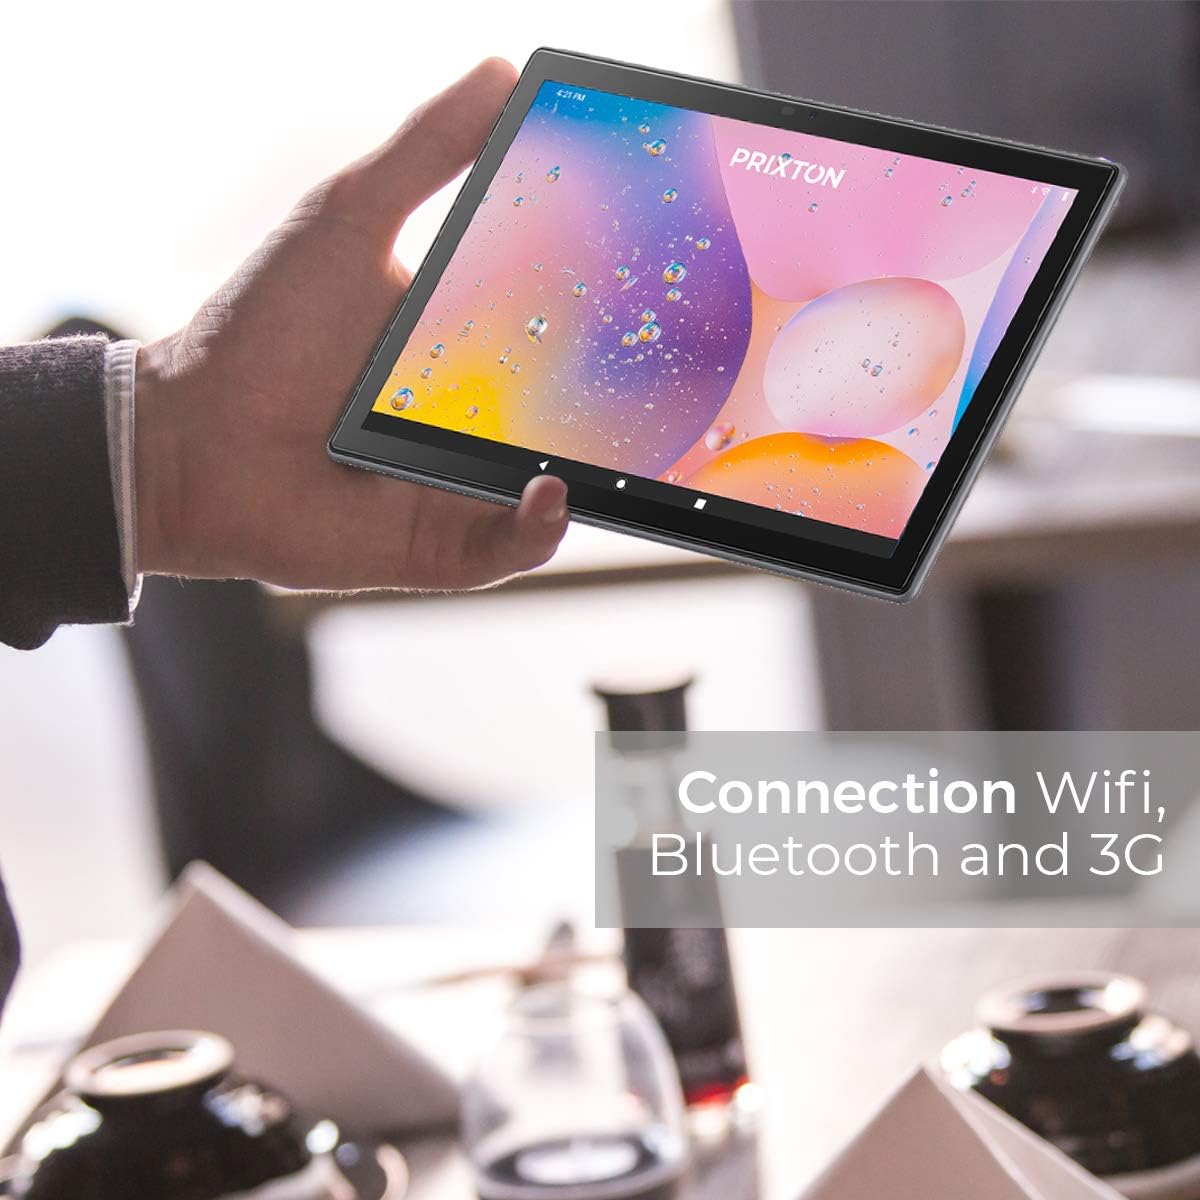
Figure 4.2.1: A person holding the tablet, illustrating its portability and highlighting its Wi-Fi, Bluetooth, and 3G connection capabilities.
- വൈഫൈ: പോകുക ക്രമീകരണങ്ങൾ > നെറ്റ്വർക്കും ഇന്റർനെറ്റും > വൈ-ഫൈ. വൈഫൈ ഓണാക്കി നിങ്ങൾക്ക് ആവശ്യമുള്ള നെറ്റ്വർക്ക് തിരഞ്ഞെടുക്കുക. ആവശ്യപ്പെടുകയാണെങ്കിൽ പാസ്വേഡ് നൽകുക.
- ബ്ലൂടൂത്ത്: പോകുക ക്രമീകരണങ്ങൾ > കണക്റ്റുചെയ്ത ഉപകരണങ്ങൾ > ബ്ലൂടൂത്ത്. Turn Bluetooth on and pair with compatible devices.
- 3G: Ensure a valid SIM card is inserted. Go to ക്രമീകരണം > നെറ്റ്വർക്കും ഇന്റർനെറ്റും > മൊബൈൽ നെറ്റ്വർക്ക് to configure mobile data settings.
4.3 ക്യാമറകൾ ഉപയോഗിക്കുന്നത്
The tablet is equipped with a 5 Mpx front camera and an 8 Mpx rear camera.

ചിത്രം 4.3.1: വിശദമായി view of the tablet's rear 8 Mpx camera module, including its flash.
Open the Camera application from the home screen or app drawer. You can switch between front and rear cameras, select photo or video mode, and adjust settings like flash and timer.
4.4 സ്റ്റോറേജ് മാനേജ്മെൻ്റ്
The tablet comes with 64GB of internal storage, expandable via microSD card.

Figure 4.4.1: The tablet's back panel, indicating its Android 10.0 operating system, Octa Core Spreadtrum processor, 3GB RAM, and 64GB internal storage.
സംഭരണ ഉപയോഗം പരിശോധിക്കുന്നതിനോ നിയന്ത്രിക്കുന്നതിനോ files, പോകുക ക്രമീകരണങ്ങൾ > സംഭരണം. നിങ്ങൾക്ക് കഴിയും view available space, format the microSD card, and manage applications or media files.
5. പരിപാലനം
5.1 ഉപകരണം വൃത്തിയാക്കുന്നു
നിങ്ങളുടെ ടാബ്ലെറ്റ് വൃത്തിയാക്കാൻ, മൃദുവായ, ലിന്റ് രഹിത തുണി ഉപയോഗിക്കുക. കഠിനമായ പാടുകൾക്ക്, ചെറുതായി dampഇലക്ട്രോണിക് ഉപകരണങ്ങൾക്കായി പ്രത്യേകം രൂപകൽപ്പന ചെയ്ത ഒരു സ്ക്രീൻ ക്ലീനർ അല്ലെങ്കിൽ വെള്ളം ഉപയോഗിച്ച് തുണി വൃത്തിയാക്കുക. കഠിനമായ രാസവസ്തുക്കൾ, ഉരച്ചിലുകൾ ഉള്ള വസ്തുക്കൾ അല്ലെങ്കിൽ അമിതമായ ഈർപ്പം എന്നിവ ഉപയോഗിക്കുന്നത് ഒഴിവാക്കുക.
5.2 ബാറ്ററി കെയർ
- ടാബ്ലെറ്റ് ഉയർന്ന താപനിലയിൽ (ചൂടോ തണുപ്പോ) തുറന്നുവെക്കുന്നത് ഒഴിവാക്കുക, കാരണം ഇത് ബാറ്ററിയുടെ ആയുസ്സ് കുറയ്ക്കും.
- ടാബ്ലെറ്റ് പൂർണ്ണമായി ഡിസ്ചാർജ് ചെയ്ത നിലയിൽ ദീർഘനേരം വയ്ക്കരുത്.
- ഒറിജിനൽ അല്ലെങ്കിൽ സാക്ഷ്യപ്പെടുത്തിയ അനുയോജ്യമായ ചാർജറുകൾ മാത്രം ഉപയോഗിക്കുക.
5.3 സോഫ്റ്റ്വെയർ അപ്ഡേറ്റുകൾ
ഒപ്റ്റിമൽ പ്രകടനവും സുരക്ഷയും ഉറപ്പാക്കാൻ ഇടയ്ക്കിടെ സോഫ്റ്റ്വെയർ അപ്ഡേറ്റുകൾക്കായി പരിശോധിക്കുക. പോകുക ക്രമീകരണങ്ങൾ > സിസ്റ്റം > സിസ്റ്റം അപ്ഡേറ്റ് ലഭ്യമായ അപ്ഡേറ്റുകൾ പരിശോധിച്ച് ഇൻസ്റ്റാൾ ചെയ്യാൻ.
6. പ്രശ്നപരിഹാരം
| പ്രശ്നം | സാധ്യമായ കാരണം | പരിഹാരം |
|---|---|---|
| ടാബ്ലെറ്റ് ഓണാക്കുന്നില്ല | ബാറ്ററി ചാർജ് കുറവാണ്; സിസ്റ്റം ക്രാഷ് ആയി | ടാബ്ലെറ്റ് കുറഞ്ഞത് 30 മിനിറ്റെങ്കിലും ചാർജ് ചെയ്യുക. റീസ്റ്റാർട്ട് ചെയ്യാൻ നിർബന്ധിക്കുന്നതിന് പവർ ബട്ടൺ 10-15 സെക്കൻഡ് അമർത്തിപ്പിടിക്കുക. |
| Wi-Fi കണക്ഷൻ പ്രശ്നങ്ങൾ | Incorrect password; Router issue; Tablet Wi-Fi disabled | Verify Wi-Fi password. Restart your router. Ensure Wi-Fi is enabled in Settings. |
| മന്ദഗതിയിലുള്ള പ്രകടനം | വളരെയധികം ആപ്പുകൾ പ്രവർത്തിക്കുന്നു; സംഭരണശേഷി കുറവാണ്; കാലഹരണപ്പെട്ട സോഫ്റ്റ്വെയർ | Close unnecessary apps. Free up storage space. Check for system updates. |
| ആപ്പുകൾ ക്രാഷാകുന്നു | App bug; Insufficient RAM | Update the app. Clear app cache/data (Settings > Apps). Restart the tablet. |
| സ്ക്രീൻ പ്രതികരിക്കുന്നില്ല | താൽക്കാലിക സോഫ്റ്റ്വെയർ തകരാർ | Force restart the tablet by holding the Power button. |
7 സ്പെസിഫിക്കേഷനുകൾ
| ഫീച്ചർ | വിശദാംശങ്ങൾ |
|---|---|
| ബ്രാൻഡ് | പ്രിക്സ്റ്റൺ |
| മോഡൽ നമ്പർ | Tablet 10 3 G |
| പരമ്പര | വിദഗ്ധൻ |
| നിറം | മെറ്റാലിക് |
| ഓപ്പറേറ്റിംഗ് സിസ്റ്റം | ആൻഡ്രോയിഡ് 10 |
| പ്രോസസ്സർ | Octa Core Unisoc T618 |
| റാം | 3 ജിബി |
| ആന്തരിക സംഭരണം | 64 ജിബി |
| വികസിപ്പിക്കാവുന്ന സംഭരണം | മൈക്രോ എസ്ഡി |
| സ്ക്രീൻ വലിപ്പം | 10.1 ഇഞ്ച് |
| റെസലൂഷൻ | 800 x 1280 IPS |
| ഗ്രാഫിക്സ് കാർഡ് | സംയോജിപ്പിച്ചത് |
| കണക്റ്റിവിറ്റി | Wi-Fi, Bluetooth, 3G |
| ഹാർഡ്വെയർ ഇന്റർഫേസ് | Micro USB, Micro SD, SIM slot, 3.5mm Audio Jack |
| ബാറ്ററി | 6000 mAh Lithium metal |
| മുൻ ക്യാമറ | 5 Mpx |
| പിൻ ക്യാമറ | 8 Mpx |
| ഉൽപ്പന്ന അളവുകൾ (L x W x H) | 50 x 50 x 28 സെ.മീ |
| ഉൽപ്പന്ന ഭാരം | 980 ഗ്രാം |
| നിർമ്മാതാവ് | പ്രിക്സ്റ്റൺ |
| Date of Availability | ജൂലൈ 9, 2022 |
8. വാറൻ്റിയും പിന്തുണയും
For warranty information and technical support, please refer to the documentation included with your purchase or visit the official PRIXTON website. When contacting support, please have your product model (Tablet 10 3 G) and purchase details ready.


