ആമുഖം
This manual provides comprehensive instructions for the installation, operation, and maintenance of your Logitech VC Wall Mount for Video Bars. This wall mount is designed to securely attach Logitech video bars, such as the Rally Bar and Rally Bar Mini, to a wall, optimizing space and improving the aesthetic integration of your video conferencing setup.
ബോക്സിൽ എന്താണുള്ളത്
ഇൻസ്റ്റാളേഷൻ ആരംഭിക്കുന്നതിന് മുമ്പ് എല്ലാ ഘടകങ്ങളും ഉണ്ടെന്ന് ഉറപ്പാക്കുക.
- മതിൽ മൗണ്ട്
- Tilt Down Adapter
- Screws (various types for mounting)
- ഡോക്യുമെന്റേഷൻ (ഈ മാനുവൽ)

ചിത്രം 1: All components included with the Logitech VC Wall Mount. This includes the main wall mount bracket, the tilt-down adapter, various screws for installation, and the product documentation.
സജ്ജീകരണവും ഇൻസ്റ്റാളേഷനും
Follow these steps carefully to ensure proper and secure installation of the wall mount and your video bar.
1. മൗണ്ടിംഗ് ലൊക്കേഷൻ തയ്യാറാക്കുക
Choose a suitable wall location that can support the weight of the mount and the video bar. Ensure there are no electrical wires or plumbing behind the drilling area. Mark the desired height and horizontal position for the mount.
2. വാൾ മൗണ്ട് ബ്രാക്കറ്റ് ഘടിപ്പിക്കുക
- Position the wall mount bracket against the wall at your marked location.
- Using a pencil, mark the drilling points through the screw holes on the bracket.
- Drill pilot holes at the marked points. Use appropriate drill bits for your wall material (e.g., wood studs, drywall with anchors, concrete).
- Secure the wall mount bracket to the wall using the provided screws. Ensure it is level and firmly attached.
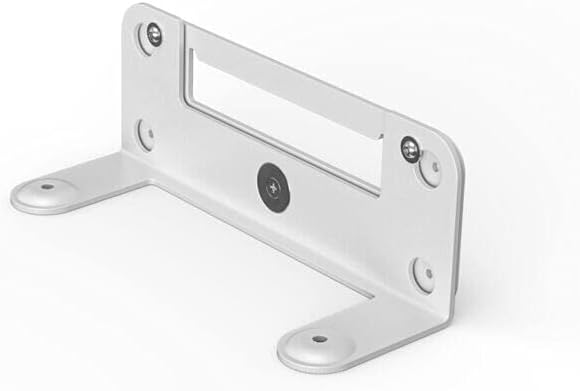
ചിത്രം 2: The main wall mount bracket, ready for installation. Note the screw holes for securing it to the wall.

ചിത്രം 3: An exploded diagram showing how the screws and washers are used to assemble and secure the wall mount components.
3. Attach the Tilt Down Adapter (Optional)
If you require a downward tilt for your video bar, attach the tilt down adapter to the wall mount bracket before mounting the video bar.
- Align the tilt down adapter with the designated slots on the wall mount bracket.
- Secure the adapter using the provided screws.

ചിത്രം 4: The tilt down adapter, which allows for angle adjustment of the mounted video bar.
4. Mount the Video Bar
Carefully attach your Logitech video bar (e.g., Rally Bar, Rally Bar Mini) to the installed wall mount or tilt down adapter.
- Align the mounting points on the video bar with the corresponding features on the wall mount/adapter.
- Slide the video bar into place until it clicks or is securely seated.
- If applicable, use any additional securing screws or mechanisms provided with your video bar to lock it onto the mount.

ചിത്രം 5: A Logitech video bar securely mounted to the wall, positioned above a display screen.

ചിത്രം 6: A Logitech video bar mounted below a display, demonstrating how cables can be routed for a clean installation.
പ്രവർത്തിക്കുന്നു
Once installed, the Logitech VC Wall Mount requires no active operation. Its function is to securely hold the video bar in place. Ensure all connections to the video bar are properly routed and not strained by the mount.
If the tilt down adapter is used, the angle is set during installation and is not typically adjusted during normal operation. For angle adjustments, you may need to partially unmount the video bar to access the adjustment mechanism.
മെയിൻ്റനൻസ്
The Logitech VC Wall Mount is designed for durability and requires minimal maintenance.
- വൃത്തിയാക്കൽ: Use a soft, dry cloth to wipe down the mount if it accumulates dust. Avoid abrasive cleaners or solvents.
- പരിശോധന: Periodically check the mounting screws to ensure they remain tight and secure. Over time, vibrations or environmental factors could potentially loosen them.
- നാശം: If the mount appears damaged or bent, do not use it. Contact Logitech support for assistance.
ട്രബിൾഷൂട്ടിംഗ്
This section addresses common issues you might encounter with the wall mount.
| പ്രശ്നം | സാധ്യമായ കാരണം | പരിഹാരം |
|---|---|---|
| ചുമരിലെ മൗണ്ട് അയഞ്ഞതായി തോന്നുന്നു. | Screws are not fully tightened or wall anchors are insufficient. | Tighten all mounting screws. If the issue persists, consider using stronger wall anchors or relocating the mount to a wall stud. |
| Video bar does not sit flush or securely. | Incorrect alignment during mounting or obstruction. | Remove the video bar and re-align it with the mount's features. Ensure no cables or debris are obstructing the connection. Verify the video bar is compatible with this mount. |
| Mount appears bent or damaged. | Physical impact or excessive force during installation. | Do not use a damaged mount. Contact Logitech support for a replacement. |
സ്പെസിഫിക്കേഷനുകൾ
- ഉൽപ്പന്ന അളവുകൾ: 1.1 x 9.7 x 6.5 ഇഞ്ച്
- ഇനത്തിൻ്റെ ഭാരം: 2.2 പൗണ്ട്
- ഇനം മോഡൽ നമ്പർ: 952-000044
- ബ്രാൻഡ്: ലോജിടെക്
- നിർമ്മാതാവ്: LOGITECH VC
- അനുയോജ്യമായ ഉപകരണങ്ങൾ: Rally Bar, Rally Bar Mini
- മൗണ്ടിംഗ് തരം: മതിൽ മൗണ്ട്
- പ്രത്യേക സവിശേഷത: VESA-compatible mounting kit, Tilt Down Adapter, Built-in angle adjustment
- ആദ്യം ലഭ്യമായ തീയതി: 9 മാർച്ച് 2021
വാറൻ്റിയും പിന്തുണയും
വാറന്റി വിവരങ്ങൾക്കും സാങ്കേതിക പിന്തുണയ്ക്കും, ദയവായി ഔദ്യോഗിക ലോജിടെക് പിന്തുണ സന്ദർശിക്കുക. webസൈറ്റിൽ ബന്ധപ്പെടുക അല്ലെങ്കിൽ അവരുടെ ഉപഭോക്തൃ സേവനവുമായി ബന്ധപ്പെടുക. വാങ്ങിയതിന്റെ തെളിവായി നിങ്ങളുടെ വാങ്ങൽ രസീത് സൂക്ഷിക്കുക.
ലോജിടെക് പിന്തുണ: www.logitech.com/support


