1. ഉൽപ്പന്നം കഴിഞ്ഞുview
The LILYGO TTGO T-Echo is a versatile wireless communication module featuring the NRF52840 microcontroller, LoRa SX1262 transceiver, L76K GPS, and a 1.54-inch E-Paper display. This device is designed for long-range, low-power communication, making it suitable for off-grid messaging, tracking, and various IoT applications. It supports mesh networking protocols like Meshtastic, allowing devices to relay messages to extend communication range.

Figure 1: LILYGO TTGO T-Echo NRF52840 LoRa Wireless Module
2 പ്രധാന സവിശേഷതകൾ
- മൈക്രോകൺട്രോളർ: NRF52840
- LoRa Transceiver: SX1262 (915MHz) for long-range, low-power communication.
- GPS മൊഡ്യൂൾ: L76K Multi-System Positioning GNSS (GPS, GLONASS, BeiDou, QZSS) with improved receiving and anti-interference attributes.
- ഡിസ്പ്ലേ: 1.54-inch E-Paper display (200x200 resolution, 2 grey levels, 2s full refresh time).
- വയർലെസ് കണക്റ്റിവിറ്റി: Bluetooth 5, Thread, Bluetooth Mesh, ANT, 802.15.4, Zigbee.
- Bus Interfaces: UART, SPI, TWI, PDM, I2S, QSPI.
- മെമ്മറി: 2MB Flash, 256KB RAM.
- Optional Sensor: BME280 temperature and pressure sensor (depending on model).
3. പാക്കേജ് ഉള്ളടക്കം
നിങ്ങളുടെ പാക്കേജിൽ എല്ലാ ഇനങ്ങളും ഉണ്ടെന്ന് ഉറപ്പാക്കുക:
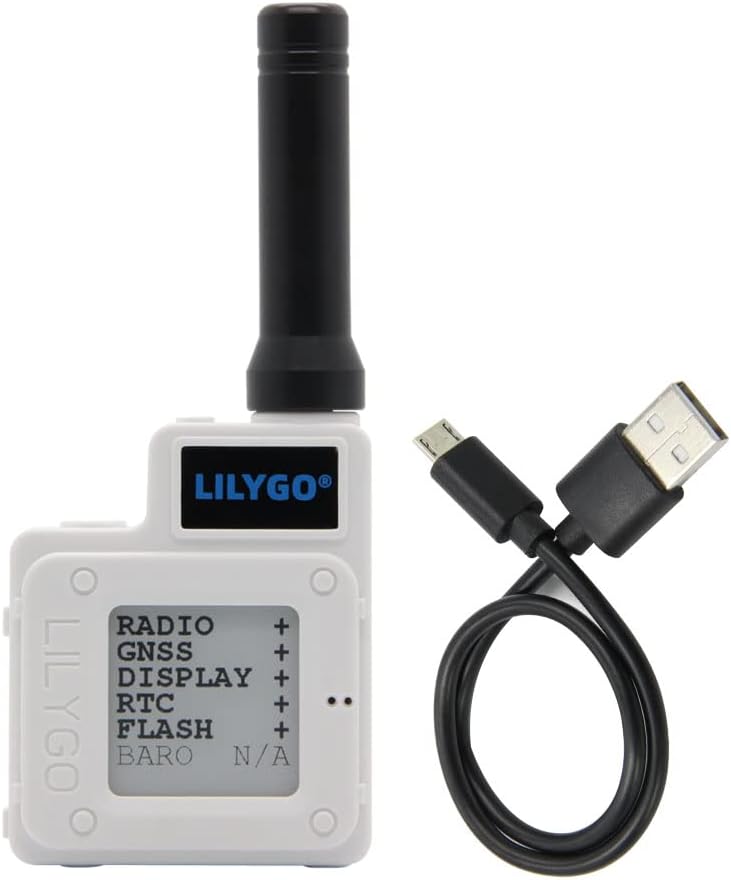
Figure 2: T-Echo module and USB cable
- 1 x SoftRF Motherboard
- 1 x ജിപിഎസ് ആന്റിന
- 1 x LORA 915MHz Antenna
- 1 x NFC Antenna
- 1 x Touch Cable
- 1 x Jst 2pin1.25mm Battery Cable
- 1 x TYPE-C USB Cable
- 1 x 850mA Capacity Battery
- 1 x ABS Material Enclosure White
4. ഘടക ഐഡന്റിഫിക്കേഷൻ

ചിത്രം 3: പിന്നിലേക്ക് view ലേബൽ ചെയ്ത ഘടകങ്ങൾ ഉള്ളത്

Figure 4: Detailed Pinout Diagram
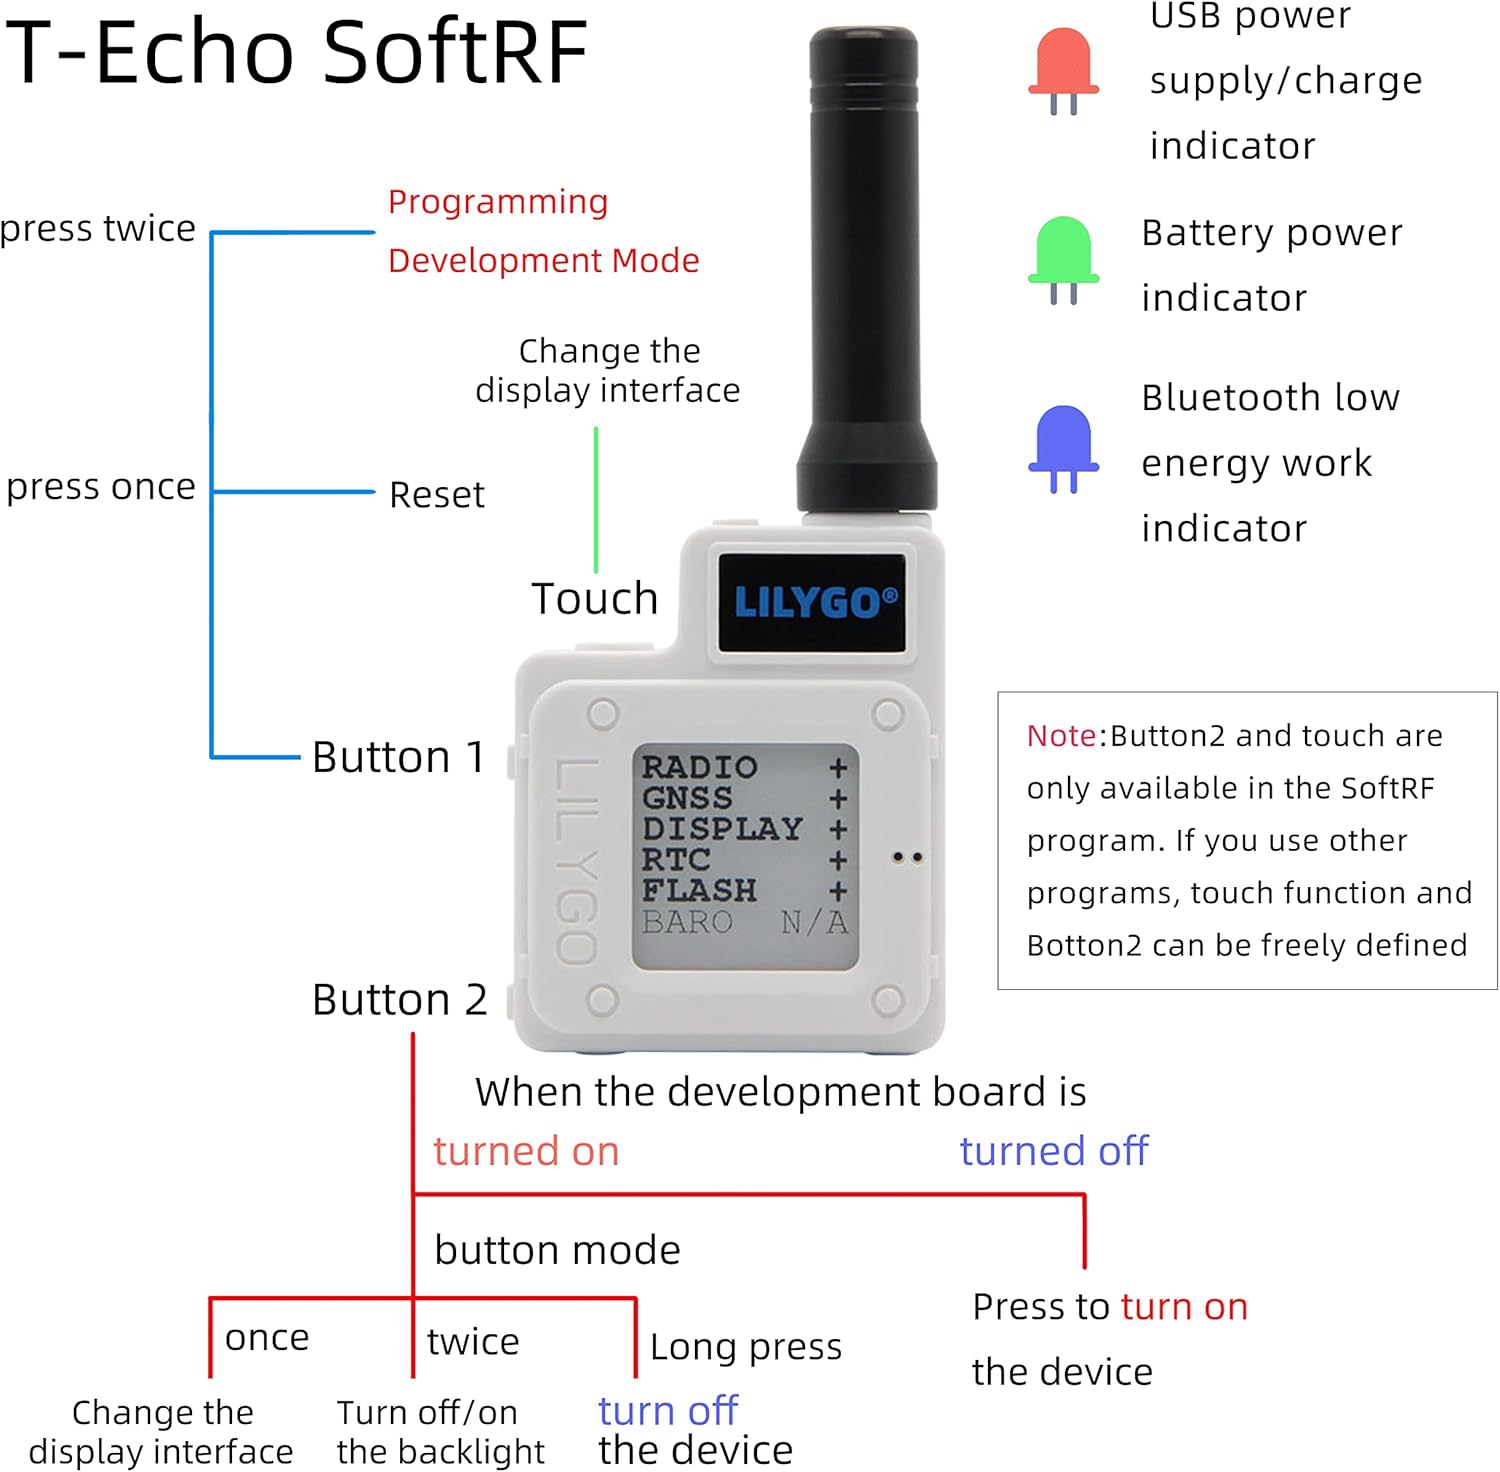
Figure 5: Button functions and LED indicators
5. സജ്ജീകരണം
5.1 ഹാർഡ്വെയർ അസംബ്ലി
The T-Echo module comes with an ABS enclosure. Follow these steps to assemble the device:
- Connect the LoRa antenna to the module's SMA connector.
- Carefully place the main board into the bottom part of the enclosure.
- Connect the battery to the appropriate JST connector on the board.
- Secure the battery within the enclosure, often using double-sided adhesive foam for isolation and stability.
- Attach the top part of the enclosure and secure it with the provided screws.
Video 1: Installation for Mesh Node T114 Board+Battery+N36 Case Set
Video 2: N30 Protective Case for ESP32 LoRa V3 Board Antenna Battery
5.2 Firmware Installation
To utilize the full capabilities of your LILYGO T-Echo, it is recommended to install the Meshtastic firmware. This firmware enables mesh networking capabilities for off-grid communication.
- Download the Meshtastic firmware for the LILYGO T-Echo from the official Meshtastic webസൈറ്റ്.
- Connect your T-Echo device to your computer using the provided USB-C cable.
- Follow the instructions on the Meshtastic website or the provided video to flash the firmware onto your device. This typically involves using a web flasher tool or a command-line interface.
Video 3: How to Install Meshtastic to LILYGO T-Echo
6. പ്രവർത്തന നിർദ്ദേശങ്ങൾ
6.1 Basic Device Operation
The T-Echo features two buttons (Button 1 and Button 2) and a touch interface for navigation and control, especially when running the SoftRF program. LED indicators provide visual feedback on device status.
- ബട്ടൺ 1:
- Press once to reset the device.
- Press twice to enter Programming Development Mode.
- Button 2 (when device is turned on, in button mode):
- Press once to change the display interface.
- Press twice to turn off/on the backlight.
- ഉപകരണം ഓഫാക്കാൻ ദീർഘനേരം അമർത്തുക.
- ടച്ച് ഇന്റർഫേസ്: Changes the display interface (available in SoftRF program).
- LED സൂചകങ്ങൾ:
- Red LED: USB power supply/charge indicator.
- Green LED: Battery power indicator.
- Blue LED: Bluetooth low energy work indicator.
Figure 6: Button functions and LED indicators
6.2 സന്ദേശങ്ങൾ അയയ്ക്കുകയും സ്വീകരിക്കുകയും ചെയ്യുന്നു
After installing the Meshtastic firmware and connecting your device to a mobile phone via Bluetooth, you can use the Meshtastic app to send and receive text messages.
- Ensure your T-Echo is powered on and connected to your phone via Bluetooth.
- Open the Meshtastic application on your smartphone.
- Select the desired channel or recipient within the app.
- Type your message and send it. The T-Echo will transmit the message over the LoRa network.
- Incoming messages will be displayed on the T-Echo's E-Paper screen and within the Meshtastic app.
Video 4: How to use
7. Wiring and Sensor Integration
The LILYGO T-Echo can be integrated with external sensors and relays for various applications, such as door monitoring or remote control. The following diagram illustrates a typical wiring setup for a door monitoring system using a Hall Effect sensor and a relay.
Video 5: ESP32 LoRa V3 N32 Set DIY Project - Door Monitor
8. പരിപാലനം
- ബാറ്ററി ചാർജിംഗ്: Charge the device using the provided USB-C cable. The red LED indicates charging status, and the green LED indicates battery level.
- ഫേംവെയർ അപ്ഡേറ്റുകൾ: Periodically check the official Meshtastic webഒപ്റ്റിമൽ പ്രകടനവും പുതിയ സവിശേഷതകളിലേക്കുള്ള ആക്സസും ഉറപ്പാക്കാൻ ഫേംവെയർ അപ്ഡേറ്റുകൾക്കായുള്ള സൈറ്റ്.
- വൃത്തിയാക്കൽ: ഉപകരണം വൃത്തിയാക്കാൻ മൃദുവായതും ഉണങ്ങിയതുമായ തുണി ഉപയോഗിക്കുക. കഠിനമായ രാസവസ്തുക്കളോ ഉരച്ചിലുകളോ ഉള്ള വസ്തുക്കൾ ഉപയോഗിക്കുന്നത് ഒഴിവാക്കുക.
- സംഭരണം: നേരിട്ടുള്ള സൂര്യപ്രകാശത്തിൽ നിന്നും കടുത്ത താപനിലയിൽ നിന്നും മാറി തണുത്തതും വരണ്ടതുമായ സ്ഥലത്ത് ഉപകരണം സൂക്ഷിക്കുക.
9. പ്രശ്നപരിഹാരം
- ഉപകരണം പവർ ചെയ്യുന്നില്ല: Ensure the battery is charged. Connect the device to a power source via USB-C.
- ബ്ലൂടൂത്ത് കണക്ഷൻ ഇല്ല: Verify Bluetooth is enabled on your smartphone and the T-Echo. Ensure the blue LED is active. Try restarting both devices.
- Unable to Send/Receive Messages: Check the LoRa antenna connection. Ensure both devices are within range and running compatible Meshtastic firmware. Verify channel settings in the Meshtastic app.
- ജിപിഎസ് പ്രവർത്തിക്കുന്നില്ല: Ensure the GPS antenna is properly connected and the device has a clear view ആകാശത്തിൻ്റെ.
- E-Paper Display Issues: If the display is unresponsive or shows artifacts, try resetting the device.
10 സ്പെസിഫിക്കേഷനുകൾ
| ഇനം മോഡൽ നമ്പർ | H472-A |
| ഡിസ്പ്ലേ വലിപ്പം | 1.54 ഇഞ്ച് |
| ഡിസ്പ്ലേ തരം | ഇ-പേപ്പർ |
| ബ്ലൂടൂത്ത് പിന്തുണയ്ക്കുന്നു | ബ്ലൂടൂത്ത് |
| കണക്റ്റിവിറ്റി ടെക്നോളജി | ബ്ലൂടൂത്ത് |
| മെമ്മറി സ്റ്റോറേജ് കപ്പാസിറ്റി | 2 MB |
| ഹ്യൂമൻ ഇന്റർഫേസ് ഇൻപുട്ട് | ബട്ടണുകൾ |
| മൗണ്ടിംഗ് തരം | പാനൽ മ .ണ്ട് |
11. വാറൻ്റിയും പിന്തുണയും
For warranty information and technical support, please refer to the documentation provided with your purchase or visit the official LILYGO webസൈറ്റ്. പ്രദേശത്തെയും റീട്ടെയിലറെയും ആശ്രയിച്ച് നിർദ്ദിഷ്ട വാറന്റി നിബന്ധനകൾ വ്യത്യാസപ്പെടാം.


