സമയം ക്രമീകരിക്കുന്നു
മണിക്കൂർ, മിനിറ്റ് സൂചികൾ ക്രമീകരിക്കുന്നതിന് ക്ലോക്കിന്റെ പിൻഭാഗത്തുള്ള സമയ ക്രമീകരണ നോബ് ഉപയോഗിക്കുക. ശരിയായ സമയം പ്രദർശിപ്പിക്കുന്നതുവരെ നോബ് ഘടികാരദിശയിലോ എതിർ ഘടികാരദിശയിലോ തിരിക്കുക.
മോഡൽ: B09JKWDFTT | ബ്രാൻഡ്: ROTH
ഈ മാനുവൽ ROTH വിദ്യാഭ്യാസ അലാറം ക്ലോക്കിനും സെന്റ്ക്കും സമഗ്രമായ നിർദ്ദേശങ്ങൾ നൽകുന്നു.amp സെറ്റ്. സമയം പറയാൻ കുട്ടികളെ സഹായിക്കുന്നതിനായി രൂപകൽപ്പന ചെയ്തിരിക്കുന്ന ഈ സെറ്റിൽ വിവിധ സവിശേഷതകളുള്ള ഒരു അലാറം ക്ലോക്കും ഒരു പൂരക സ്റ്റിയറും ഉൾപ്പെടുന്നു.amp പരിശീലനത്തിനായി സജ്ജമാക്കി. ശരിയായ പ്രവർത്തനവും സുരക്ഷയും ഉറപ്പാക്കാൻ ഉപയോഗിക്കുന്നതിന് മുമ്പ് ദയവായി ഈ മാനുവൽ നന്നായി വായിക്കുക.

മുന്നറിയിപ്പ്: ശ്വാസംമുട്ടൽ അപകടം - ചെറിയ ഭാഗങ്ങൾ. 3 വയസ്സിന് താഴെയുള്ള കുട്ടികൾക്ക് അനുയോജ്യമല്ല.
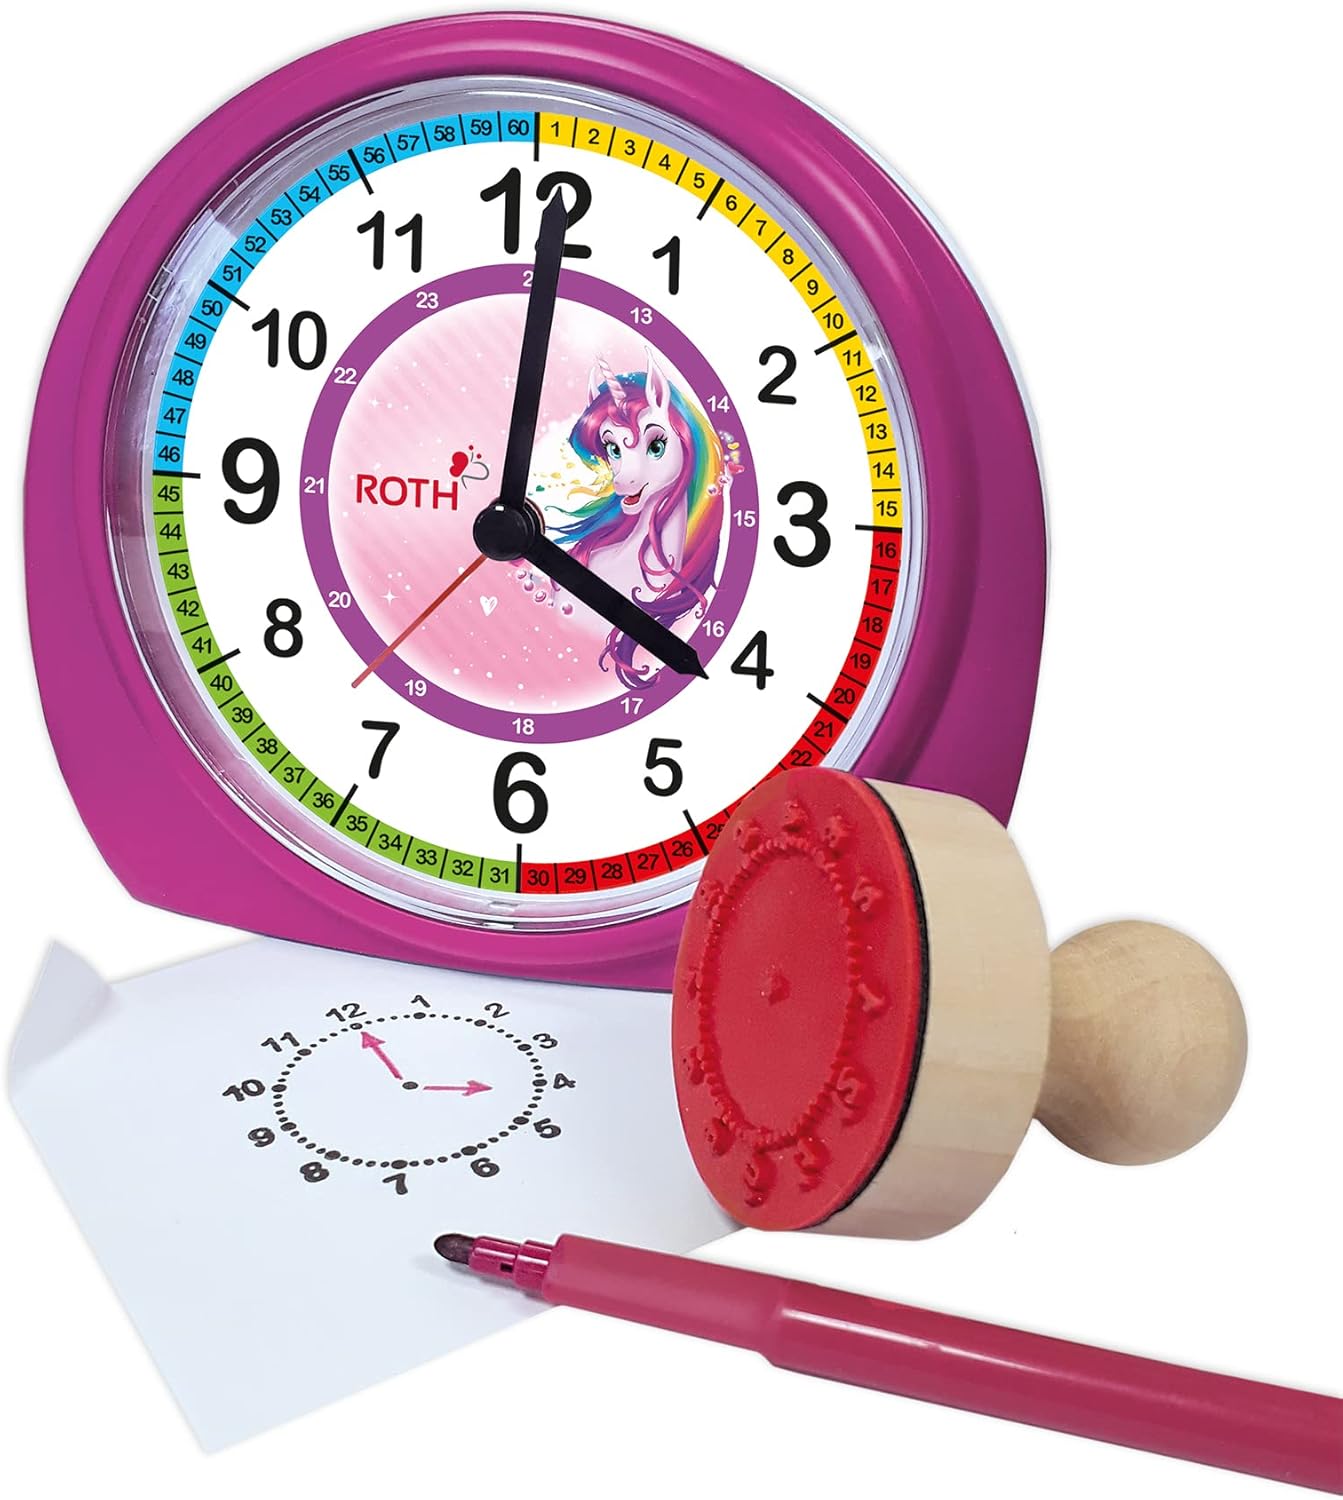
എല്ലാ ഇനങ്ങളും ഉണ്ടെന്ന് ഉറപ്പാക്കാൻ പാക്കേജ് പരിശോധിക്കുക:

അലാറം ക്ലോക്കിന് 1x AA ബാറ്ററി ആവശ്യമാണ് (ഉൾപ്പെടുത്തിയിട്ടില്ല).

മണിക്കൂർ, മിനിറ്റ് സൂചികൾ ക്രമീകരിക്കുന്നതിന് ക്ലോക്കിന്റെ പിൻഭാഗത്തുള്ള സമയ ക്രമീകരണ നോബ് ഉപയോഗിക്കുക. ശരിയായ സമയം പ്രദർശിപ്പിക്കുന്നതുവരെ നോബ് ഘടികാരദിശയിലോ എതിർ ഘടികാരദിശയിലോ തിരിക്കുക.
ആവശ്യമുള്ള അലാറം സമയം സജ്ജീകരിക്കാൻ, അലാറം ക്രമീകരണ നോബ് ഉപയോഗിക്കുക, അതും പിന്നിലാണ്. നിശ്ചിത സമയം എത്തുമ്പോൾ അലാറം ഒരു ബീപ്പ് മുഴക്കും. അലാറം സജീവമാക്കാനോ നിർജ്ജീവമാക്കാനോ, ക്ലോക്കിന്റെ വശത്തുള്ള ഓൺ/ഓഫ് സ്വിച്ച് ഉപയോഗിക്കുക.

അലാറം മുഴങ്ങുമ്പോൾ, സ്നൂസ് പ്രവർത്തനം സജീവമാക്കുന്നതിന് ക്ലോക്കിന്റെ മുകളിലുള്ള വലിയ ബട്ടൺ അമർത്തുക. അലാറം താൽക്കാലികമായി നിർത്തി ഒരു ചെറിയ ഇടവേളയ്ക്ക് ശേഷം വീണ്ടും മുഴങ്ങും.
കുറഞ്ഞ വെളിച്ചത്തിൽ ദൃശ്യപരത ഉറപ്പാക്കാൻ ക്ലോക്കിൽ ഒരു ബാക്ക്ലൈറ്റ് ഉണ്ട്. ക്ലോക്ക് ഫെയ്സ് പ്രകാശിപ്പിക്കുന്നതിന്, സാധാരണയായി മുകളിലോ വശത്തോ സ്ഥിതിചെയ്യുന്ന ബാക്ക്ലൈറ്റ് ബട്ടൺ അമർത്തുക.
ഉൾപ്പെടുത്തിയിരിക്കുന്ന തടി സ്റ്റേഷൻamp സമയം പറയാൻ കുട്ടികളെ പരിശീലിപ്പിക്കാൻ സഹായിക്കുന്നതിനാണ് ഇങ്ക് പാഡും രൂപകൽപ്പന ചെയ്തിരിക്കുന്നത്.amp കുട്ടികൾക്ക് വിവിധ സമയങ്ങളിൽ കൈകളിൽ വരയ്ക്കാൻ അനുവദിക്കുന്ന തരത്തിൽ പേപ്പറിൽ ഒരു ക്ലോക്ക് ഫെയ്സ് ഔട്ട്ലൈൻ സൃഷ്ടിക്കുന്നു.

| പ്രശ്നം | സാധ്യമായ കാരണം | പരിഹാരം |
|---|---|---|
| ക്ലോക്ക് പ്രവർത്തിക്കുന്നില്ല | ബാറ്ററി തീർന്നു അല്ലെങ്കിൽ തെറ്റായി ചേർത്തിരിക്കുന്നു. | ബാറ്ററി (1x AA) മാറ്റിസ്ഥാപിക്കുക അല്ലെങ്കിൽ പോളാരിറ്റി പരിശോധിക്കുക. |
| അലാറം മുഴങ്ങുന്നില്ല | അലാറം സജീവമാക്കിയിട്ടില്ല അല്ലെങ്കിൽ തെറ്റായി സജ്ജീകരിച്ചിട്ടില്ല. | അലാറം ഓൺ/ഓഫ് സ്വിച്ച് 'ഓൺ' സ്ഥാനത്താണെന്നും അലാറം സമയം ശരിയായി സജ്ജീകരിച്ചിട്ടുണ്ടെന്നും ഉറപ്പാക്കുക. |
| ബാക്ക്ലൈറ്റ് പ്രവർത്തിക്കുന്നില്ല | ബാറ്ററി കുറവാണ് അല്ലെങ്കിൽ ബാക്ക്ലൈറ്റ് ബട്ടൺ അമർത്തിയിട്ടില്ല. | ബാറ്ററി മാറ്റിസ്ഥാപിക്കുക അല്ലെങ്കിൽ ബാക്ക്ലൈറ്റ് ബട്ടൺ ദൃഢമായി അമർത്തുക. |
| Stamp വ്യക്തമായ ധാരണ ഉണ്ടാക്കുന്നില്ല | ഇങ്ക് പാഡ് ഉണങ്ങിയതോ കട്ടിയുള്ളതോ ആണ്amp തുല്യമായി മഷി പുരട്ടാത്തത്. | ഇങ്ക് പാഡ് ഈർപ്പമുള്ളതാണെന്ന് ഉറപ്പാക്കുക; വീണ്ടും മഷി പുരട്ടുക.amp ആവശ്യമെങ്കിൽ ഇങ്ക് പാഡ് മാറ്റിസ്ഥാപിക്കുക. |
| ഫീച്ചർ | വിശദാംശങ്ങൾ |
|---|---|
| ഉൽപ്പന്ന അളവുകൾ (LxWxH) | 20 x 21.1 x 7.3 സെ.മീ |
| ഇനത്തിൻ്റെ ഭാരം | 350 ഗ്രാം |
| പ്രത്യേക സവിശേഷതകൾ | സ്നൂസ്, അലാറം, ബാക്ക്ലൈറ്റ് |
| ബ്രാൻഡ് | റോത്ത് |
| പ്രായപരിധി (വിവരണം) | കുട്ടികൾ |
| മെറ്റീരിയൽ | വുഡ് (സെന്റ്)amp), പ്ലാസ്റ്റിക് (ക്ലോക്ക്) |
| നിറം | പിങ്ക് |
| പവർ ഉറവിടം | ബാറ്ററി പവർ |
| ബാറ്ററി തരം | 1x AA (ഉൾപ്പെടുത്തിയിട്ടില്ല) |
ഈ ഉൽപ്പന്നത്തിന് ഒരു സ്റ്റാൻഡേർഡ് നിർമ്മാതാവിന്റെ വാറണ്ടിയുണ്ട്. ദൈർഘ്യവും കവറേജും ഉൾപ്പെടെയുള്ള നിർദ്ദിഷ്ട വാറണ്ടി വിശദാംശങ്ങൾക്ക്, ദയവായി ഉൽപ്പന്ന പാക്കേജിംഗ് പരിശോധിക്കുകയോ ROTH ഉപഭോക്തൃ പിന്തുണയെ നേരിട്ട് ബന്ധപ്പെടുകയോ ചെയ്യുക. നിങ്ങൾക്ക് എന്തെങ്കിലും പ്രശ്നങ്ങൾ നേരിടുകയോ ഈ മാനുവലിൽ ഉൾപ്പെടുത്തിയിട്ടില്ലാത്ത ചോദ്യങ്ങൾ ഉണ്ടെങ്കിലോ, സഹായത്തിനായി റീട്ടെയിലറെയോ നിർമ്മാതാവിനെയോ ബന്ധപ്പെടുക.
കൂടുതൽ പിന്തുണയ്ക്ക്, ദയവായി ഔദ്യോഗിക ROTH സന്ദർശിക്കുക. webസൈറ്റ് അല്ലെങ്കിൽ അവരുടെ ഉപഭോക്തൃ സേവന വിഭാഗവുമായി ബന്ധപ്പെടുക.
Ask about setup, troubleshooting, compatibility, parts, safety, or missing instructions. Manuals+ will review the question and use this page’s manual context to help answer it.