1. ആമുഖം
This manual provides detailed instructions for the proper use and maintenance of your GMKtec Xpanel2 15.6-inch 4K Portable Touchscreen Monitor. Please read this manual thoroughly before operating the device to ensure optimal performance and longevity.
പ്രധാന സവിശേഷതകൾ
- ഉയർന്ന മിഴിവുള്ള ഡിസ്പ്ലേ: Features a 3840x2160 4K IPS panel with a 178-degree ultra-wide viewing angle, ensuring consistent image quality from various perspectives.
- വൈബ്രൻ്റ് വർണ്ണ പുനർനിർമ്മാണം: Boasts 550 cd/m² brightness, a 1500:1 contrast ratio, and 100% Adobe RGB color gamut coverage for accurate and vivid visuals.
- അൾട്രാ പോർട്ടബിൾ ഡിസൈൻ: With a thickness of approximately 4mm, this monitor is designed for easy transport, fitting conveniently into bags for on-the-go productivity or entertainment.
- വിപുലമായ കണക്റ്റിവിറ്റി: Equipped with multiple ports including two Type-C, one Mini HDMI, one headphone jack, and one OTG port, allowing connection to a wide range of devices such as laptops, smartphones, gaming consoles (PS4, Xbox, Nintendo Switch), and more.
- ടച്ച്സ്ക്രീൻ പ്രവർത്തനം: Offers intuitive interaction with supported devices.

Image 1.1: The GMKtec Xpanel2 portable monitor showcasing its 4K UHD display and touchscreen capability.
2. സജ്ജീകരണവും കണക്ഷനുകളും
Follow these steps to connect your GMKtec Xpanel2 monitor to various devices.
2.1 പാക്കേജ് ഉള്ളടക്കം
എല്ലാ ഇനങ്ങളും നിങ്ങളുടെ പാക്കേജിൽ ഉൾപ്പെടുത്തിയിട്ടുണ്ടെന്ന് ഉറപ്പാക്കുക:
- GMKtec Xpanel2 Portable Monitor
- ടൈപ്പ്-സി മുതൽ ടൈപ്പ്-സി കേബിൾ വരെ (x2)
- Standard HDMI to Mini HDMI Cable (x1)
- USB Type-A to Type-C Cable (x1)
- പവർ അഡാപ്റ്റർ (x1)
ചിത്രം 2.1: കഴിഞ്ഞുview of the GMKtec Xpanel2 monitor and its included cables and power adapter.
2.2 പോർട്ട് ഓവർview
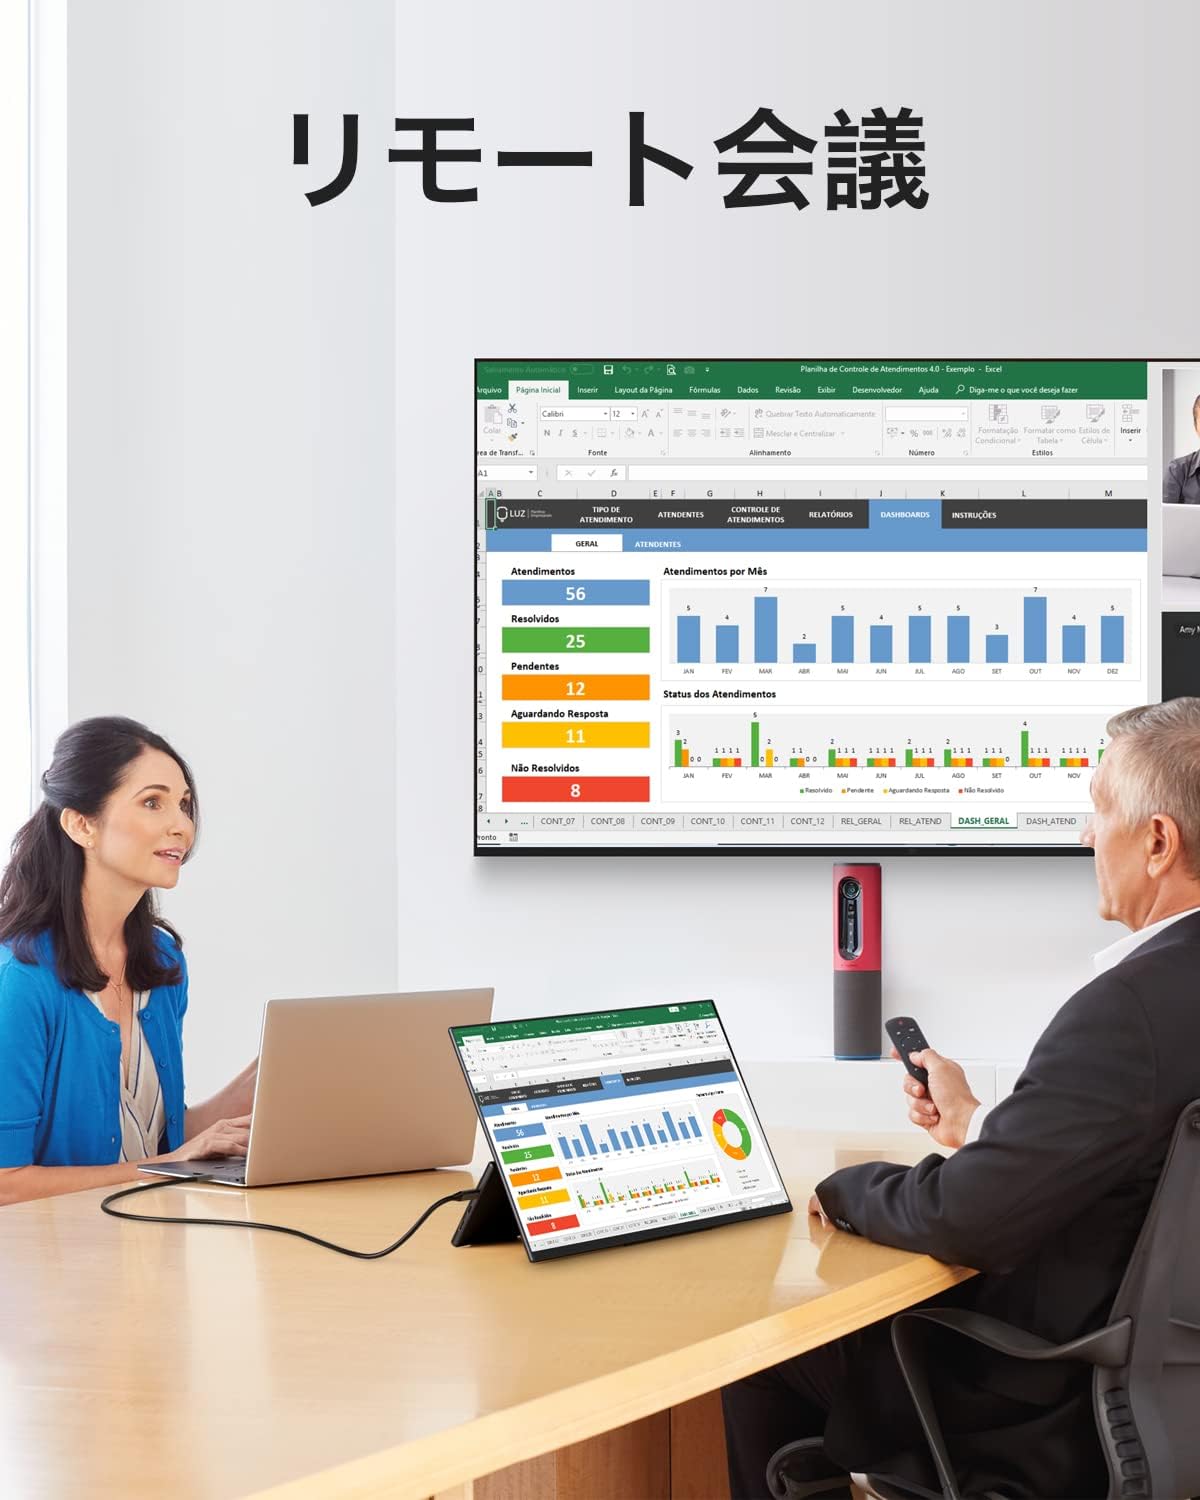
Image 2.2: Detailed diagram showing the various ports on the GMKtec Xpanel2 monitor.
- മിനി HDMI: Connects to HDMI output devices for video and audio.
- Full-function Type-C (x2): Supports video input, touch signal, and power delivery.
- ഹെഡ്ഫോൺ ജാക്ക് (3.5 മിമി): ബാഹ്യ ഓഡിയോ ഉപകരണങ്ങൾ ബന്ധിപ്പിക്കുന്നതിന്.
- OTG: For data transmission only, typically for connecting a mouse or keyboard.
- പവർ ബട്ടൺ: Short press to display the power menu, long press to turn on/off.
2.3 ഉപകരണങ്ങളിലേക്ക് ബന്ധിപ്പിക്കുന്നു
The monitor offers versatile connectivity options. Ensure your device supports the necessary output modes.
2.3.1 Connecting to a Smartphone (Full-function Type-C)
If your smartphone has a full-function Type-C port (supporting DisplayPort Alt Mode), you can connect it using a single Type-C to Type-C cable for video, audio, and touch functionality. If power is insufficient, an external power source is required. Failure to connect external power simultaneously may result in flickering or a black screen.

Image 2.3: A smartphone connected to the portable monitor via a single Type-C cable, extending the display.

Image 2.4: Diagram illustrating a Type-C phone connection, highlighting the need for external power if the phone's power output is insufficient.
2.3.2 Connecting to a Laptop/PC (Type-C or HDMI)
For laptops or PCs with a full-function Type-C port, use a Type-C to Type-C cable. For devices without DisplayPort Alt Mode support via Type-C, use the Mini HDMI port with the provided Standard HDMI to Mini HDMI cable. An external power source may be required for the monitor, especially if the laptop's USB-C port does not provide sufficient power.

Image 2.5: A laptop connected to the portable monitor via a Type-C cable, extending the desktop.
2.3.3 Connecting to Gaming Consoles (Nintendo Switch, PS4, Xbox)
Connect gaming consoles using the Mini HDMI port. For Nintendo Switch, an external power source (45W PD or higher) is required to power both the display and the Switch simultaneously. The touch function is not available when connected to Nintendo Switch.

Image 2.6: A Nintendo Switch connected to the portable monitor, demonstrating a gaming setup.
3. പ്രവർത്തന നിർദ്ദേശങ്ങൾ
3.1 പവർ ഓൺ/ഓഫ്
Press and hold the Power Button (refer to Image 2.2) for a few seconds to turn the monitor on or off. A short press will bring up the on-screen display (OSD) menu.
3.2 ഓൺ-സ്ക്രീൻ ഡിസ്പ്ലേ (OSD) മെനു
Use the control buttons (usually a joystick or a combination of buttons near the power button) to navigate the OSD menu. This menu allows you to adjust settings such as brightness, contrast, color mode, input source, and other display parameters.
3.3 ടച്ച്സ്ക്രീൻ പ്രവർത്തനം
The monitor supports 10-point multi-touch input. Ensure your connected device supports touch input over Type-C (DisplayPort Alt Mode) for this feature to work. For optimal responsiveness, keep the screen clean.
3.4 Gravity Sensor and Screen Rotation
The monitor features a gravity sensor that supports 90-degree automatic screen rotation. This allows the display to switch between landscape and portrait modes based on its orientation, enhancing versatility for different applications.

Image 3.1: The monitor's integrated metal bracket allows for flexible viewing angles from 0 to 90 degrees, supporting various orientations.

Image 3.2: Visual comparison highlighting the superior clarity and detail of 4K UHD resolution compared to 1080p.
4. പരിപാലനം
Proper maintenance ensures the longevity and performance of your monitor.
4.1 സ്ക്രീൻ വൃത്തിയാക്കൽ
- Turn off the monitor and disconnect all cables before cleaning.
- മൃദുവായ, ലിന്റ് രഹിത തുണി ഉപയോഗിക്കുക, ചെറുതായി നനവ് ഉണ്ടാകരുത്.ampened with water or a screen-cleaning solution.
- Wipe the screen gently to remove dust and smudges. Avoid excessive pressure.
- ആൽക്കഹോൾ, അമോണിയ, അല്ലെങ്കിൽ അബ്രാസീവ് ക്ലീനറുകൾ എന്നിവ ഉപയോഗിക്കരുത്, കാരണം ഇവ സ്ക്രീൻ പ്രതലത്തിന് കേടുവരുത്തും.
4.2 പൊതു പരിചരണം
- തീവ്രമായ ഊഷ്മാവ്, ഈർപ്പം അല്ലെങ്കിൽ നേരിട്ടുള്ള സൂര്യപ്രകാശം എന്നിവയിൽ മോണിറ്ററിനെ തുറന്നുകാട്ടുന്നത് ഒഴിവാക്കുക.
- Do not place heavy objects on the monitor.
- Handle the monitor with care to prevent drops or impacts.
- Store the monitor in a protective sleeve or case when traveling.
5. പ്രശ്നപരിഹാരം
If you encounter issues with your GMKtec Xpanel2 monitor, refer to the following common problems and solutions.
5.1 No Display / Black Screen
- പവർ പരിശോധിക്കുക: Ensure the monitor is properly connected to a power source using the provided adapter or a compatible Type-C cable. If using a single Type-C cable for both power and video, ensure the connected device can supply sufficient power, or connect an external power adapter to the monitor.
- ഇൻപുട്ട് ഉറവിടം: Verify that the correct input source (Type-C or HDMI) is selected in the monitor's OSD menu.
- കേബിൾ കണക്ഷൻ: Ensure all cables (Type-C, HDMI) are securely connected to both the monitor and the source device. Try using different cables if available.
- ഉപകരണ അനുയോജ്യത: Confirm that your source device's Type-C port supports DisplayPort Alt Mode for video output.
5.2 മിന്നുന്ന സ്ക്രീൻ
- അപര്യാപ്തമായ ശക്തി: Flickering often indicates insufficient power. Connect the monitor to its dedicated power adapter. If using a single Type-C cable, ensure the power adapter is also connected to the monitor's second Type-C port.
- കേബിൾ നിലവാരം: Use the high-quality cables provided with the monitor. Faulty or low-quality cables can cause display issues.
- Refresh Rate/Resolution: Ensure the display settings on your source device are compatible with the monitor's capabilities.
5.3 ടച്ച്സ്ക്രീൻ പ്രതികരിക്കുന്നില്ല
- ടൈപ്പ്-സി കണക്ഷൻ: Touch functionality typically requires a full-function Type-C connection (DisplayPort Alt Mode). Ensure your device and cable support this. Touch is not supported via HDMI.
- ഡ്രൈവർ ഇൻസ്റ്റാളേഷൻ: For some operating systems, specific drivers might be required for touch functionality. Check the GMKtec support webസൈറ്റ്.
- വൃത്തിയുള്ള സ്ക്രീൻ: Ensure the screen is clean and free of debris that might interfere with touch input.
- ഉപകരണങ്ങൾ പുനരാരംഭിക്കുക: Restart both the monitor and the connected device.
5.4 OSD Menu Not Appearing or Unresponsive
- പവർ ബട്ടൺ: Ensure you are performing a short press on the power button to access the OSD menu.
- നിയന്ത്രണ ബട്ടണുകൾ: If the menu appears but is unresponsive, check the control buttons for any physical obstruction or damage.
- ഫേംവെയർ: In rare cases, a firmware update might resolve OSD issues. Contact support for guidance.
6 സ്പെസിഫിക്കേഷനുകൾ
| ഫീച്ചർ | സ്പെസിഫിക്കേഷൻ |
|---|---|
| ബ്രാൻഡ് | ജിഎംകെടെക് |
| മോഡൽ നമ്പർ | Xpanel2 |
| സ്ക്രീൻ വലിപ്പം | 15.6 ഇഞ്ച് |
| പാനൽ തരം | ഐ.പി.എസ് |
| റെസലൂഷൻ | 3840 x 2160 (4K UHD) |
| വീക്ഷണാനുപാതം | 16:9 |
| തെളിച്ചം | 550 cd/m² |
| കോൺട്രാസ്റ്റ് റേഷ്യോ | 1500:1 |
| വർണ്ണ ഗാമറ്റ് | Adobe Flash RGB |
| HDMI പോർട്ടുകൾ | 1 (മിനി HDMI) |
| ടൈപ്പ്-സി പോർട്ടുകൾ | 2 (Full-function) |
| ഹെഡ്ഫോൺ ജാക്ക് | (1 മില്ലി) |
| OTG പോർട്ട് | 1 |
| ഉൽപ്പന്ന അളവുകൾ | 35.6 x 22.6 x 1.2 സെ.മീ |
| ഉൽപ്പന്ന ഭാരം | 1.84 കി.ഗ്രാം |
7. വാറൻ്റിയും പിന്തുണയും
7.1 വാറൻ്റി വിവരങ്ങൾ
Your GMKtec Xpanel2 monitor comes with the following warranty and return policies:
- 1-Year Free Repair Warranty: Covers manufacturing defects and malfunctions for one year from the purchase date.
- 1-Month Free Return: Eligible for free returns within one month of the purchase date.
- ആജീവനാന്ത വിൽപ്പനാനന്തര സേവനം: GMKtec is committed to providing lifetime technical support for its products.
7.2 ഉപഭോക്തൃ പിന്തുണ
For any questions or technical assistance, please contact GMKtec customer support:
- Order-Related Inquiries: Locate your "GMKtec" order and click the "Ask a question" button to contact us.
- സാങ്കേതിക സഹായം: For professional technical support, please email support@gmktec.com. Our team aims to respond within 24 business hours.


