1. ആമുഖം
Thank you for choosing the aigo AR12 120mm White ARGB Case Fan. This manual provides detailed instructions for the proper installation, operation, and maintenance of your new PC case fan. Please read this manual thoroughly before installation and keep it for future reference.

Figure 1: The aigo AR12 120mm White ARGB Case Fan, showcasing its white frame and translucent fan blades with vibrant ARGB lighting.
2 സുരക്ഷാ വിവരങ്ങൾ
- ഇൻസ്റ്റാളേഷൻ അല്ലെങ്കിൽ അറ്റകുറ്റപ്പണികൾ നടത്തുന്നതിന് മുമ്പ് നിങ്ങളുടെ കമ്പ്യൂട്ടർ സിസ്റ്റം പവർ ഓഫ് ചെയ്തിട്ടുണ്ടെന്നും വാൾ ഔട്ട്ലെറ്റിൽ നിന്ന് അൺപ്ലഗ് ചെയ്തിട്ടുണ്ടെന്നും ഉറപ്പാക്കുക.
- Handle components with care to avoid damage from static electricity. Consider using an anti-static wrist strap.
- ഫാനിലോ അതിന്റെ കേബിളുകളിലോ മാറ്റങ്ങൾ വരുത്താൻ ശ്രമിക്കരുത്. അനധികൃത മാറ്റങ്ങൾ നിങ്ങളുടെ വാറന്റി അസാധുവാക്കുകയും സുരക്ഷാ അപകടങ്ങൾ ഉണ്ടാക്കുകയും ചെയ്തേക്കാം.
- ദ്രാവകങ്ങളിൽ നിന്നും അമിതമായ ഈർപ്പത്തിൽ നിന്നും ഫാനിനെ അകറ്റി നിർത്തുക.
- Ensure proper cable management to prevent interference with moving parts or other components.
3. പാക്കേജ് ഉള്ളടക്കം
നിങ്ങളുടെ പാക്കേജിൽ എല്ലാ ഘടകങ്ങളും ഉണ്ടെന്ന് ഉറപ്പാക്കുക:
- aigo AR12 120mm White ARGB Case Fan(s)
- മൗണ്ടിംഗ് സ്ക്രൂകൾ
- (Optional, if purchased with a kit) aigo Micro 6-pin Controller
- (Optional, if purchased with a kit) Remote Control
4. ഉൽപ്പന്നം കഴിഞ്ഞുview
The aigo AR12 fan features a 120mm design with addressable RGB lighting, allowing for customizable illumination. It connects via a micro 6-pin connector and requires an aigo micro 6-pin controller for operation. The fan blades are designed to optimize airflow while minimizing noise. Anti-shock pads are integrated on both sides of the fan frame to reduce vibration and noise.

Figure 2: Diagram illustrating the 5V ARGB 3-pin synchronization with a compatible motherboard. Note the correct 5V 3-pin header (ADD GEN2) versus the incompatible 12V 4-pin RGB header.
പ്രധാന സവിശേഷതകൾ:
- 5V ARGB Addressable RGB: Synchronizes with compatible motherboards for unified lighting effects.
- Optimized Fan Blade Design: Engineered for effective airflow and reduced noise levels.
- ആന്റി-ഷോക്ക് ഡിസൈൻ: Integrated pads on the fan frame minimize resonance and operational noise.
- TPU Light Guidance Ring: Ensures comfortable and uniform lighting distribution.
- Micro 6-pin Power Connector: Requires an aigo micro 6-pin controller for power and ARGB control.
5. സജ്ജീകരണവും ഇൻസ്റ്റാളേഷനും
Follow these steps to install your aigo AR12 case fan:
- നിങ്ങളുടെ സിസ്റ്റം തയ്യാറാക്കുക: Power off your computer and unplug it from the power outlet. Open your PC case.
- മൗണ്ടിംഗ് സ്ഥലം തിരിച്ചറിയുക: Determine the desired location for the fan within your PC case (e.g., front, top, rear, bottom). Ensure there is sufficient clearance.
- ഫാൻ ഘടിപ്പിക്കുക: നിങ്ങളുടെ പിസി കേസിലെ സ്ക്രൂ ദ്വാരങ്ങളുമായി ഫാൻ വിന്യസിക്കുക. ഫാൻ ദൃഢമായി ഉറപ്പിക്കാൻ നൽകിയിരിക്കുന്ന മൗണ്ടിംഗ് സ്ക്രൂകൾ ഉപയോഗിക്കുക. അമിതമായി മുറുക്കരുത്.
- കൺട്രോളറുമായി ബന്ധിപ്പിക്കുക: Connect the micro 6-pin cable from the AR12 fan to an available fan port on your aigo micro 6-pin controller. The controller typically has ports labeled FAN1, FAN2, etc.
- Power the Controller: Connect the SATA power cable from the aigo controller to an available SATA power connector from your power supply unit (PSU).
- ARGB Motherboard Sync (Optional): If your motherboard supports 5V ARGB (3-pin header), connect the ARGB sync cable from the aigo controller to the 5V ARGB header on your motherboard. Do not connect to a 12V RGB (4-pin) header, as this will damage the LEDs.
- കേബിൾ മാനേജുമെന്റ്: ശരിയായ വായുസഞ്ചാരവും വൃത്തിയുള്ള നിർമ്മാണവും ഉറപ്പാക്കാൻ എല്ലാ കേബിളുകളും വൃത്തിയായി റൂട്ട് ചെയ്യുക.
- കെയ്സ് അടച്ച് പവർ ഓണാക്കുക: Close your PC case, plug in the power cable, and power on your system.

Figure 3: Comprehensive connection diagram showing multiple aigo fans, an LED strip, and a remote control connected to the aigo controller, which is powered by a SATA cable from the power supply. It also illustrates motherboard ARGB sync options.

ചിത്രം 4: മുൻഭാഗം view of a PC case with multiple aigo AR12 fans installed, showcasing their vibrant ARGB illumination and contribution to the overall system aesthetics.
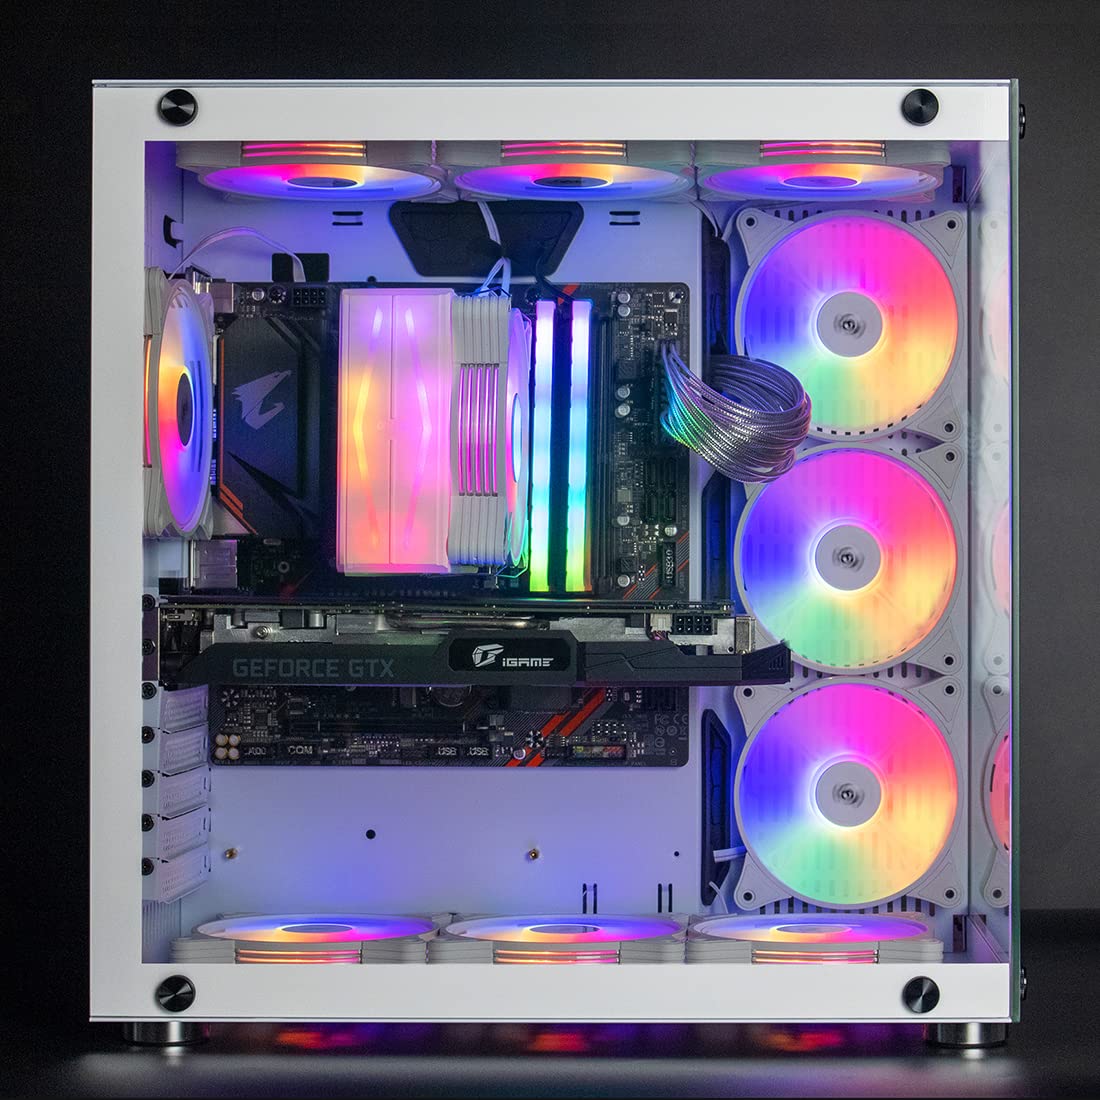
ചിത്രം 5: വശം view of a PC case with aigo AR12 fans installed, providing a clear perspective of the fan placement and the integrated lighting effects within the system.
6. പ്രവർത്തന നിർദ്ദേശങ്ങൾ
Once installed, the aigo AR12 fans will operate when your computer is powered on. The ARGB lighting can be controlled in two primary ways:
- Via Remote Control (if applicable): If your aigo controller came with a remote control, you can use it to cycle through various lighting modes, adjust brightness, and change colors. Refer to your controller's specific instructions for remote functions.
- Via Motherboard ARGB Software: If you connected the controller to a 5V ARGB header on your motherboard, you can control the fan lighting using your motherboard's proprietary RGB software (e.g., ASUS Aura Sync, MSI Mystic Light Sync, GIGABYTE RGB Fusion, ASRock Polychrome Sync). This allows for synchronized lighting effects across all compatible components.
The fan speed is typically controlled by the motherboard's fan headers or a dedicated fan controller, depending on your system configuration. The aigo AR12 fans are designed for optimal airflow and quiet operation.
7. പരിപാലനം
Regular maintenance helps ensure optimal performance and longevity of your aigo AR12 fans:
- പൊടി നീക്കം: Periodically clean dust from the fan blades and frame using compressed air or a soft, dry cloth. Ensure the system is powered off and unplugged before cleaning.
- പരിശോധന: Check cables for any signs of wear or damage. Ensure all connections remain secure.
- ദ്രാവകങ്ങൾ ഒഴിവാക്കുക: Do not use liquid cleaners directly on the fan or controller.
8. പ്രശ്നപരിഹാരം
| പ്രശ്നം | സാധ്യമായ കാരണം | പരിഹാരം |
|---|---|---|
| ഫാൻ കറങ്ങുന്നില്ല. |
|
|
| ARGB lighting not working or incorrect. |
|
|
| അമിതമായ ശബ്ദം. |
|
|
9 സ്പെസിഫിക്കേഷനുകൾ
| ഫീച്ചർ | വിശദാംശങ്ങൾ |
|---|---|
| മോഡൽ | AR12 |
| ഫാൻ വലിപ്പം | 120mm x 120mm x 25mm |
| നിറം | വെള്ള |
| ലൈറ്റിംഗ് | വിലാസമുള്ള RGB (ARGB) |
| പവർ കണക്റ്റർ | Micro 6-pin (requires aigo controller) |
| റേറ്റുചെയ്ത വോളിയംtage | 5V (for ARGB) |
| തണുപ്പിക്കൽ രീതി | വായു |
| പരമാവധി റൊട്ടേഷണൽ സ്പീഡ് | 2000 ആർപിഎം |
| അനുയോജ്യമായ ഉപകരണങ്ങൾ | ഡെസ്ക്ടോപ്പ് പിസികൾ |
| മെറ്റീരിയൽ | TPU (Light Guidance Ring) |
10. വാറൻ്റിയും പിന്തുണയും
aigo products are manufactured to high quality standards. For information regarding warranty coverage, technical support, or replacement parts, please refer to the warranty card included with your product or visit the official aigo webസൈറ്റ്. വാറന്റി ക്ലെയിമുകൾക്കായി നിങ്ങളുടെ വാങ്ങലിന്റെ തെളിവ് സൂക്ഷിക്കുക.
For further assistance, you may contact aigo customer support through their official channels.


