1. ആമുഖം
The Waveshare ESP32-S2 MCU WiFi Development Board is a compact and versatile module designed for Internet of Things (IoT) applications. It integrates a low-power Wi-Fi System-on-Chip (SoC) and mass memory, making it suitable for various embedded projects. This manual provides essential information for setting up, operating, and maintaining your development board.
2 പ്രധാന സവിശേഷതകൾ
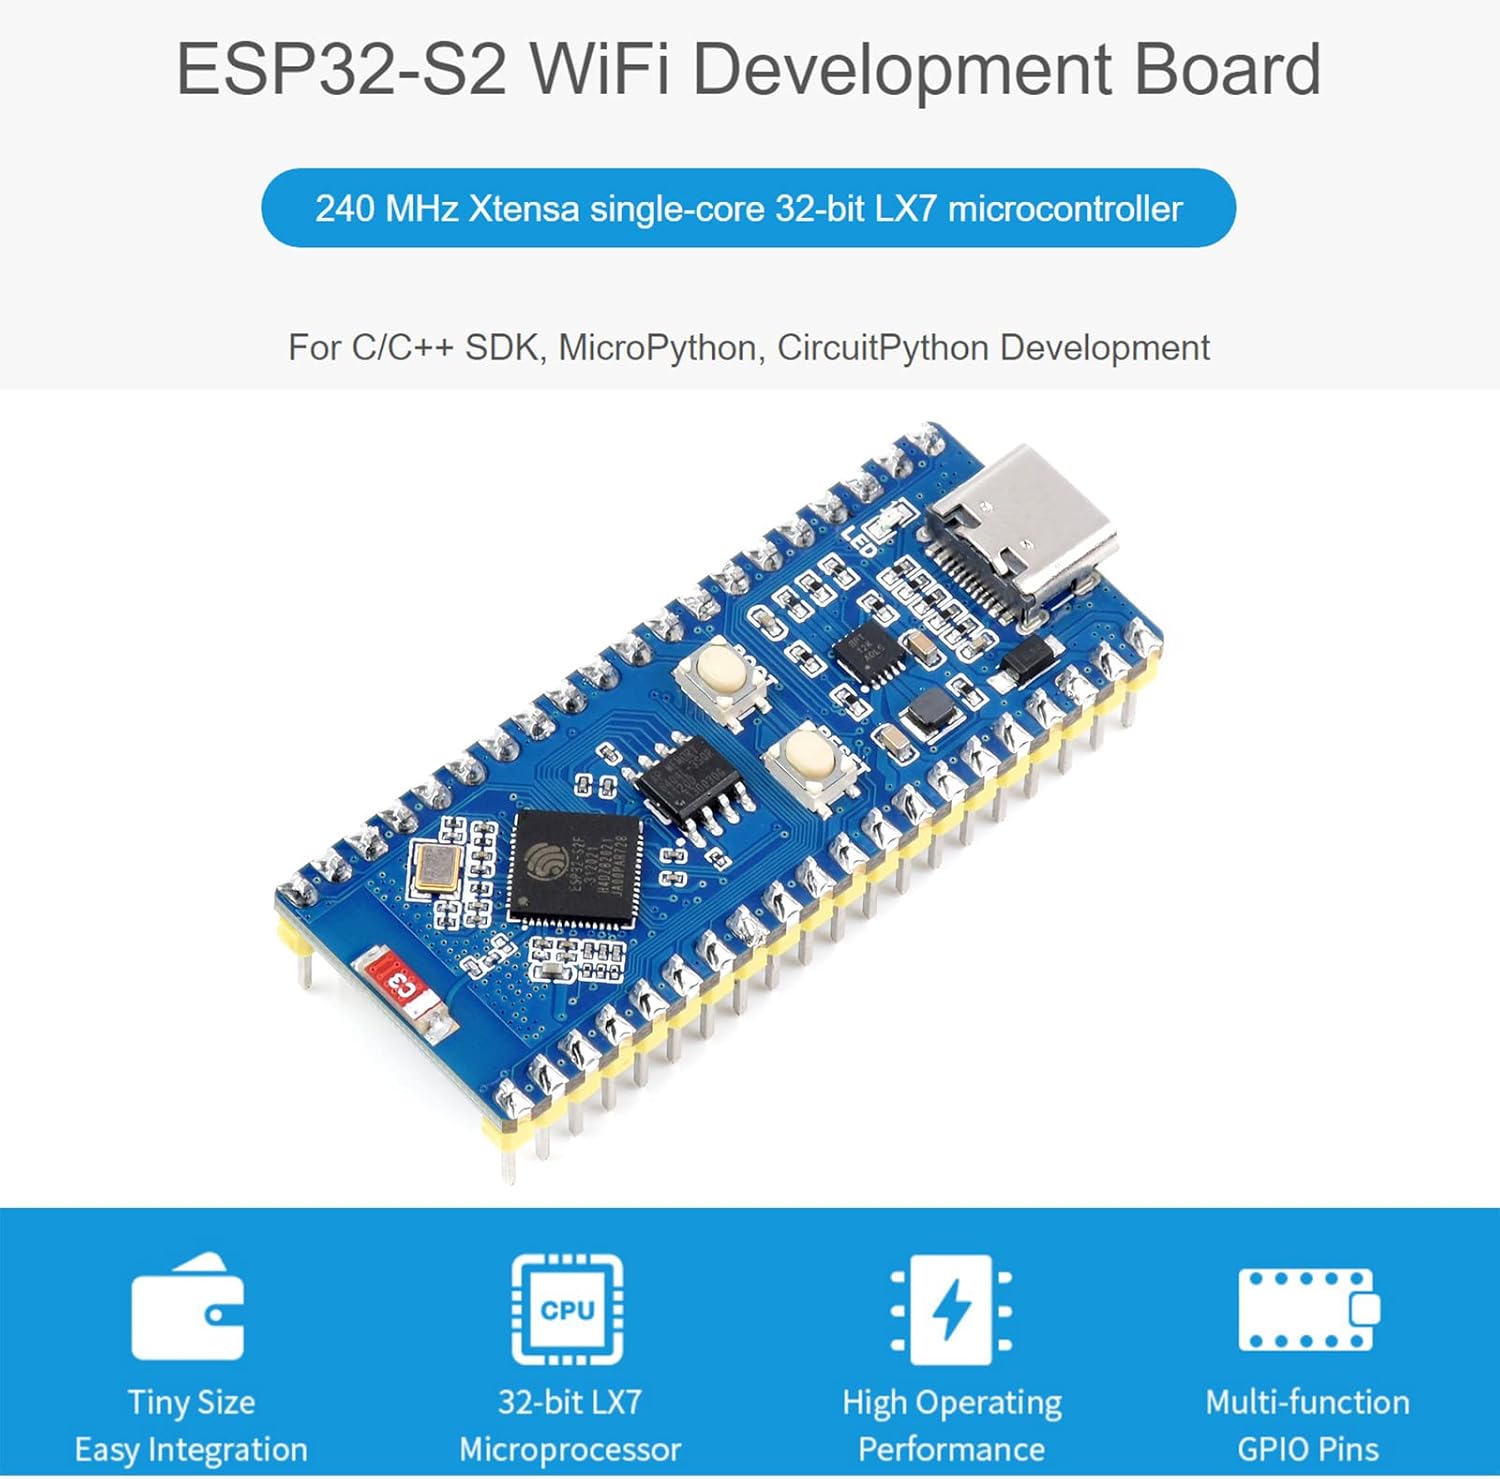
ചിത്രം: കഴിഞ്ഞുview of the ESP32-S2 WiFi Development Board highlighting its core features.
- 2.4 GHz WiFi Development Board: Supports Raspberry Pi Pico expansion board ecosystem for IoT application development.
- മൈക്രോപ്രൊസസ്സർ: Based on single-core 32-bit LX7 microprocessor ESP32-S2FH4, with a clock frequency up to 240 MHz.
- മെമ്മറി: Integrated 320KB SRAM, 128KB ROM, 8MB PSRAM, and 4MB Flash memory.
- വയർലെസ് കണക്റ്റിവിറ്റി: Supports IEEE802.11 b/g/n with an on-board 2.4 GHz WiFi ceramic antenna, offering up to 150 Mbps data transfer rate.
- യുഎസ്ബി-സി കണക്റ്റർ: Features a USB-C connector for convenient connection and on-chip integrated full-speed USB OTG interface.
- പെരിഫറലുകൾ: Includes LCD interface (8-bit serial RGB/8080/6800), TWAI controller (ISO11898-1 compatible), capacitive sensor GPIO, temperature sensor, and RMT (TX/RX).
- Development Support: Compatible with C/C++, MicroPython, and CircuitPython, with comprehensive SDK and development resources.
- കോംപാക്റ്റ് ഡിസൈൻ: Small form factor with castellated module for direct soldering to user-designed carrier boards.
3. ഹാർഡ്വെയർ ഓവർview
This section details the main components and their functions on the ESP32-S2 Standard Version development board.
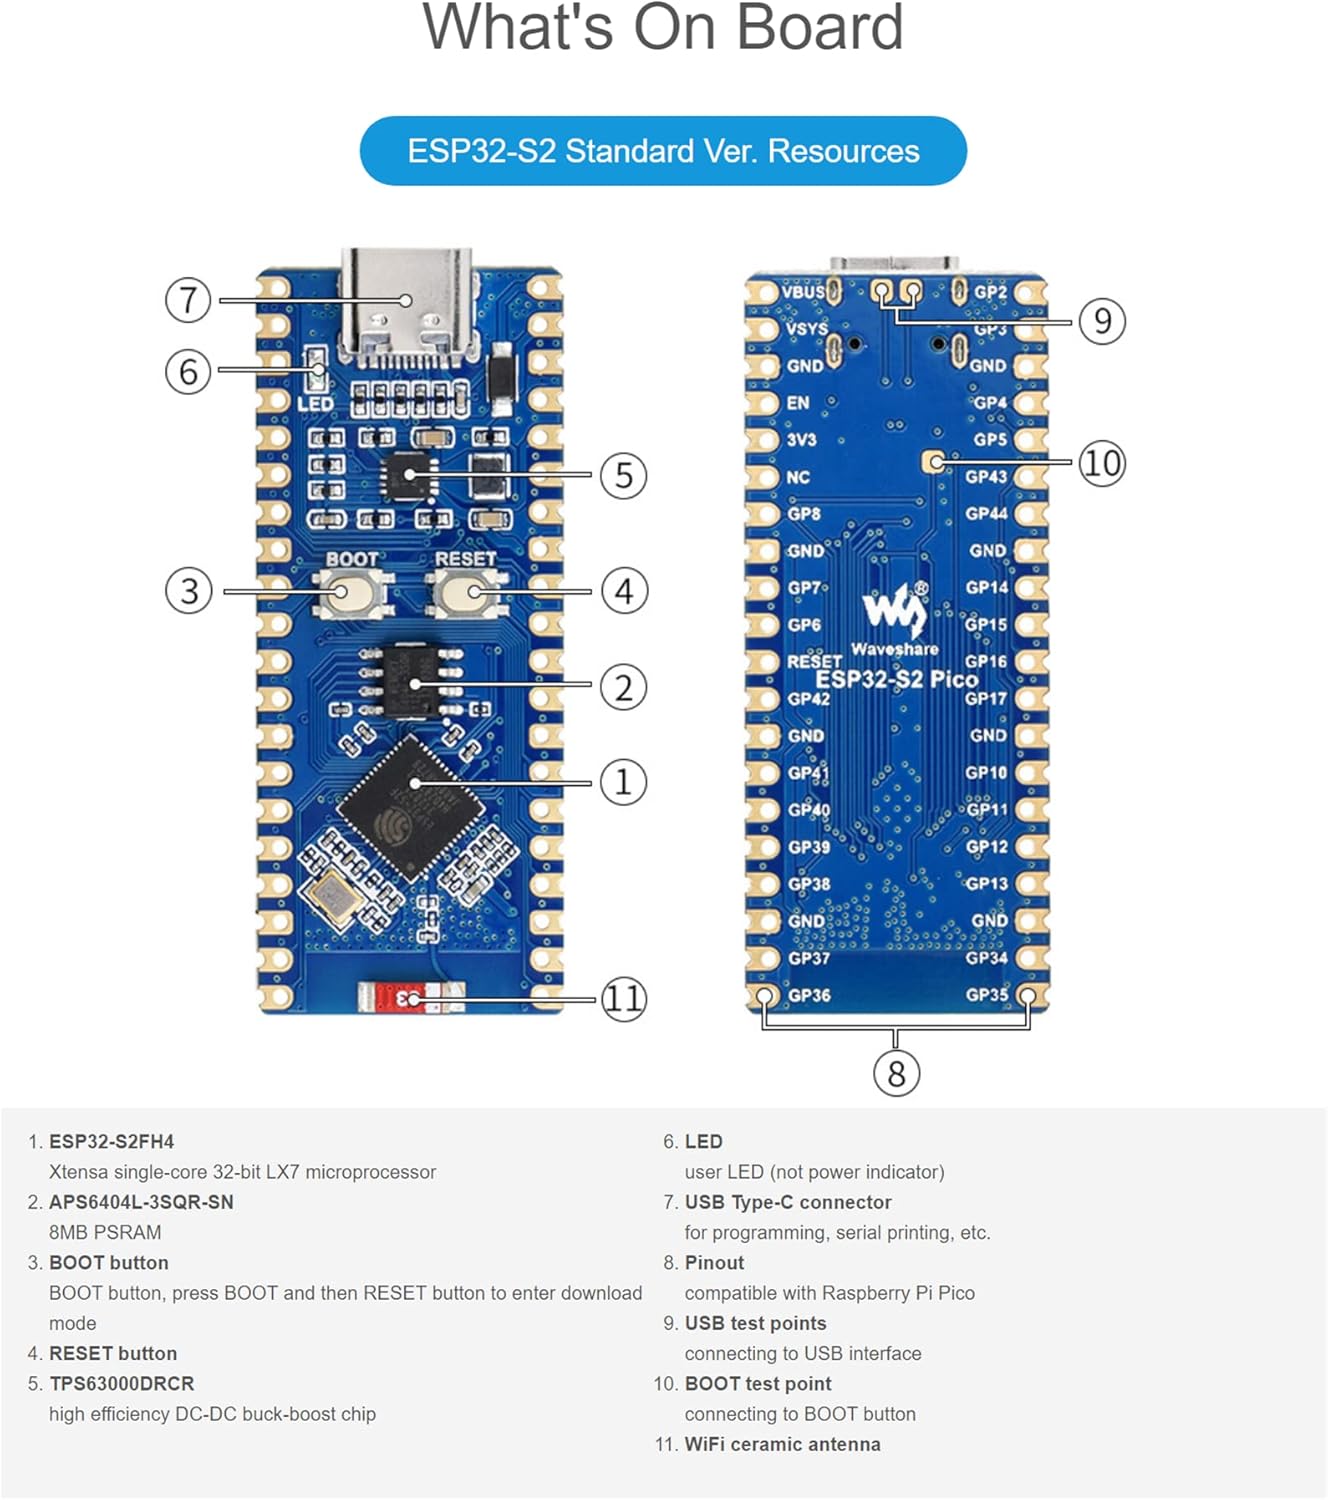
Image: Labeled diagram of the ESP32-S2 Standard Version board components.
- ESP32-S2FH4: Xtensa single-core 32-bit LX7 microprocessor.
- APS6404L-3SQR-SN: 8MB PSRAM.
- ബൂട്ട് ബട്ടൺ: Button to enter download mode (press BOOT, then RESET).
- റീസെറ്റ് ബട്ടൺ: ബോർഡ് പുനഃസജ്ജമാക്കുന്നു.
- TPS63000DRCR: High efficiency DC-DC buck-boost chip.
- എൽഇഡി: User LED (not power indicator).
- യുഎസ്ബി ടൈപ്പ്-സി കണക്റ്റർ: For programming, serial printing, etc.
- പിൻഔട്ട്: Compatible with Raspberry Pi Pico.
- USB test points: For connecting to USB interface.
- BOOT test point: For connecting to BOOT button.
- WiFi ceramic antenna: On-board antenna for wireless communication.
4 പിൻഔട്ട് ഡയഗ്രം
The ESP32-S2 development board features configurable pin functions, allowing flexible development and integration. Below are the pinout diagrams for the Standard Version and LCD Version.

Image: Pinout diagrams for the ESP32-S2 Standard Version and ESP32-S2 LCD Version, indicating various pin functions.
The pinout includes various interfaces such as Power, Ground, UART, GPIO, ADC, SPI, System Control, and I2C. Refer to the diagram for specific pin assignments and functions.
5 സാങ്കേതിക സവിശേഷതകൾ
| ഫീച്ചർ | സ്പെസിഫിക്കേഷൻ |
|---|---|
| മൈക്രോപ്രൊസസർ | ESP32-S2FH4 (Single-core 32-bit LX7) |
| ക്ലോക്ക് ആവൃത്തി | 240 MHz വരെ |
| SRAM | 320KB |
| ROM | 128KB |
| PSRAM | 8എംബി |
| ഫ്ലാഷ് മെമ്മറി | 4എംബി |
| വയർലെസ് സ്റ്റാൻഡേർഡ് | IEEE802.11 b/g/n (2.4 GHz) |
| ഡാറ്റ കൈമാറ്റ നിരക്ക് | 150 Mbps വരെ |
| കണക്റ്റിവിറ്റി ഇന്റർഫേസ് | USB Type-C (OTG), GPIO, UART, SPI, I2C, ADC, LCD, TWAI |
| അളവുകൾ | 3.5 x 2.05 x 0.87 ഇഞ്ച് (പാക്കേജ്) |
| ഇനത്തിൻ്റെ ഭാരം | 0.493 ഔൺസ് |
| നിർമ്മാതാവ് | വേവ്ഷെയർ |
6. സജ്ജീകരണ നിർദ്ദേശങ്ങൾ
To begin using your Waveshare ESP32-S2 development board, follow these basic setup steps:
- വൈദ്യുതി വിതരണം: Connect the board to a computer or a suitable 5V power adapter using a USB Type-C cable. The board will draw power through the USB connection.
- ഡ്രൈവർ ഇൻസ്റ്റാളേഷൻ: Depending on your operating system, you may need to install USB-to-serial drivers (e.g., CP210x or CH340 drivers) if the board is not recognized automatically. Refer to the official ESP-IDF documentation or Waveshare's product page for specific driver links.
- വികസന പരിസ്ഥിതി: Install the necessary development tools. The ESP32-S2 supports the Espressif IoT Development Framework (ESP-IDF), Arduino IDE with ESP32 core, MicroPython, or CircuitPython. Choose the environment that best suits your project requirements.
- ആദ്യ പരിപാടി: Once the development environment is set up, you can upload your first program (e.g., a "blink" example) to verify the board's functionality. Use the USB Type-C connection for programming.
7. ബോർഡ് പ്രവർത്തിപ്പിക്കൽ
The ESP32-S2 board is designed for flexible operation across various programming paradigms.
- പ്രോഗ്രാമിംഗ് ഭാഷകൾ: Develop applications using C/C++, MicroPython, or CircuitPython.
- SDKs: Utilize the comprehensive SDKs provided by Espressif or community-driven libraries for specific functionalities.
- GPIO Control: Access and control the various General Purpose Input/Output (GPIO) pins for connecting sensors, actuators, and other peripherals. Refer to the pinout diagram for available pins.
- വൈഫൈ കണക്റ്റിവിറ്റി: Implement Wi-Fi functionalities to connect to local networks, cloud services, or create access points for IoT applications.
- യുഎസ്ബി ഒടിജി: Leverage the USB On-The-Go (OTG) interface for advanced USB functionalities, such as acting as a USB host or device.
വിശദമായ പ്രോഗ്രാമിംഗ് ഗൈഡുകളും ഉദാ.amples are available on the Waveshare wiki and Espressif documentation webസൈറ്റുകൾ.
8. പരിപാലനവും പരിചരണവും
Proper care ensures the longevity and reliable operation of your development board:
- കൈകാര്യം ചെയ്യൽ: Handle the board by its edges to avoid touching components, especially the pins, which can be sensitive to static electricity.
- സംഭരണം: Store the board in an anti-static bag when not in use, in a cool, dry environment away from direct sunlight and extreme temperatures.
- വൃത്തിയാക്കൽ: ആവശ്യമെങ്കിൽ, മൃദുവായതും ഉണങ്ങിയതുമായ ബ്രഷ് അല്ലെങ്കിൽ കംപ്രസ് ചെയ്ത വായു ഉപയോഗിച്ച് ബോർഡ് സൌമ്യമായി വൃത്തിയാക്കുക. ദ്രാവകങ്ങളോ ഉരച്ചിലുകളോ ഉള്ള വസ്തുക്കൾ ഉപയോഗിക്കുന്നത് ഒഴിവാക്കുക.
- വൈദ്യുതി വിതരണം: Always use a stable and appropriate 5V power supply. Over-voltage ബോർഡിന് കേടുവരുത്തും.
- ഫേംവെയർ അപ്ഡേറ്റുകൾ: Regularly check for and apply firmware updates for the ESP32-S2 chip and your chosen development environment to benefit from bug fixes and new features.
9. പ്രശ്നപരിഹാരം
If you encounter issues with your ESP32-S2 development board, consider the following common troubleshooting steps:
- Board Not Detected:
- Ensure the USB Type-C cable is securely connected to both the board and your computer.
- Verify that the correct USB-to-serial drivers are installed on your computer.
- മറ്റൊരു USB പോർട്ട് അല്ലെങ്കിൽ കേബിൾ പരീക്ഷിക്കുക.
- Failed to Upload Program:
- Check that the correct board and COM port are selected in your development environment.
- Ensure the board is in download mode. For the ESP32-S2, this typically involves pressing and holding the BOOT button, then pressing and releasing the RESET button, and finally releasing the BOOT button.
- Verify your code for syntax errors or compilation issues.
- വൈഫൈ കണക്ഷൻ പ്രശ്നങ്ങൾ:
- Double-check your Wi-Fi credentials (SSID and password).
- Ensure the board is within range of the Wi-Fi access point.
- Verify that the Wi-Fi antenna is not obstructed or damaged.
- അപ്രതീക്ഷിത പെരുമാറ്റം:
- Review ലോജിക്കൽ പിശകുകൾക്കുള്ള നിങ്ങളുടെ കോഡ്.
- വൈദ്യുതി വിതരണ സ്ഥിരത പരിശോധിക്കുക.
- Consult online forums and the Waveshare/Espressif community for similar issues and solutions.
10. വാറൻ്റിയും പിന്തുണയും
Specific warranty details for the Waveshare ESP32-S2 MCU WiFi Development Board are not provided within this manual. For warranty information, technical support, and additional resources, please refer to the official Waveshare website or contact their customer service directly. Online documentation, forums, and community support are also valuable resources for development assistance.
വേവ്ഷെയർ ഒഫീഷ്യൽ Webസൈറ്റ്: www.waveshare.com


