1. ആമുഖം
Thank you for choosing the Prechen 19.5-inch 1600x900 LED Monitor. This monitor is designed to provide a high-quality visual experience for various applications, including office work, multimedia, and gaming. Featuring a 1600x900 resolution TN panel, 60Hz refresh rate, and built-in speakers, it offers a versatile display solution. This manual provides detailed instructions for setup, operation, maintenance, and troubleshooting to ensure optimal performance and longevity of your device.

ചിത്രം 1: മുൻഭാഗം view of the Prechen 19.5-inch LED Monitor.
2 പ്രധാനപ്പെട്ട സുരക്ഷാ വിവരങ്ങൾ
Please read all safety warnings and instructions carefully before using this monitor to prevent damage or injury.
- തീയോ വൈദ്യുതാഘാതമോ ഒഴിവാക്കാൻ മോണിറ്ററിനെ മഴയിലോ ഈർപ്പത്തിലോ തുറന്നുവെക്കരുത്.
- മോണിറ്റർ തുറക്കരുത് casing. ഉള്ളിൽ ഉപയോക്തൃ-സേവനയോഗ്യമായ ഭാഗങ്ങളൊന്നുമില്ല. എല്ലാ സേവനങ്ങളും യോഗ്യതയുള്ള സേവന ഉദ്യോഗസ്ഥരെ ഏൽപ്പിക്കുക.
- വീഴാതിരിക്കാൻ മോണിറ്റർ ഒരു സ്ഥിരതയുള്ളതും പരന്നതുമായ പ്രതലത്തിൽ വയ്ക്കുക.
- മോണിറ്ററിന് ചുറ്റും ശരിയായ വായുസഞ്ചാരം ഉറപ്പാക്കുക. വായുസഞ്ചാര ദ്വാരങ്ങൾ അടയ്ക്കരുത്.
- മോണിറ്ററിനൊപ്പം നൽകിയിരിക്കുന്ന പവർ അഡാപ്റ്റർ മാത്രം ഉപയോഗിക്കുക.
- മോണിറ്റർ കൂടുതൽ നേരം ഉപയോഗിക്കുന്നില്ലെങ്കിൽ ഔട്ട്ലെറ്റിൽ നിന്ന് പവർ പ്ലഗ് വിച്ഛേദിക്കുക.
- Avoid placing the monitor near heat sources such as radiators, heat registers, stoves, or other products (including ampലൈഫയറുകൾ) ചൂട് ഉത്പാദിപ്പിക്കുന്നത്.
3. പാക്കേജ് ഉള്ളടക്കം
എല്ലാ ഇനങ്ങളും ഉണ്ടെന്നും കേടുപാടുകൾ സംഭവിച്ചിട്ടില്ലെന്നും ഉറപ്പാക്കാൻ പാക്കേജ് ഉള്ളടക്കങ്ങൾ പരിശോധിക്കുക:
- Prechen 19.5-inch LED Monitor
- പവർ അഡാപ്റ്റർ
- HDMI കേബിൾ
- ഉപയോക്തൃ മാനുവൽ

Figure 2: Included accessories: Monitor, Power Adapter, HDMI Cable, and User Manual.
4. സജ്ജീകരണ ഗൈഡ്
4.1 സ്റ്റാൻഡ് കൂട്ടിച്ചേർക്കൽ
- മോണിറ്ററിന്റെയും സ്റ്റാൻഡിന്റെയും ഘടകങ്ങൾ പാക്കേജിംഗിൽ നിന്ന് ശ്രദ്ധാപൂർവ്വം നീക്കം ചെയ്യുക.
- Attach the stand base to the stand neck, securing it with the provided screw (if applicable).
- Align the assembled stand with the mounting slot on the back of the monitor and gently push until it clicks into place or secure with screws as per the stand design.
4.2 മോണിറ്റർ ബന്ധിപ്പിക്കുന്നു
The monitor supports both HDMI and VGA connections.
- പവർ കണക്ഷൻ: Connect the power adapter to the monitor's DC IN port, then plug the adapter into a power outlet.
- വീഡിയോ കണക്ഷൻ (HDMI): Connect one end of the HDMI cable to the HDMI port on your computer or device, and the other end to the HDMI port on the monitor.
- വീഡിയോ കണക്ഷൻ (VGA): Connect one end of the VGA cable to the VGA port on your computer or device, and the other end to the VGA port on the monitor.
- ഓഡിയോ കണക്ഷൻ: If using a VGA connection and external speakers, connect an audio cable from your computer's audio output to the monitor's audio input port. The built-in speakers will function automatically with HDMI.

Figure 3: Monitor back panel with input ports and control buttons.

Figure 4: Multiple connection options for the monitor.
5. പ്രവർത്തന നിർദ്ദേശങ്ങൾ
5.1 പവർ ഓൺ/ഓഫ്
Press the power button located on the back of the monitor to turn it on or off. The power indicator light will illuminate when the monitor is on.
5.2 OSD മെനു ഉപയോഗിക്കുന്നു
The On-Screen Display (OSD) menu allows you to adjust various monitor settings. The control buttons are located on the back of the monitor (refer to Figure 3).
- മെനു: OSD മെനു തുറക്കാൻ അമർത്തുക.
- UP/DOWN (Volume Up/Down): Use to navigate through menu options or adjust values.
- ENTER (Switch): ഒരു തിരഞ്ഞെടുപ്പ് സ്ഥിരീകരിക്കാൻ അമർത്തുക അല്ലെങ്കിൽ ഒരു ഉപമെനു നൽകുക.
- എക്സിറ്റ് (റിട്ടേൺ): Press to exit the current menu or return to the previous level.
5.3 ഡിസ്പ്ലേ സെറ്റിംഗ്സ് ക്രമീകരിക്കൽ
Navigate the OSD menu to adjust settings such as:
- തെളിച്ചം/തീവ്രത: ഡിസ്പ്ലേയുടെ മൊത്തത്തിലുള്ള പ്രകാശവും കോൺട്രാസ്റ്റും ക്രമീകരിക്കുക.
- വർണ്ണ ക്രമീകരണങ്ങൾ: വർണ്ണ താപനില, RGB ലെവലുകൾ എന്നിവ പരിഷ്കരിക്കുക, അല്ലെങ്കിൽ പ്രീസെറ്റ് കളർ മോഡുകൾ തിരഞ്ഞെടുക്കുക.
- ഇൻപുട്ട് തിരഞ്ഞെടുക്കുക: Manually switch between HDMI and VGA input sources.
- വീക്ഷണ അനുപാതം: Choose between 16:9 (widescreen) or 4:3 (standard) display modes.
- മൂർച്ച: Adjust the clarity of the image.
5.4 ഓഡിയോ ക്രമീകരണങ്ങൾ
The monitor features two built-in speakers. You can adjust the volume using the OSD menu or the dedicated volume buttons on the back of the monitor.
6. പരിപാലനവും പരിചരണവും
Proper care and maintenance will extend the life of your monitor.
- സ്ക്രീൻ വൃത്തിയാക്കൽ: മൃദുവായ, ലിന്റ് രഹിത തുണി ഉപയോഗിച്ച് സ്ക്രീൻ സൌമ്യമായി തുടയ്ക്കുക. കഠിനമായ പാടുകൾക്ക്, dampതുണിയിൽ അൽപം വെള്ളം അല്ലെങ്കിൽ അമോണിയ രഹിതവും ആൽക്കഹോൾ രഹിതവുമായ സ്ക്രീൻ ക്ലീനർ പുരട്ടുക. ഒരിക്കലും സ്ക്രീനിൽ നേരിട്ട് ക്ലീനർ സ്പ്രേ ചെയ്യരുത്.
- സി വൃത്തിയാക്കൽasing: മോണിറ്റർ തുടയ്ക്കാൻ മൃദുവായതും ഉണങ്ങിയതുമായ തുണി ഉപയോഗിക്കുക casing. അബ്രാസീവ് ക്ലീനറുകളോ ലായകങ്ങളോ ഉപയോഗിക്കുന്നത് ഒഴിവാക്കുക.
- സംഭരണം: മോണിറ്റർ ദീർഘനേരം സൂക്ഷിക്കുകയാണെങ്കിൽ, അത് വൈദ്യുതിയിൽ നിന്ന് വിച്ഛേദിച്ച് തണുത്തതും വരണ്ടതുമായ സ്ഥലത്ത്, അതിന്റെ യഥാർത്ഥ പാക്കേജിംഗിൽ സൂക്ഷിക്കുക.
7. പ്രശ്നപരിഹാരം
If you encounter problems with your monitor, please refer to the following table for common issues and solutions.
| പ്രശ്നം | സാധ്യമായ കാരണം | പരിഹാരം |
|---|---|---|
| ശക്തിയില്ല | പവർ കേബിൾ ബന്ധിപ്പിച്ചിട്ടില്ല; പവർ ഔട്ട്ലെറ്റ് തകരാറിലാണ്; മോണിറ്റർ ഓഫാണ്. | Ensure power cable is securely connected. Try a different power outlet. Press the power button on the monitor. |
| സിഗ്നൽ ഇല്ല | വീഡിയോ കേബിൾ ബന്ധിപ്പിച്ചിട്ടില്ല; തെറ്റായ ഇൻപുട്ട് ഉറവിടം തിരഞ്ഞെടുത്തു; കമ്പ്യൂട്ടർ സിഗ്നൽ ഔട്ട്പുട്ട് ചെയ്യുന്നില്ല. | Check HDMI/VGA cable connection. Select the correct input source via the OSD menu. Ensure your computer is on and outputting video. |
| ബിൽറ്റ്-ഇൻ സ്പീക്കറുകളിൽ നിന്ന് ശബ്ദമില്ല | Volume too low/muted; Incorrect audio output selected on PC; Audio cable not connected (for VGA). | Increase monitor volume. Check PC audio settings to ensure monitor is selected as output. For VGA, ensure audio cable is connected. |
| ചിത്രം മങ്ങിയതോ വളച്ചൊടിച്ചതോ ആണ് | തെറ്റായ റെസല്യൂഷൻ; കേബിൾ പ്രശ്നം. | Set your computer's display resolution to 1600x900. Try a different video cable. |
8. ഉൽപ്പന്ന സവിശേഷതകൾ
| ഫീച്ചർ | സ്പെസിഫിക്കേഷൻ |
|---|---|
| ബ്രാൻഡ് | പ്രീചെൻ |
| സ്ക്രീൻ വലിപ്പം | 19.5 ഇഞ്ച് |
| ഡിസ്പ്ലേ തരം | എൽഇഡി |
| പരമാവധി ഡിസ്പ്ലേ റെസല്യൂഷൻ | 1600 x 900 |
| പുതുക്കിയ നിരക്ക് | 60 Hz |
| പ്രതികരണ സമയം | 5 മില്ലിസെക്കൻഡ് |
| വീക്ഷണാനുപാതം | 16:9 |
| കണക്റ്റിവിറ്റി ടെക്നോളജി | എച്ച്ഡിഎംഐ, വിജിഎ |
| പ്രത്യേക സവിശേഷതകൾ | ബിൽറ്റ്-ഇൻ സ്പീക്കറുകൾ |
| VESA മൗണ്ട് അനുയോജ്യത | 100 x 100 മി.മീ |
9. വെസ മൗണ്ടിംഗ്
The Prechen monitor supports VESA standard mounting (100 x 100 mm), allowing you to mount it on a wall or an articulating arm for flexible viewing options. This feature makes the monitor lightweight and easy to install in various setups.
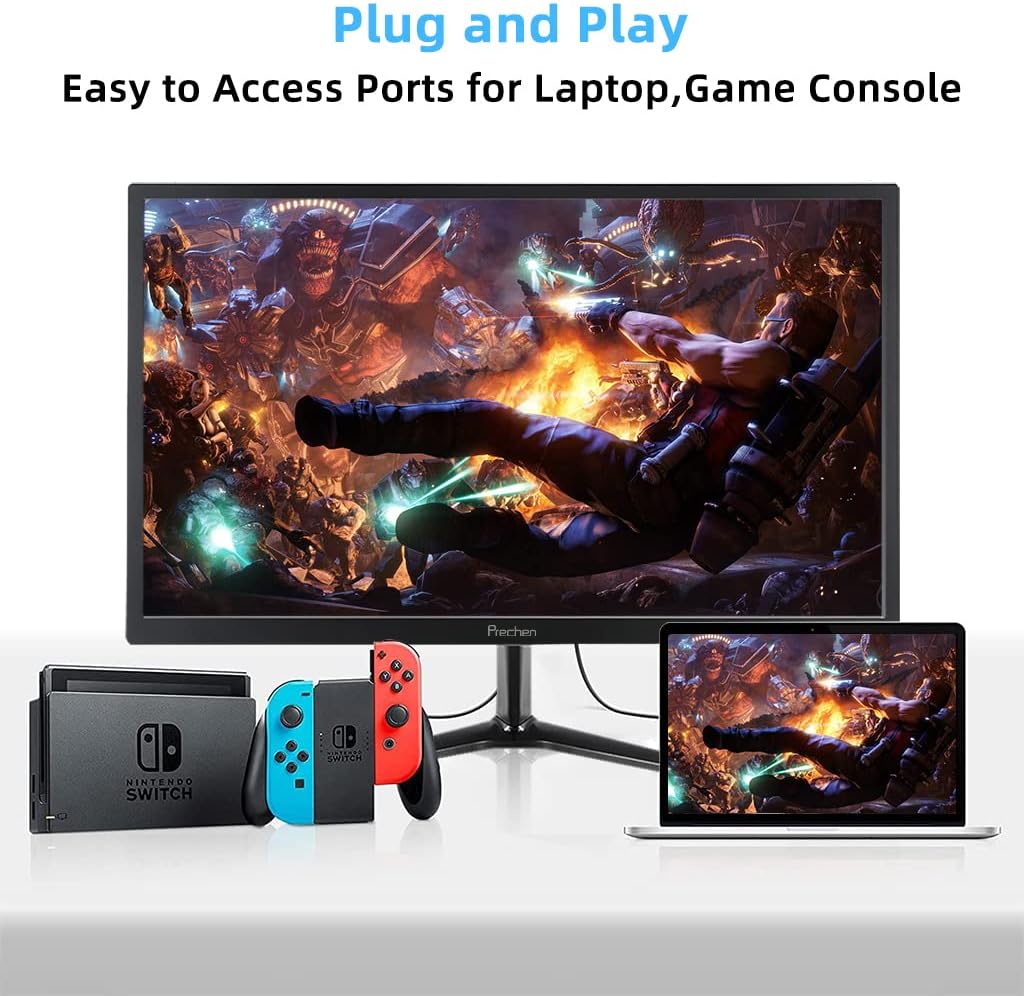
Figure 5: VESA mount dimensions on the monitor back.

ചിത്രം 6: ഉദാample of VESA mounting with an articulating arm.
10. വാറൻ്റിയും പിന്തുണയും
Each Prechen product is covered by a one-year warranty from the date of purchase, which includes a one-month refund and exchange policy. This warranty covers manufacturing defects and issues arising from normal use.
For any questions, technical support, or warranty claims, please contact Prechen customer service. Please have your product model and purchase information ready when contacting support.
Contact information for customer service can typically be found on the product packaging or the official Prechen webസൈറ്റ്.


