1. ആമുഖം
This manual provides essential information for the safe and proper use of your Ovsuqu Raycus 30W Fiber Laser Engraver, Model FL-30W. Please read this manual thoroughly before operating the machine to ensure optimal performance and user safety. This device is designed for precision marking and engraving on various materials, including metals and certain non-metals.
2 സുരക്ഷാ വിവരങ്ങൾ
WARNING: This product contains a Class 2 laser. Direct exposure to the laser beam may cause eye injury. Always wear appropriate laser safety goggles during operation.
- ലേസർ ക്ലാസ്: Class 2, with an output power of 0.874mW.
- FDA Accession Number: 2420799-000.
- Always wear certified laser safety goggles that protect against 1064 nm wavelength light.
- Never look directly into the laser beam or at reflections from shiny surfaces.
- ജോലിസ്ഥലം കത്തുന്ന വസ്തുക്കളിൽ നിന്ന് മുക്തമാണെന്ന് ഉറപ്പാക്കുക.
- ഓപ്പറേറ്റിംഗ് മെഷീനിൽ നിന്ന് കുട്ടികളെയും അനധികൃത വ്യക്തികളെയും അകറ്റി നിർത്തുക.
- Operate the machine in a well-ventilated area to dissipate fumes generated during engraving.
- ഉപകരണങ്ങളുടെ ശരിയായ ഗ്രൗണ്ടിംഗ് ഉറപ്പാക്കുക.
3. ഉൽപ്പന്നം കഴിഞ്ഞുview
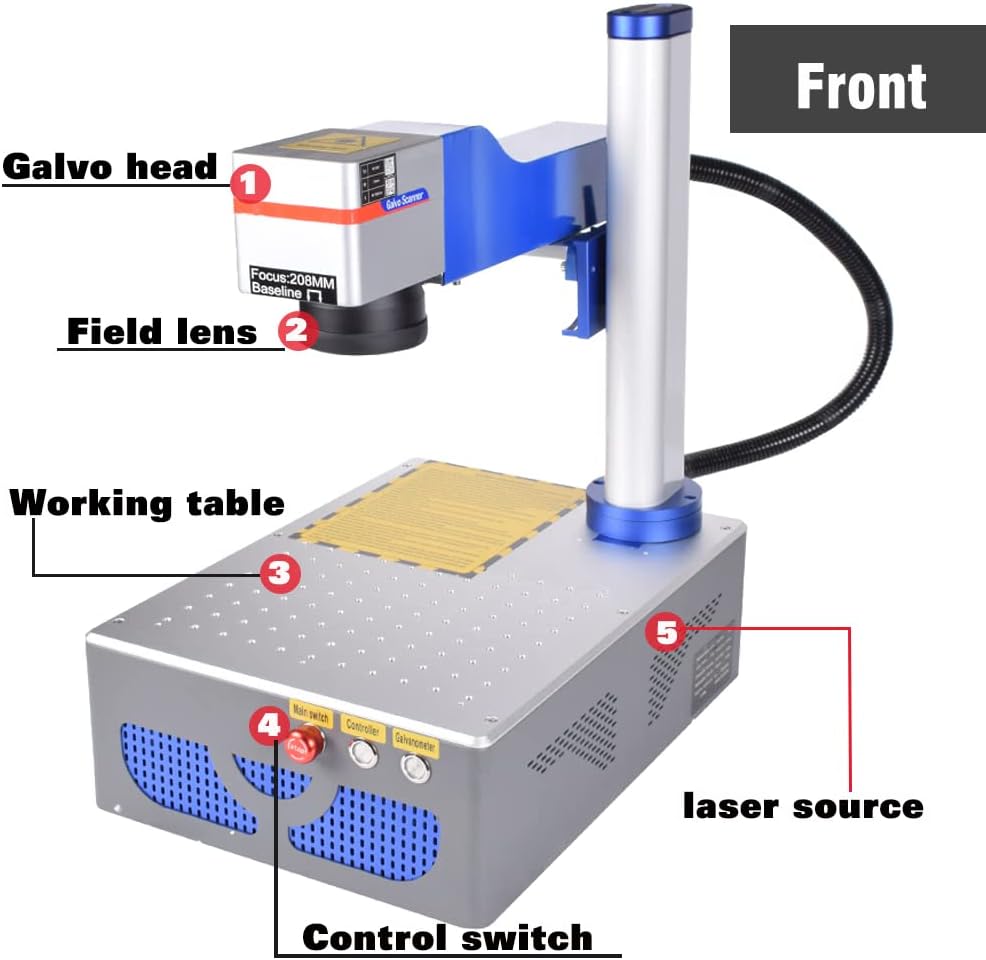
The Ovsuqu Raycus 30W Fiber Laser Engraver is a compact and powerful machine designed for precise material marking. Familiarize yourself with its main components:

ചിത്രം 3.1: മൊത്തത്തിൽ view of the Ovsuqu Raycus 30W Fiber Laser Engraver. This image displays the complete laser marking machine, highlighting its compact design suitable for desktop use.

ചിത്രം 3.2: ഫ്രണ്ട് view with labeled components. Key parts include the Galvo head (1), Field lens (2), Working table (3), Control switch (4), and the internal Laser source (5).
ചിത്രം 3.3: തിരികെ view with labeled ports. This view shows the Laser source protect cable (6), Lifting handle (7), Cooling fan (8), PC-USB port, Pedal Port, Power Socket, and External Ground connection.
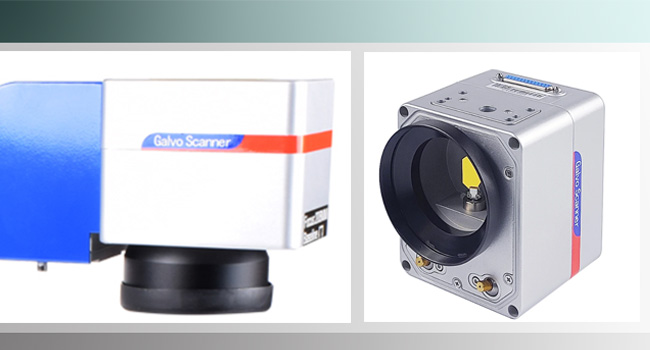
ചിത്രം 3.4: Close-up of the Galvo Scanner Head. This component directs the laser beam with high precision across the working area.
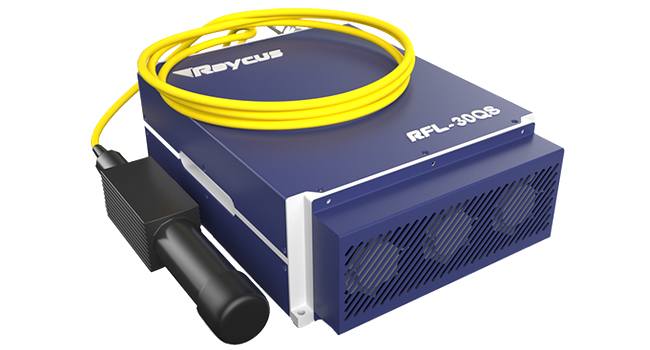
ചിത്രം 3.5: Raycus RFL-30QS Fiber Laser Source. This is the core component generating the laser beam, known for its reliability and performance.
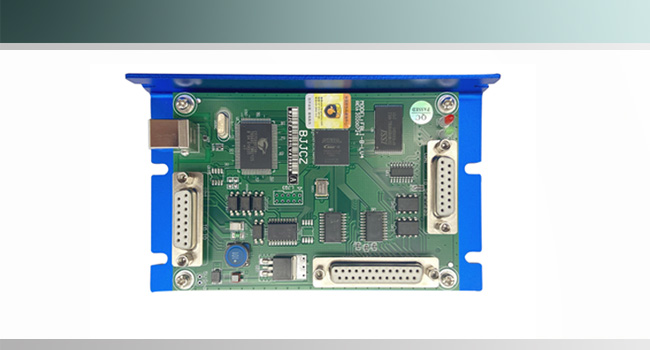
ചിത്രം 3.6: BJJCZ Control Board. This board manages the laser's operations and interfaces with the control software.
4. സജ്ജീകരണം
4.1 അൺപാക്കിംഗും പരിശോധനയും
Upon receiving your laser engraver, carefully unpack it. The machine is typically shipped in a protective wooden crate with styrofoam padding. Inspect all components for any signs of damage during transit. Report any damage immediately to the supplier.
4.2 ഉൾപ്പെടുത്തിയ ഘടകങ്ങൾ
പാക്കേജിൽ എല്ലാ ഇനങ്ങളും ഉണ്ടെന്ന് ഉറപ്പാക്കുക:

ചിത്രം 4.1: Included accessories. This image shows the various cables, tools, safety glasses, and other items provided with the laser engraver.
- Ovsuqu Raycus 30W Fiber Laser Marking Machine
- Software & Manual (on U Disk)
- ലേസർ സുരക്ഷാ കണ്ണടകൾ
- കാൽ സ്വിച്ച്
- പവർ കേബിൾ
- USB കേബിൾ
- Focal Length Ruler
- ഗ്രൌണ്ട് ചെയ്യൽ വയർ
- Mounting Hardware (e.g., hex bolts)
4.3 അസംബ്ലി
- Carefully attach the Galvo head assembly to the main unit using the provided hex bolts. Typically, this involves securing about 6 bolts.
- Connect the laser source protect cable to its designated port.
- Connect the USB cable from the machine's PC-USB port to your computer.
- Plug the foot switch into the Pedal Port.
- Connect the power cable to the Power Socket and then to a grounded electrical outlet.
- Attach the external ground wire to the designated terminal on the machine and to a reliable ground source.
4.4 സോഫ്റ്റ്വെയർ ഇൻസ്റ്റലേഷൻ
The included U Disk contains the necessary drivers and software (EZCAD). Install these programs on your computer. The machine is also compatible with LightBurn software for Galvo lasers, which may require separate purchase and setup. Refer to the software documentation on the U Disk for detailed installation instructions.
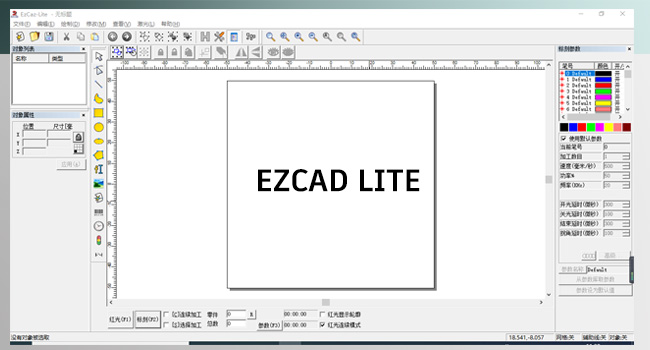
ചിത്രം 4.2: EZCAD Lite Software Interface. This is the primary software used to control the laser engraver.
5. ഓപ്പറേഷൻ
5.1 Initial Power-Up and Focus Adjustment
- Ensure all connections are secure and you are wearing safety goggles.
- മെഷീനിലെ മെയിൻ പവർ സ്വിച്ച് ഓണാക്കുക.
- Launch the EZCAD software on your computer.
- Place the focal length ruler on your material. Adjust the lifting handle (7 in Figure 3.3) until the laser's red guide light (if equipped) converges into a single, sharp point on the material surface, indicating correct focus.
5.2 Software Usage (EZCAD/LightBurn)
Use the installed software to design or import your engraving patterns. The software allows you to control laser parameters such as power, speed, frequency, and scan area. Refer to the software's dedicated manual for detailed instructions on creating and executing engraving jobs.
5.3 Material Compatibility and Applications
The Ovsuqu Raycus 30W Fiber Laser Engraver is suitable for a wide range of materials and applications:
- ലോഹങ്ങൾ: Gold, Silver, Aluminum, Stainless Steel, Brass, Copper, Alloy Steel, Carbon Steel. Applications include metal surface processing, peeling coatings, aluminum black marking, and black/color marking on stainless steel.
- ലോഹങ്ങളല്ലാത്തവ: Nylon, light button, ABS, PVC, PES. Suitable for excellent marking effects on plastics and other sensitive materials.
The machine is ideal for large area engraving and applications in the semi-conductor and electronics industries.
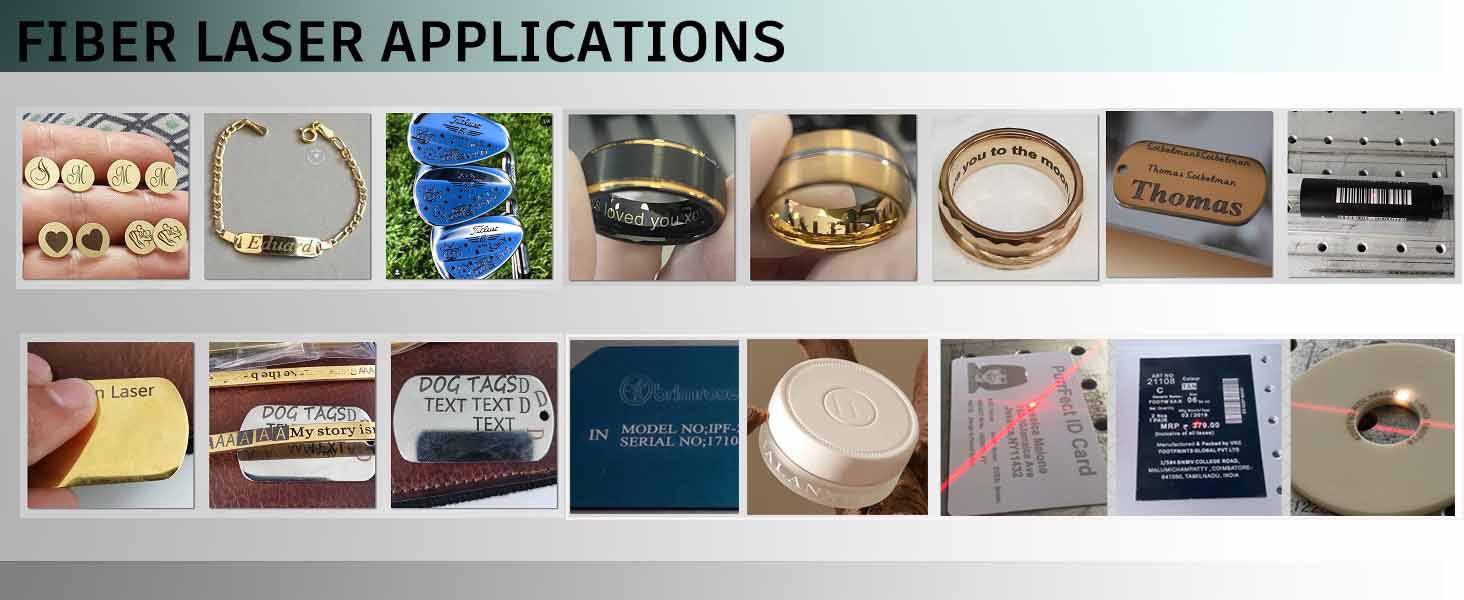
ചിത്രം 5.1: Examples of Fiber Laser Applications. This image showcases various items marked or engraved by a fiber laser, including jewelry, metal tags, and plastic components.
6. പരിപാലനം
പതിവ് അറ്റകുറ്റപ്പണികൾ നിങ്ങളുടെ ലേസർ എൻഗ്രേവറിന്റെ ദീർഘായുസ്സും മികച്ച പ്രകടനവും ഉറപ്പാക്കുന്നു.
- വൃത്തിയാക്കൽ: Keep the working table and the exterior of the machine clean. Use a soft, dry cloth.
- ലെൻസ് കെയർ: The field lens is a critical component. Clean it gently with a lens cleaning solution and a lint-free cloth specifically designed for optical components. Avoid touching the lens surface with bare hands.
- കൂളിംഗ് ഫാനുകൾ: Periodically check and clean the cooling fans (8 in Figure 3.3) to ensure proper airflow and prevent overheating.
- കണക്ഷനുകൾ: Regularly inspect all cables and connections for wear or looseness.
- സോഫ്റ്റ്വെയർ അപ്ഡേറ്റുകൾ: Keep your EZCAD or LightBurn software updated to the latest version for improved features and stability.
7. പ്രശ്നപരിഹാരം
This section addresses common issues you might encounter. For more complex problems, refer to the software manual or contact customer support.
- ലേസർ ഔട്ട്പുട്ട് ഇല്ല: Check if the machine is powered on, the emergency stop button is disengaged, and all cables (power, USB) are securely connected. Verify laser parameters in the software.
- മോശം കൊത്തുപണി നിലവാരം: Ensure the laser is properly focused on the material. Adjust laser power, speed, and frequency settings in the software. Clean the field lens if necessary.
- സോഫ്റ്റ്വെയർ കണക്ഷൻ പ്രശ്നങ്ങൾ: Reinstall USB drivers from the U Disk. Try a different USB port or cable. Restart both the machine and the computer.
- മെഷീൻ പ്രതികരിക്കുന്നില്ല: Check the emergency stop button. Ensure the main switch is on. Restart the machine.
8 സ്പെസിഫിക്കേഷനുകൾ
| ഫീച്ചർ | സ്പെസിഫിക്കേഷൻ |
|---|---|
| ബ്രാൻഡ് | ഒവ്സുകു |
| മോഡൽ | FL-30W |
| ലേസർ ഉറവിടം | Raycus 30W Fiber Laser |
| ലേസർ ക്ലാസ് | Class 2 (0.874mW Output Power) |
| FDA പ്രവേശന നമ്പർ | 2420799-000 |
| മധ്യ തരംഗദൈർഘ്യം | 1064 എൻഎം |
| Repetition Frequency Range | 40-60kHz |
| Maximum Single Pulse Energy | 0.75 എം.ജെ |
| പവർ അഡ്ജസ്റ്റ്മെന്റ് റേഞ്ച് | 10-100% |
| വർക്കിംഗ് ഏരിയ | 200 x 200 മി.മീ |
| നിയന്ത്രണ ബോർഡ് | BJJCZ Original |
| സോഫ്റ്റ്വെയർ അനുയോജ്യത | EZCAD (included), LightBurn (compatible) |
| കണക്കാക്കിയ സേവന ജീവിതം | 100,000 മണിക്കൂർ |
| മെറ്റീരിയലുകൾ | Metals (Gold, Silver, Aluminum, Stainless Steel, Brass, Copper, etc.), Non-metals (Nylon, ABS, PVC, PES, etc.) |
9. വാറൻ്റിയും പിന്തുണയും
The Ovsuqu Raycus 30W Fiber Laser Engraver comes with a 2 വർഷത്തെ വാറൻ്റി. For technical assistance, troubleshooting beyond this manual, or warranty claims, please contact your vendor or the manufacturer's customer support. Ensure you have your model number (FL-30W) and purchase details available when seeking support.


