1. ഉൽപ്പന്നം കഴിഞ്ഞുview
The BLACK+DECKER Kitchen Wand is a versatile 6-in-1 cordless kitchen multi-tool designed to assist with various food preparation tasks. This kit includes a wand base with an adjustable speed dial and battery indicator lights, along with several attachments for blending, whisking, frothing, can opening, wine opening, and spice grinding. It features a built-in rechargeable battery for cordless convenience.

Figure 1: The BLACK+DECKER Kitchen Wand 6-in-1 Multi-Tool Set, showcasing the main unit and various attachments in its packaging.
2 സുരക്ഷാ വിവരങ്ങൾ
ഉപകരണം ഉപയോഗിക്കുന്നതിന് മുമ്പ് എല്ലാ നിർദ്ദേശങ്ങളും ശ്രദ്ധാപൂർവ്വം വായിക്കുക. ഈ നിർദ്ദേശങ്ങൾ പാലിക്കുന്നതിൽ പരാജയപ്പെടുന്നത് വൈദ്യുതാഘാതം, തീപിടുത്തം അല്ലെങ്കിൽ ഗുരുതരമായ പരിക്കിന് കാരണമായേക്കാം.
- Always ensure the appliance is switched off and unplugged (if applicable) before assembling, disassembling, or cleaning.
- പരിക്കുകൾ ഒഴിവാക്കാൻ ഓപ്പറേഷൻ സമയത്ത് കൈകൾ, മുടി, വസ്ത്രങ്ങൾ, പാത്രങ്ങൾ എന്നിവ ചലിക്കുന്ന ഭാഗങ്ങളിൽ നിന്ന് അകറ്റി നിർത്തുക.
- മോട്ടോർ യൂണിറ്റ് വെള്ളത്തിലോ മറ്റ് ദ്രാവകങ്ങളിലോ മുക്കരുത്. പരസ്യം ഉപയോഗിച്ച് വൃത്തിയാക്കുക.amp തുണി മാത്രം.
- ശാരീരികമോ, ഇന്ദ്രിയപരമോ, മാനസികമോ ആയ കഴിവുകൾ കുറഞ്ഞവർ, അല്ലെങ്കിൽ അനുഭവപരിചയമോ അറിവോ ഇല്ലാത്തവർ എന്നിവർക്ക് ഈ ഉപകരണം ഉപയോഗിക്കാൻ ഉദ്ദേശിച്ചുള്ളതല്ല, അവരുടെ സുരക്ഷയ്ക്ക് ഉത്തരവാദിയായ ഒരു വ്യക്തി ഉപകരണത്തിന്റെ ഉപയോഗത്തെക്കുറിച്ച് മേൽനോട്ടമോ നിർദ്ദേശമോ നൽകിയിട്ടില്ലെങ്കിൽ.
- കുട്ടികൾ ഉപകരണം ഉപയോഗിച്ച് കളിക്കുന്നില്ലെന്ന് ഉറപ്പാക്കാൻ മേൽനോട്ടം വഹിക്കണം.
- നിർമ്മാതാവ് ശുപാർശ ചെയ്യുന്ന അറ്റാച്ചുമെൻ്റുകളും ആക്സസറികളും മാത്രം ഉപയോഗിക്കുക.
- ഒരു ഉപകരണവും കേടായ കോർഡ് അല്ലെങ്കിൽ പ്ലഗ് ഉപയോഗിച്ച് പ്രവർത്തിപ്പിക്കരുത്, അല്ലെങ്കിൽ ഉപകരണം തകരാറിലായതിന് ശേഷം അല്ലെങ്കിൽ ഏതെങ്കിലും വിധത്തിൽ വീഴുകയോ കേടുപാടുകൾ സംഭവിക്കുകയോ ചെയ്യരുത്.
3. പാക്കേജ് ഉള്ളടക്കം
താഴെ കൊടുത്തിരിക്കുന്ന എല്ലാ ഇനങ്ങളും നിങ്ങളുടെ പാക്കേജിൽ ഉണ്ടെന്ന് ഉറപ്പാക്കുക:
- Black wand base
- ഇമ്മേഴ്ഷൻ ബ്ലെൻഡർ അറ്റാച്ച്മെന്റ്
- Immersion Blender Guard
- വിസ്ക് അറ്റാച്ച്മെന്റ്
- പാൽ ഫ്രോതർ അറ്റാച്ച്മെന്റ്
- Wine Opener Attachment with Foil Cutter
- Spice Grinder Attachment with Lid
- മൂടിയോടുകൂടിയ അളവ് കപ്പ്
- 2 Storage Cases with Tray Insert
- Charging Dock with Cord

Figure 2: The main unit of the BLACK+DECKER Kitchen Wand with the immersion blender attachment connected.
4. സജ്ജീകരണവും ചാർജിംഗും
4.1 പ്രാരംഭ ചാർജ്
Before first use, fully charge the Kitchen Wand base. Place the wand base onto the charging dock and connect the power cord to an electrical outlet. The battery state-of-charge indicator lights on the wand base will illuminate to show charging progress. A full charge provides up to 30 minutes of continuous runtime.

Figure 3: The charging dock with its power adapter, used to recharge the Kitchen Wand base.
4.2 ആക്സസറികൾ അറ്റാച്ചുചെയ്യുന്നു
To attach any accessory, align the accessory with the wand base and twist until it locks securely into place. Ensure the attachment is firmly connected before operation.
5. പ്രവർത്തന നിർദ്ദേശങ്ങൾ
5.1 പൊതു പ്രവർത്തനം
The wand base features an adjustable speed dial for precise control over power. Rotate the dial to select your desired speed setting. Press and hold the power button to operate the appliance. Release the button to stop.
5.2 Immersion Blender Attachment
Attach the immersion blender to the wand base. Insert the blender into liquids or soft foods in a pot or container. Use a gentle up-and-down motion to blend ingredients until desired consistency is achieved. The immersion blender guard (Figure 4) should be used to protect the blades and prevent splashing.

Figure 4: A man is using the BLACK+DECKER Kitchen Wand with the immersion blender attachment to blend soup in a pot.
5.3 വിസ്ക് അറ്റാച്ച്മെന്റ്
Connect the whisk attachment to the wand base. Use for whipping cream, beating eggs, or mixing batters. Start at a low speed and gradually increase as needed.

Figure 5: A man is using the BLACK+DECKER Kitchen Wand with the whisk attachment to mix ingredients in a bowl.
5.4 Milk Frother Attachment
Attach the milk frother. Insert into milk or other beverages to create foam. Move the frother gently up and down to achieve desired frothiness.

Figure 6: A woman is using the BLACK+DECKER Kitchen Wand with the milk frother attachment to create foam in a glass.
5.5 Can Opener Attachment
Secure the can opener attachment. Place the can opener on the rim of the can, ensuring the cutting wheel is positioned correctly. Press the power button and allow the opener to rotate around the can until it completes a full circle. Lift the can opener to remove the lid.

Figure 7: A woman is shown using the BLACK+DECKER Kitchen Wand to open a can, demonstrating the can opener attachment.
5.6 Wine Opener Attachment
Attach the wine opener. Use the included foil cutter (Figure 8) to remove the foil from the wine bottle. Place the wine opener over the bottle neck, ensuring it is centered. Press the power button to extract the cork. Reverse the operation to release the cork from the opener.

Figure 8: A man is using the BLACK+DECKER Kitchen Wand with the wine opener attachment to open a wine bottle.
5.7 Spice Grinder Attachment
Attach the spice grinder. Fill the transparent chamber with whole spices like salt or pepper. Press the power button to grind. Adjust the coarseness if applicable (refer to specific grinder instructions if provided with the attachment).

Figure 9: A woman is using the BLACK+DECKER Kitchen Wand with the spice grinder attachment to season a salad.
6. പരിപാലനവും ശുചീകരണവും
ശരിയായ അറ്റകുറ്റപ്പണി നിങ്ങളുടെ അടുക്കള വാൻഡിന്റെ ദീർഘായുസ്സും പ്രകടനവും ഉറപ്പാക്കുന്നു.
- Wand Base: പരസ്യം ഉപയോഗിച്ച് വാൻഡ് ബേസ് തുടയ്ക്കുകamp തുണി. വെള്ളത്തിൽ മുക്കരുത്.
- അറ്റാച്ചുമെൻ്റുകൾ: Most attachments (immersion blender shaft, whisk, milk frother, measuring cup, storage cases) are dishwasher safe or can be washed by hand with warm, soapy water. Refer to individual attachment instructions for specific cleaning guidelines.
- Can Opener, Wine Opener, Spice Grinder: These attachments may have specific cleaning requirements. Generally, wipe clean with a damp cloth. Avoid immersing electrical components.
- സംഭരണം: Use the provided storage cases with tray inserts (Figure 10) to keep all components organized and protected when not in use.
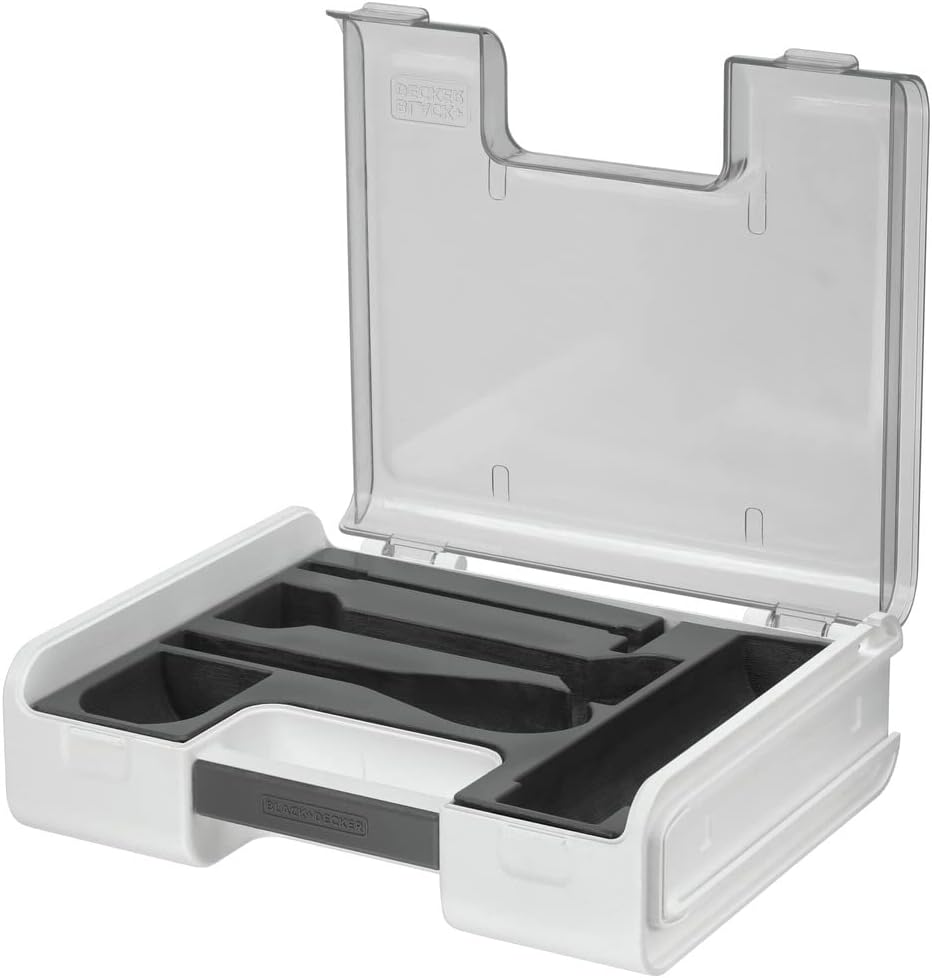
Figure 10: Two clear storage cases with custom-fit tray inserts to organize the various Kitchen Wand attachments.
7. പ്രശ്നപരിഹാരം
If you encounter issues with your BLACK+DECKER Kitchen Wand, refer to the following common solutions:
- ഉപകരണം ഓണാക്കുന്നില്ല: Ensure the wand base is fully charged. Check that the attachment is securely connected to the wand base.
- Attachments not working effectively: Verify that the attachment is correctly assembled and locked into place. Ensure the speed dial is set to an appropriate level for the task.
- ബാറ്ററി ചാർജ്ജുചെയ്യുന്നില്ല: Confirm the charging dock is properly connected to a working electrical outlet and the wand base is correctly seated on the dock.
- അമിതമായ വൈബ്രേഷൻ അല്ലെങ്കിൽ ശബ്ദം: Discontinue use immediately. Check for any obstructions in the attachment or damage to components.
ഈ ഘട്ടങ്ങളിലൂടെ പരിഹരിക്കപ്പെടാത്ത പ്രശ്നങ്ങൾക്ക്, ദയവായി ഉപഭോക്തൃ പിന്തുണയുമായി ബന്ധപ്പെടുക.
8 സ്പെസിഫിക്കേഷനുകൾ
| ബ്രാൻഡ് | ബ്ലാക്ക്+ഡെക്കർ |
| മോഡൽ നമ്പർ | BCKM1016KS10 സ്പെസിഫിക്കേഷൻ |
| നിറം | കറുപ്പ് |
| പ്രത്യേക ഫീച്ചർ | കോർഡ്ലെസ്സ് |
| Capacity (Measuring Cup) | 700 മില്ലി ലിറ്റർ |
| ഉൽപ്പന്ന അളവുകൾ | 18.86"D x 11.3"W x 7.25"H |
| പവർ ഉറവിടം | ബാറ്ററി പവർ |
| വാല്യംtage | 230 വോൾട്ട് |
| ബ്ലേഡ് മെറ്റീരിയൽ | പ്ലാസ്റ്റിക് |
| നിയന്ത്രണ തരം | വേരിയബിൾ സ്പീഡ് ഡയൽ |
| കണ്ടെയ്നർ മെറ്റീരിയൽ | പ്ലാസ്റ്റിക് |
| ഇനത്തിൻ്റെ ഭാരം | 7.8 പൗണ്ട് |
9. വാറൻ്റിയും പിന്തുണയും
9.1 വാറൻ്റി വിവരങ്ങൾ
This BLACK+DECKER Kitchen Wand is covered by a പരിമിത വാറൻ്റി. നിർദ്ദിഷ്ട നിബന്ധനകൾ, വ്യവസ്ഥകൾ, കവറേജ് കാലയളവ് എന്നിവയ്ക്കായി നിങ്ങളുടെ ഉൽപ്പന്ന പാക്കേജിംഗിൽ ഉൾപ്പെടുത്തിയിരിക്കുന്ന വാറന്റി കാർഡ് പരിശോധിക്കുക. വാറന്റി ക്ലെയിമുകൾക്കായി നിങ്ങളുടെ വാങ്ങിയതിന്റെ തെളിവ് സൂക്ഷിക്കുക.
9.2 ഉപഭോക്തൃ പിന്തുണ
For technical assistance, replacement parts, or any questions regarding your product, please visit the official BLACK+DECKER website or contact their customer service department. Contact information can typically be found in the warranty documentation or on the manufacturer's webസൈറ്റ്.