1. ആമുഖം
The Radiolink CM210 is a compact and portable 2S 7.4V LiPo battery balance charger designed for various RC applications, including airplanes, transmitters, cars, boats, and gel blaster guns. It features multiple charging protections, fast charging capabilities, and a battery recovery function to ensure safe and efficient battery management.
പ്രധാന സവിശേഷതകളിൽ ഇവ ഉൾപ്പെടുന്നു:
- Multiple Charging Protection: Incorporates a software logic safety algorithm and over-temperature protection to prevent charging errors and reduce risks.
- Faster Charging & Battery Recovery: Offers a maximum output power of 20W and supports 1.5A fast charging. Includes trickle current recovery for over-discharged batteries, extending battery life.
- High Charging Efficiency: Achieves up to 82% efficiency with a voltage precision of 4.2±0.02V per cell when fully charged, preventing both overcharging and undercharging.
- ഒതുക്കമുള്ള വലിപ്പം: Measuring only 40.5 x 21 x 15mm and weighing 9g, it is highly portable.
- Clear Charging Indicator: Provides an LED indicator to clearly show when the battery is fully charged.
2. പാക്കേജ് ഉള്ളടക്കം
നിങ്ങളുടെ പാക്കേജിൽ എല്ലാ ഇനങ്ങളും ഉണ്ടെന്ന് ദയവായി പരിശോധിക്കുക:
- Radiolink CM210 Balance Charger
- യുഎസ്ബി ടൈപ്പ്-സി ചാർജിംഗ് കേബിൾ
- നിർദ്ദേശ മാനുവൽ (ഈ പ്രമാണം)
3. സജ്ജീകരണവും കണക്ഷനും
Follow these steps to set up and connect your CM210 charger:
3.1 ചാർജർ പവർ ചെയ്യുന്നു
- Insert the USB Type-C cable into the input port of the CM210 charger.
- Connect the other end of the USB cable to a suitable 5V power source, such as a USB wall adapter, power bank, computer USB port, or car charger.
- Upon successful connection, the red LED indicator on the CM210 will illuminate, indicating it is ready to charge.

Figure 1: Radiolink CM210 charger with its USB Type-C cable, ready for connection to a power source.

Figure 2: The CM210 charger can be powered by various USB sources including wall adapters, mobile power banks, car chargers, and computer USB ports.
3.2 ബാറ്ററി ബന്ധിപ്പിക്കുന്നു
The CM210 charger is compatible with 2S LiPo batteries that feature a 3P PH2.54 balance connector.
- Carefully insert the balance port of your 2S LiPo battery into the charging port of the CM210. Ensure the connector is inserted correctly, aligning the pins. Reverse connection can damage the charger.
- Once the battery is connected, the green LED indicators on the charger will begin flashing, signifying that charging has started.

Figure 3: Illustration of correct and incorrect battery connection. Always ensure proper pin alignment to prevent damage.

Figure 4: The CM210 charger is designed for 2S LiPo batteries with a 3P PH2.54 balance connector, commonly used in RC models.
Video 1: Demonstrates the charging steps for the Radiolink CM210 balance charger, including connecting the power source and the battery.
4. പ്രവർത്തന നിർദ്ദേശങ്ങൾ
The CM210 charger automatically manages the charging process once the battery is connected. Observe the LED indicators for charging status.
4.1 LED Indicator Meanings
The CM210 uses a series of LED indicators to communicate its status and the battery's charge level:
| LED ഇൻഡിക്കേറ്റർ നില | അർത്ഥം |
|---|---|
| എല്ലാ പച്ച LED-കളും ഒരു തവണ ഫ്ലാഷ് ചെയ്യുന്നു | Charger powered on, calibration done (factory default). |
| ചുവന്ന LED എപ്പോഴും ഓണാണ് | Charger powered on, no battery connected. Battery needs to be connected. |
| ചാർജ് ചെയ്യുമ്പോൾ ചുവന്ന എൽഇഡി മിന്നുന്നു | Charger detects an abnormality. Reconnect battery and cable to troubleshoot. |
| ആദ്യത്തെ പച്ച LED ഫ്ലാഷുകൾ | ബാറ്ററി വോളിയംtagഇ <7.4V |
| ആദ്യത്തെ പച്ച LED എപ്പോഴും ഓണാണ്, രണ്ടാമത്തെ പച്ച LED മിന്നുന്നു | 7.4V < Battery Voltagഇ <7.8V |
| The front 2 green LEDs are always on, and the third green LED is flashing | 7.8V < Battery Voltagഇ <8.2V |
| The front 3 green LEDs are always on, and the fourth green LED is flashing | 8.2V < Battery Voltagഇ <8.4V |
| All 4 green LEDs are always on | ബാറ്ററി പൂർണ്ണമായും ചാർജ്ജ് ചെയ്തു. |
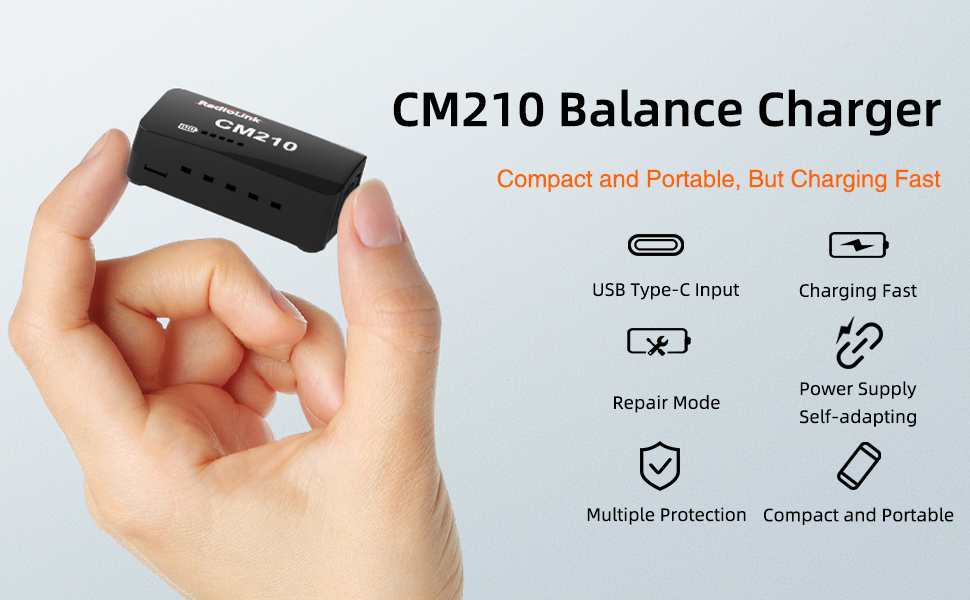
Figure 5: Detailed explanation of the CM210's LED indicator lights and their corresponding meanings for charging status and battery voltage.
Video 2: Illustrates the various LED indicator states of the Radiolink CM210 balance charger during the charging process, showing battery voltage levels and full charge indication.
4.2 Battery Recovery Mode
The CM210 features a trickle current recovery mode for over-discharged batteries. This function helps to safely bring deeply discharged LiPo batteries back to a recoverable voltage level before initiating standard fast charging, which can extend the overall lifespan of the battery.

Figure 6: Diagram showing the low voltage pre-charge and repair mode, where the charger applies a small current to recover deeply discharged cells before normal charging.
5. പരിപാലനവും സുരക്ഷയും
To ensure the longevity and safe operation of your Radiolink CM210 charger and batteries, please adhere to the following guidelines:
- ചാർജർ വൃത്തിയായും പൊടിയും അവശിഷ്ടങ്ങളും ഇല്ലാതെയും സൂക്ഷിക്കുക. വൃത്തിയാക്കാൻ ഉണങ്ങിയതും മൃദുവായതുമായ തുണി ഉപയോഗിക്കുക.
- Avoid exposing the charger to moisture, extreme temperatures, or direct sunlight.
- ചാർജർ വേർപെടുത്താനോ പരിഷ്ക്കരിക്കാനോ ശ്രമിക്കരുത്. ഇത് വാറന്റി അസാധുവാക്കുകയും തകരാറുകൾക്കോ പരിക്കിനോ കാരണമായേക്കാം.
- Always use the charger with compatible 2S LiPo batteries. Using incompatible batteries may cause damage or safety hazards.
- Store the charger and batteries in a cool, dry place away from flammable materials.
- Regularly inspect the USB cable and battery connectors for any signs of wear or damage. Replace if necessary.
- ചാർജ് ചെയ്യുന്ന ബാറ്ററികൾ ഒരിക്കലും ശ്രദ്ധിക്കാതെ വിടരുത്.
6. പ്രശ്നപരിഹാരം
If you encounter issues with your CM210 charger, refer to the LED indicator meanings in Section 4.1. Here are some common troubleshooting tips:
- ചാർജർ ഓണാക്കുന്നില്ല: Ensure the USB Type-C cable is securely connected to both the charger and a functional power source. Try a different USB cable or power adapter.
- Red LED always on (no charging): This indicates no battery is connected. Ensure the battery's balance connector is fully and correctly inserted into the charger.
- Red LED flashing during charging: This signals an abnormality. Disconnect the battery and the power source, then reconnect them carefully. If the issue persists, the battery or charger may be faulty.
- Battery not charging to full capacity: Verify that the battery is a 2S LiPo type. Ensure the power source provides sufficient current (e.g., 1.5A or higher for fast charging).
- വേഗത കുറഞ്ഞ ചാർജിംഗ്: Ensure your power source can deliver adequate current. The CM210 supports 1.5A fast charging, but a lower current power source will result in slower charging.
7 സ്പെസിഫിക്കേഷനുകൾ
| ഫീച്ചർ | വിശദാംശങ്ങൾ |
|---|---|
| മോഡൽ | CM210 |
| ഇൻപുട്ട് കണക്റ്റർ | യുഎസ്ബി ടൈപ്പ്-സി |
| Putട്ട്പുട്ട് വോളിയംtage (പരമാവധി) | 8.4V (for 2S LiPo) |
| പരമാവധി ഔട്ട്പുട്ട് പവർ | 20W |
| പരമാവധി ചാർജിംഗ് കറൻ്റ് | 1.5എ |
| ചാർജിംഗ് കാര്യക്ഷമത | 82% വരെ |
| വാല്യംtagഇ പ്രിസിഷൻ | 4.2V ± 0.02V per cell |
| അളവുകൾ (L x W x H) | 40.5 x 21 x 15 മിമി (1.59 x 0.82 x 0.59 ഇഞ്ച്) |
| ഭാരം | 9 ഗ്രാം (0.317 ഔൺസ്) |
| നിറം | കറുപ്പ് |
8. വാറൻ്റിയും പിന്തുണയും
Radiolink products are designed for reliability and performance. For any technical assistance, troubleshooting, or warranty inquiries, please contact Radiolink's after-sales service. You can find support information on the Radiolink Direct store or through the online user instructions available on the product's sales page.
For further assistance, please visit the official Radiolink store: Radiolink Store


