1. പ്രധാന സുരക്ഷാ നിർദ്ദേശങ്ങൾ
Please read all safety warnings and instructions carefully before using this appliance to prevent fire, electric shock, injury, or property damage. Keep this manual for future reference.
- ഹീറ്റർ എപ്പോഴും ഒരു വാൾ ഔട്ട്ലെറ്റിലേക്ക് നേരിട്ട് പ്ലഗ് ചെയ്യുക. ഒരിക്കലും എക്സ്റ്റൻഷൻ കോഡോ മാറ്റി സ്ഥാപിക്കാവുന്ന പവർ ടാപ്പോ ഉപയോഗിച്ച് ഉപയോഗിക്കരുത്.
- കേടായ കോഡോ പ്ലഗോ ഉപയോഗിച്ച് ഒരു ഹീറ്ററും പ്രവർത്തിപ്പിക്കരുത്, അല്ലെങ്കിൽ ഹീറ്റർ തകരാറിലായതിനുശേഷം അല്ലെങ്കിൽ ഏതെങ്കിലും വിധത്തിൽ താഴെ വീണുപോയതിനുശേഷം അല്ലെങ്കിൽ കേടുപാടുകൾ സംഭവിച്ചതിനുശേഷം.
- പുറത്ത് ഉപയോഗിക്കരുത്. ഈ ഹീറ്റർ ഇൻഡോർ ഉപയോഗത്തിന് മാത്രമുള്ളതാണ്.
- ഫർണിച്ചറുകൾ, തലയിണകൾ, കിടക്കവിരികൾ, പേപ്പറുകൾ, വസ്ത്രങ്ങൾ, കർട്ടനുകൾ തുടങ്ങിയ കത്തുന്ന വസ്തുക്കൾ ഹീറ്ററിന്റെ മുൻവശത്ത് നിന്ന് കുറഞ്ഞത് 3 അടി (0.9 മീറ്റർ) അകലെയും വശങ്ങളിൽ നിന്നും പിന്നിൽ നിന്നും അകറ്റി നിർത്തുക.
- ഏതെങ്കിലും ഹീറ്റർ കുട്ടികളോ അസാധുവായവരോ സമീപത്തോ ഉപയോഗിക്കുമ്പോഴോ ഹീറ്റർ ശ്രദ്ധിക്കാതെ പ്രവർത്തിക്കുമ്പോഴോ അതീവ ജാഗ്രത ആവശ്യമാണ്.
- ഹീറ്റർ വിച്ഛേദിക്കുന്നതിന്, നിയന്ത്രണങ്ങൾ ഓഫാക്കുക, തുടർന്ന് ഔട്ട്ലെറ്റിൽ നിന്ന് പ്ലഗ് നീക്കം ചെയ്യുക.
- ഏതെങ്കിലും വെൻ്റിലേഷനിലേക്കോ എക്സ്ഹോസ്റ്റ് ഓപ്പണിംഗിലേക്കോ വിദേശ വസ്തുക്കൾ തിരുകുകയോ അനുവദിക്കുകയോ ചെയ്യരുത്, കാരണം ഇത് വൈദ്യുതാഘാതമോ തീയോ ഉണ്ടാക്കുകയോ ഹീറ്ററിന് കേടുപാടുകൾ വരുത്തുകയോ ചെയ്യാം.
- This heater includes an anti-tip safety switch and an overheating protection system. If the heater tips over or overheats, it will automatically shut off.
2. പാക്കേജ് ഉള്ളടക്കം
അൺപാക്ക് ചെയ്യുമ്പോൾ എല്ലാ ഘടകങ്ങളും ഉണ്ടെന്നും നല്ല നിലയിലാണെന്നും ഉറപ്പാക്കുക.
- OCEANIC 1500W Electric Oil-Filled Radiator Heater (Main Unit)
- റിമോട്ട് കൺട്രോൾ
- Wheel Assemblies (2 sets)
- ഇൻസ്ട്രക്ഷൻ മാനുവൽ
3. സജ്ജീകരണം
3.1 വീലുകൾ ഘടിപ്പിക്കൽ
- Carefully turn the heater upside down on a soft, non-abrasive surface to avoid scratching.
- Locate the two U-shaped bolts and four wing nuts provided.
- Align the wheel assemblies with the mounting holes at the bottom of the heater.
- Insert the U-shaped bolts through the mounting holes and secure them with the wing nuts. Ensure they are tightened firmly.
- Return the heater to an upright position.

വശം view of the heater, illustrating the proper attachment of the wheel assemblies for mobility.
3.2 പ്ലേസ്മെൻ്റ് മാർഗ്ഗനിർദ്ദേശങ്ങൾ
Place the heater on a firm, level surface. Ensure there is adequate clearance from walls, furniture, and other objects (minimum 3 feet / 0.9 meters). Do not place the heater directly below a power outlet.

Example of the heater placed in a living space, demonstrating appropriate clearance from furniture and walls.
4. പ്രവർത്തന നിർദ്ദേശങ്ങൾ
4.1 കൺട്രോൾ പാനൽ ഓവർview

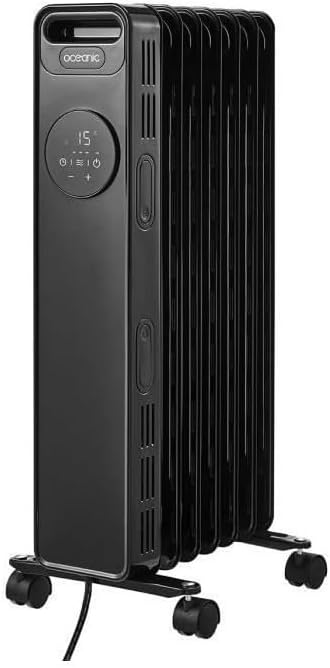
വിശദമായി view of the heater's LED display and control buttons, including power, mode, timer, and temperature adjustments.
- പവർ ബട്ടൺ: ഹീറ്റർ ഓൺ/ഓഫ് ചെയ്യുന്നു.
- മോഡ് ബട്ടൺ: Cycles through heating power settings (600W, 900W, 1500W).
- താപനില ബട്ടണുകൾ (+/-): ആവശ്യമുള്ള താപനില ക്രമീകരിക്കുന്നു.
- ടൈമർ ബട്ടൺ: ഓപ്പറേറ്റിംഗ് ടൈമർ സജ്ജമാക്കുന്നു (24 മണിക്കൂർ വരെ).
- LED ഡിസ്പ്ലേ: Shows current temperature, timer settings, and power mode.
4.2 പവർ ഓൺ/ഓഫ്
- Plug the heater into a suitable 220-240V AC power outlet.
- Press the Power Button on the control panel or remote control to turn the heater ON. The LED display will illuminate.
- To turn OFF, press the Power Button again.
4.3 Setting Temperature and Power
- Once ON, use the + or - buttons to set your desired temperature. The heater will automatically maintain this temperature.
- അമർത്തുക മോഡ് button to cycle through the three heating power settings: Low (600W), Medium (900W), and High (1500W). Select the appropriate power for your heating needs.
4.4 ടൈമർ ഫംഗ്ഷൻ ഉപയോഗിക്കുന്നു
- അമർത്തുക ടൈമർ button. The display will show '00'.
- ഉപയോഗിക്കുക + or - buttons to set the desired operating duration, from 1 to 24 hours.
- The heater will automatically turn off after the set time has elapsed.
4.5 റിമോട്ട് കൺട്രോൾ ഓപ്പറേഷൻ
The included remote control duplicates the functions of the main control panel, allowing convenient operation from a distance. Ensure the remote has working batteries (not included) and is pointed towards the heater's receiver.
5. പരിപാലനം
5.1 വൃത്തിയാക്കൽ
- വൃത്തിയാക്കുന്നതിന് മുമ്പ് എല്ലായ്പ്പോഴും ഹീറ്റർ അൺപ്ലഗ് ചെയ്ത് പൂർണ്ണമായും തണുക്കാൻ അനുവദിക്കുക.
- ഒരു മൃദുവായ, ഡി ഉപയോഗിച്ച് ബാഹ്യ പ്രതലങ്ങൾ തുടയ്ക്കുകamp തുണി. ഉരച്ചിലുകളുള്ള ക്ലീനറുകളോ ലായകങ്ങളോ ഉപയോഗിക്കരുത്.
- ഹീറ്റർ വെള്ളത്തിൽ മുക്കരുത് അല്ലെങ്കിൽ വെള്ളം ഉള്ളിലേക്ക് ഒഴുകാൻ അനുവദിക്കരുത്.
5.2 സംഭരണം
When not in use, store the heater in a cool, dry place. It is recommended to use the integrated cable winder to neatly store the power cord.
6. പ്രശ്നപരിഹാരം
| പ്രശ്നം | സാധ്യമായ കാരണം | പരിഹാരം |
|---|---|---|
| ഹീറ്റർ ഓണാക്കുന്നില്ല. | വൈദ്യുതി വിതരണം ഇല്ല. അമിത ചൂടാക്കൽ സംരക്ഷണം സജീവമാക്കി. ആന്റി-ടിപ്പ് സ്വിച്ച് സജീവമാക്കി. | പ്ലഗ് ഔട്ട്ലെറ്റിൽ സുരക്ഷിതമായി ബന്ധിപ്പിച്ചിട്ടുണ്ടോയെന്ന് പരിശോധിക്കുക. Unplug, wait 30 minutes, then plug back in. ഹീറ്റർ പരന്നതും സ്ഥിരതയുള്ളതുമായ ഒരു പ്രതലത്തിലാണെന്ന് ഉറപ്പാക്കുക. |
| ഹീറ്റർ താപം ഉൽപാദിപ്പിക്കുന്നില്ല. | താപനില ക്രമീകരണം വളരെ കുറവാണ്. Power mode set to low. | ആവശ്യമുള്ള താപനില ക്രമീകരണം വർദ്ധിപ്പിക്കുക. Cycle through power modes to a higher setting (900W or 1500W). |
| റിമോട്ട് കൺട്രോൾ പ്രവർത്തിക്കുന്നില്ല. | ബാറ്ററികൾ തീർന്നിരിക്കുന്നു അല്ലെങ്കിൽ തെറ്റായി ചേർത്തിരിക്കുന്നു. റിമോട്ടിനും ഹീറ്ററിനും ഇടയിലുള്ള തടസ്സം. | ബാറ്ററികൾ മാറ്റി ശരിയായ പോളാരിറ്റി ഉറപ്പാക്കുക. സിഗ്നൽ പാത തടയുന്ന എല്ലാ വസ്തുക്കളും നീക്കം ചെയ്യുക. |
7 സ്പെസിഫിക്കേഷനുകൾ
| ഫീച്ചർ | വിശദാംശങ്ങൾ |
|---|---|
| മോഡൽ നമ്പർ | OCEABHE1500B |
| പവർ ഔട്ട്പുട്ട് | 1500W (പരമാവധി) |
| Heating Power Settings | 600W, 900W, 1500W |
| ഘടകങ്ങൾ | 7 Oil-Filled Elements |
| തെർമോസ്റ്റാറ്റ് | ഇലക്ട്രിക് തെർമോസ്റ്റാറ്റ് |
| പ്രദർശിപ്പിക്കുക | LED ഡിസ്പ്ലേ |
| ടൈമർ | 24 മണിക്കൂർ വരെ |
| നിയന്ത്രണം | On-board Panel & Remote Control |
| സുരക്ഷാ സവിശേഷതകൾ | Anti-tip switch, Overheating protection |
| മൗണ്ടിംഗ് തരം | Floor Mount (with wheels) |
| പവർ ഉറവിടം | കോർഡഡ് ഇലക്ട്രിക് |
| ഇനത്തിൻ്റെ ഭാരം | 9.54 കിലോഗ്രാം |
| നിറം | കറുപ്പ് |
8. വാറൻ്റിയും പിന്തുണയും
This OCEANIC product is covered by a manufacturer's warranty. For specific warranty terms, duration, and to register your product, please refer to the warranty card included in your package or visit the official OCEANIC website. For technical support, troubleshooting assistance, or to inquire about replacement parts, please contact OCEANIC customer service through their official channels.
ഏതെങ്കിലും വാറന്റി ക്ലെയിമുകൾക്കായി നിങ്ങളുടെ വാങ്ങിയതിന്റെ തെളിവ് സൂക്ഷിക്കുക.


