ആമുഖം
Thank you for choosing the HUPEJOS V7PRO 3 Channel Dash Cam. This manual provides essential information for installing, operating, and maintaining your device. Please read it thoroughly to ensure proper usage and to maximize the benefits of your dash cam.
പാക്കേജ് ഉള്ളടക്കം
താഴെ ലിസ്റ്റ് ചെയ്തിരിക്കുന്ന എല്ലാ ഇനങ്ങളും നിങ്ങളുടെ പാക്കേജിൽ ഉൾപ്പെടുത്തിയിട്ടുണ്ടെന്ന് ഉറപ്പാക്കുക:
- 1 x V7-Pro Dash Cam
- 1 x Car Charger with Type C USB Cable
- 1 x സക്ഷൻ കപ്പ് മൗണ്ട്
- 1 x Car Wiring Tool
- 1 x 3M Adhesive Mounts
- 1 x GPS Module and 2.5m Cable
- 1 x ഉപയോക്തൃ മാനുവൽ
- 1 x 128GB SD Memory card (pre-installed)

ഉൽപ്പന്നം കഴിഞ്ഞുview
The HUPEJOS V7PRO is a sophisticated 3-channel dash cam designed to provide comprehensive vehicle surveillance. Key features include:
- Three Channel Recording: Simultaneously records front, left, and right views (1440P+1080P+1080P) or 4K front with 1080P left/right.
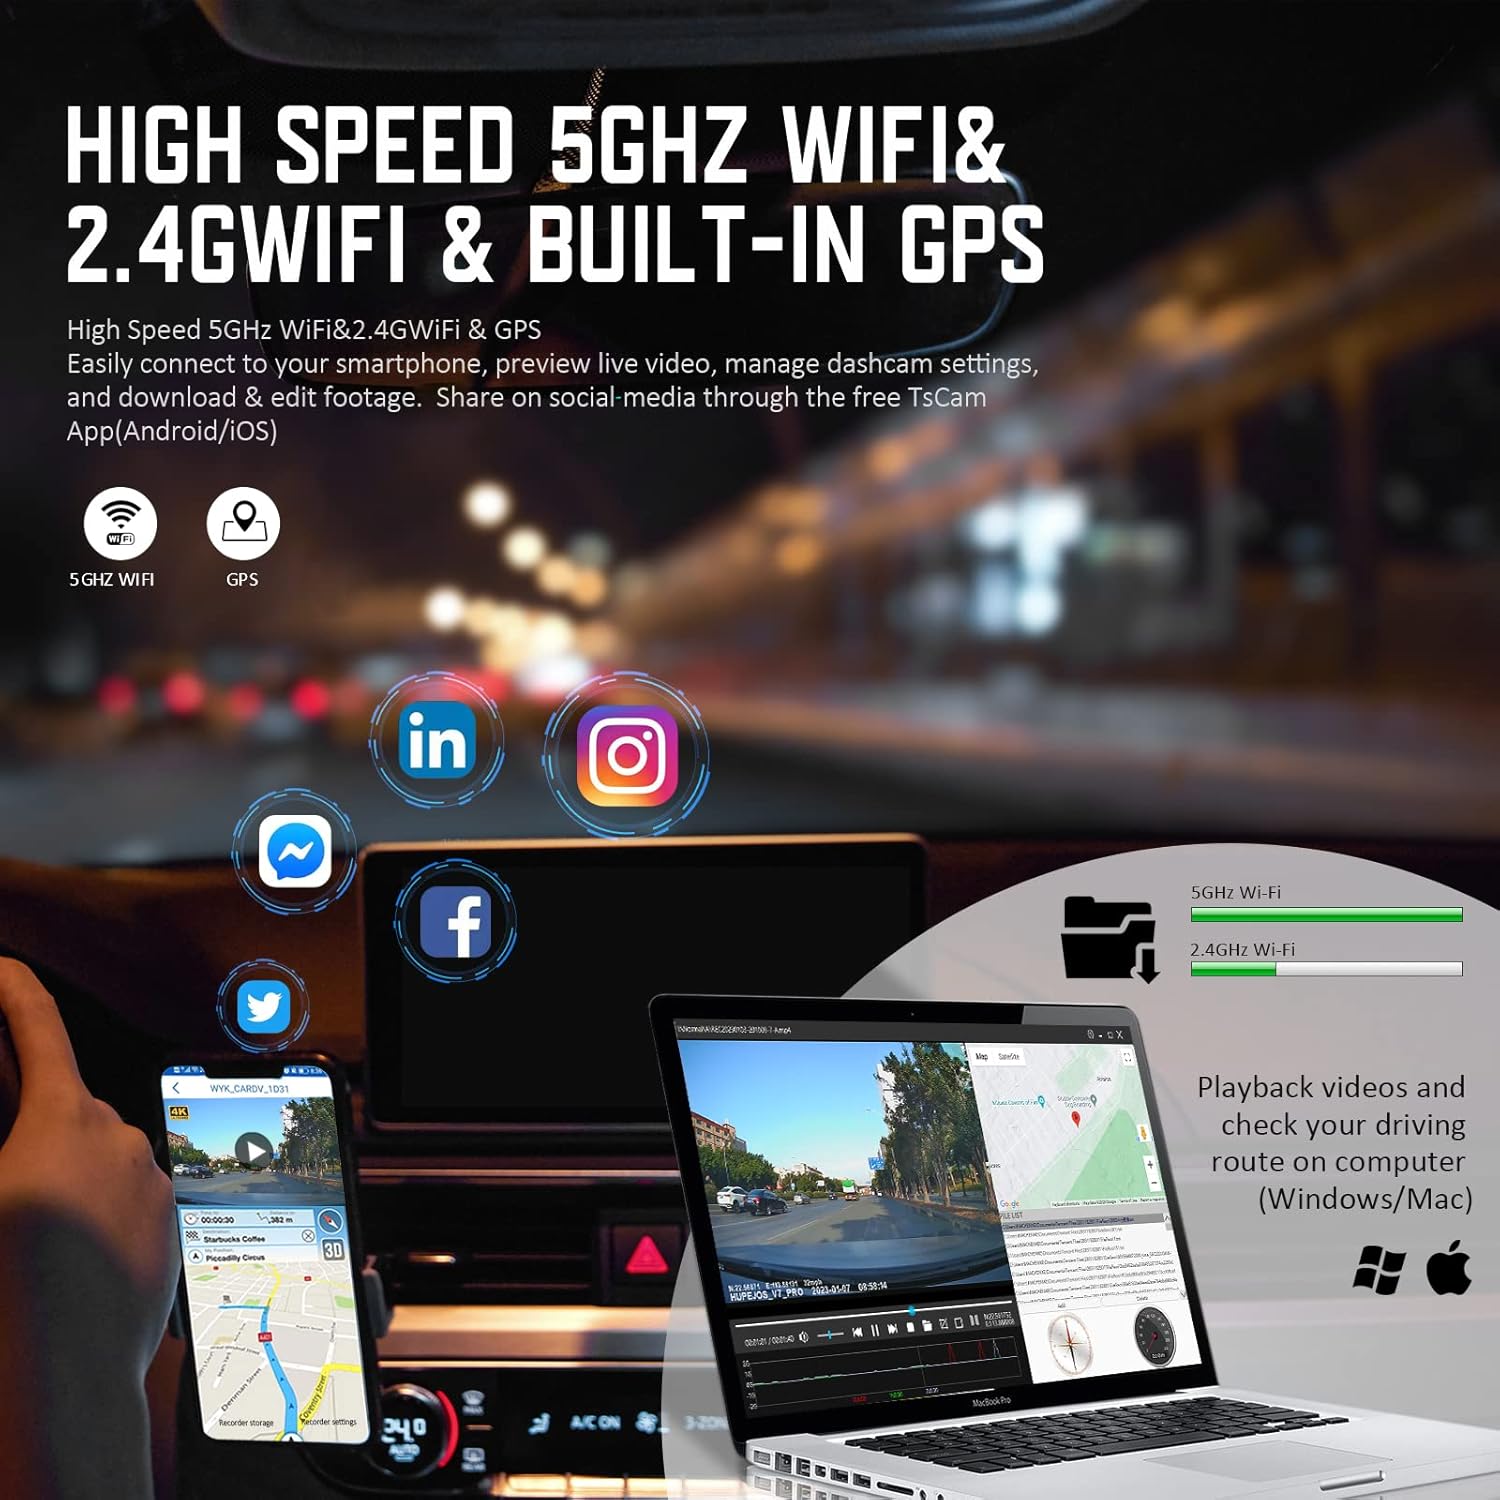
- 5GHz WiFi & GPS: Built-in 5G WiFi for faster app connectivity and GPS for tracking driving trajectory and speed.
- സൂപ്പർ നൈറ്റ് വിഷൻ: Equipped with 8 IR lamps and 6-glass lenses for clear recordings in low-light conditions.
- 24-മണിക്കൂർ പാർക്കിംഗ് മോഡ്: Offers Collision Detection and Radar Intelligent Monitoring (requires optional hardwire kit).
- Dashboard Function: Displays real-time speed (KM/H or MP/H) and synchronizes clock with GPS time.
- ലൂപ്പ് റെക്കോർഡിംഗ്: ഏറ്റവും പഴയ foo യാന്ത്രികമായി ഓവർറൈറ്റ് ചെയ്യുന്നുtagമെമ്മറി കാർഡ് നിറയുമ്പോൾ ഇ.
- Automatic Incident Detection: G-Sensor detects collisions and locks footagതിരുത്തിയെഴുതുന്നത് തടയാൻ ഇ.


സജ്ജമാക്കുക
ഇൻസ്റ്റലേഷൻ ഘട്ടങ്ങൾ
- ഡാഷ് ക്യാം മൗണ്ട് ചെയ്യുന്നു: Attach the suction cup mount to your windshield, ensuring it does not obstruct your view. Securely attach the dash cam to the mount.
- ബന്ധിപ്പിക്കുന്ന പവർ: Connect the Type C USB cable to the dash cam and the car charger. Plug the car charger into your vehicle's cigarette lighter socket. Route the cable neatly along the windshield and dashboard using the provided car wiring tool to avoid interference with driving.
- Installing the GPS Module: Connect the GPS module to the designated port on the dash cam. Position the GPS module on your dashboard or near the windshield for optimal signal reception. Route its cable discreetly.
പ്രാരംഭ കോൺഫിഗറേഷൻ
- SD കാർഡ്: The 128GB SD card is pre-installed. Ensure it is properly seated in the slot. The dash cam will prompt you to format the SD card periodically for optimal performance.
- പവർ ഓൺ/ഓഫ്: The dash cam will automatically power on when your vehicle starts and power off when the engine is turned off.
ഡാഷ് ക്യാം പ്രവർത്തിപ്പിക്കുന്നു
അടിസ്ഥാന റെക്കോർഡിംഗ്
Once powered on, the dash cam automatically begins recording. It utilizes loop recording, meaning it continuously records and overwrites the oldest files when the memory card is full. Video segments are typically 1-minute long.
Manual Event Recording (G-Sensor)
The built-in G-Sensor detects sudden impacts or collisions. When triggered, it automatically locks the current video segment, preventing it from being overwritten by loop recording. You can also manually lock footage by pressing the designated button on the dash cam.

Wi-Fi, ആപ്പ് കണക്റ്റിവിറ്റി
The dash cam features built-in 5GHz Wi-Fi for fast connection to the TsCam app on your smartphone (iOS/Android). This allows you to:
- View real-time video feeds.
- ഡാഷ് ക്യാം ക്രമീകരണങ്ങൾ നിയന്ത്രിക്കുക.
- Download and edit footage.
ജിപിഎസ് പ്രവർത്തനം
The integrated GPS module records your driving trajectory and speed. This information can be viewed later:
- Within the TsCam app for mobile playback.
- On a computer using the GXPlayer software (compatible with Windows and Mac) to view Google Map GPS driving position track.
ഡാഷ്ബോർഡ് ഡിസ്പ്ലേ
The V7PRO features a unique dashboard interface that displays your real-time speed in KM/H or MP/H directly on the screen. The dash cam's clock is automatically synchronized with GPS time.
നൈറ്റ് വിഷൻ
The dash cam is equipped with 8 IR lamps and 6-glass lenses, along with WDR technology, to enhance night vision. This ensures clear video and image capture even in low-light conditions. To manually control the IR LED, navigate to the dash cam Menu, select 'IRLED', and choose 'ON' or 'OFF'. If not set, it will operate automatically.

പാർക്കിംഗ് നിരീക്ഷണം
The HUPEJOS V7PRO offers two parking monitor modes to protect your vehicle when parked. Both modes require connection to an optional hardwire kit (sold separately) to draw power directly from your car battery.
- 1. Collision Detection: When the dash cam detects a collision, it automatically powers on and records a 1-minute protected video. (Requires hardwire kit ASIN: B0BLMRPNQT).
- 2. Radar Intelligent Monitoring System: In the car-off state, this system monitors objects approaching the car within a 3-4 meter range. The dash cam automatically records a 1-minute video. If movement continues, it records until the object leaves the monitored area. (Requires hardwire kit ASIN: B0BV2CJ5SW).

മെയിൻ്റനൻസ്
Regular maintenance ensures the longevity and optimal performance of your dash cam:
- SD കാർഡ് ഫോർമാറ്റിംഗ്: It is recommended to format the SD card at least twice a month to prevent data corruption and ensure continuous recording. This can typically be done through the dash cam's menu settings.
- വൃത്തിയാക്കൽ: Use a soft, dry cloth to clean the camera lenses and the display screen. Avoid using abrasive cleaners or solvents.
- ഫേംവെയർ അപ്ഡേറ്റുകൾ: നിർമ്മാതാവിന്റെ webപ്രകടനം മെച്ചപ്പെടുത്തുന്നതിനും പുതിയ സവിശേഷതകൾ ചേർക്കുന്നതിനുമായി ലഭ്യമായ ഏതെങ്കിലും ഫേംവെയർ അപ്ഡേറ്റുകൾക്കായി സൈറ്റ്.
ട്രബിൾഷൂട്ടിംഗ്
നിങ്ങൾ നേരിട്ടേക്കാവുന്ന പൊതുവായ പ്രശ്നങ്ങൾക്കുള്ള പരിഹാരങ്ങൾ ഇതാ:
- Q: Does it include the SD card?
A: Yes, a 128GB SD card is pre-installed inside the dash cam. Please check the dash cam SD card slot. - Q: Why can't I view the live video on the APP?
A: Cellular data can interfere with live video viewing. Please disable the 'Peztio' cellular data for the TsCam app on your cellphone (Settings → Peztio → Disable 'Cellular Data'). - Q: Why the APP won't show real-time recording?
A: The app needs to be connected to the DVR's dedicated wireless network. Switch your mobile WiFi network to 'HUPEJOS_V7PRO_****' and then enter the app to view തത്സമയ വീഡിയോ. - Q: Can't connect to WiFi or connection failed?
A: Ensure the app has album, location, WLAN, and cellular data permissions. Turn off any VPN, security software, or anti-virus apps on your mobile phone, as these can interfere with the WiFi connection. - Q: Why doesn't WiFi connect automatically?
A: Automatic WiFi connection is disabled to prevent issues with 4G/5G usage on single-channel mobile phones. Manual connection ensures mobile data functionality is not interrupted. - ചോദ്യം: എങ്ങനെ view GPS information?
A: GPS driving position track can be seen in the TsCam app mobile playback after downloading the video. For computer viewing, install GXPlayer (Windows and Mac compatible) to watch Google Map GPS driving position track. Tablets are not recommended for viewGPS വിവരങ്ങൾ ശേഖരിക്കുന്നു.
സ്പെസിഫിക്കേഷനുകൾ
| ഉൽപ്പന്ന അളവുകൾ | 3.86 x 0.8 x 2.76 ഇഞ്ച് |
| ഇനത്തിൻ്റെ ഭാരം | 1.21 പൗണ്ട് |
| മോഡൽ നമ്പർ | V7PRO-3CH-128G |
| കണക്റ്റിവിറ്റി ടെക്നോളജി | വൈഫൈ (5GHz) |
| വീഡിയോ ക്യാപ്ചർ റെസല്യൂഷൻ | 4K Front + 1080P Left or Right, 1440P Front + 1080P*2 Left Right |
| ഫീൽഡ് ഓഫ് View | 150 ഡിഗ്രി |
| പ്രത്യേക സവിശേഷതകൾ | 3 Channel Recording, Built-In GPS, Built-In WiFi, 24 Hours Buffered Parking Mode, Built-In Microphone, Built-In Display, Built-In Supercapacitor, Loop Recording, Automatic Incident Detection, Super Night Vision, 360 Degree, App Control |
| മൗണ്ടിംഗ് തരം | വിൻഡ്ഷീൽഡ് മ .ണ്ട് |
| നിറം | കറുപ്പ് |
വാറൻ്റിയും പിന്തുണയും
For warranty information, please refer to the documentation included with your purchase or contact the manufacturer directly. If you have any questions or require technical assistance, please contact HUPEJOS customer support.
ഉപഭോക്തൃ പിന്തുണാ ഇമെയിൽ: hupejos@gmail.com


