1. ആമുഖം
The RUIXIN PRO RX-009 Knife Sharpener is a professional-grade, fixed-angle sharpening system designed for precision sharpening of various blades. Constructed primarily from stainless steel, this sharpener offers durability and stability for consistent results. Its innovative 360-degree rotation flip design allows for easy sharpening of both sides of a blade without repositioning the knife.
This manual provides detailed instructions for the assembly, operation, maintenance, and troubleshooting of your RX-009 Knife Sharpener to ensure optimal performance and longevity.

Figure 1.1: RUIXIN PRO RX-009 Knife Sharpener in action with included accessories.
2. ഉൽപ്പന്ന ഘടകങ്ങൾ
The RX-009 Knife Sharpener set includes the following components:
- 1 x Knife Sharpening Tool RX-009 (Main assembly)
- 1 x 120 Grits Whetstone (Coarse)
- 1 x 320 Grits Whetstone (Medium)
- 1 x 600 Grits Whetstone (Fine)
- 1 x 1500 Grits Whetstone (Extra Fine)
- 1 x Storage Casing
- നിർദ്ദേശ മാനുവൽ (ഈ പ്രമാണം)

Figure 2.1: Complete set of RX-009 Knife Sharpener components.
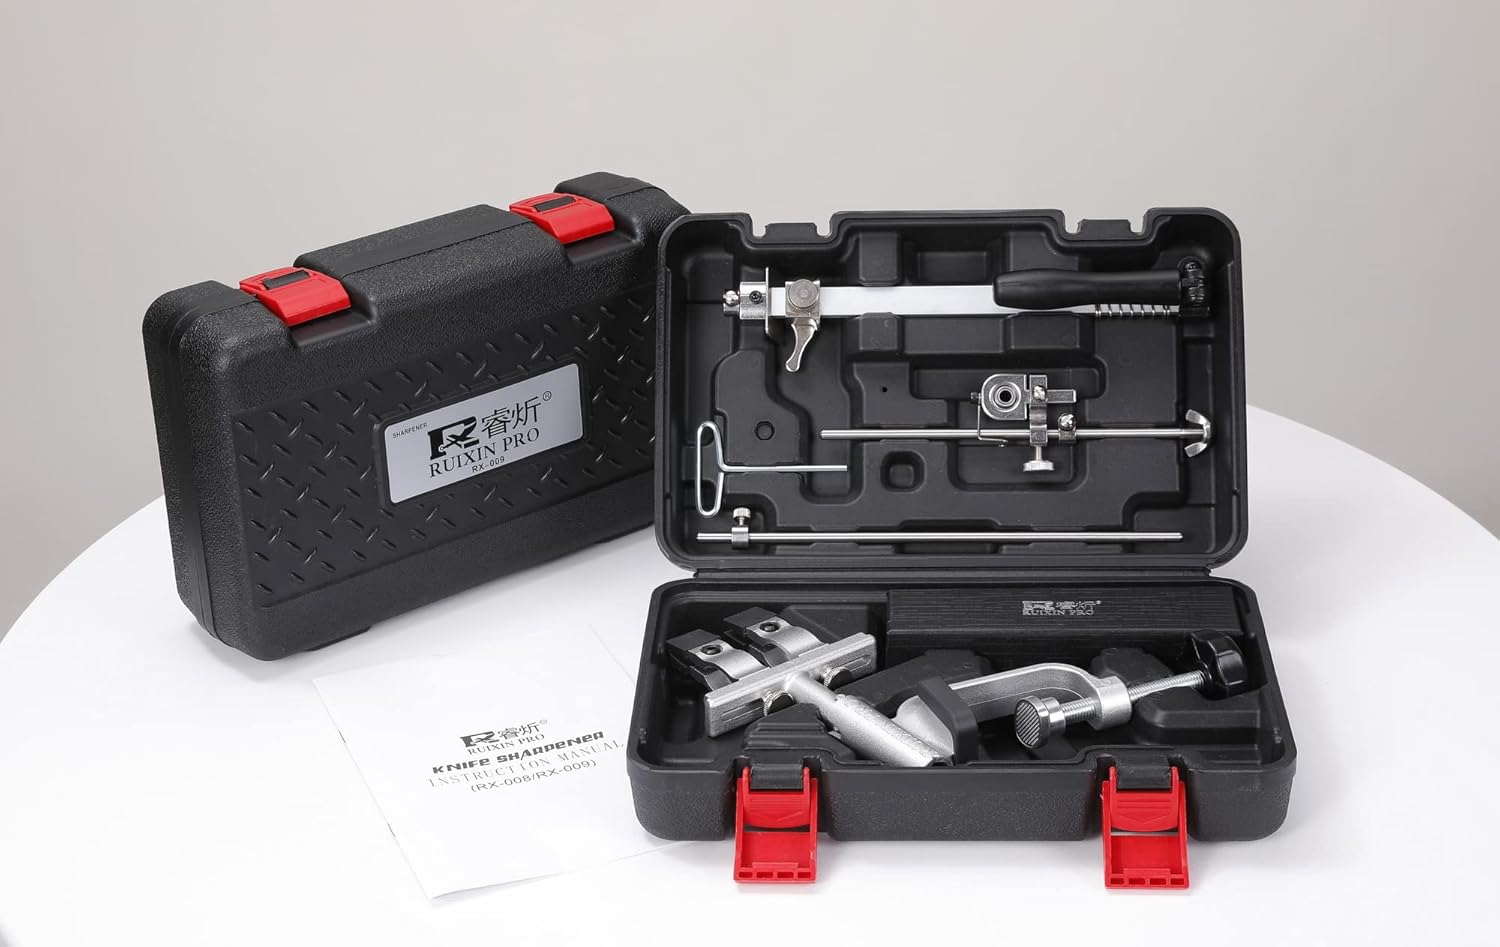
Figure 2.2: RX-009 Knife Sharpener components stored in its casing.
3. സജ്ജീകരണം
Follow these steps to assemble and set up your knife sharpener:
- അടിസ്ഥാനം സുരക്ഷിതമാക്കുക: Identify the G-clamp on the sharpener's base. Tightly clamp the base to a stable surface such as a table or kitchen counter. Ensure it is firmly secured to prevent movement during sharpening.
- Assemble the Rods: Insert the main vertical rod into the base. Attach the horizontal guide rod to the vertical rod, ensuring all screws are tightened to prevent wobble.
- Attach the Blade Fixture: The metal blade fixture is designed to hold the knife firmly. Ensure it is properly aligned and secured to the main assembly.
- Prepare the Sharpening Stone: Select the appropriate grit whetstone for your sharpening needs. For initial sharpening or repairing damaged edges, start with a lower grit (e.g., 120 or 320). For refining and polishing, use higher grits (e.g., 600 or 1500).
- Mount the Stone: Insert the selected sharpening stone into the stone holder on the guide rod. Ensure it is securely fastened.
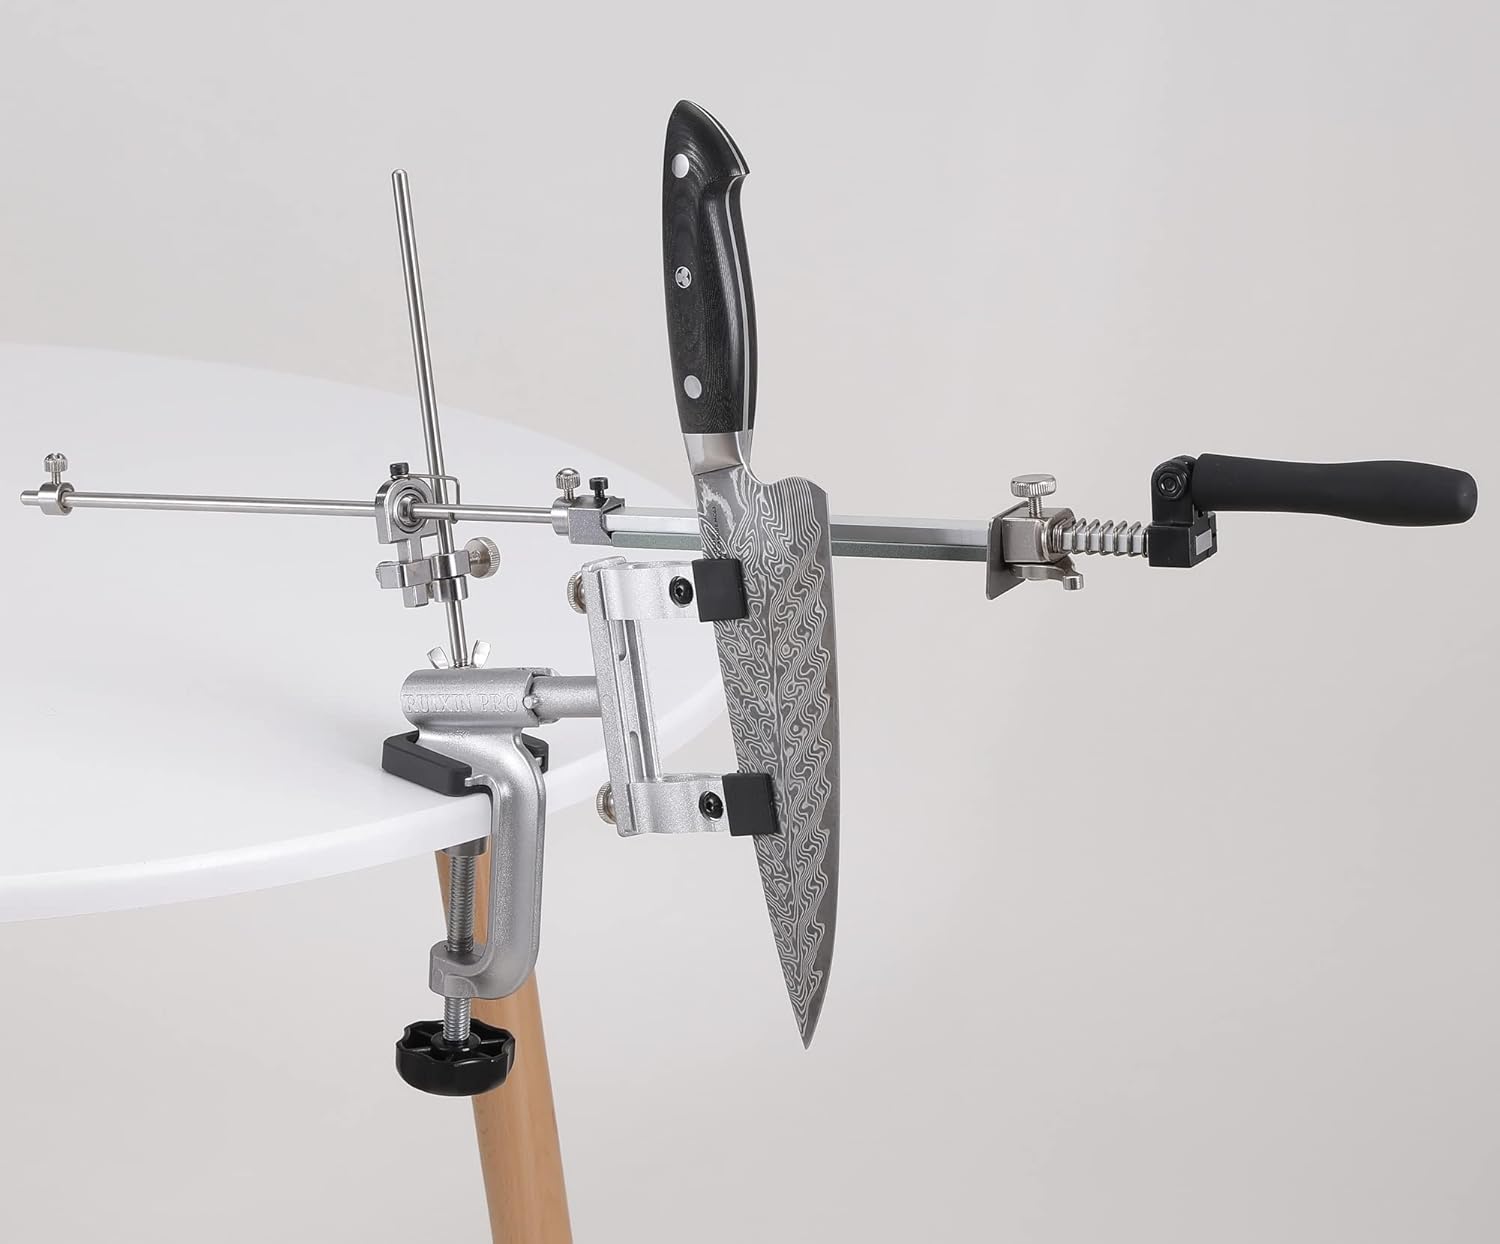
Figure 3.1: Sharpener clamped to a stable surface with a knife mounted.
4. പ്രവർത്തന നിർദ്ദേശങ്ങൾ
4.1. Mounting the Knife
Carefully place the knife blade into the metal blade fixture. Ensure the blade is centered and held firmly. The fixture is designed to hold the blade securely without causing damage.
4.2. Adjusting the Sharpening Angle
The RX-009 allows for a wide range of sharpening angles, from 5 to 90 degrees. To adjust the angle, unscrew the knob on the vertical rod that controls the height of the horizontal guide rod. Move the guide rod up or down to achieve the desired angle. A lower angle (e.g., 15-20 degrees) is suitable for fine cutting edges, while a higher angle (e.g., 25-30 degrees) is better for more durable edges on utility knives. Tighten the knob once the desired angle is set.
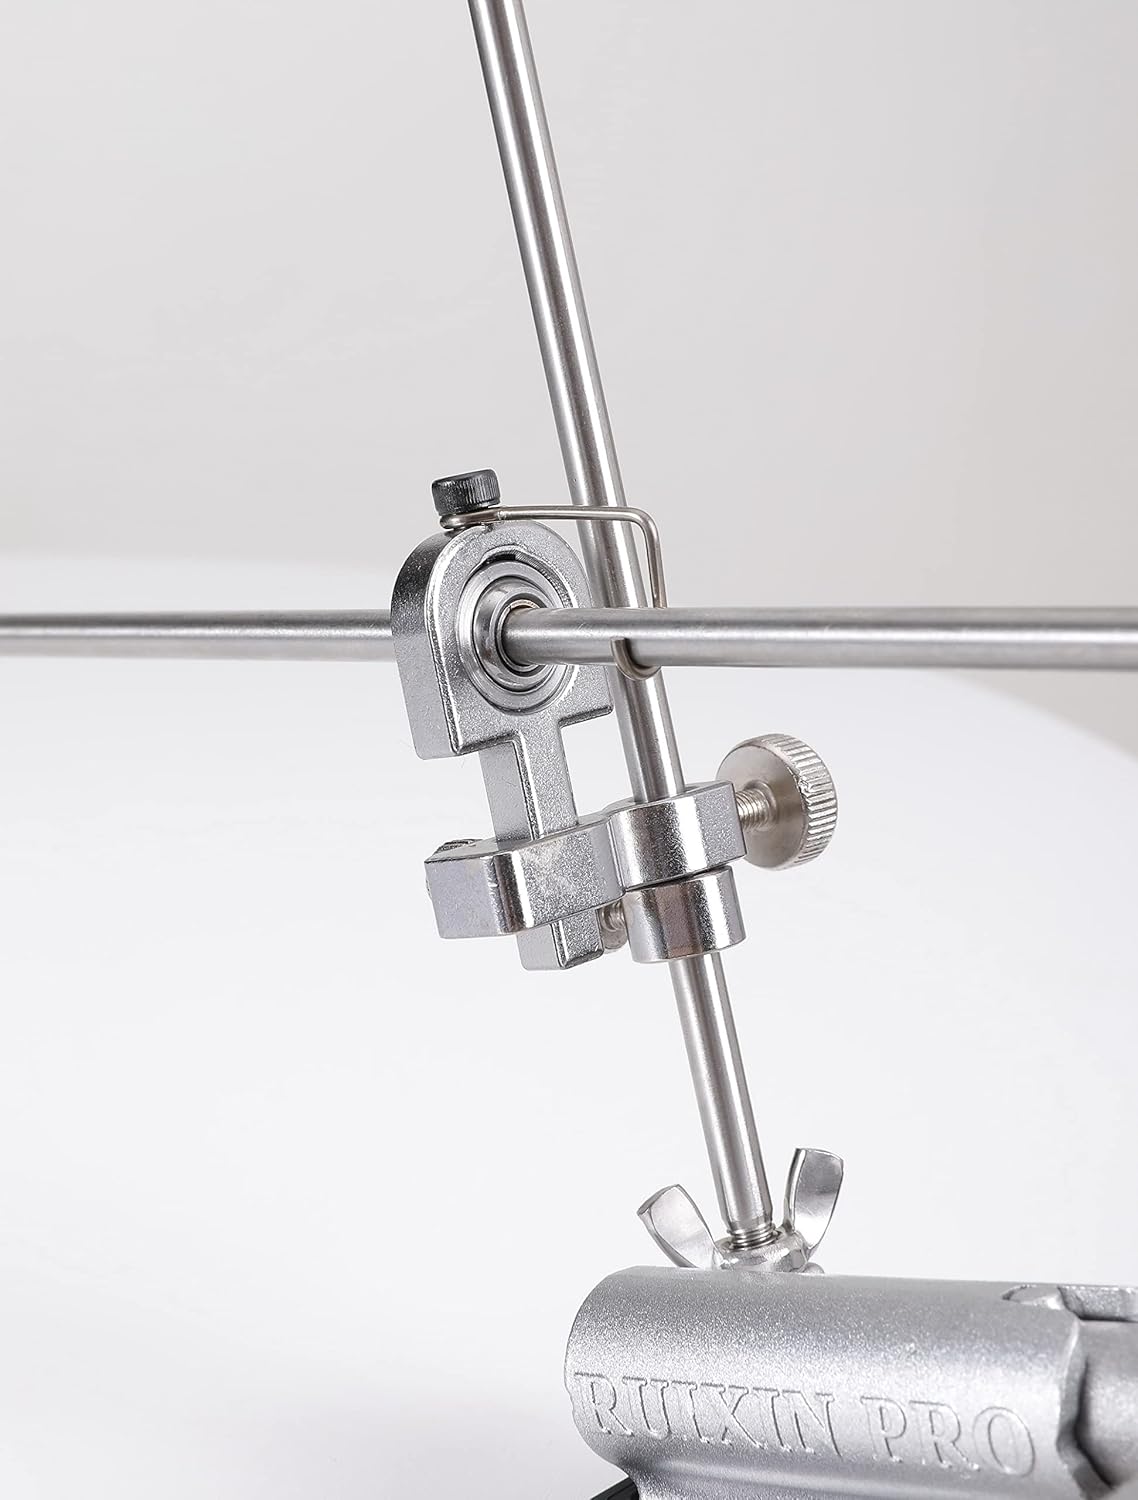
Figure 4.1: Angle adjustment mechanism.
4.3. മൂർച്ച കൂട്ടൽ പ്രക്രിയ
- Lubricate the Stone: If using whetstones, apply water or honing oil to the stone surface. Keep the stone wet throughout the sharpening process.
- Begin Sharpening: Hold the handle of the stone holder and gently slide the stone across the blade edge, moving from the heel to the tip of the knife. Apply consistent, moderate pressure.
- Flip the Blade (360° Rotation): The innovative 360° rotation flip design allows you to sharpen the other side of the blade without removing the knife from the clamp. Simply rotate the blade fixture to expose the opposite side. This ensures symmetry and consistency in the sharpening angle.
- Repeat and Progress: Continue sharpening each side until a burr forms along the entire edge. Once a burr is felt, switch to the next finer grit stone and repeat the process. Reduce pressure with finer grits.
- അന്തിമ പോളിഷ്: Finish with the 1500 grit stone for a highly refined and polished edge.

Figure 4.2: Sharpening with various grit stones.

Figure 4.3: Demonstrating the 360-degree rotation flip design.
4.4. Versatile Sharpening
Beyond knives, this sharpener can also be used for other tools such as scissors, peelers, and small saws, provided they can be securely clamped in the fixture.

Figure 4.4: Sharpening a peeler.
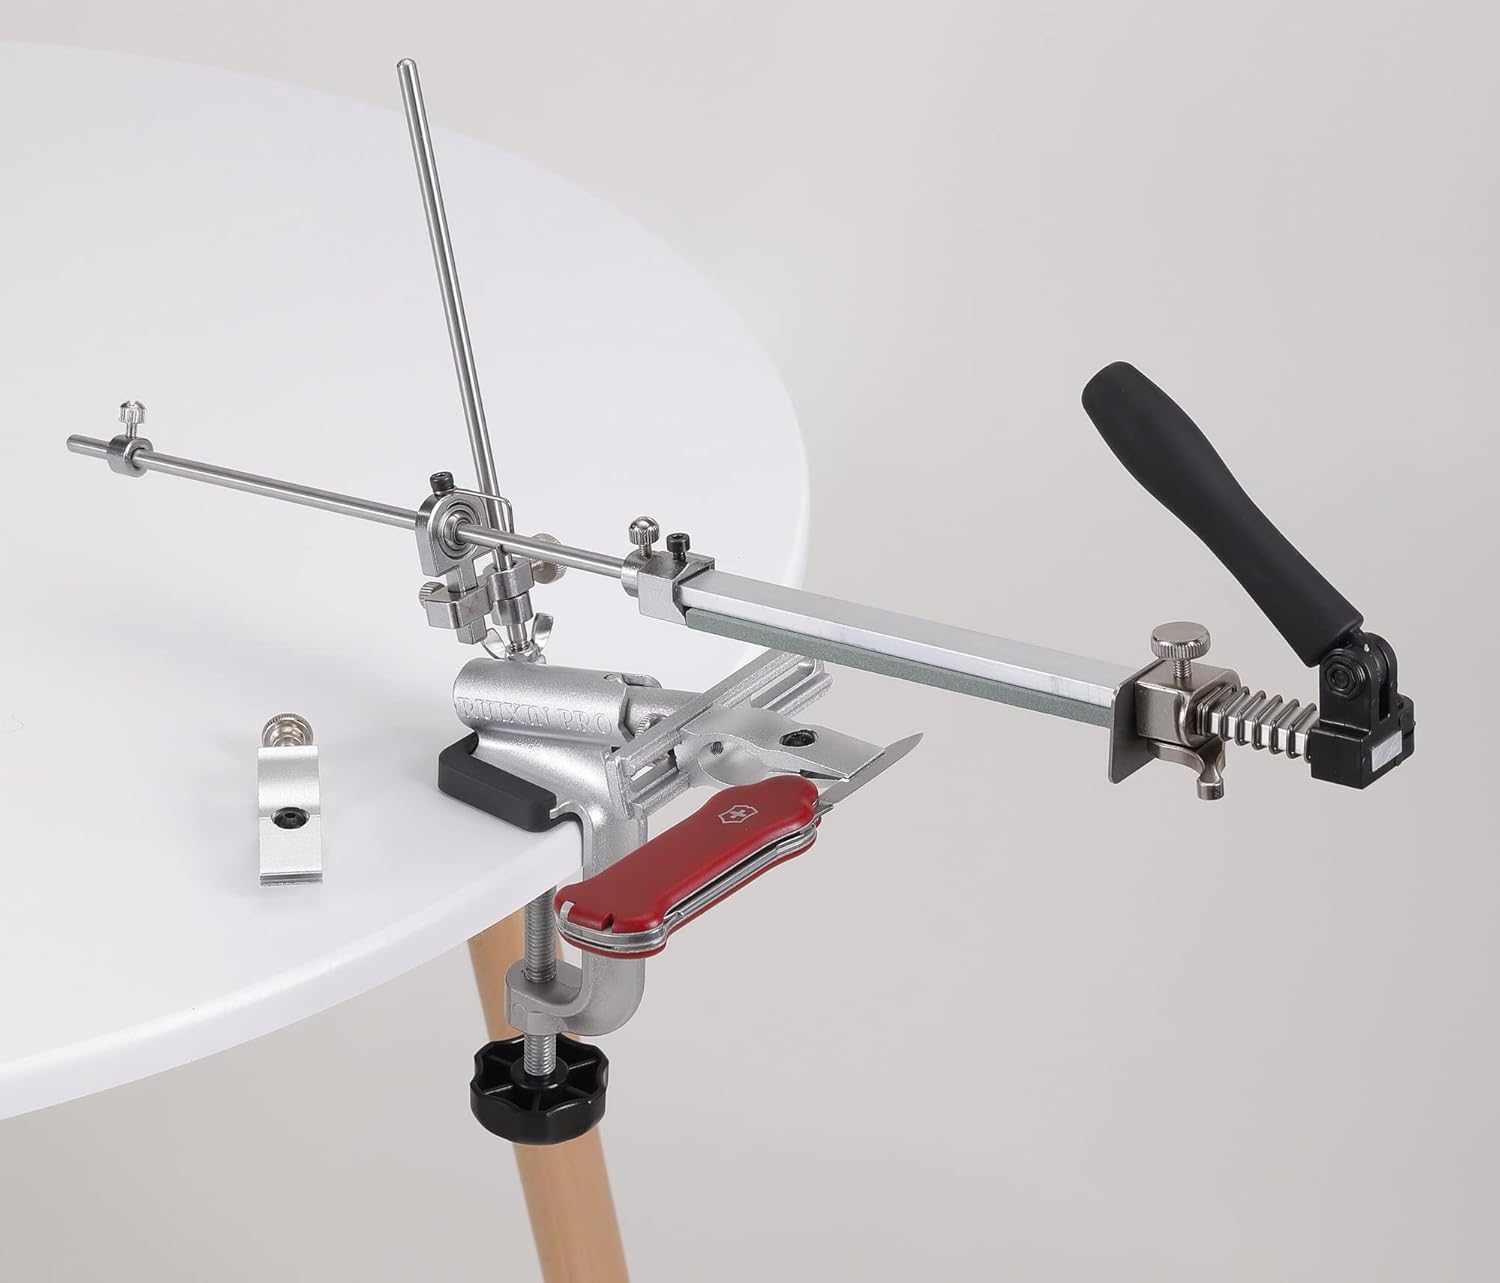
Figure 4.5: Sharpening a small multi-tool knife.
5. പരിപാലനം
- വൃത്തിയാക്കൽ: After each use, clean the sharpening stones by rinsing them with water to remove metal particles. Wipe down the metal components of the sharpener with a damp cloth to prevent rust and maintain cleanliness.
- ഉണക്കൽ: Ensure all components, especially the stainless steel parts and stones, are thoroughly dried before storage to prevent corrosion and mold growth on the stones.
- സംഭരണം: Store the sharpener and its components in the provided storage casing in a dry place, away from direct sunlight and extreme temperatures.
- കല്ല് പരിചരണം: Whetstones may develop grooves over time. Periodically flatten them using a lapping plate or coarse sandpaper on a flat surface to maintain optimal sharpening performance.
6. പ്രശ്നപരിഹാരം
| പ്രശ്നം | സാധ്യമായ കാരണം | പരിഹാരം |
|---|---|---|
| Knife not getting sharp. | Incorrect sharpening angle; insufficient pressure; worn-out stone; not progressing through grits correctly. | Verify and adjust the sharpening angle. Apply consistent, moderate pressure. Ensure stones are clean and not excessively worn. Start with a coarser grit and gradually move to finer grits. |
| Sharpener wobbles during use. | Base not securely clamped; loose screws on assembly. | Ensure the G-clamp is tightened firmly to a stable surface. Check and tighten all assembly screws on the rods and fixtures. |
| Stones are not cutting effectively. | Stones are dry; clogged with metal particles; glazed surface. | Keep stones adequately lubricated with water or honing oil. Clean stones regularly. If glazed, flatten the stone surface. |
| Blade is scratched or damaged. | Improper blade mounting; excessive pressure; debris on stone. | Ensure the blade is securely and correctly mounted. Use appropriate pressure. Clean stones before and during use. |
7 സ്പെസിഫിക്കേഷനുകൾ
- മോഡൽ: RX-009
- ബ്രാൻഡ്: TUNEZ (Manufactured by Ruixin Pro)
- മെറ്റീരിയൽ: Stainless Steel, Whetstone
- നിറം: കറുപ്പ്
- Sharpening Angle Range: 5 മുതൽ 90 ഡിഗ്രി വരെ
- Included Whetstones: 120, 320, 600, 1500 Grits
- ഡിസൈൻ സവിശേഷത: 360° Rotation Flip Design
- Clampമെക്കാനിസം: G-Clamp for table/platform attachment
- ബഹുമുഖത: Suitable for knives, scissors, peelers, saws, and other tools.
8 സുരക്ഷാ വിവരങ്ങൾ
Always exercise caution when handling sharp objects and using the sharpener. Adhere to the following safety guidelines:
- Keep fingers and hands away from the blade edge during sharpening.
- Ensure the sharpener is securely clampഉപയോഗിക്കുന്നതിന് മുമ്പ് ഒരു സ്ഥിരതയുള്ള പ്രതലത്തിൽ വയ്ക്കുക.
- Do not apply excessive force, as this can damage the blade or the sharpener.
- ഷാർപ്നർ കുട്ടികൾക്ക് ലഭ്യമാകാതെ സൂക്ഷിക്കുക.
- Wear appropriate safety gear, such as cut-resistant gloves, if desired.
- Inspect the sharpener for any damage before each use. Do not use if components are broken or loose.


