1. ആമുഖം
This manual provides essential information for the proper installation, operation, and maintenance of your LC-Power FHD 32 inch 165Hz Curved Gaming Monitor (Model: LC-M32-FHD-165-C-A). Please read this manual thoroughly before using the product to ensure optimal performance and safety.

ചിത്രം 1.1: മുൻഭാഗം view of the LC-Power 32-inch curved gaming monitor.
2 സുരക്ഷാ വിവരങ്ങൾ
മോണിറ്ററിന് കേടുപാടുകൾ സംഭവിക്കാതിരിക്കാനും ഉപയോക്തൃ സുരക്ഷ ഉറപ്പാക്കാനും ഇനിപ്പറയുന്ന സുരക്ഷാ മുൻകരുതലുകൾ പാലിക്കുക:
- മഴ, ഈർപ്പം അല്ലെങ്കിൽ തീവ്രമായ താപനിലകൾ മോണിറ്ററിനെ ഏൽപ്പിക്കരുത്.
- മോണിറ്ററിന് ചുറ്റും ശരിയായ വായുസഞ്ചാരം ഉറപ്പാക്കുക. വായുസഞ്ചാര ദ്വാരങ്ങൾ അടയ്ക്കരുത്.
- മോണിറ്ററിനൊപ്പം നൽകിയിരിക്കുന്ന പവർ അഡാപ്റ്റർ മാത്രം ഉപയോഗിക്കുക.
- വൈദ്യുതി കമ്പിയിൽ ഭാരമുള്ള വസ്തുക്കൾ വയ്ക്കുന്നത് ഒഴിവാക്കുക.
- Disconnect the power cable from the outlet during lightning storms or when unused for extended periods.
- മോണിറ്റർ സ്വയം നന്നാക്കാൻ ശ്രമിക്കരുത്. എല്ലാ സേവനങ്ങളും യോഗ്യതയുള്ള ഉദ്യോഗസ്ഥരെ ഏൽപ്പിക്കുക.
3. പാക്കേജ് ഉള്ളടക്കം
പാക്കേജിൽ എല്ലാ ഇനങ്ങളും ഉണ്ടെന്ന് ഉറപ്പാക്കുക:
- LC-Power 32 inch Curved Gaming Monitor
- മോണിറ്റർ സ്റ്റാൻഡ് (ബേസും കഴുത്തും)
- പവർ അഡാപ്റ്ററും പവർ കേബിളും
- HDMI കേബിൾ
- ഉപയോക്തൃ മാനുവൽ
- സ്റ്റാൻഡ് അസംബ്ലിക്കുള്ള സ്ക്രൂകൾ
4. സജ്ജീകരണം
4.1 സ്റ്റാൻഡ് കൂട്ടിച്ചേർക്കൽ
- മോണിറ്റർ അതിന്റെ പാക്കേജിംഗിൽ നിന്ന് ശ്രദ്ധാപൂർവ്വം നീക്കം ചെയ്യുക, മൃദുവായ പ്രതലത്തിൽ അതിനെ സംരക്ഷിച്ചു നിർത്തുക.
- നൽകിയിരിക്കുന്ന സ്ക്രൂകൾ ഉപയോഗിച്ച് മോണിറ്റർ പാനലിൽ സ്റ്റാൻഡ് നെക്ക് ഘടിപ്പിക്കുക.
- Connect the stand base to the stand neck and secure it with the remaining screws.
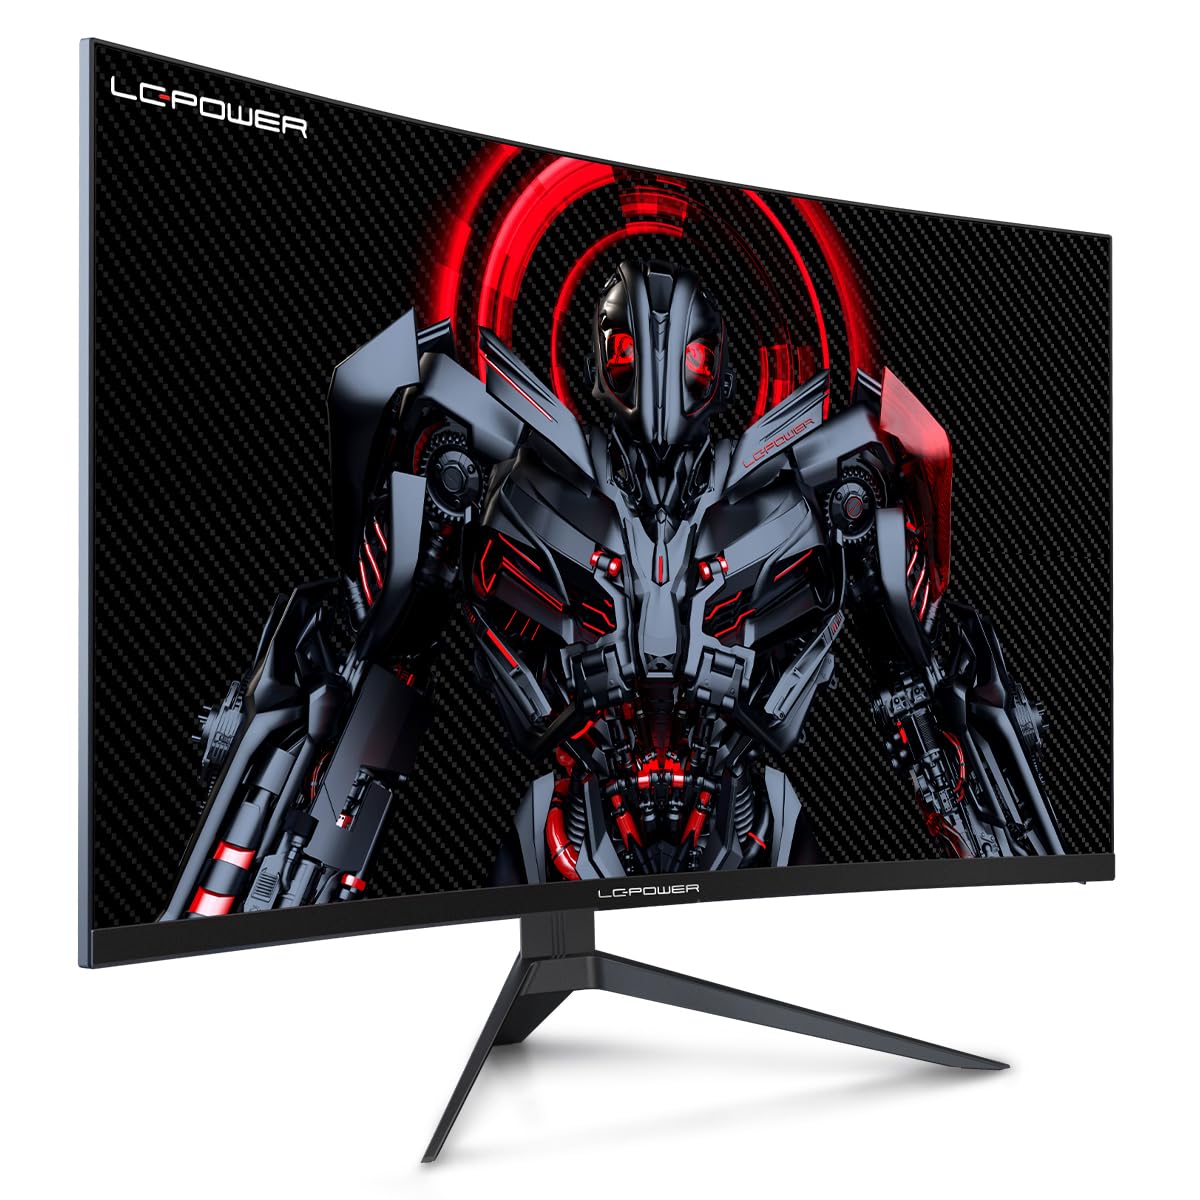
Figure 4.1: LC-Power monitor with stand assembled.
4.2 ബന്ധിപ്പിക്കുന്ന കേബിളുകൾ
മോണിറ്ററിന്റെ പിൻ പോർട്ടുകളിലേക്ക് ആവശ്യമായ കേബിളുകൾ ബന്ധിപ്പിക്കുക:
- ശക്തി: പവർ അഡാപ്റ്റർ മോണിറ്ററിന്റെ ഡിസി ഇൻപുട്ടിലേക്കും പിന്നീട് ഒരു പവർ ഔട്ട്ലെറ്റിലേക്കും ബന്ധിപ്പിക്കുക.
- വീഡിയോ ഇൻപുട്ട്: നിങ്ങളുടെ കമ്പ്യൂട്ടറിന്റെ ഗ്രാഫിക്സ് കാർഡിൽ നിന്ന് ഒരു HDMI അല്ലെങ്കിൽ DisplayPort കേബിൾ മോണിറ്ററിലെ അനുബന്ധ പോർട്ടിലേക്ക് ബന്ധിപ്പിക്കുക.

ചിത്രം 4.2: പിൻഭാഗം view ഇൻപുട്ട് പോർട്ടുകളുള്ള മോണിറ്ററിന്റെ.
4.3 VESA മൗണ്ടിംഗ് (ഓപ്ഷണൽ)
The monitor supports VESA 100x100mm mounting. To use a VESA mount, remove the stand and attach the monitor to a compatible VESA bracket using appropriate screws (not included).
5. പ്രവർത്തന നിർദ്ദേശങ്ങൾ
5.1 പവർ ഓൺ/ഓഫ്
Press the power button, typically located on the back or bottom of the monitor, to turn the monitor on or off. The power indicator light will illuminate when the monitor is on.
5.2 ഓൺ-സ്ക്രീൻ ഡിസ്പ്ലേ (OSD) മെനു
The OSD menu allows you to adjust various monitor settings. Use the control buttons (joystick or individual buttons) on the monitor to navigate the menu.
സാധാരണ OSD ക്രമീകരണങ്ങൾ:
- ചിത്ര ക്രമീകരണങ്ങൾ: തെളിച്ചം, ദൃശ്യതീവ്രത, മൂർച്ച, വർണ്ണ താപനില എന്നിവ ക്രമീകരിക്കുക.
- ഇൻപുട്ട് തിരഞ്ഞെടുക്കുക: HDMI, DisplayPort ഇൻപുട്ടുകൾക്കിടയിൽ സ്വമേധയാ മാറുക.
- ഓഡിയോ: Adjust volume if external speakers are connected via the monitor's audio output.
- ഗെയിം ക്രമീകരണങ്ങൾ: Access features like Overdrive, GamePlus (crosshair overlays), FPS/RTS modes, and Adaptive Sync.
- ഡിസ്പ്ലേ ക്രെമീകരണങ്ങൾ: Adjust aspect ratio, resolution, and refresh rate. Ensure your graphics card is configured to output 1920x1080 resolution at 165Hz for optimal performance.
- Low Blue Light & Flicker-Free: These features are designed to reduce eye strain during prolonged use. They can be enabled or disabled in the OSD menu.
6. പരിപാലനം
6.1 മോണിറ്റർ വൃത്തിയാക്കുന്നു
- വൃത്തിയാക്കുന്നതിന് മുമ്പ് എപ്പോഴും മോണിറ്റർ അൺപ്ലഗ് ചെയ്യുക.
- മൃദുവായ, ലിൻ്റ് രഹിത തുണി ഉപയോഗിക്കുകampവെള്ളം അല്ലെങ്കിൽ നേരിയതും, ഉരച്ചിലുകളില്ലാത്തതുമായ സ്ക്രീൻ ക്ലീനർ ഉപയോഗിച്ച് തുടയ്ക്കുക.
- ക്ലീനർ നേരിട്ട് സ്ക്രീനിൽ സ്പ്രേ ചെയ്യരുത്.
- Avoid using benzene, thinner, or ammonia-based cleaners.
6.2 സംഭരണം
If storing the monitor for an extended period, disconnect all cables, pack it in its original packaging, and store it in a cool, dry place away from direct sunlight.
7. പ്രശ്നപരിഹാരം
പൊതുവായ പ്രശ്നങ്ങളും അവയുടെ പരിഹാരങ്ങളും അറിയാൻ താഴെ കൊടുത്തിരിക്കുന്ന പട്ടിക കാണുക:
| പ്രശ്നം | സാധ്യമായ കാരണം | പരിഹാരം |
|---|---|---|
| സ്ക്രീനിൽ ചിത്രമൊന്നുമില്ല | Power cable disconnected; Video cable disconnected; Incorrect input selected | Check power and video cable connections; Select correct input via OSD menu |
| ചിത്രം മിന്നിമറയുന്നു | Faulty video cable; Graphics card driver issue; Refresh rate mismatch | Replace video cable; Update graphics drivers; Set refresh rate to 165Hz in OS display settings |
| നിറങ്ങൾ തെറ്റായി കാണപ്പെടുന്നു | Color settings in OSD; Graphics card settings | Adjust color settings in OSD; Calibrate colors via graphics card control panel |
| മോണിറ്റർ ഓണാക്കുന്നില്ല | Power cable not connected; Power adapter faulty | Ensure power cable is securely connected; Test power outlet; Contact support if adapter is suspected faulty |
8 സ്പെസിഫിക്കേഷനുകൾ
Detailed technical specifications for the LC-Power LC-M32-FHD-165-C-A monitor:
| ഫീച്ചർ | സ്പെസിഫിക്കേഷൻ |
|---|---|
| ബ്രാൻഡ് | എൽസി-പവർ |
| മോഡൽ | LC-M32-FHD-165-CA |
| സ്ക്രീൻ വലിപ്പം | 32 ഇഞ്ച് |
| സ്ക്രീൻ റെസല്യൂഷൻ | 1920 x 1080 (FHD 1080p) |
| പുതുക്കിയ നിരക്ക് | 165 Hz |
| പ്രതികരണ സമയം | 1 മില്ലിസെക്കൻഡ് |
| വക്രത | 1500R |
| വീക്ഷണാനുപാതം | 16:9 |
| ഡിസ്പ്ലേ ടെക്നോളജി | എൽസിഡി |
| Viewing ആംഗിൾ | 178 ഡിഗ്രി |
| ഹാർഡ്വെയർ ഇന്റർഫേസ് | HDMI, ഡിസ്പ്ലേ പോർട്ട് |
| പ്രത്യേക സവിശേഷതകൾ | Curved, Flicker-Free, Low Blue Light, GamePlus, Overdrive, FPS/RTS |
| VESA അനുയോജ്യത | 100x100 മി.മീ |
| ഉൽപ്പന്ന അളവുകൾ | 14.3 x 53.8 x 40.6 സെ.മീ (L x W x H) |
| ഇനത്തിൻ്റെ ഭാരം | 8.24 കി.ഗ്രാം |
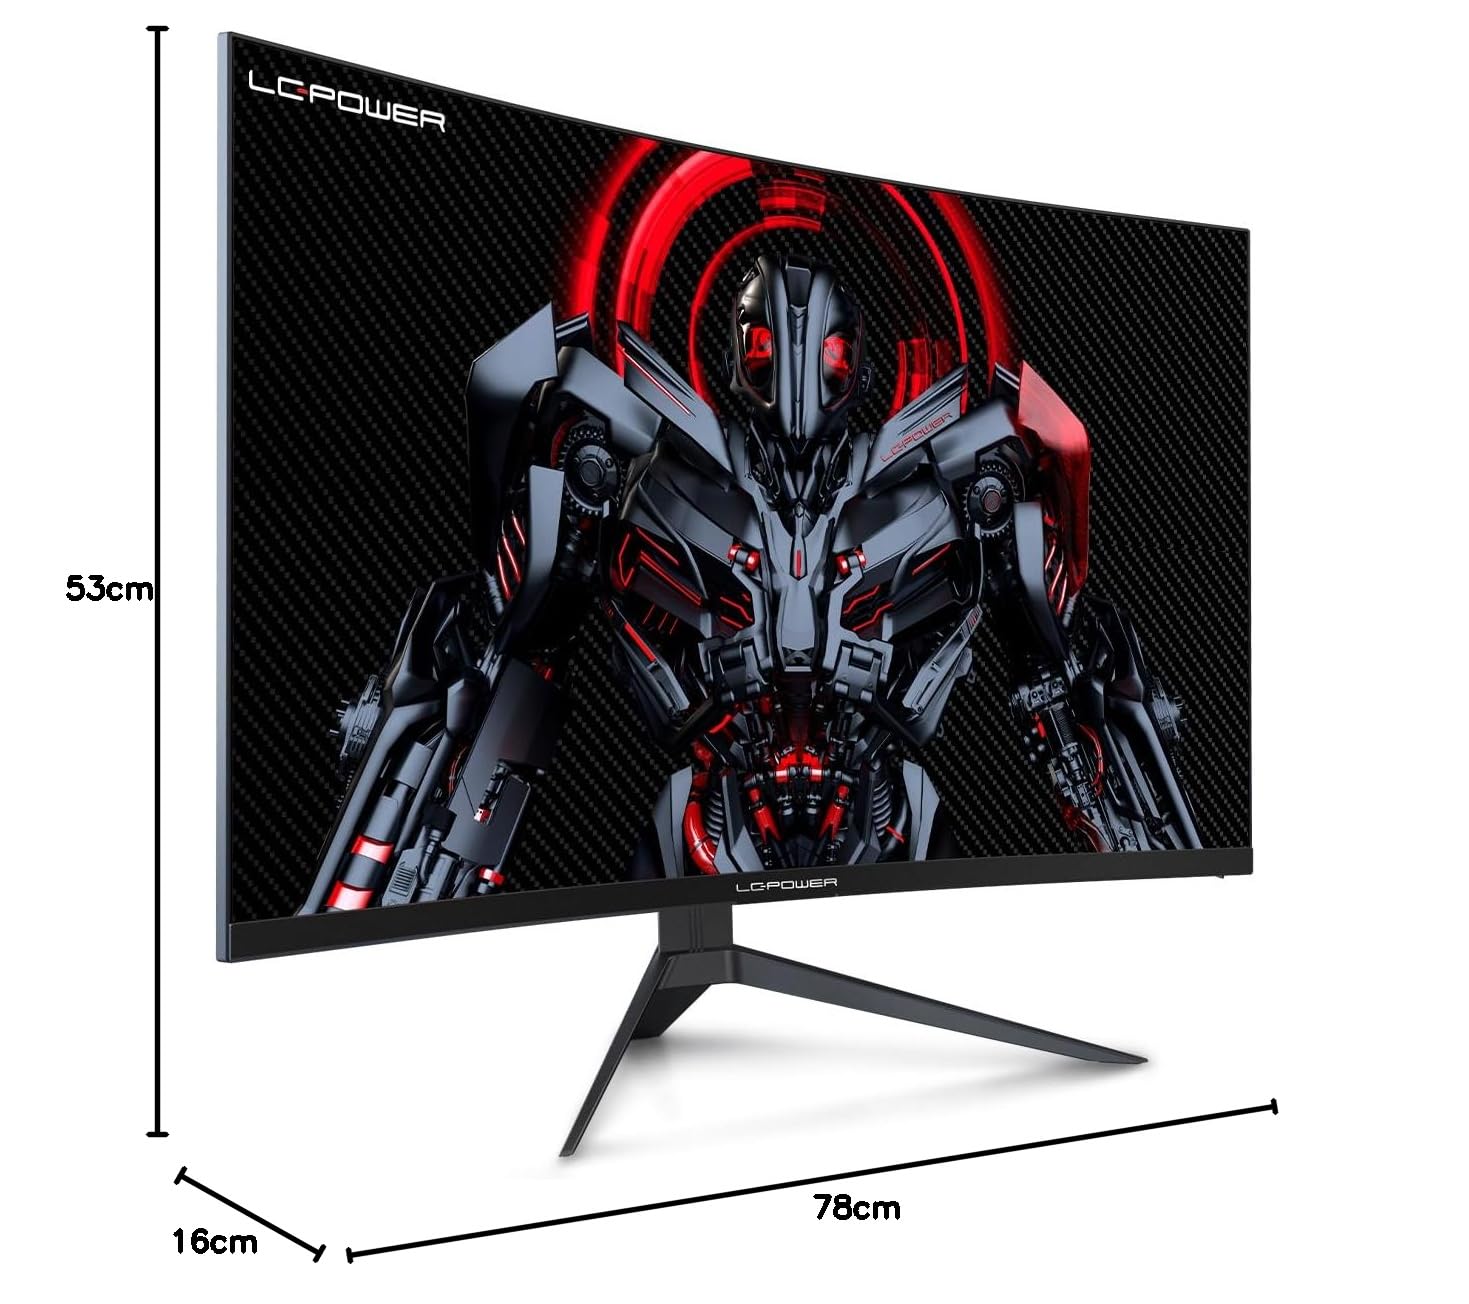
Figure 8.1: Monitor dimensions for planning installation space.
9. വാറൻ്റിയും പിന്തുണയും
LC-Power provides a three-year warranty for this product. Additionally, a twelve-month replacement service is available. For technical assistance or inquiries regarding damage, defects, or missing parts, please contact LC-Power customer support. Telephone technical support is also available.


