ഉൽപ്പന്നം കഴിഞ്ഞുview
The xTool P2 Riser Base is an essential accessory designed to significantly expand the capabilities of your xTool P2 CO2 laser cutter. It increases the maximum workpiece height, allowing for engraving on thicker materials and seamless integration with other xTool accessories like the Automatic Conveyor Feeder and RA2 Pro rotary attachment. This manual provides detailed instructions for assembly, operation, and maintenance to ensure optimal performance and safety.

Image: The xTool P2 Riser Base, a standalone unit.
പ്രധാന സവിശേഷതകൾ
- Significant Engraving Thickness Upgrade: Enables engraving on ultra-thick materials up to 8.4 inches (215mm), such as trunks and briefcases, and supports batch processing of multiple thick items.
- Best Partner for Automatic Conveyor Feeder: Perfectly matches with the Automatic Conveyor Feeder (sold separately) for automatic passthrough, ensuring precision and convenience when processing extra-large materials.
- Adaptable to RA2 Pro for Cylindrical Objects: The 9-layer design accommodates various processing needs, allowing the RA2 Pro (sold separately) to be assembled for engraving cylindrical items like wine glasses, tumblers, baseball bats, and mugs.
- Safe & Tailor-made: Easy to install and custom-designed, the riser base ensures that engraving and cutting processes for higher objects are performed within a completely enclosed space, preventing light and smoke leakage.
- Right Side Space for Storage: Convenient storage space on the right side of the riser base allows you to keep removed screws, slats, and even the RA2 Pro for instant access.
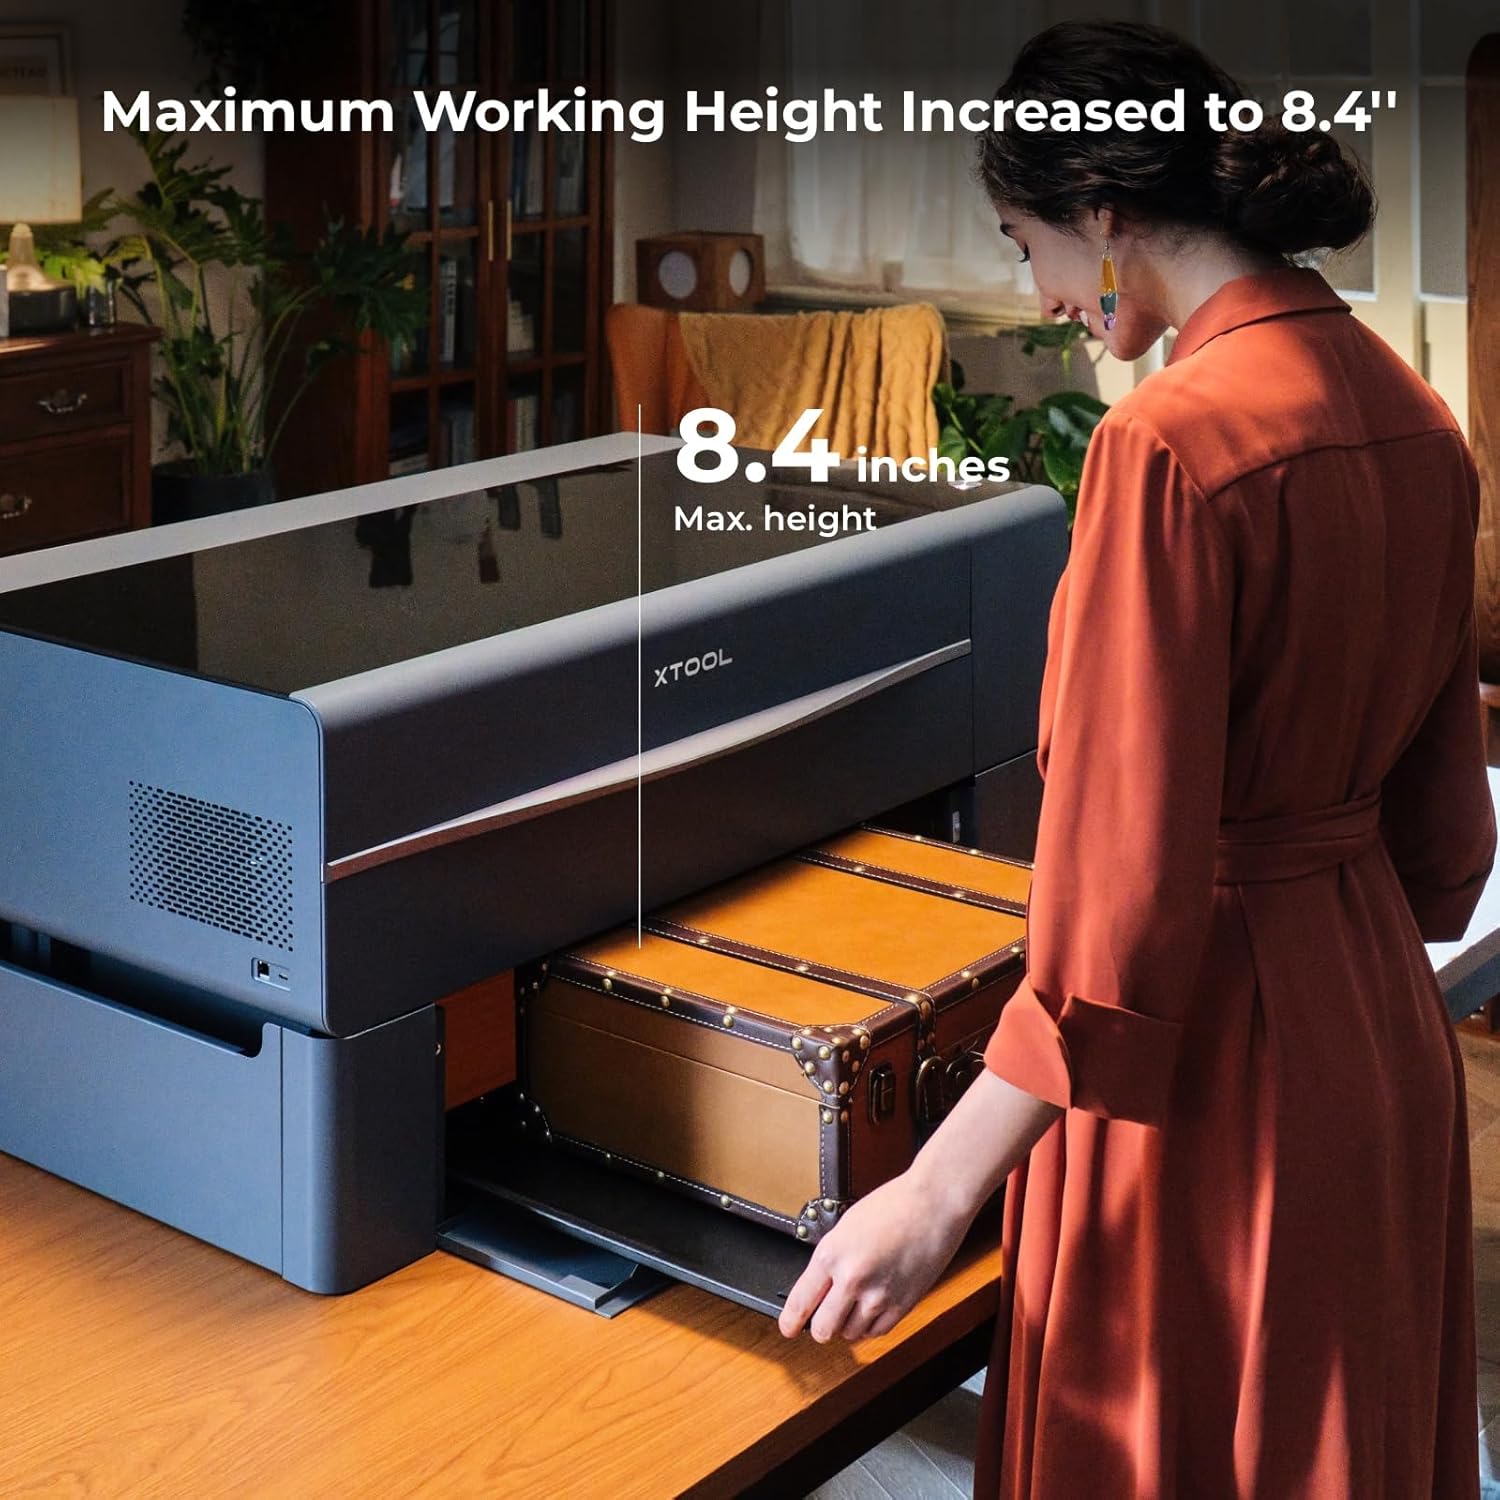
Image: The xTool P2 Riser Base increases the maximum working height to 8.4 inches, accommodating large items like a trunk.

Image: The Riser Base integrates seamlessly with the Automatic Conveyor Feeder for processing long materials.

Image: The Riser Base supports various accessories, including the Rotary Accessory (RA2 Pro).

Image: The enclosed design of the Riser Base prevents light and smoke leakage during operation.

Image: The Riser Base includes a convenient side storage space for accessories.
സജ്ജീകരണവും അസംബ്ലിയും
Follow these steps to assemble your xTool P2 Riser Base. Ensure you have all components as listed in the user manual included in the box.
അൺബോക്സിംഗും ഘടക തിരിച്ചറിയലും
Carefully open the packaging using a box opener. Remove all items from the box. Be mindful that some parts may have sharp edges; handle them with care.
Video: Unboxing and identifying components of the xTool P2 Riser Base. (Source: xToolDirect)
അസംബ്ലി ഘട്ടങ്ങൾ
- Assemble the Left Structure:
- Obtain the left side panel (with two holes on each side) and the left corners (smaller ones).
- Fit the left corners and the left side panel together using four M4*8 screws (two on each side).
- Fit the support corner and left guide rail panel together using two screws (concave surface facing upwards).
- Fit the left guide rail panel together with the left corners using six M4*8 screws.
- Install the Right Structure:
- Obtain the right side panel (with a pin on each side) and the right corners (with magnetic locks).
- Insert the pins of the right side panel into the holes in the right corners.
- Place the fixing plate between the two right corners and secure it using M3*6 screws (two on each side).
- Fit the support corner and right guide rail panel together (similar to the left structure).
- Fit the right guide rail panel together with the right corners using screws.
- വാതിൽ പാനലുകൾ ഇൻസ്റ്റാൾ ചെയ്യുക:
- Observe the two door panels: the front door panel is slightly wider than the rear one.
- Insert the pins on the door panels into the holes in the left and right corners.
- Place the fixing plates between the left and right structures and use screws to fit them together.
- Close the door panels.
- Fit the Rear Cover Panel:
- Fit the rear cover panel on the guide rail panels with the raised edges facing upwards.
Placing xTool P2 on the Riser Base
The xTool P2 is not included with the Riser Base. At least two people are needed to lift the xTool P2. Do not hold the machine on the corners when lifting it. The riser base is designed with positions on the left and right sides for placing your hands. To place xTool P2, hold it on the sides instead of at the corners, so that your hands don't get hurt.

Image: Proper hand placement for lifting and placing the xTool P2 onto the Riser Base.
പ്രവർത്തന നിർദ്ദേശങ്ങൾ
The xTool P2 Riser Base allows for processing various material types and sizes. Always ensure the correct baseplate level is set for your material.
1. Processing Long Materials (Passthrough)
For long materials, use the passthrough feature. Measure the material thickness using the provided tape measure or a ruler. Determine the baseplate placement level based on the thickness table. Remove all slats before processing and store them in the side compartment. Place the baseplate upside down at the corresponding level.

Image: Measuring material thickness for passthrough processing.
Video: Demonstrating how to measure material thickness, remove slats, and place the baseplate for long material processing. (Source: xToolDirect)
2. Processing Thick Materials
For thick materials, measure the material thickness using the tape measure or a ruler. Determine the baseplate placement level based on the thickness table. Place the baseplate right side up at the corresponding level. Open the door panels, place your material, and close the panels before processing.

ചിത്രം: ഉദാamples of projects possible with the Riser Base, including engraving on thick materials.
Video: Demonstrating how to measure material thickness and place the baseplate for thick material processing. (Source: xToolDirect)
3. Processing Cylindrical Materials (with RA2 Pro)
For cylindrical materials, measure the diameter using the tape measure or a ruler. Determine the roller and baseplate placement level based on the RA2-Roller level and Riser base level scales. Place the baseplate at the correct level and set the adjustable roller to the appropriate level. Place the rotary attachment in the center of the working area and place the support module. Use the mini level to observe and adjust the height of the support module until the bubble stays in the middle. Insert the connection cable into the extension port of xTool P2 and tighten the connector before starting processing.
Video: Demonstrating how to measure diameter, adjust baseplate and roller levels, set up the rotary attachment, and begin processing cylindrical materials. (Source: xToolDirect)
മെയിൻ്റനൻസ്
Regular maintenance ensures the longevity and optimal performance of your xTool P2 Riser Base.
- വൃത്തിയാക്കൽ: Regularly clean the baseplate and internal surfaces of the riser base to prevent residue buildup from engraving and cutting. Use a soft cloth and appropriate cleaning solutions.
- കണക്ഷനുകൾ പരിശോധിക്കുക: Periodically inspect all connections, especially those for rotary attachments, to ensure they are secure and free from damage.
- Slats Management: Always remove slats when processing materials that require the baseplate to be lowered. Store them properly in the designated side compartment to prevent damage.
ട്രബിൾഷൂട്ടിംഗ്
If you encounter issues with your xTool P2 Riser Base, refer to the following common problems and solutions.
- Smoke/Fumes Leaking: Ensure all door panels are properly closed and seated. Verify that the xTool P2 is correctly positioned on the riser base, creating a sealed environment. Check for any obstructions preventing full closure.
- Material Not Level: Use a mini-level to ensure the material is perfectly level on the baseplate or rotary attachment. Adjust the baseplate height or material supports as needed.
- Incorrect Engraving Depth/Focus: Double-check that the material thickness/diameter is accurately measured and the baseplate/roller level is set according to the provided tables.
ഉൽപ്പന്ന സവിശേഷതകൾ
| സ്പെസിഫിക്കേഷൻ | വിശദാംശങ്ങൾ |
|---|---|
| പാക്കേജ് അളവുകൾ | 32.25 x 13.5 x 10.25 ഇഞ്ച് |
| ഇനം മോഡൽ നമ്പർ | P5010239 |
| ഇനത്തിൻ്റെ ഭാരം | 26.1 പൗണ്ട് |
| നിർമ്മാതാവ് | എക്സ്ടൂൾ |
| മാതൃരാജ്യം | ചൈന |
| ആദ്യ തീയതി ലഭ്യമാണ് | ഓഗസ്റ്റ് 10, 2023 |
വാറൻ്റിയും പിന്തുണയും
xTool products typically come with a manufacturer's warranty. For specific warranty details and duration, please refer to the warranty card included with your product or visit the official xTool webസൈറ്റ്.
ഉപഭോക്തൃ പിന്തുണ
xTool offers multi-channel service and a dedicated technical support team to assist with any inquiries or issues. You can reach out via email, live chat, phone call, or through their official Facebook group.

Image: xTool's multi-channel customer service and technical support team.


