1. ആമുഖം
The GOYOJO UV-759 UV Visible Double Beam Spectrophotometer is an advanced instrument designed for precise laboratory testing and scientific research. This new generation intelligent instrument features a dual beam optical system, ensuring high stability and a strong signal-to-noise ratio. It offers high resolution and low stray light, making it suitable for daily analysis and various scientific applications.
This manual provides essential information for the safe and efficient operation of your spectrophotometer, including setup, operational procedures, maintenance, and troubleshooting.

ചിത്രം 1.1: കഴിഞ്ഞുview of the GOYOJO UV-759 Spectrophotometer highlighting its scanning capabilities and product introduction.
2 സുരക്ഷാ വിവരങ്ങൾ
ഉപകരണത്തിന് പരിക്കേൽക്കുന്നതും കേടുപാടുകൾ സംഭവിക്കുന്നതും തടയാൻ ഇനിപ്പറയുന്ന സുരക്ഷാ മുൻകരുതലുകൾ എപ്പോഴും പാലിക്കുക:
- Ensure the instrument is connected to a grounded power outlet with the correct voltage (220 V ± 10% 50 Hz ± 1 Hz).
- Do not operate the instrument in environments with excessive humidity, dust, or corrosive gases.
- Avoid direct exposure to the UV light source.
- ഉപകരണം തുറക്കരുത് casing unless instructed by qualified service personnel.
- Handle cuvettes and samples with care, especially when dealing with hazardous chemicals.
3. പാക്കേജ് ഉള്ളടക്കം
അൺപാക്ക് ചെയ്യുമ്പോൾ എല്ലാ ഘടകങ്ങളും ഉണ്ടെന്നും കേടുപാടുകൾ സംഭവിച്ചിട്ടില്ലെന്നും ഉറപ്പാക്കുക:
- GOYOJO UV-759 Spectrophotometer Unit
- പവർ കേബിൾ
- USB Communication Cable (for RS232 interface)
- Cuvettes (quantity may vary)
- ഇൻസ്ട്രക്ഷൻ മാനുവൽ
- സോഫ്റ്റ്വെയർ സിഡി (ബാധകമെങ്കിൽ)
4. സജ്ജീകരണം
4.1 അൺപാക്കിംഗും പ്ലേസ്മെന്റും
Carefully remove the spectrophotometer from its packaging. Place the instrument on a stable, level surface away from direct sunlight, vibrations, and strong electromagnetic fields. Ensure adequate ventilation around the unit.
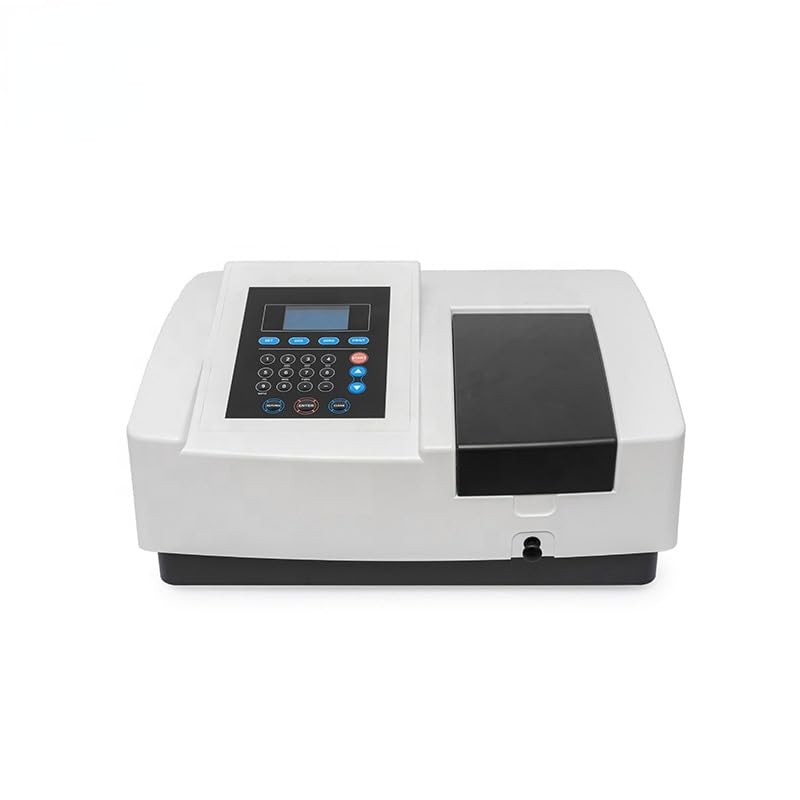
ചിത്രം 4.1: മുൻഭാഗം view of the GOYOJO UV-759 Spectrophotometer, showing the main unit and control panel.
4.2 പവർ കണക്ഷൻ
Connect the provided power cable to the power inlet on the rear of the instrument and then to a suitable grounded electrical outlet. Ensure the power switch is in the OFF position before connecting.
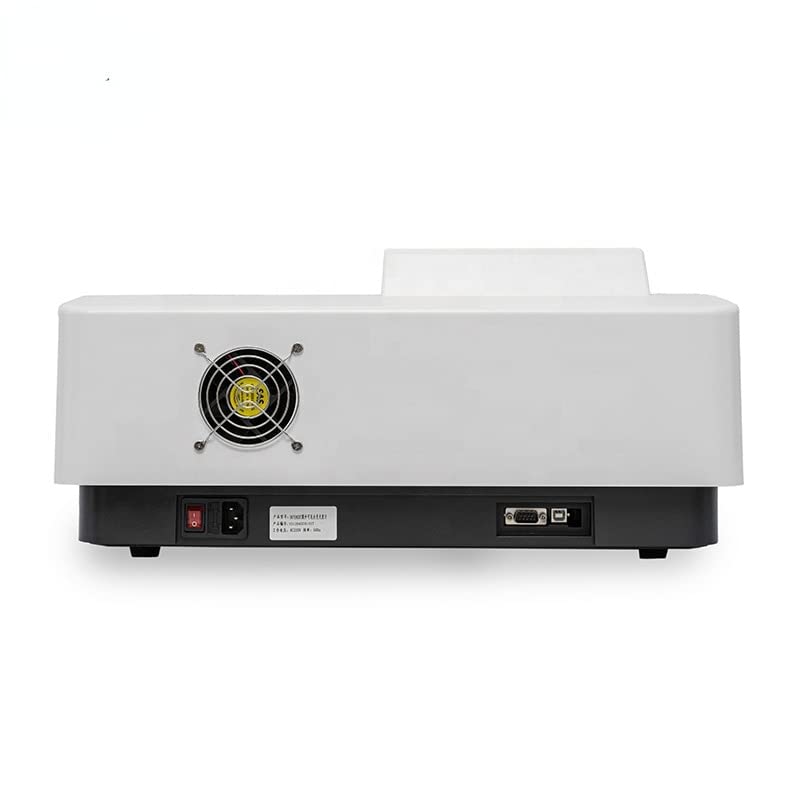
Image 4.2: Rear panel of the spectrophotometer, illustrating the power input and RS232 communication port.
4.3 Communication Setup (Optional)
If connecting to a computer for data acquisition or control, use the provided USB cable to connect the RS232 communication port on the instrument to your computer. Install any necessary drivers or software as per the instructions provided with the software package.
5. പ്രവർത്തന നിർദ്ദേശങ്ങൾ
5.1 Powering On and Initial Warm-up
- Flip the power switch on the rear of the instrument to the ON position.
- The instrument will perform a self-test. Allow approximately 15-30 minutes for the lamps to warm up and stabilize for accurate measurements.
- The display will show the main menu or a ready state once warm-up is complete.
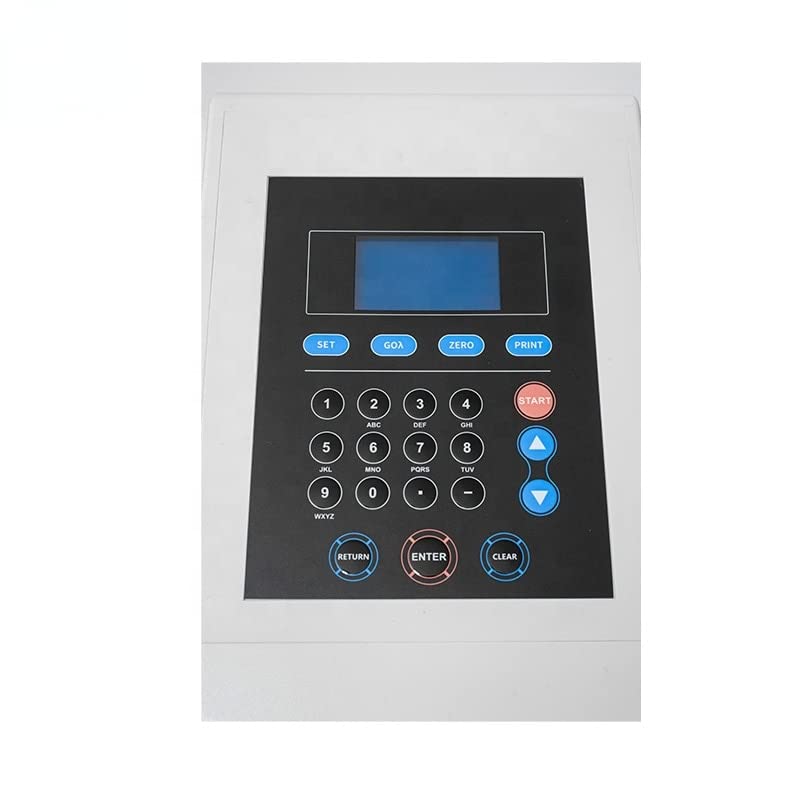
ചിത്രം 5.1: വിശദമായത് view of the control panel, including the LCD screen and function keys.
5.2 Basic Measurement Procedure
- മോഡ് തിരഞ്ഞെടുക്കുക: From the main menu, select the desired measurement mode (e.g., Absorbance, Transmittance, Concentration, or Quantitative).
- Set Wavelength: Use the keypad to enter the desired wavelength for your measurement. Press ENTER.
- Prepare Blank: Fill a clean cuvette with your blank solution (e.g., solvent). Insert it into the sampലെ കമ്പാർട്ട്മെന്റ്.
- Zero/Calibrate: Press the "ZERO" or "CAL" button to set the baseline or zero the instrument with the blank.
- എസ് തയ്യാറാക്കുകampLe: Remove the blank and insert a cuvette containing your samps ലേക്കുള്ള പരിഹാരംampലെ കമ്പാർട്ട്മെന്റ്.
- അളക്കുക: Press the "START" or "MEASURE" button to initiate the measurement. The result will be displayed on the screen.
- ആവർത്തിക്കുക: ഒന്നിലധികം സെamples, repeat steps 5 and 6.
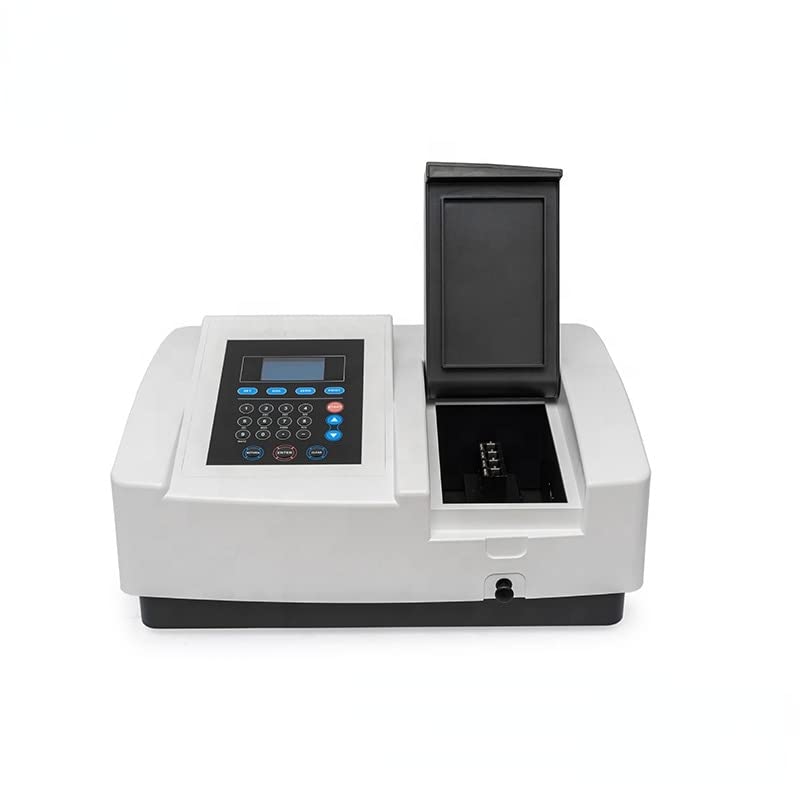
Image 5.2: The sample compartment opened, revealing the cuvette holder for sample insertion.
5.3 വിപുലമായ പ്രവർത്തനങ്ങൾ
Refer to the detailed software manual (if applicable) for instructions on advanced functions such as spectral scanning, kinetics, and multi-wavelength analysis. These functions typically require connection to a computer and specialized software.
6. പരിപാലനം
6.1 വൃത്തിയാക്കൽ
- പുറം: ഒരു മൃദുവായ, ഡി ഉപയോഗിച്ച് ബാഹ്യ പ്രതലങ്ങൾ തുടയ്ക്കുകamp തുണി. ഉരച്ചിലുകളുള്ള ക്ലീനറുകളോ ലായകങ്ങളോ ഉപയോഗിക്കരുത്.
- Sample Compartment: എസ് സൂക്ഷിക്കുകample compartment clean and dry. Use a lint-free cloth to remove any spills.
- Cuvettes: Always use clean cuvettes. Rinse them thoroughly with appropriate solvent and dry them before use.
6.2 എൽamp മാറ്റിസ്ഥാപിക്കൽ
The UV and Visible lamps have a finite lifespan. When lamp performance degrades (e.g., unstable readings, low energy), they may need replacement. This procedure should ideally be performed by qualified service personnel or by following specific instructions in a service manual, as it involves sensitive optical components.
6.3 സംഭരണം
When not in use for extended periods, power off the instrument, disconnect it from the power supply, and cover it with a dust cover to protect it from dust and environmental contaminants.
7. പ്രശ്നപരിഹാരം
| പ്രശ്നം | സാധ്യമായ കാരണം | പരിഹാരം |
|---|---|---|
| Instrument does not power on | Power cable disconnected; Power switch off; No power from outlet | Check power cable connection; Ensure power switch is ON; Verify power outlet functionality |
| അസ്ഥിരമായ വായനകൾ | Instrument not warmed up; Dirty cuvettes; Air bubbles in sample; Lamp ജീവിതാവസാനത്തോട് അടുക്കുന്നു | Allow adequate warm-up time; Clean cuvettes thoroughly; Remove air bubbles; Consider lamp മാറ്റിസ്ഥാപിക്കൽ |
| No light detected / Error message | Lamp failure; Sample compartment lid open; Optical path blocked | എൽ പരിശോധിക്കുകamp status; Ensure sample compartment lid is closed; Verify no obstructions in optical path |
| Communication error with PC | Incorrect cable; Driver not installed; Software settings incorrect | Use correct USB/RS232 cable; Install necessary drivers; Configure software communication settings |
8 സ്പെസിഫിക്കേഷനുകൾ
The following table outlines the key technical specifications for the GOYOJO UV-759 UV Visible Double Beam Spectrophotometer:

Image 8.1: Key technical specifications of the spectrophotometer.
| പരാമീറ്റർ | മൂല്യം |
|---|---|
| ഉൽപ്പന്നത്തിൻ്റെ പേര് | UV Visible Double Beam Spectrophotometer |
| മോഡൽ | UV-759 (MAKIT-82530) |
| തരംഗദൈർഘ്യ ശ്രേണി | 190-1100 എൻഎം |
| തരംഗദൈർഘ്യ കൃത്യത | ± 0.3 nm |
| Wavelength Repeatability | 0.1 എൻഎം |
| Spectral Bandwidth | 1.8 എൻഎം |
| Transmittance Accuracy | ± 0.3% T |
| ഫോട്ടോമെട്രിക് റേഞ്ച് | -3 ~ 3a, 0-200% T, 0 ~ 9999c |
| Baseline Straightness | ± 0.001 A/h |
| സ്ട്രേ ലൈറ്റ് | 0.05% T@220nm, 360nm |
| സ്ഥിരത | ± 0.001 A/h @ 500nm |
| RS232 ആശയവിനിമയം | യുഎസ്ബി ഇൻ്റർഫേസ് |
| വൈദ്യുതി വിതരണം | 220 V ± 10% 50 Hz ± 1 Hz, 70 W |
| ഭാരം | 18 കി.ഗ്രാം |
9. വാറൻ്റിയും പിന്തുണയും
9.1 വാറൻ്റി വിവരങ്ങൾ
GOYOJO products are manufactured to high-quality standards. For specific warranty terms and conditions, please refer to the warranty card included with your product or contact GOYOJO customer service. Keep your purchase receipt as proof of purchase.
9.2 ഉപഭോക്തൃ പിന്തുണ
If you encounter any issues not covered in this manual or require technical assistance, please contact GOYOJO customer support. Provide your product model (UV-759) and serial number (if applicable) when contacting support for faster service.
For contact information, please visit the official GOYOJO webസൈറ്റ് അല്ലെങ്കിൽ നിങ്ങളുടെ ഉൽപ്പന്ന പാക്കേജിംഗ് റഫർ ചെയ്യുക.


