1. ആമുഖം
Thank you for choosing the JAVIK Gas Cap Fuel Gauge. This product is designed to provide accurate fuel level readings for your Arctic Cat Snowmobile. It features an exact gauge structure and an upgraded anti-aging and anti-corrosion seal to ensure durability and prevent leaks. This manual will guide you through the installation, operation, and maintenance of your new fuel gauge.

Figure 1: JAVIK Gas Cap Fuel Gauge (Cap and Float Assembly)
This image displays the complete JAVIK Gas Cap Fuel Gauge, showing both the top cap with the integrated fuel level display and the long float assembly that extends into the fuel tank. The gauge face clearly indicates 'E' for Empty and 'F' for Full, with a red needle for easy reading.
2 അനുയോജ്യത
This fuel gauge (OEM# 0670-658) is compatible with various Arctic Cat Snowmobile models. Please verify your specific model and tank depth (designed for 11-1/2" deep tanks) before installation.
അനുയോജ്യമായ മോഡലുകൾ:
- Bearcat 570 (2004-2005)
- Jag (1997), Jag 340 (1998-1999), Jag 440 (1998-1999)
- Panther 340 (1998-2000), Panther 370 (2001-2007), Panther 440 (1998-2002), Panther 550 (1999-2001), Panther 570 (2002-2007)
- Powder Special 2K (2000), Powder Special 500 (2000), Powder Special 600 (1998-2000), Powder Special EFI 600 (2000), Powder Special 700 (1999-2000)
- Puma (1997)
- Thundercat (1999)
- Triple Touring (1999)
- Z 370 (1999-2000), Z 440 (1998-2000)
- ZL 440 (1998-2000), ZL 500 (1998-2000), ZL 600 (1999-2000), ZL 700 (2000)
- ZR 2K (2000), ZR 440 (1998), ZR 500 (1998-2000), ZR 600 (1998-2000), ZR 600 VEV (2001), ZR 700 (1999-2000)
- ZRT 600 (1999), ZRT 800 (1999)
3. സജ്ജീകരണവും ഇൻസ്റ്റാളേഷനും
Follow these steps to properly install your new JAVIK Gas Cap Fuel Gauge:
- തയ്യാറാക്കൽ: Ensure your snowmobile's engine is off and cool. Locate the existing gas cap. It is recommended to perform this installation when the fuel tank is low to minimize spills.
- പഴയ തൊപ്പി നീക്കം ചെയ്യുക: Carefully unscrew and remove the old gas cap. Be mindful of any fuel vapors.
- Inspect Tank Opening: Check the fuel tank opening for any debris or residue. Clean if necessary.
- Insert New Gauge: Gently insert the float assembly of the new JAVIK Gas Cap Fuel Gauge into the fuel tank opening. Ensure the float and rod move freely without obstruction.
- തൊപ്പി ഉറപ്പിക്കുക: Align the threads of the new gas cap with the tank opening and screw it on clockwise until it is hand-tight. Ensure the cap is seated firmly to create a proper seal. The upgraded anti-aging and anti-corrosion seal helps prevent leaks.
- ഫിറ്റ്മെന്റ് പരിശോധിക്കുക: After installation, gently try to rotate the cap to ensure it is securely fastened and does not wobble.

Figure 2: Fuel Gauge Float Assembly
This image shows the full length of the fuel gauge's float assembly, highlighting the long rod and the white float component. This part extends into the fuel tank to measure the fuel level.
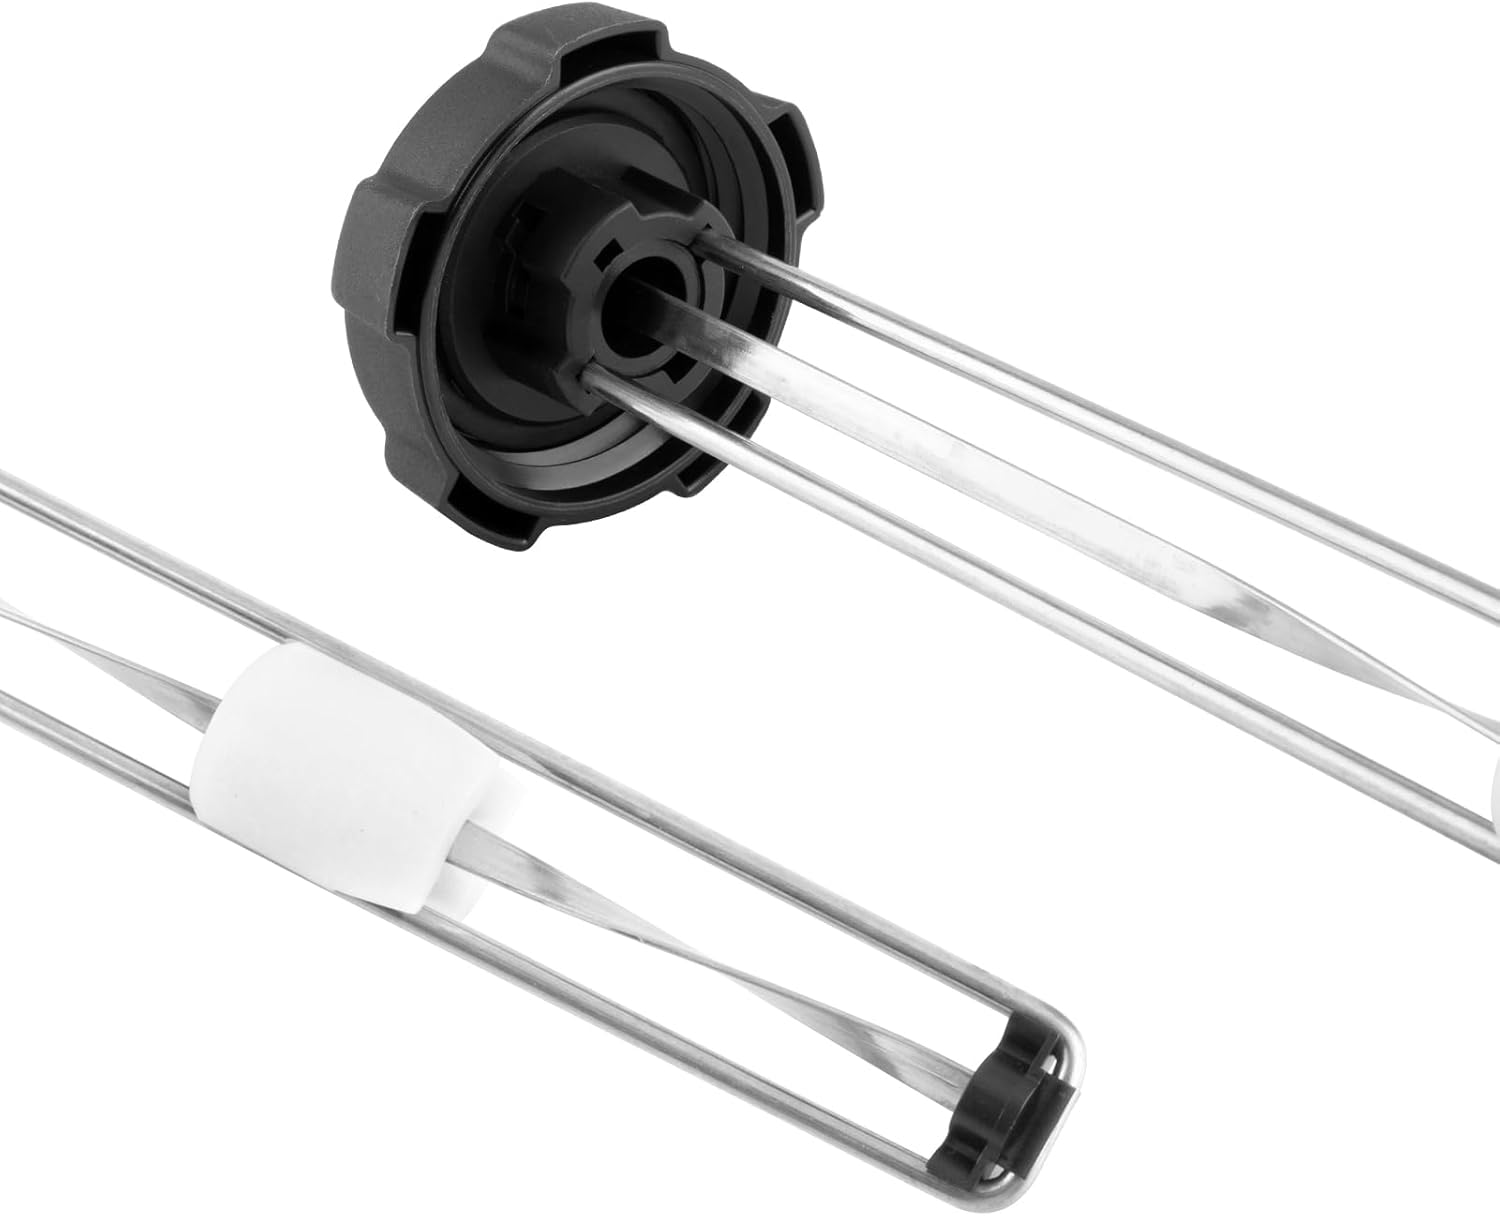
Figure 3: Underside of Gas Cap with Sealing Mechanism
ഈ ചിത്രം ഒരു view of the underside of the gas cap, detailing the threads and the sealing ring. This part connects directly to the fuel tank opening, ensuring a secure and leak-proof fit.
4. പ്രവർത്തന നിർദ്ദേശങ്ങൾ
The JAVIK Gas Cap Fuel Gauge provides a direct visual indication of your fuel level.
- ഗേജ് വായിക്കുന്നു: The gauge face is marked with 'E' for Empty and 'F' for Full. The red needle will move between these indicators to show the current fuel level.
- കൃത്യത: The exact gauge structure and float mechanism are designed to move accurately, providing reliable readings.
- പ്രസ്ഥാനം: The needle's position will adjust as the fuel level in the tank changes.
5. പരിപാലനം
Regular maintenance will help prolong the life and accuracy of your fuel gauge.
- വൃത്തിയാക്കൽ: Periodically wipe the exterior of the gas cap with a clean, damp cloth to remove dirt and grime. Avoid using harsh chemicals that could damage the plastic or chrome finish.
- മുദ്ര പരിശോധന: Regularly inspect the rubber seal on the underside of the gas cap for any signs of wear, cracking, or damage. A compromised seal can lead to fuel leaks or inaccurate readings due to pressure changes. Replace if necessary.
- Float Mechanism Check: Occasionally remove the cap and gently check that the float and rod assembly move freely without sticking. Ensure no debris has entered the tank that could obstruct its movement.
6. പ്രശ്നപരിഹാരം
If you encounter issues with your JAVIK Gas Cap Fuel Gauge, refer to the table below for common problems and solutions.
| പ്രശ്നം | സാധ്യമായ കാരണം | പരിഹാരം |
|---|---|---|
| Gauge reads inaccurately or sticks | Float mechanism obstructed; incorrect tank depth; internal component issue. | Remove cap and check for obstructions. Verify your tank depth is approximately 11-1/2 inches. If issues persist, contact customer service. |
| Fuel leaks from cap | Cap not tightened properly; damaged seal. | Ensure cap is securely tightened. Inspect the seal for damage and replace if necessary. |
| Plastic lens/cover falls off or is loose | Manufacturing defect; impact damage. | Ensure the lens is properly seated. If it continues to detach or is damaged, contact customer service. |
| Condensation inside gauge | Temperature fluctuations; improper ventilation. | This can sometimes occur with temperature changes. If it significantly impairs visibility or indicates a sealing issue, ensure the cap is properly sealed. |
| Cap does not fit tank opening | Incorrect model/size purchased. | Double-check the product compatibility list against your snowmobile model and year. Ensure you have the correct size (310mm, 323mm, or 279mm) for your tank depth. |
7 സ്പെസിഫിക്കേഷനുകൾ
- നിർമ്മാതാവ്: JAVIK
- ബ്രാൻഡ്: JAVIK
- മോഡൽ: ഇന്ധന ഗേജ്
- ഇനം മോഡൽ നമ്പർ: FG026-JK
- Manufacturer Part Number (OEM#): 0670-658
- മെറ്റീരിയൽ: Stainless Steel (float assembly), Chrome (exterior)
- ഇനത്തിൻ്റെ ഭാരം: ഏകദേശം 7.4 ഔൺസ്
- പാക്കേജ് അളവുകൾ: ഏകദേശം 13.78 x 3.5 x 3.15 ഇഞ്ച്
- മാതൃരാജ്യം: ചൈന
- Designed for Tank Depth: 11-1/2 ഇഞ്ച്
8. വാറൻ്റിയും പിന്തുണയും
JAVIK offers a 1 വർഷത്തെ വാറൻ്റി on this product. For any questions, concerns, or warranty claims, please contact JAVIK customer service. We are committed to providing 24-hour customer service to assist you with any problems you may encounter.
ബന്ധപ്പെടാനുള്ള വിവരങ്ങൾ: Please refer to your purchase platform or the JAVIK official store for direct customer service contact details.


