ആമുഖം
This manual provides detailed instructions for the FIFINE Ampli1+L9 Audio Mixer and accompanying XLR Cable. Designed for streaming, podcasting, and music recording, this USB audio interface offers high-quality sound reproduction for microphones and instruments. It features 48V phantom power for condenser microphones, intuitive gain controls, and versatile input/output options to enhance your audio experience.
ഉൽപ്പന്ന സവിശേഷതകൾ
- Improved Sound Quality: Elevate your recording or instrument creation to studio-level performance. The audio interface delivers original sound reproduction that captures every nuance for your podcasting.
- XLR Microphone Interface: Equipped with an XLR microphone interface, the recording audio interface grants you the freedom to connect your XLR microphone to capture studio-grade vocals. Enjoy the convenience of 48V phantom power for directly using with condenser microphones and an intuitive mic gain knob to fine-tune input levels.
- Instrument Input and Audio Output: Whether you're a guitarist or bassist, the podcast mixer has you covered. Connect a dedicated instrument input and experience rich and authentic tones. Audio output with a separate volume knob ensures precise control over playback levels.
- Upgraded-Quality Audio Cable: The included XLR microphone audio cable ensures pristine audio quality, delivering clear and balanced sound reproduction for professional-grade recordings.
- വിശ്വസനീയവും മോടിയുള്ളതും: Crafted with top-quality materials, the XLR audio cable is built to withstand the rigors of frequent use, providing long-lasting performance and durability.

Figure 1: FIFINE Ampli1+L9 Audio Mixer and XLR Cable.

Figure 2: The audio mixer features a dedicated instrument input for recording guitars or other instruments.

Figure 3: XLR and 6.35mm microphone inputs with 48V phantom power for condenser microphones and a 50dB gain input.

Figure 4: Direct monitoring feature with a dedicated volume knob for real-time audio feedback.

Figure 5: Diagram illustrating the various input options (microphone, instrument) and output options (headphones, speakers) for flexible connectivity.

Figure 6: Input gain knobs for MIC/LINE and INST with audio status indicators (Moderate Level, Close to Distortion, Distortion) to prevent clipping.
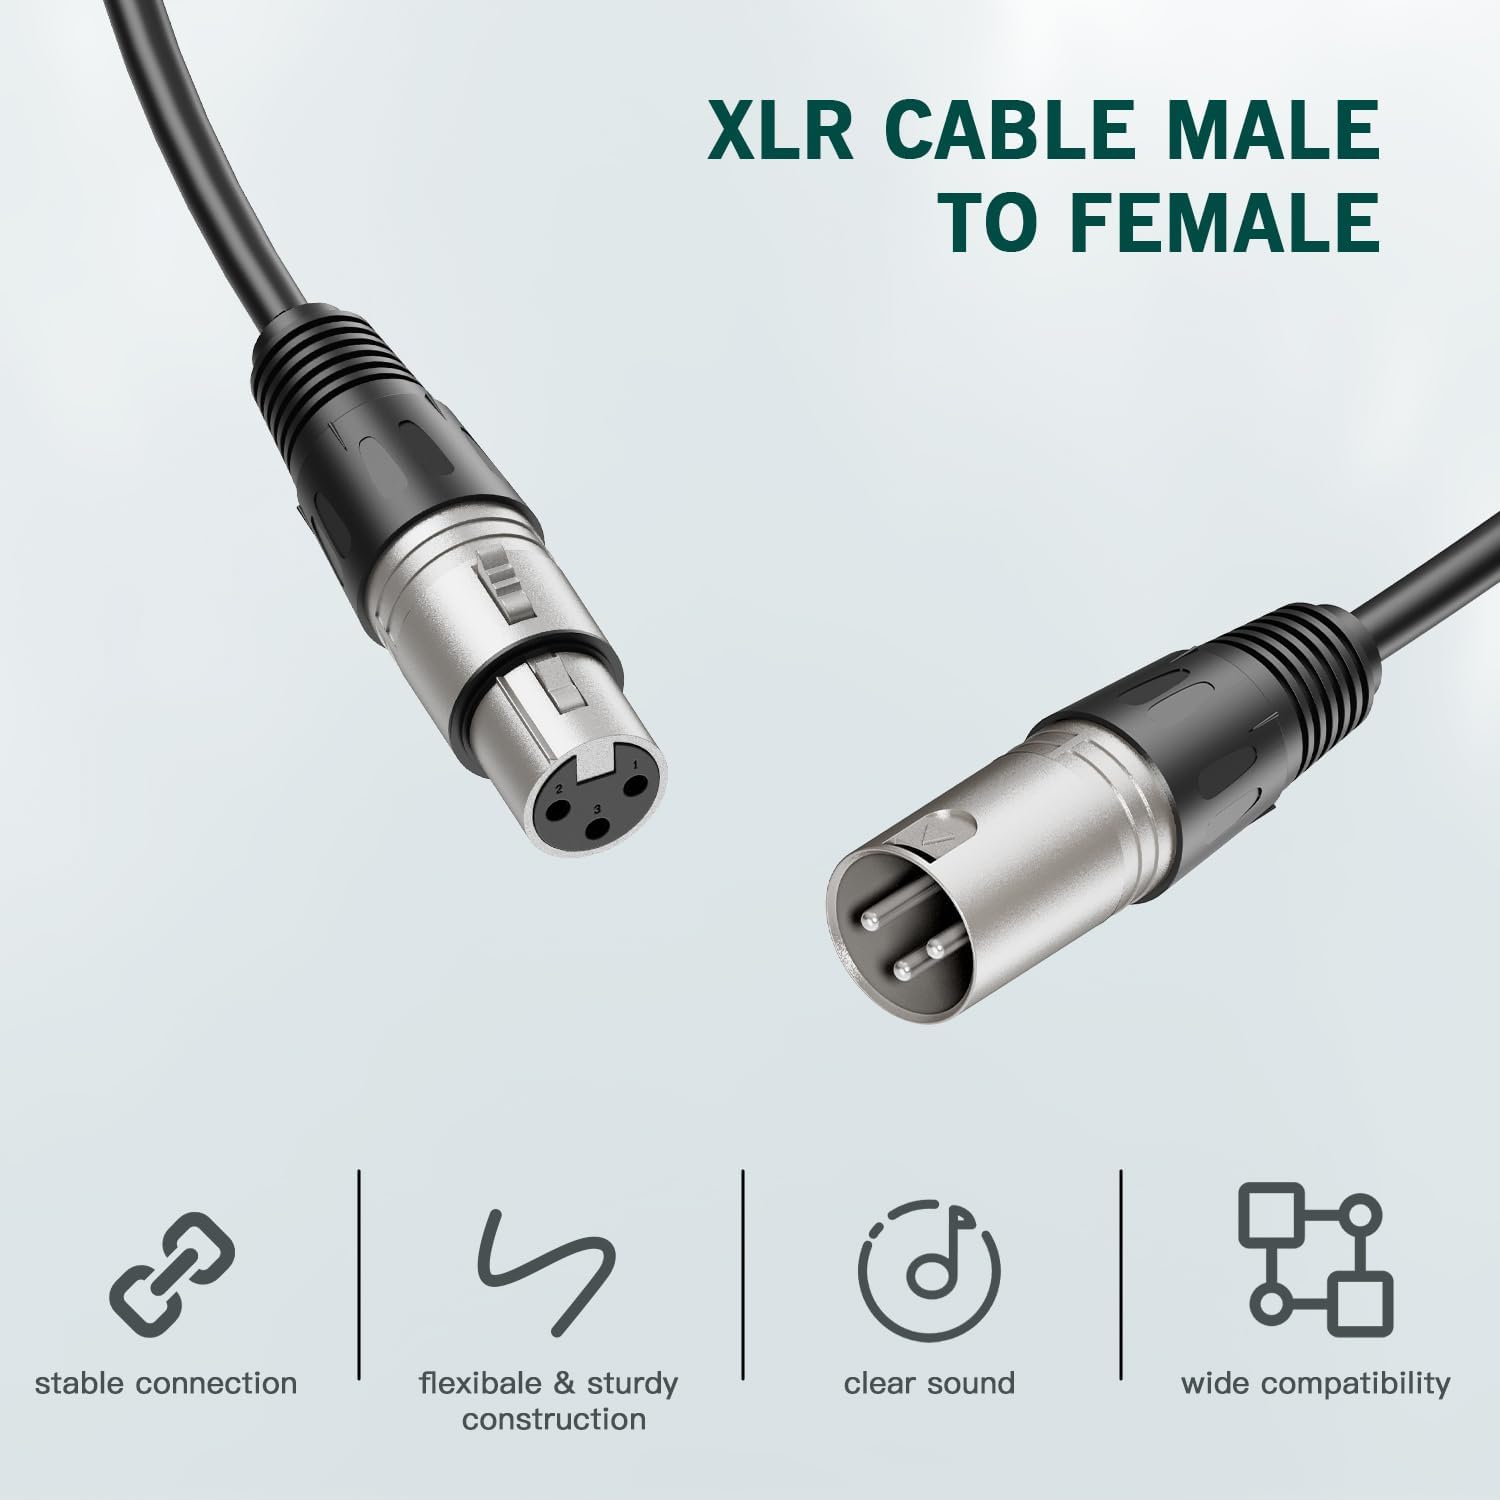
Figure 7: The included XLR Male to Female audio cable, designed for stable connection, flexible and sturdy construction, clear sound, and wide compatibility.

Figure 8: The XLR audio cable is constructed from top-quality PVC materials for enhanced durability and reliability.

Figure 9: The audio mixer integrated into a studio setup with a keyboard and monitor, highlighting its 50dB gain input.

Figure 10: A guitarist connected to the FIFINE Ampli1+L9 Audio Mixer, demonstrating its use for instrument recording.

Figure 11: The audio mixer connected to both headphones and speakers, illustrating its versatile output capabilities.

Figure 12: The audio mixer connected to a laptop via a USB-C cable, showing its digital connectivity.

Figure 13: A user monitoring their audio in real-time with headphones connected to the FIFINE Ampli1+L9 Audio Mixer.

Figure 14: A condenser microphone connected to the audio mixer, utilizing the 48V phantom power feature.

Figure 15: Visual representation of the audio status indicators on the mixer, showing levels from moderate to distorted.

Figure 16: Dedicated volume knobs for both output and headphones, allowing precise control over playback levels.

ചിത്രം 17: വിശദമായി views of the mixer's front, back, and top panels, labeling all interfaces and control knobs for easy identification.
സജ്ജമാക്കുക
- കമ്പ്യൂട്ടറുമായി ബന്ധിപ്പിക്കുക: Use the provided USB-C cable to connect the Ampli1+L9 mixer to your computer. The mixer is compatible with Linux, Windows, and macOS operating systems.
- മൈക്രോഫോൺ ബന്ധിപ്പിക്കുക: Plug your XLR microphone into the MIC/LINE 1 input. If using a condenser microphone, ensure the 48V Phantom Power is activated (refer to the Operating section).
- ഉപകരണം ബന്ധിപ്പിക്കുക: If recording an instrument, plug it into the INST 2 input.
- ഹെഡ്ഫോണുകൾ ബന്ധിപ്പിക്കുക: For direct monitoring, plug your headphones into the dedicated headphone jack on the front panel.
- Connect Speakers (Optional): Connect your studio monitors or speakers to the LEFT and RIGHT OUTPUTS on the rear panel.
പ്രവർത്തന നിർദ്ദേശങ്ങൾ
ക്രമീകരണം നേടുക
- MIC/LINE Gain: Use the 'MIC/LINE GAIN 1' knob to adjust the input level for your microphone.
- INST Gain: Use the 'INST GAIN 2' knob to adjust the input level for your instrument.
- Audio Status Indicators: Monitor the LED indicators next to the gain knobs. Green indicates a moderate level, orange indicates close to distortion, and red indicates distortion. Adjust gain to keep the indicator in the green range for optimal sound quality.
48V ഫാന്റം പവർ
- Press the '48V' button located near the MIC/LINE 1 input to activate phantom power for condenser microphones. The indicator light will illuminate when active.
- Ensure phantom power is OFF when using dynamic microphones or instruments that do not require it.
നേരിട്ടുള്ള നിരീക്ഷണം
- Activate the 'DIRECT MONITOR' button to hear your input signal directly through your headphones without latency.
- Adjust the 'HEADPHONES' volume knob to control the monitoring level.
ഔട്ട്പുട്ട് വോളിയം
- Use the 'OUTPUTS' volume knob to control the overall output level to your connected speakers or studio monitors.
മെയിൻ്റനൻസ്
- വൃത്തിയാക്കൽ: Use a soft, dry cloth to clean the exterior of the mixer. Avoid using liquid cleaners or solvents.
- സംഭരണം: Store the mixer and cable in a cool, dry place away from direct sunlight and extreme temperatures.
- കേബിൾ കെയർ: Avoid sharp bends or kinks in the XLR cable to prevent damage to the internal wiring. Use the included Velcro strap for tidy storage.
ട്രബിൾഷൂട്ടിംഗ്
- സൗണ്ട് ഔട്ട്പുട്ട് ഇല്ല:
- Ensure the mixer is properly connected to your computer via USB and powered on.
- Check all cable connections (microphone, instrument, headphones, speakers).
- Verify that the gain knobs for inputs and outputs are set to an audible level.
- Confirm that your computer's sound settings recognize the FIFINE Ampli1+L9 as the input/output device.
- വികലമായ ഓഡിയോ:
- Reduce the input gain (MIC/LINE or INST) if the audio status indicators are showing orange or red.
- Check for damaged cables or faulty connections.
- Microphone Not Detected/Working:
- Ensure the microphone is securely plugged into the XLR input.
- If using a condenser microphone, activate the 48V Phantom Power.
- Test with a different microphone or cable if possible.
- No Direct Monitoring:
- Ensure headphones are properly connected and the 'DIRECT MONITOR' button is active.
- Adjust the 'HEADPHONES' volume knob.
സ്പെസിഫിക്കേഷനുകൾ
| ഫീച്ചർ | വിശദാംശങ്ങൾ |
|---|---|
| ബ്രാൻഡ് | ഫിഫൈൻ |
| കണക്റ്റിവിറ്റി ടെക്നോളജി | XLR |
| ചാനലുകളുടെ എണ്ണം | 2 |
| അനുയോജ്യമായ ഉപകരണങ്ങൾ | Microphone, Personal Computer, Electric Guitar |
| പിന്തുണയ്ക്കുന്ന സോഫ്റ്റ്വെയർ | DAW software that supports XLR devices |
| ഓപ്പറേറ്റിംഗ് സിസ്റ്റം | Linux, Windows, macOS |
വാറൻ്റി & പിന്തുണ
വാറന്റി വിവരങ്ങൾക്കും സാങ്കേതിക പിന്തുണയ്ക്കും, ദയവായി ഔദ്യോഗിക FIFINE കാണുക. webസൈറ്റിൽ ബന്ധപ്പെടുക അല്ലെങ്കിൽ അവരുടെ ഉപഭോക്തൃ സേവനവുമായി നേരിട്ട് ബന്ധപ്പെടുക. വാറന്റി ക്ലെയിമുകൾക്കായി നിങ്ങളുടെ വാങ്ങൽ രസീത് സൂക്ഷിക്കുക.
ഉൽപ്പന്ന വീഡിയോകൾ
ഫിഫൈൻ Ampli1 Audio Mixer Overview
ഈ വീഡിയോ ഒരു ഓവർ നൽകുന്നുview FIFINE യുടെ Ampli1 audio mixer, demonstrating its features and basic functionality. It highlights the mixer's design and ease of use for audio recording.
Amazon Basics Male-Female XLR Cable Unboxing
This video showcases the unboxing and features of an Amazon Basics Male-Female XLR cable, similar to the one included with your FIFINE Ampli1+L9. It demonstrates the cable's construction and connectors.


