ആമുഖം
This manual provides detailed instructions for the assembly, operation, and maintenance of your VINGLI Wooden Wishing Well Outdoor Planter (Model: 22" w/ 2 Reinforced Rods). Please read this manual thoroughly before assembly and use to ensure proper function and longevity of your product.
The VINGLI Wooden Wishing Well is designed as an outdoor planter and decorative garden accent, featuring durable fir wood construction, reinforced rods for stability, and an adjustable hanging bucket.
സുരക്ഷാ വിവരങ്ങൾ
- ഉൽപ്പന്നം എല്ലായ്പ്പോഴും പരന്നതും സ്ഥിരതയുള്ളതുമായ ഒരു പ്രതലത്തിൽ കൂട്ടിച്ചേർക്കുക.
- ഉപയോഗിക്കുന്നതിന് മുമ്പ് എല്ലാ സ്ക്രൂകളും ഫാസ്റ്റനറുകളും സുരക്ഷിതമായി മുറുക്കിയിട്ടുണ്ടെന്ന് ഉറപ്പാക്കുക.
- ശ്വാസംമുട്ടൽ അപകടങ്ങൾ തടയാൻ അസംബ്ലി സമയത്ത് ചെറിയ ഭാഗങ്ങൾ കുട്ടികളിൽ നിന്ന് അകറ്റി നിർത്തുക.
- Wear appropriate safety gear, such as gloves, during assembly to protect hands from splinters or wood stain.
- Do not overload the hanging bucket or the main planter base to prevent structural damage.
- Periodically check the product for loose parts or damage and address them promptly.
- Position the wishing well in a location where it will not obstruct pathways or pose a tripping hazard.
ഭാഗങ്ങളുടെ പട്ടിക
അസംബ്ലി ആരംഭിക്കുന്നതിന് മുമ്പ്, താഴെ ലിസ്റ്റ് ചെയ്തിരിക്കുന്ന എല്ലാ ഭാഗങ്ങളും ഉണ്ടെന്ന് ഉറപ്പാക്കുക. ഏതെങ്കിലും ഭാഗങ്ങൾ നഷ്ടപ്പെട്ടാലോ കേടുപാടുകൾ സംഭവിച്ചാലോ, ദയവായി ഉപഭോക്തൃ പിന്തുണയുമായി ബന്ധപ്പെടുക.
| ഭാഗം | വിവരണം | അളവ് |
|---|---|---|
| A | Main Planter Base Panels | (Varies, typically pre-assembled sections) |
| B | Vertical Support Posts | 2 |
| C | മേൽക്കൂര അസംബ്ലി | 1 |
| D | Hanging Bucket | 1 |
| E | Rope and Handle Mechanism | 1 സെറ്റ് |
| F | Hardware Pack (Screws, bolts, etc.) | 1 പായ്ക്ക് |
Note: The main planter base and roof may come partially pre-assembled.
സജ്ജീകരണവും അസംബ്ലിയും
Tools required: Phillips head screwdriver (power drill recommended), gloves.
Step 1: Assemble the Planter Base
Carefully unpack the main planter base panels. If not pre-assembled, connect the panels to form the octagonal base using the provided screws. Ensure the reinforced rods are correctly aligned and secured for stability.

Image: Close-up of the reinforced rods and 4-layer crossing fir boards in the planter base, highlighting sturdy construction.
Step 2: Attach Vertical Support Posts
Attach the two vertical support posts (B) to the assembled planter base (A). Align the pre-drilled holes and secure them with screws from the hardware pack (F). Ensure the posts are upright and stable.
Step 3: Install the Roof Assembly
Place the roof assembly (C) onto the top of the vertical support posts (B). Align the holes and secure the roof using the appropriate screws. Ensure the roof is centered and firmly attached.
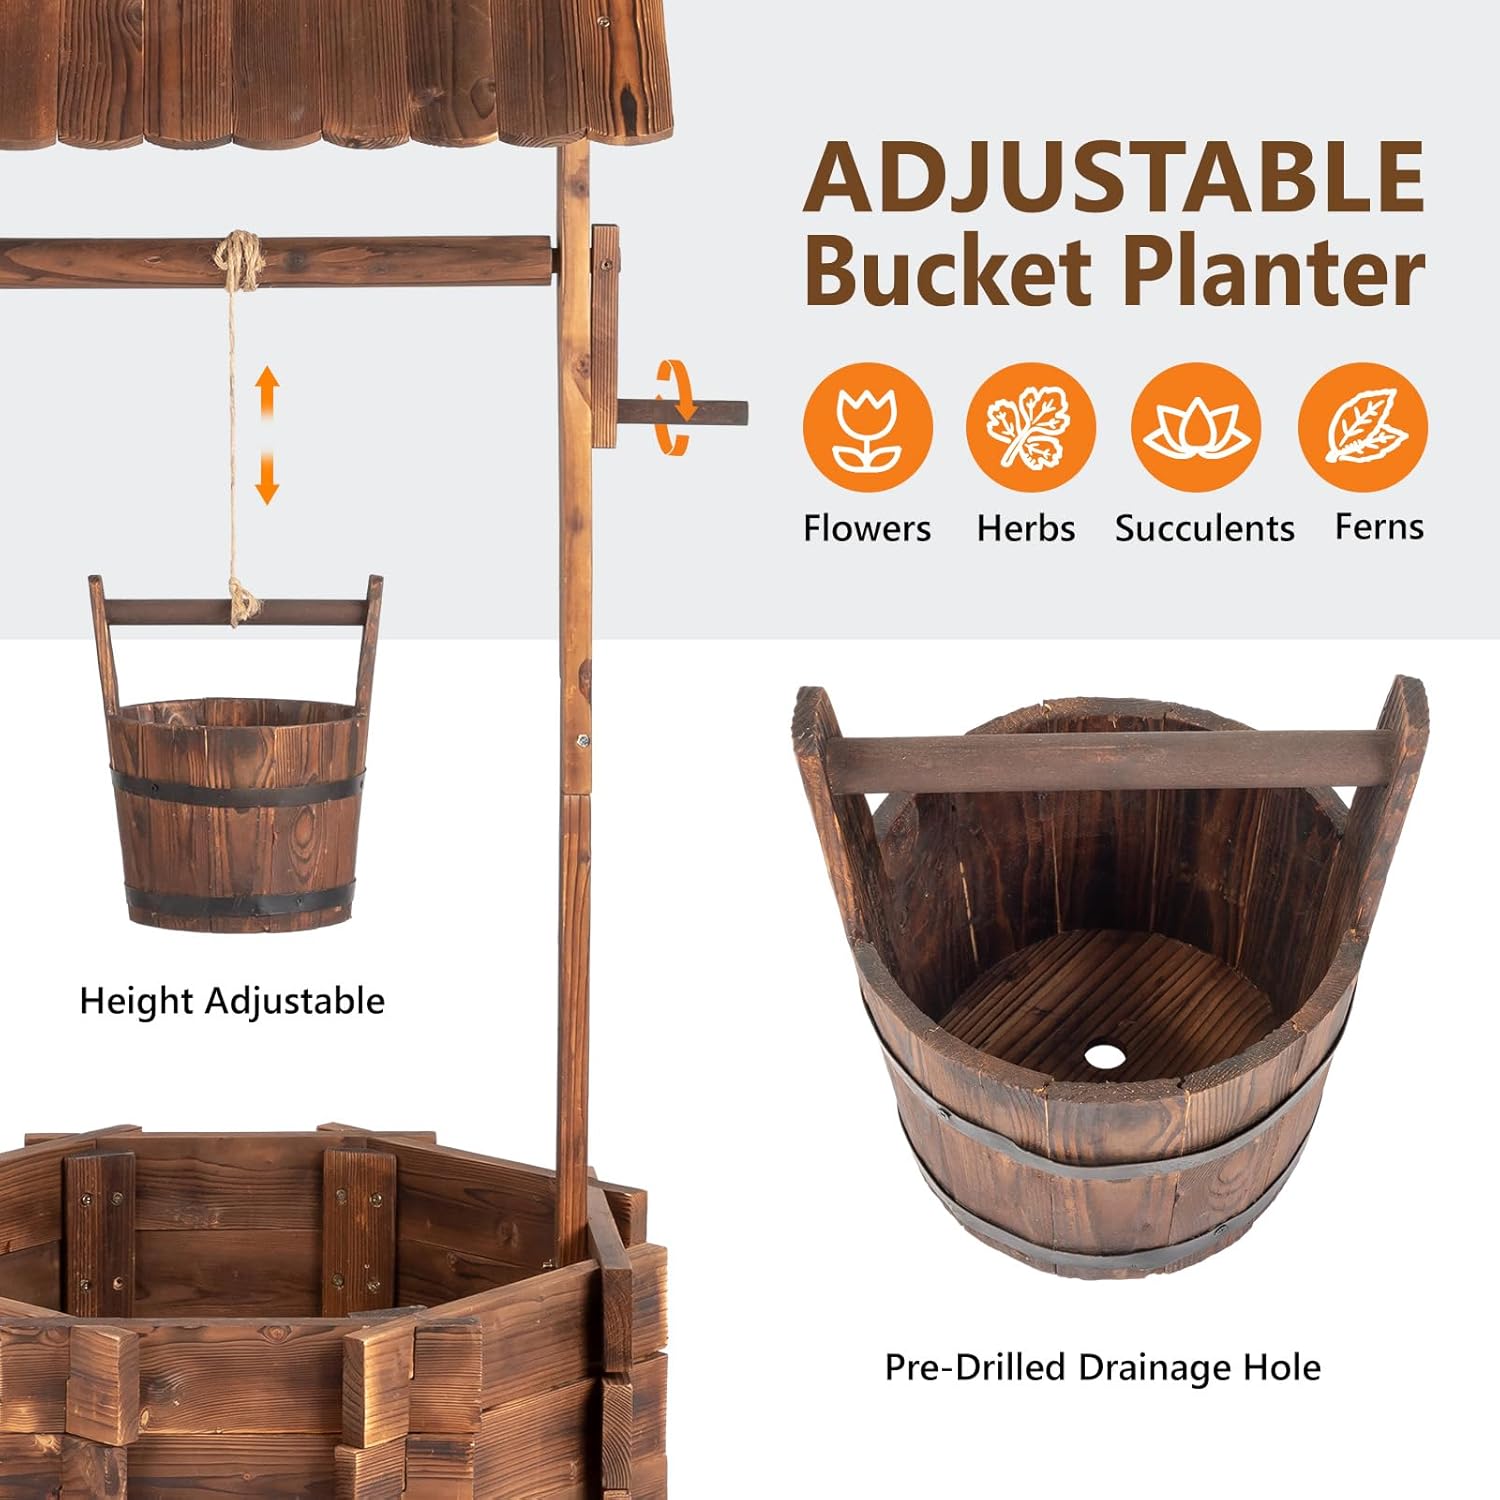
Image: Detail of the protective roof, illustrating its design and construction.
Step 4: Attach the Hanging Bucket and Rope Mechanism
Thread the rope through the pulley system on the roof structure. Attach one end of the rope to the hanging bucket (D) and the other end to the handle mechanism (E). Ensure the bucket can be smoothly raised and lowered.

Image: Close-up of the adjustable bucket planter, showing its height adjustment feature and pre-drilled drainage hole.
അസംബ്ലി വീഡിയോ
Video: A detailed assembly guide for the VINGLI Wooden Wishing Well, demonstrating each step of the construction process.
പ്രവർത്തന നിർദ്ദേശങ്ങൾ
Using the Main Planter Base
The main planter base has a diameter of 16.5 inches, providing ample space for multiple plants. Fill the base with appropriate drainage material (e.g., gravel, mulch) followed by soil. Plant your desired flowers, herbs, or succulents.

Image: The main planter base filled with soil, ready for planting, demonstrating its capacity.
Adjusting the Hanging Bucket
The hanging bucket can be used as an additional planter for smaller plants. It features a pre-drilled drainage hole. Use the rope and handle mechanism to adjust the bucket's height to your preference. To secure the bucket at a specific height, wrap the rope around the handle or tie it off securely.

Image: The VINGLI wishing well in a garden setting, illustrating its use as a decorative cover for outdoor elements such as a well pump, septic tank, or water pipe.
മെയിൻ്റനൻസ്
- വൃത്തിയാക്കൽ: പരസ്യം ഉപയോഗിച്ച് തടി പ്രതലങ്ങൾ തുടയ്ക്കുകamp ആവശ്യാനുസരണം തുണി ഉപയോഗിക്കുക. മരത്തിന്റെ ഉപരിതലത്തിന് കേടുവരുത്തുന്ന കഠിനമായ രാസവസ്തുക്കൾ ഒഴിവാക്കുക.
- കാലാവസ്ഥ സംരക്ഷണം: While constructed from durable fir wood, applying a weather-resistant sealant annually can extend the product's lifespan and protect it from sun and rain.
- പരിശോധന: എല്ലാ സ്ക്രൂകളും കണക്ഷനുകളും ഇറുകിയതാണെന്ന് ഉറപ്പാക്കാൻ ഇടയ്ക്കിടെ പരിശോധിക്കുക. ആവശ്യമെങ്കിൽ വീണ്ടും മുറുക്കുക.
- ഡ്രെയിനേജ്: Ensure the drainage hole in the hanging bucket remains clear to prevent water accumulation.
ട്രബിൾഷൂട്ടിംഗ്
| പ്രശ്നം | സാധ്യമായ കാരണം | പരിഹാരം |
|---|---|---|
| Product feels wobbly after assembly. | Screws not fully tightened; uneven assembly surface. | Ensure all screws are securely tightened. Assemble on a flat, level surface. Gently coax parts into alignment during assembly. |
| Hanging bucket does not move smoothly. | Rope tangled or improperly threaded; friction in pulley system. | Check rope for tangles and re-thread if necessary. Ensure the rope is correctly seated in the pulley. |
| Wood color fading or showing wear. | Exposure to sun and weather without protection. | Apply a clear, weather-resistant wood sealant or stain to protect the wood. |
സ്പെസിഫിക്കേഷനുകൾ
- മോഡൽ: 22" w/ 2 Reinforced Rods
- മെറ്റീരിയൽ: ഫിർ വുഡ്
- നിറം: ബ്രൗൺ
- ഉൽപ്പന്ന അളവുകൾ: 22"D x 21.6"W x 45"H (55.9 സെ.മീ D x 54.9 സെ.മീ W x 114.3 സെ.മീ H)
- Planter Base Diameter: ഏകദേശം 16.5 ഇഞ്ച്
- ഇനത്തിൻ്റെ ഭാരം: 22.7 പൗണ്ട് (10.3 കി.ഗ്രാം)
- പ്രത്യേക സവിശേഷതകൾ: Drainage Hole (in bucket), Weather Resistant (with proper maintenance)
- ശൈലി: രാജ്യം
- ഇൻഡോർ/ഔട്ട്ഡോർ ഉപയോഗം: ഔട്ട്ഡോർ
- മൗണ്ടിംഗ് തരം: ഫ്ലോർ സ്റ്റാൻഡിംഗ്
- ഉൾപ്പെടുത്തിയ ഘടകങ്ങൾ: Instruction manual, Hardware

Image: Diagram illustrating the overall dimensions of the wishing well, including height, width, and depth measurements.
വാറൻ്റിയും പിന്തുണയും
For warranty information or customer support, please refer to the purchase documentation or contact VINGLI customer service directly. Keep your purchase receipt for any warranty claims.
ബന്ധപ്പെടാനുള്ള വിവരങ്ങൾ: Please visit the official VINGLI website or refer to your product packaging for the most current contact details.


