1. ആമുഖം
Thank you for choosing the Avatar ABR-460.4 4 Channel Class AB Ampലിഫയർ. നിങ്ങളുടെ ശരിയായ ഇൻസ്റ്റാളേഷൻ, പ്രവർത്തനം, പരിപാലനം എന്നിവയ്ക്ക് ആവശ്യമായ വിവരങ്ങൾ ഈ മാനുവൽ നൽകുന്നു. ampലിഫയർ. ഇൻസ്റ്റാൾ ചെയ്യാനോ പ്രവർത്തിപ്പിക്കാനോ ശ്രമിക്കുന്നതിന് മുമ്പ് ദയവായി ഈ മാനുവൽ നന്നായി വായിക്കുക ampഒപ്റ്റിമൽ പ്രകടനവും സുരക്ഷയും ഉറപ്പാക്കാൻ ലിഫയർ.
2 സുരക്ഷാ വിവരങ്ങൾ
പരിക്കുകളോ കേടുപാടുകളോ ഉണ്ടാകാതിരിക്കാൻ താഴെപ്പറയുന്ന സുരക്ഷാ മുൻകരുതലുകൾ എപ്പോഴും പാലിക്കുക. amplifier and other components:
- Disconnect the vehicle's negative battery terminal before beginning any installation.
- ചുറ്റും ശരിയായ വായുസഞ്ചാരം ഉറപ്പാക്കുക amplifier. Do not mount in enclosed spaces without adequate airflow.
- ഇൻസ്റ്റലേഷൻ വിഭാഗത്തിൽ വ്യക്തമാക്കിയിരിക്കുന്നതുപോലെ പവർ, ഗ്രൗണ്ട്, സ്പീക്കർ കണക്ഷനുകൾക്ക് ഉചിതമായ ഗേജ് വയറിംഗ് ഉപയോഗിക്കുക.
- Protect all wiring from sharp edges and heat sources.
- തുറന്നുകാട്ടരുത് ampഈർപ്പം അല്ലെങ്കിൽ അങ്ങേയറ്റത്തെ ഊഷ്മാവിൽ ലിഫയർ.
- If you are unsure about any part of the installation process, consult a professional car audio installer.
3. ഉൽപ്പന്നം കഴിഞ്ഞുview
The Avatar ABR-460.4 is a 4-channel Class AB amplifier designed to enhance your car audio system with robust and clear sound. It delivers 460 watts of peak power and offers versatile power options for various audio setups.
പ്രധാന സവിശേഷതകൾ:
- ശക്തമായ 4-ചാനൽ Amplifier: Delivers 460 watts of peak power for robust and clear audio.
- Class AB Design: Offers high-quality sound with minimal distortion and excellent efficiency.
- Versatile Power Options: Capable of delivering 230W x 4 at 2 Ohms, 115W x 4 at 4 Ohms, and 460W x 2 when bridged at 4 Ohms.
- Advanced Filters and Controls: Includes low pass filter (50-250 Hz), high pass filter (120-3000 Hz), and a bass boost option (0/6/12 dB) for precise sound tuning.
- Durable and Compact: Measures 14.9" x 8.6" x 1.9" and weighs 7.15 lbs, designed for easy installation and long-lasting performance.
പാക്കേജ് ഉള്ളടക്കം:
- 1 x Avatar ABR-460.4 Ampജീവപര്യന്തം
- ഉപയോക്തൃ മാനുവൽ (ഈ പ്രമാണം)
- Mounting Hardware (screws, etc. - typically included)
ഉൽപ്പന്നം Views:
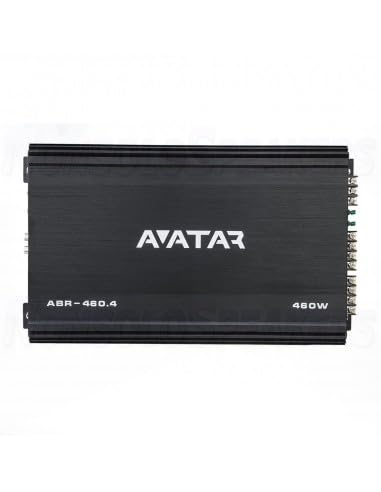
ചിത്രം 3.1: മുകളിൽ view of the Avatar ABR-460.4 amplifier, displaying the 'AVATAR' logo, 'ABR-460.4' model designation, and '460W' power rating on its sleek black casing.
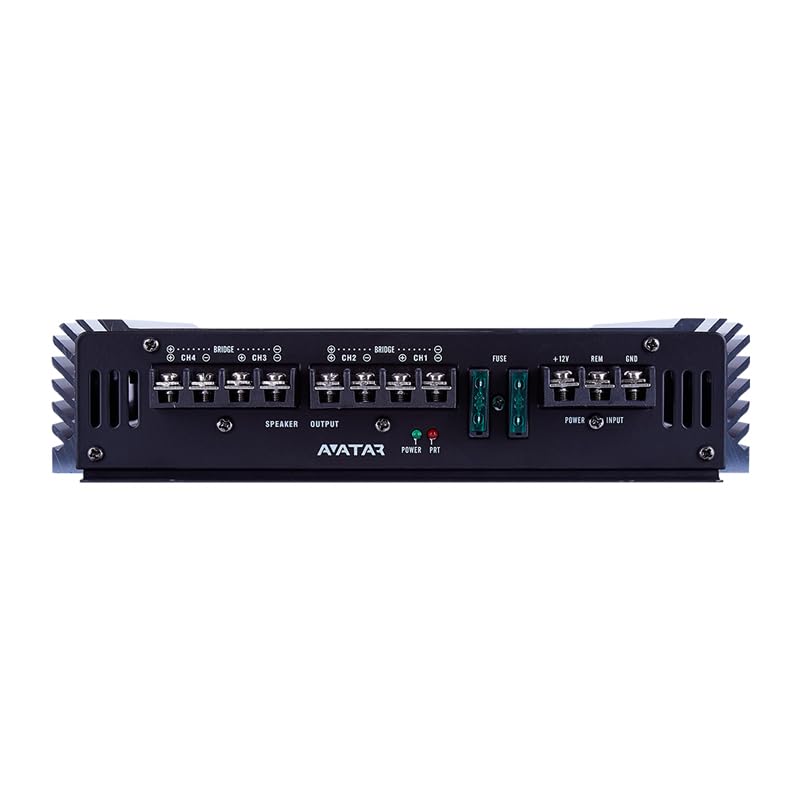
ചിത്രം 3.2: പിൻഭാഗം view of the Avatar ABR-460.4 amplifier, highlighting the power input terminals (+12V, REM, GND), fuse holders, and speaker output terminals for channels 1-4, including bridge mode indicators.

ചിത്രം 3.3: മുൻഭാഗം view of the Avatar ABR-460.4 amplifier, displaying the RCA input jacks and various control knobs for Bass Boost, LPF, HPF, and Gain for both front and rear speaker channels.
4. സജ്ജീകരണവും ഇൻസ്റ്റാളേഷനും
4.1 Before Installation:
- Plan your wiring carefully. Ensure all cables are routed away from moving parts and heat sources.
- ആവശ്യത്തിന് വായുസഞ്ചാരം നൽകുന്നതും ഈർപ്പത്തിൽ നിന്ന് സംരക്ഷിക്കപ്പെടുന്നതുമായ ഒരു മൗണ്ടിംഗ് സ്ഥലം തിരഞ്ഞെടുക്കുക.
- Ensure the vehicle's battery is disconnected before making any electrical connections.
4.2 വയറിംഗ് കണക്ഷനുകൾ:
Refer to Figure 3.2 for a visual guide to the connection terminals.
- പവർ കണക്ഷൻ (+12V): Connect a 6 AWG power cable from the vehicle's positive battery terminal to the +12V terminal on the amplifier. Install an appropriate fuse (not supplied) within 18 inches of the battery.
- ഗ്രൗണ്ട് കണക്ഷൻ (GND): Connect a 6 AWG ground cable from the GND terminal on the ampവാഹനത്തിന്റെ ചേസിസിൽ വൃത്തിയുള്ളതും പെയിന്റ് ചെയ്യാത്തതുമായ ഒരു ലോഹ പ്രതലത്തിലേക്ക് ലിഫയർ ഘടിപ്പിക്കുക. ദൃഢവും കുറഞ്ഞ പ്രതിരോധശേഷിയുള്ളതുമായ കണക്ഷൻ ഉറപ്പാക്കുക.
- റിമോട്ട് ടേൺ-ഓൺ (REM): നിങ്ങളുടെ ഹെഡ് യൂണിറ്റിന്റെ റിമോട്ട് ഔട്ട്പുട്ടിൽ നിന്ന് ഒരു റിമോട്ട് ടേൺ-ഓൺ വയർ REM ടെർമിനലിലേക്ക് ബന്ധിപ്പിക്കുക. ampലിഫയർ. ഈ വയർ ampനിങ്ങളുടെ ഹെഡ് യൂണിറ്റിനൊപ്പം ലിഫയർ ഓണും ഓഫും ആക്കുക.
- RCA Input (INPUT): നിങ്ങളുടെ ഹെഡ് യൂണിറ്റിന്റെ പ്രീ-യിൽ നിന്ന് RCA കേബിളുകൾ ബന്ധിപ്പിക്കുക.amp outputs to the INPUT jacks on the ampജീവൻ.
- Speaker Output (SPEAKER OUTPUT): Connect your speakers to the SPEAKER OUTPUT terminals. Ensure correct polarity (+ to + and - to -). For bridged operation, refer to the markings on the amplifier's terminal block. The minimum permissible load per channel is 2 Ohms, and 4 Ohms in a bridge connection.
4.3 മൗണ്ടിംഗ്:
മൗണ്ട് ദി amplifier securely to a solid surface using the provided mounting hardware. Ensure there is sufficient space around the ampഅമിതമായി ചൂടാകുന്നത് തടയാൻ വായു സഞ്ചാരത്തിനുള്ള ലിഫയർ.
5. ഓപ്പറേഷൻ
5.1 പ്രാരംഭ പവർ-അപ്പ്:
After all connections are made and verified, reconnect the vehicle's negative battery terminal. Turn on your head unit. The amplifier's power indicator light should illuminate, indicating it is receiving power and is operational.
5.2 Adjusting Controls:
Refer to Figure 3.3 for a visual guide to the control knobs.
- ഗെയിൻ: ഈ നിയന്ത്രണം പൊരുത്തപ്പെടുന്നു amplifier's input sensitivity to the output level of your head unit. Start with the gain set to minimum and slowly increase it until you achieve a clear, undistorted sound at your desired volume level. Avoid setting the gain too high, as this can lead to distortion.
- LPF (ലോ പാസ് ഫിൽട്ടർ): This filter allows frequencies below the set point to pass through to the speakers. It is typically used for subwoofers. The range is 50 - 250 Hz.
- HPF (ഹൈ പാസ് ഫിൽട്ടർ): This filter allows frequencies above the set point to pass through to the speakers. It is typically used for full-range speakers or tweeters. The range is 120 - 3000 Hz.
- ബാസ് ബൂസ്റ്റ്: This control provides an adjustable bass boost at 0, 6, or 12 dB. Use this feature sparingly to avoid distortion and potential speaker damage.
- ക്രോസ്ഓവർ: This switch selects the mode for the filters (LPF, HPF, or FULL).
6. പരിപാലനം
The Avatar ABR-460.4 amplifier requires minimal maintenance. Keep the amplifier clean and free from dust and debris. Periodically check all wiring connections to ensure they are secure and free from corrosion. Do not use harsh chemicals or abrasive cleaners on the amplifier's surface.
7. പ്രശ്നപരിഹാരം
നിങ്ങളുടെ ഉപകരണത്തിൽ പ്രശ്നങ്ങൾ അനുഭവപ്പെടുകയാണെങ്കിൽ amplifier, refer to the table below for common problems and their solutions:
| പ്രശ്നം | സാധ്യമായ കാരണം | പരിഹാരം |
|---|---|---|
| വൈദ്യുതിയില്ല / Ampലൈഫയർ ഓണാക്കുന്നില്ല | Blown fuse; Loose power or ground connection; No remote turn-on signal. | Check and replace fuses; Verify all power, ground, and remote connections are secure; Check head unit's remote output. |
| സൗണ്ട് ഔട്ട്പുട്ട് ഇല്ല | Loose RCA cables; Speaker wires disconnected; Amplifier in protection mode; Gain set too low. | Ensure RCA cables are securely connected; Check speaker wire connections; Check for short circuits in speaker wiring; Adjust gain setting. |
| വികലമായ ശബ്ദം | ഗെയിൻ സെറ്റ് വളരെ കൂടുതലാണ്; തെറ്റായ ക്രോസ്ഓവർ ക്രമീകരണങ്ങൾ; സ്പീക്കർ ഇംപെഡൻസ് പൊരുത്തക്കേട്; കേടായ സ്പീക്കറുകൾ. | Reduce gain setting; Adjust LPF/HPF settings; Verify speaker impedance matches amplifier's capabilities; Inspect speakers for damage. |
| Ampലൈഫയർ അമിതമായി ചൂടാക്കുന്നു | ആവശ്യത്തിന് വായുസഞ്ചാരമില്ല; സ്പീക്കർ ഇംപെഡൻസ് വളരെ കുറവാണ്; ദീർഘനേരം ഉയർന്ന ശബ്ദ ഉപയോഗം. | ചുറ്റും ആവശ്യത്തിന് വായുസഞ്ചാരം ഉറപ്പാക്കുക amplifier; Verify speaker impedance; Reduce volume or allow ampതണുപ്പിക്കാനുള്ള ലൈഫയർ. |
8 സാങ്കേതിക സവിശേഷതകൾ
| സ്പെസിഫിക്കേഷൻ | മൂല്യം |
|---|---|
| മോഡൽ | ABR-460.4 |
| ടൈപ്പ് ചെയ്യുക | Amplifier Class-AB |
| ചാനലുകളുടെ എണ്ണം | 4 |
| ഫ്രീക്വൻസി പ്രതികരണം | 10 - 20000 ഹെർട്സ് |
| 2 Ohm RMS Power (14.4 V) | 230W x 4 |
| 4 Ohm RMS Power (14.4 V) | 115W x 4 |
| 4 Ohm RMS Power (Bridge) | 460W x 2 |
| Minimum Permissible Load per Channel | 2 ഓം |
| Minimum Permissible Load in Bridge Connection | 4 ഓം |
| ഇൻപുട്ട് SPL | 0.2 - 6 വി |
| കുറഞ്ഞ പാസ് ഫിൽട്ടർ | 50 - 250 ഹെർട്സ് |
| ഉയർന്ന പാസ് ഫിൽട്ടർ | 120 - 3000 ഹെർട്സ് |
| ക്രോസ്ഓവർ ചരിവ് | 12 dB/ഒക്ടോ |
| ബാസ് ബൂസ്റ്റ് | 0/6/12 ഡിബി |
| Damping ഘടകം | ≥ 100 |
| വർക്കിംഗ് വോളിയംtage | 9 - 15 വി |
| സിഗ്നൽ-ടു-നോയിസ് അനുപാതം | ≥ 92 ഡിബി |
| ഇൻപുട്ട് ടെർമിനൽ കണക്ഷൻ | 6 AWG |
| ഔട്ട്പുട്ട് ടെർമിനൽ കണക്ഷൻ | 14 AWG |
| അളവുകൾ (WxLxH) | 14.9" x 8.6" x 1.9" |
| ഭാരം | 7.15 പൗണ്ട് |
9. വാറൻ്റിയും പിന്തുണയും
This Avatar ABR-460.4 amplifier is covered by a manufacturer's warranty against defects in materials and workmanship. Please refer to the warranty card included with your product for specific terms and conditions, or visit the official Avatar webവിശദമായ വാറന്റി വിവരങ്ങൾക്ക് സൈറ്റ്.
For technical support, troubleshooting assistance, or warranty claims, please contact Avatar customer service through their official website or authorized distributors. Keep your purchase receipt as proof of purchase for warranty service.


