1. ഉൽപ്പന്നം കഴിഞ്ഞുview
This manual provides detailed instructions for the installation and maintenance of the JAVIK Starter Clutch Kit and Flywheel Puller. This kit is designed as a replacement for specific Yamaha ATV models.
1.1 പാക്കേജ് ഉള്ളടക്കം
- Starter One-Way Assembly x 1
- Idler Gear 67T x 1
- സ്ക്രീൻ x 6
- ഗാസ്കറ്റ് x 1
- Flywheel Puller x 1
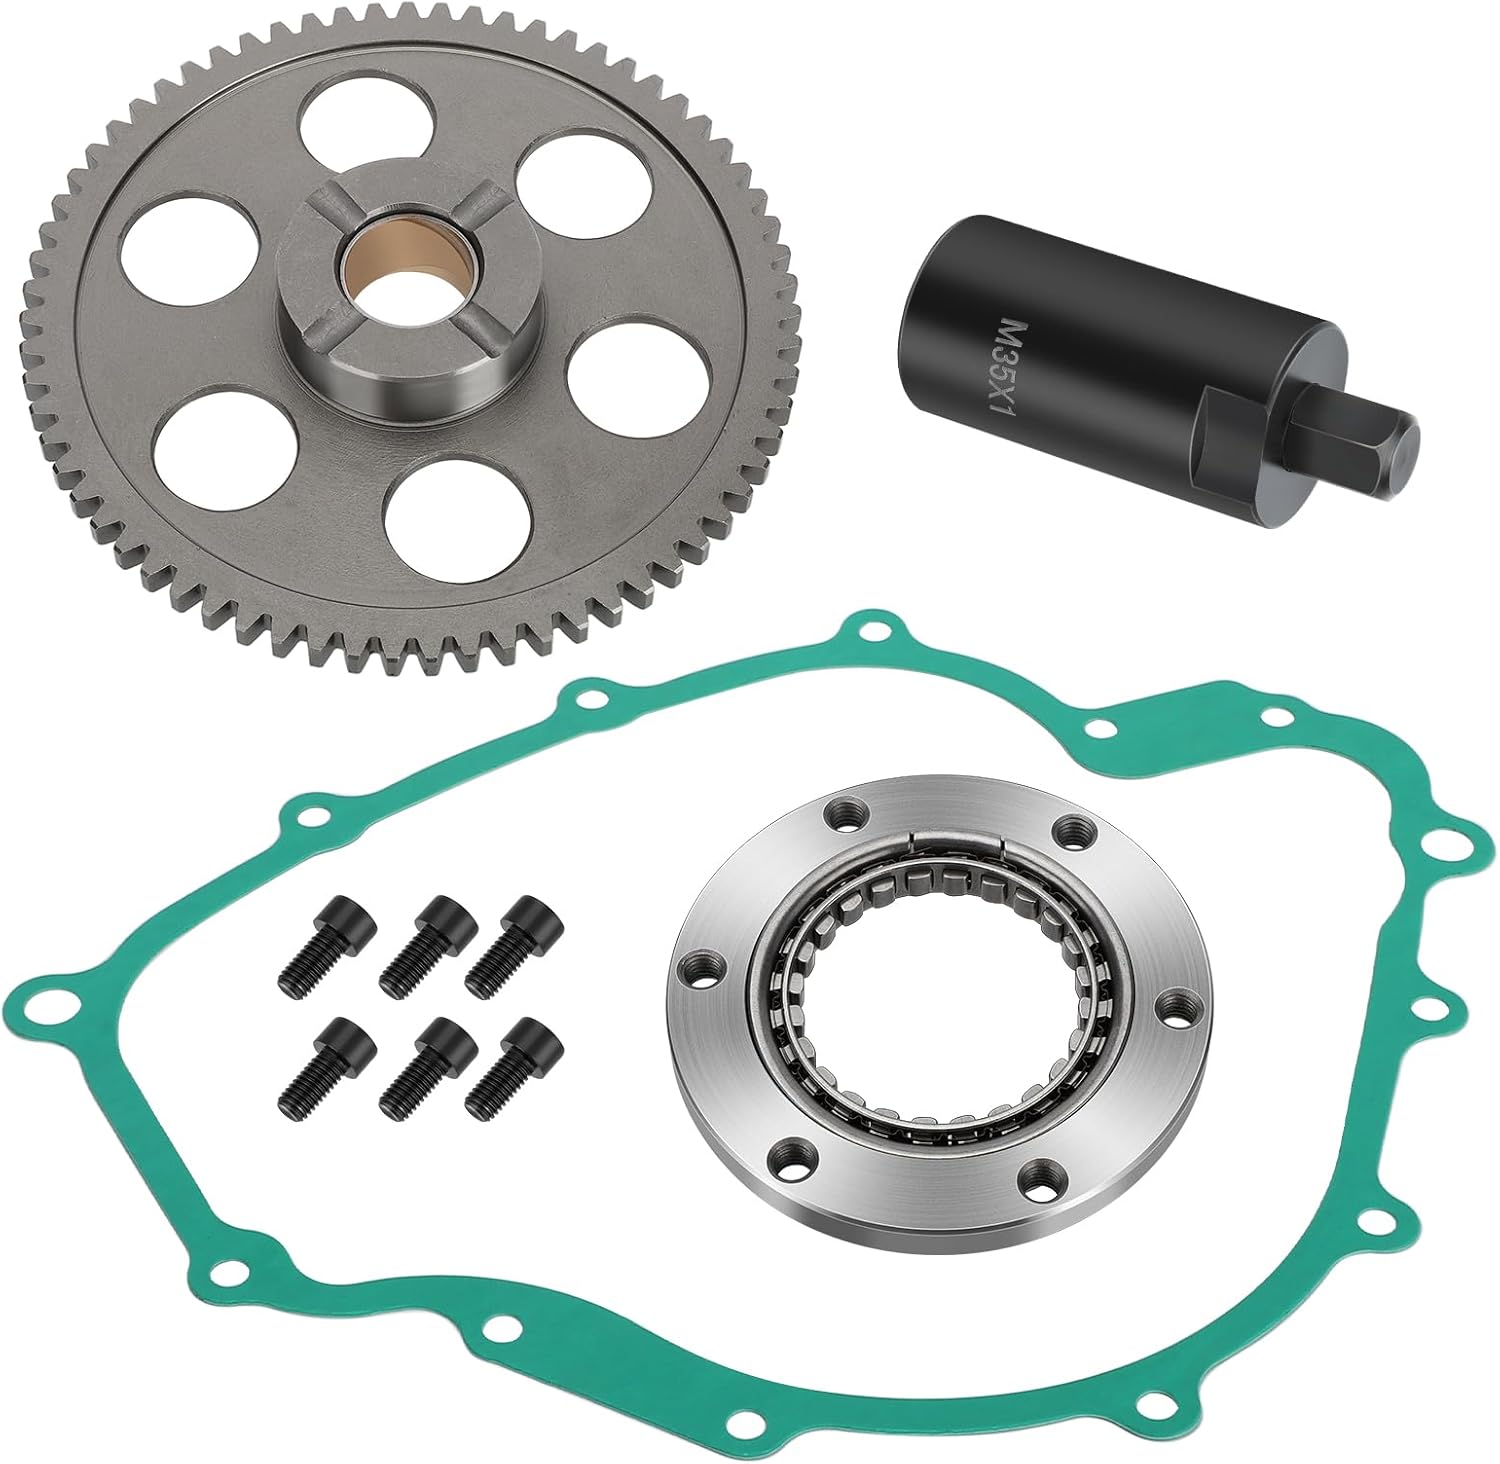
Image 1.1: Complete JAVIK Starter Clutch Kit including the one-way assembly, idler gear, screws, gasket, and flywheel puller.
1.2 അനുയോജ്യത
This kit is compatible with the following Yamaha ATV models:
- Yamaha Rhino 660 YXR66F (2004-2007)
- Yamaha Grizzly 660 YFM660F (2003-2008)
Refer to the OEM part numbers for cross-reference:
- Original OEM#: 5KM-15590-00-00, 5KM-15517-10-00, 5KM-15451-00-00
- Replacement OEM#: 5GH-15517-10-00, 1UY-15590-01-00, 1UY-15590-00-00
2 സുരക്ഷാ വിവരങ്ങൾ
Always prioritize safety when working on any vehicle. Improper installation can lead to serious injury or damage to the vehicle. If you are unsure about any step, consult a qualified mechanic.
- സുരക്ഷാ ഗ്ലാസുകൾ, കയ്യുറകൾ എന്നിവയുൾപ്പെടെ ഉചിതമായ വ്യക്തിഗത സംരക്ഷണ ഉപകരണങ്ങൾ (പിപിഇ) ധരിക്കുക.
- Ensure the vehicle is stable and securely supported before beginning work. Disconnect the battery to prevent accidental starting.
- ഓരോ ജോലിക്കും ശരിയായ ഉപകരണങ്ങൾ ഉപയോഗിക്കുക.
- ജോലിസ്ഥലം വൃത്തിയുള്ളതും നല്ല വെളിച്ചമുള്ളതുമായി സൂക്ഷിക്കുക.
- Dispose of old parts and fluids responsibly.
3. സജ്ജീകരണവും ഇൻസ്റ്റാളേഷൻ ഗൈഡും
This section outlines the general steps for installing the starter clutch kit. Specific procedures may vary slightly depending on your vehicle's exact configuration. It is highly recommended to consult your vehicle's service manual for detailed torque specifications and removal/installation sequences.
3.1 ആവശ്യമായ ഉപകരണങ്ങൾ (ഉൾപ്പെടുത്തിയിട്ടില്ല)
- സോക്കറ്റ് സെറ്റും റെഞ്ചുകളും
- ടോർക്ക് റെഞ്ച്
- ഗാസ്കറ്റ് സ്ക്രാപ്പർ
- എണ്ണ ചോർച്ച പാൻ
- New engine oil (if draining)
- Cleaning supplies (e.g., brake cleaner, rags)
3.2 ഇൻസ്റ്റലേഷൻ ഘട്ടങ്ങൾ
- തയ്യാറാക്കൽ: Park the ATV on a level surface. Ensure the engine is cool. Disconnect the negative battery terminal. Drain the engine oil if necessary, depending on the access required for the starter clutch.
- Remove Side Cover: Carefully remove the engine side cover that provides access to the starter clutch and flywheel. Be prepared for residual oil to drain.
- പഴയ ഗാസ്കറ്റ് നീക്കം ചെയ്യുക: Thoroughly clean the mating surfaces, removing all traces of the old gasket material. Ensure surfaces are smooth and free of debris.
- Flywheel Removal: Use the provided flywheel puller to safely remove the flywheel. Follow the instructions for the puller to avoid damage to the crankshaft or flywheel.

Image 3.1: The included flywheel puller, essential for safe flywheel removal.
- Starter Clutch and Idler Gear Removal: Once the flywheel is off, remove the old starter one-way assembly and idler gear. Note their orientation for correct reinstallation.
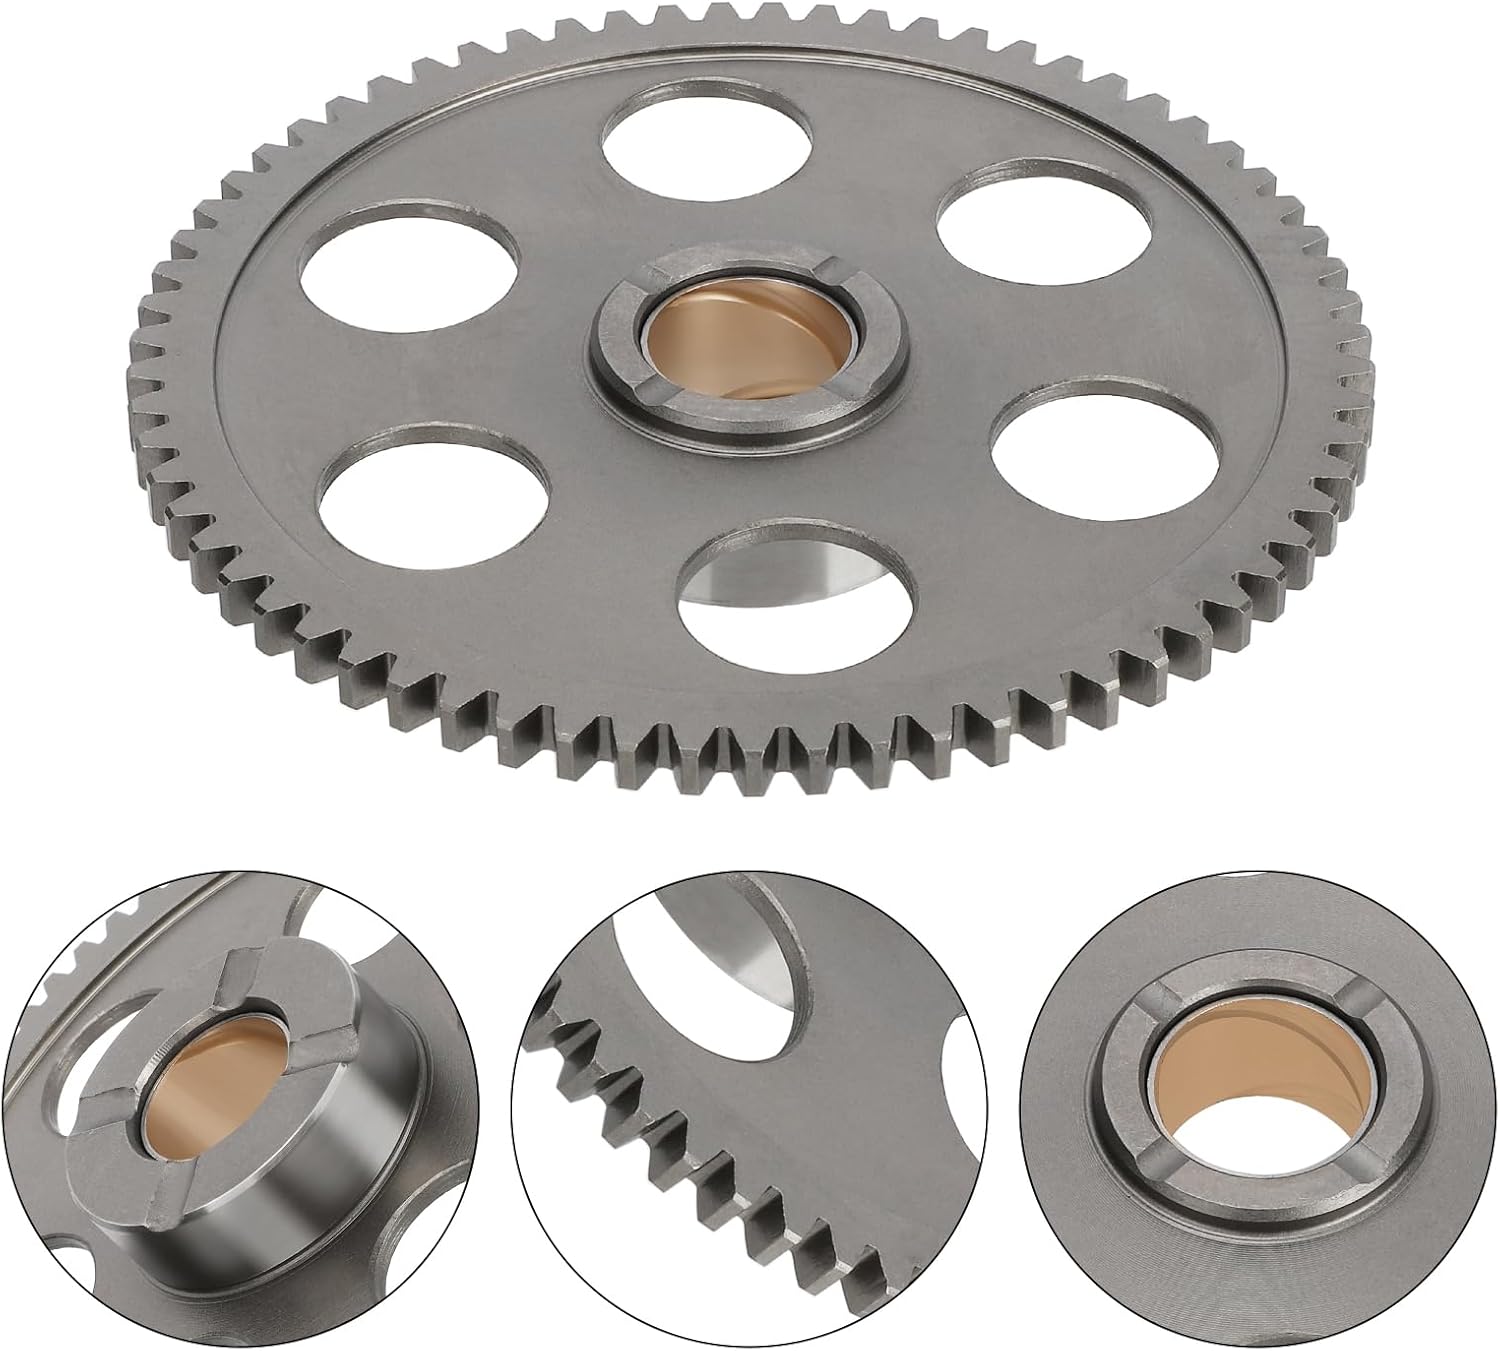
Image 3.2: The new 67T idler gear, part of the replacement kit.

Image 3.3: The JAVIK Starter One-Way Assembly, showing the bearing and housing.
- പുതിയ ഘടകങ്ങൾ ഇൻസ്റ്റാൾ ചെയ്യുക: Install the new JAVIK Starter One-Way Assembly and Idler Gear in the correct orientation. Ensure all components fit smoothly without force.
- ഫ്ലൈ വീൽ വീണ്ടും ഇൻസ്റ്റാൾ ചെയ്യുക: Carefully reinstall the flywheel. Ensure it seats correctly. Torque the flywheel nut to the manufacturer's specifications using a torque wrench.
- പുതിയ ഗാസ്കറ്റ് ഇൻസ്റ്റാൾ ചെയ്യുക: Place the new gasket onto the clean mating surface of the engine case. Ensure it is properly aligned.

Image 3.4: The replacement engine gasket, crucial for a proper seal.
Important Gasket Note: The gasket should be fixed with appropriate tension – neither too tight nor too loose. Incorrect tension can compromise the gasket's sealing efficiency and lead to leaks.
- Reinstall Side Cover: Carefully place the side cover back onto the engine, aligning it with the gasket and mounting holes. Install the six new screws provided in the kit. Tighten the screws evenly and to the manufacturer's specified torque.
- Refill Oil and Reconnect Battery: If engine oil was drained, refill it to the correct level with the recommended type of oil. Reconnect the negative battery terminal.
Video 3.1: A short demonstration showing the components of a starter clutch kit, including the flywheel puller, starter one-way assembly, and idler gear. This video provides a visual reference for the parts involved in the installation process.
4. പോസ്റ്റ്-ഇൻസ്റ്റലേഷൻ പരിശോധനകൾ
After completing the installation, perform the following checks before operating the vehicle:
- ദ്രാവക നിലകൾ: Verify engine oil level is correct. Check for any leaks around the newly installed gasket and side cover.
- ബാറ്ററി കണക്ഷൻ: ബാറ്ററി ടെർമിനലുകൾ സുരക്ഷിതമായി ബന്ധിപ്പിച്ചിട്ടുണ്ടെന്ന് ഉറപ്പാക്കുക.
- പ്രാരംഭ തുടക്കം: Start the engine and listen for any unusual noises. Allow the engine to idle for a few minutes, checking for proper operation and any warning lights.
- Test Ride: Perform a short, controlled test ride in a safe area to confirm proper starting and engine function.
5. പരിപാലനം
Proper maintenance extends the life of your starter clutch and related components:
- പതിവ് എണ്ണ മാറ്റങ്ങൾ: Ensure engine oil is changed according to the vehicle manufacturer's recommendations. Clean, fresh oil is vital for the proper lubrication and function of the starter clutch.
- ബാറ്ററി ആരോഗ്യം: Maintain a healthy battery. A weak battery can put excessive strain on the starter motor and clutch.
- ചോർച്ചകൾ പരിശോധിക്കുക: Periodically check the engine side cover area for any oil leaks, which could indicate a gasket issue.
6. പ്രശ്നപരിഹാരം
ഇൻസ്റ്റാളേഷന് ശേഷം നിങ്ങൾക്ക് പ്രശ്നങ്ങൾ നേരിടുകയാണെങ്കിൽ, ഇനിപ്പറയുന്ന പൊതുവായ പ്രശ്നങ്ങളും പരിഹാരങ്ങളും പരിഗണിക്കുക:
- എഞ്ചിൻ ക്രാങ്കുകൾ പക്ഷേ സ്റ്റാർട്ട് ആകുന്നില്ല:
- Check fuel supply and ignition system.
- Ensure battery is fully charged and connections are secure.
- Starter Motor Spins but Engine Does Not Crank (Freewheeling):
- This often indicates a problem with the starter one-way clutch. Re-check installation of the one-way assembly.
- Verify the idler gear is correctly engaged.
- Oil Leak from Side Cover:
- The gasket may be improperly seated or damaged. Ensure the mating surfaces were clean before installation.
- Check that the side cover screws are torqued correctly and evenly.
- Unusual Noises During Starting:
- Could indicate improper gear mesh or a loose component. Re-inspect the installation of the idler gear and starter clutch assembly.
For persistent issues, it is recommended to seek professional assistance.
7 സ്പെസിഫിക്കേഷനുകൾ
| ഘടകം | വിശദാംശങ്ങൾ |
|---|---|
| ബ്രാൻഡ് | JAVIK |
| നിർമ്മാതാവിൻ്റെ ഭാഗം നമ്പർ | 5KM155171000, 5KM155900000, 5KM154510000 |
| ഇനത്തിൻ്റെ ഭാരം | 4.43 പൗണ്ട് |
| പാക്കേജ് അളവുകൾ | 14.57 x 10.24 x 1.97 ഇഞ്ച് |
| മെറ്റീരിയൽ | പ്രീമിയം മെറ്റൽ |
| ഫിറ്റ്മെൻ്റ് | Yamaha Rhino 660 YXR66F (2004-2007), Yamaha Grizzly 660 YFM660F (2003-2008) |
8. വാറൻ്റിയും പിന്തുണയും
JAVIK offers a 1-year warranty on this product. For any questions, concerns, or assistance with installation or troubleshooting, please contact JAVIK customer service. They provide 24-hour customer support.
You can typically find contact information through the retailer where the product was purchased or by visiting the official JAVIK store page on Amazon: JAVIK Store