1. ആമുഖം
Thank you for choosing the AZZA CSAZ-290 Fighter Mid-Tower Computer Case. This manual provides detailed instructions for the installation, operation, and maintenance of your new computer case. Please read this manual thoroughly before beginning installation to ensure proper setup and optimal performance.
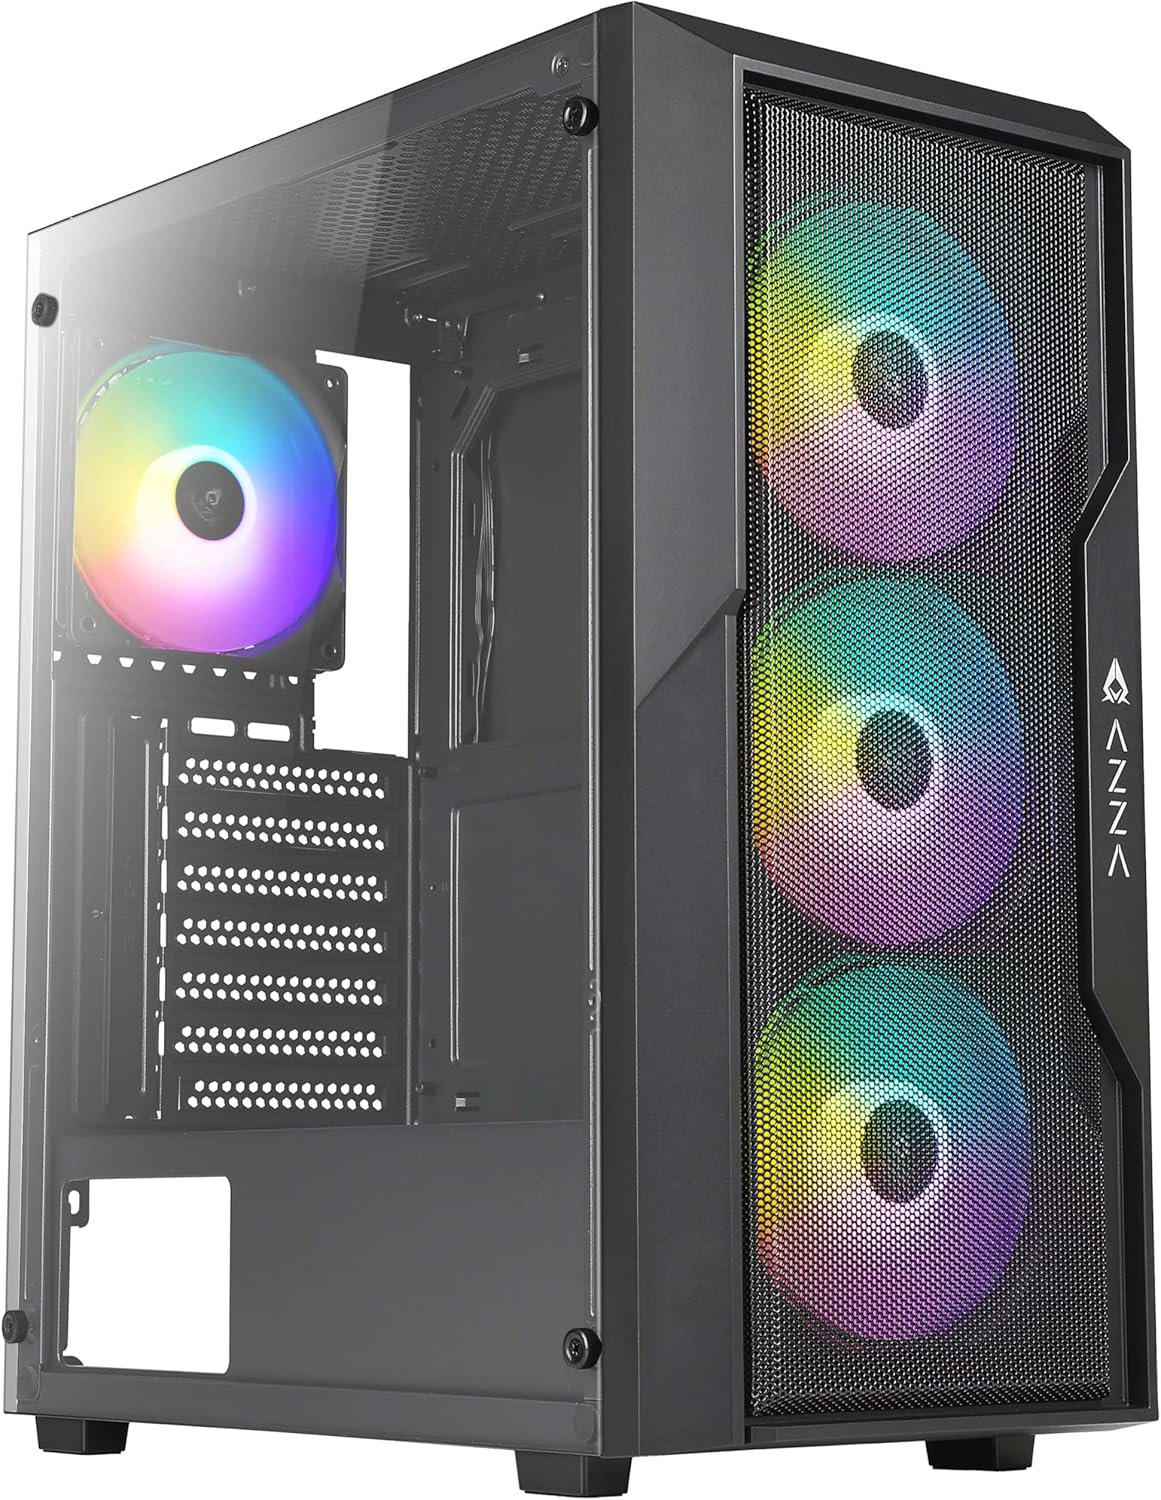
ചിത്രം 1: മുൻവശം view of the AZZA CSAZ-290 Fighter Mid-Tower Computer Case, showcasing the tempered glass side panel and the three pre-installed addressable RGB fans on the mesh front panel.
2 പ്രധാന സവിശേഷതകൾ
The AZZA CSAZ-290 is designed for performance and aesthetics, offering a robust platform for your gaming or high-performance PC build. Key features include:
- Performance Optimized Airflow: Full mesh front panel with three pre-installed 120mm addressable RGB fans for excellent airflow.
- Multifaceted Airflow Support: Supports up to 8 x 120mm fans, including options for direct GPU airflow.
- ഇഷ്ടാനുസൃതമാക്കാവുന്ന RGB ലൈറ്റിംഗ്: Controllable fan lighting via a top panel LED button, with motherboard RGB software synchronization support.
- Intuitive I/O Panel: Conveniently located top panel with Power button, LED button, Combo HD Audio, and USB 3.0 x 2 ports.
- ടെമ്പർഡ് ഗ്ലാസ് സൈഡ് പാനൽ: വ്യക്തത നൽകുന്നു view ആന്തരിക ഘടകങ്ങളുടെ.
- വിശാലമായ അനുയോജ്യത: Supports ATX, Micro ATX, and Mini ITX motherboards, with ample space for CPU coolers and GPUs.

ചിത്രം 2: ക്ലോസ്-അപ്പ് ഫ്രണ്ട് view of the case, emphasizing the full mesh design and the vibrant illumination of the three 120mm addressable RGB fans.
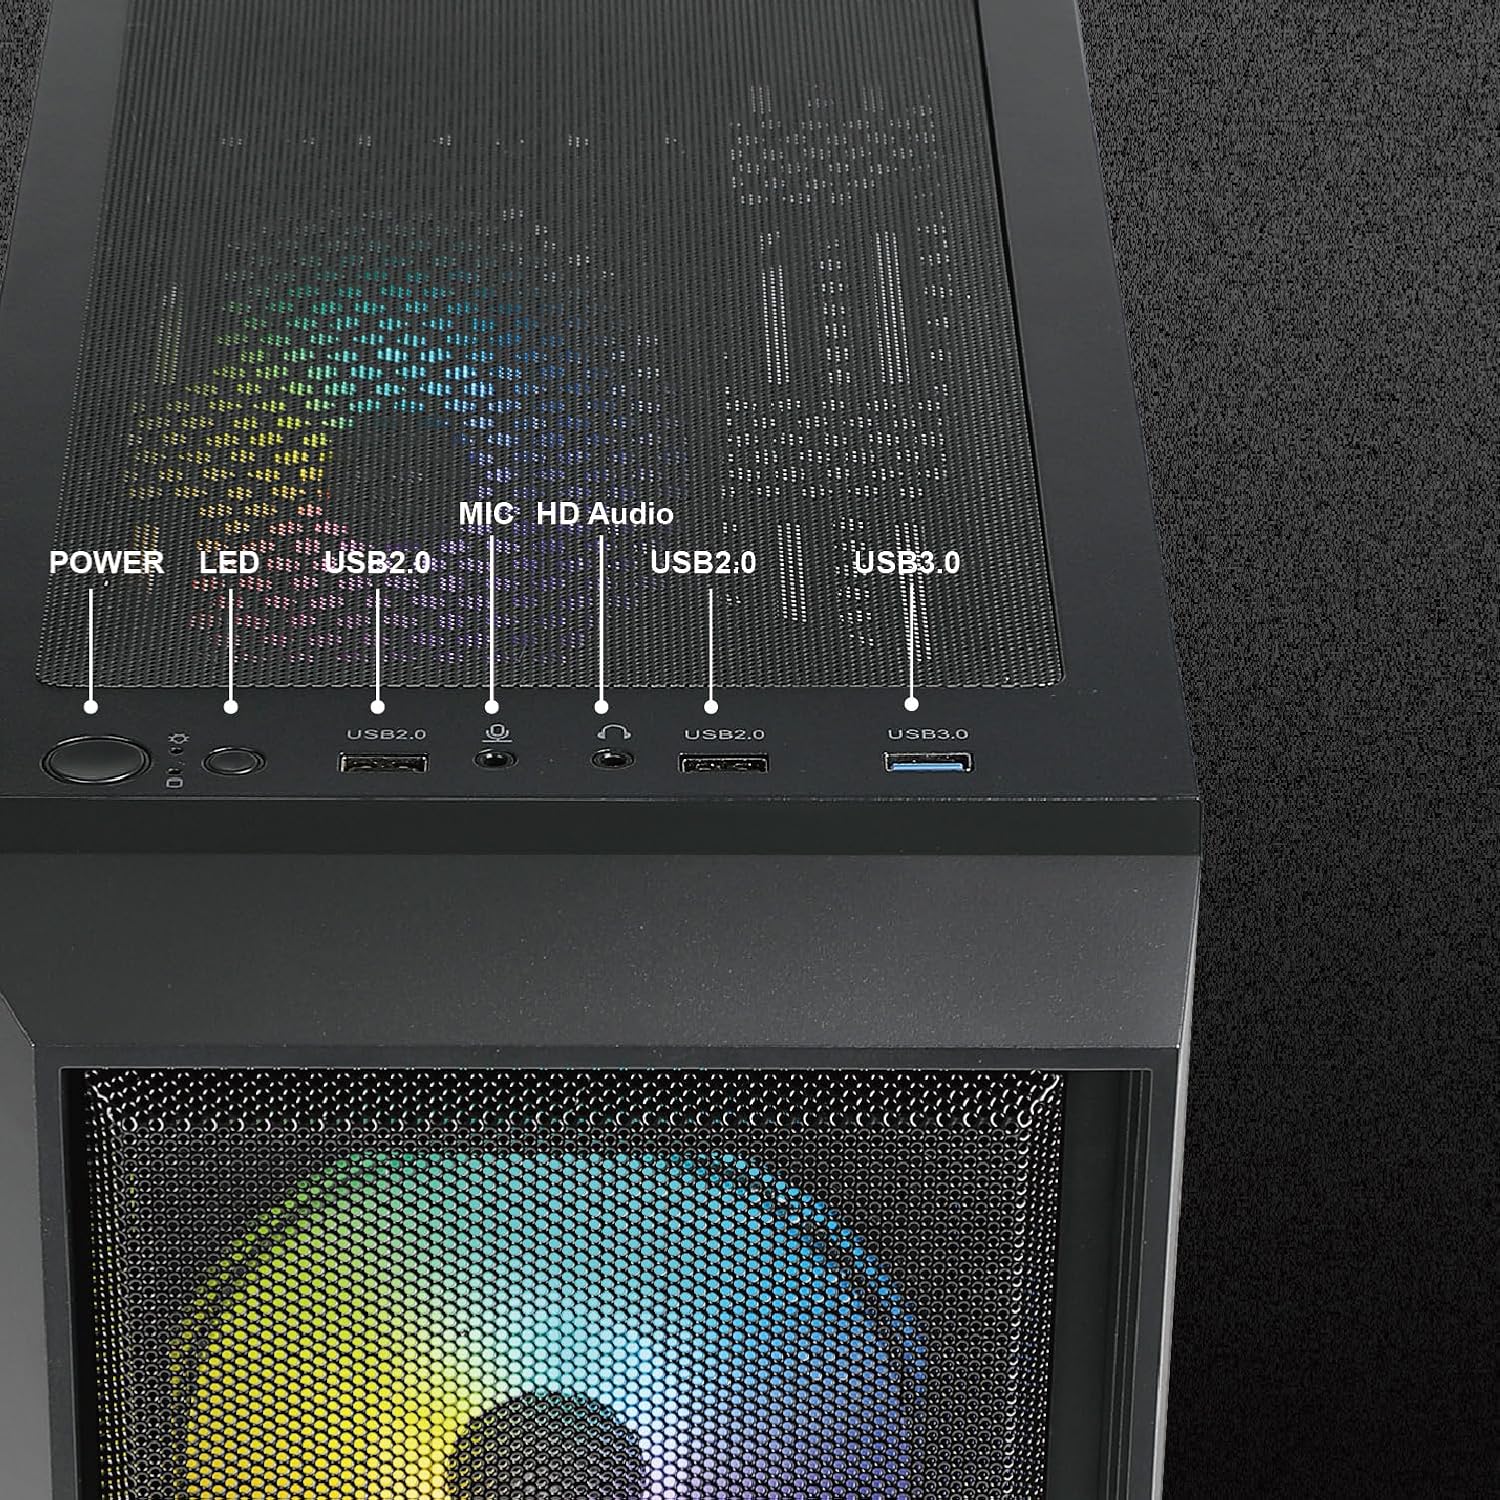
ചിത്രം 3: വിശദമായി view of the top I/O panel, illustrating the Power button, LED button for RGB control, USB 2.0 ports, HD Audio jack, and USB 3.0 ports.
3 സാങ്കേതിക സവിശേഷതകൾ
| ഫീച്ചർ | സ്പെസിഫിക്കേഷൻ |
|---|---|
| മോഡലിൻ്റെ പേര് | CSAZ-290 |
| കേസ് തരം | മിഡ് ടവർ |
| നിറം | കറുപ്പ് |
| മെറ്റീരിയൽ | ടെമ്പർഡ് ഗ്ലാസ്, പ്ലാസ്റ്റിക് |
| അളവുകൾ (L x W x H) | 15.4 x 7.7 x 17.7 ഇഞ്ച് (390 x 195 x 450 മിമി) |
| ഇനത്തിൻ്റെ ഭാരം | 13.2 പൗണ്ട് |
| മദർബോർഡ് അനുയോജ്യത | എടിഎക്സ്, മൈക്രോ എടിഎക്സ്, മിനി ഐടിഎക്സ് |
| വിപുലീകരണ സ്ലോട്ടുകൾ | 7 |
| I/O പോർട്ടുകൾ | 2 x USB 3.0, HD Audio, Mic, Power Button, LED Button |
| മുൻകൂട്ടി ഇൻസ്റ്റാൾ ചെയ്ത ഫാനുകൾ | 3 x 120mm ARGB (Front) |
| പരമാവധി ആരാധക പിന്തുണ | 8 x 120mm വരെ ഫാനുകൾ |
| റേഡിയേറ്റർ പിന്തുണ | മുൻവശം: 360 മിമി വരെ |
| പരമാവധി സിപിയു കൂളർ ഉയരം | 155 മി.മീ |
| പരമാവധി GPU ദൈർഘ്യം | 320 മി.മീ |
| പവർ സപ്ലൈ മൗണ്ടിംഗ് | താഴെയുള്ള മൗണ്ട് |

ചിത്രം 4: ഡൈമൻഷണൽ ഓവർview of the AZZA CSAZ-290 case, indicating its length (390mm), width (195mm), and height (450mm).
4. സജ്ജീകരണവും ഇൻസ്റ്റാളേഷനും
Before beginning installation, ensure you have all necessary components and tools. Always handle components with care and follow anti-static precautions.
4.1 കേസ് തയ്യാറാക്കൽ
- കേസ് ശ്രദ്ധാപൂർവ്വം അൺപാക്ക് ചെയ്ത് എല്ലാ പാക്കേജിംഗ് വസ്തുക്കളും നീക്കം ചെയ്യുക.
- Locate the accessory box inside the case, which contains screws, zip ties, and other small parts.
- Remove the tempered glass side panel by unscrewing the thumb screws. Set it aside on a soft, flat surface to prevent scratches.
4.2 മദർബോർഡ് ഇൻസ്റ്റാളേഷൻ
- Identify the correct standoff positions for your ATX, Micro ATX, or Mini ITX motherboard. The case comes with pre-installed standoffs for standard ATX.
- Install any additional standoffs required for your motherboard form factor.
- സ്ക്രൂ ദ്വാരങ്ങൾ വിന്യസിച്ചുകൊണ്ട്, നിങ്ങളുടെ മദർബോർഡ് സ്റ്റാൻഡ്ഓഫുകളിൽ ശ്രദ്ധാപൂർവ്വം വയ്ക്കുക.
- നൽകിയിരിക്കുന്ന സ്ക്രൂകൾ ഉപയോഗിച്ച് മദർബോർഡ് സുരക്ഷിതമാക്കുക.

Figure 5: Internal layout indicating compatibility zones for Motherboard (A), maximum CPU Cooler Height (B - 155mm), and maximum GPU Length (C - 320mm).
4.3 സ്റ്റോറേജ് ഡിവൈസ് ഇൻസ്റ്റലേഷൻ
The case offers flexible storage options for 3.5" HDDs and 2.5" SSDs.
- 3.5" HDD / 2.5" SSD (Cage): Install drives into the multifunctional hard disk cage located under the PSU shroud.
- 3.5" HDD (Bracket): Utilize the multifunctional hard disk bracket for additional 3.5" HDD installation.
- 2.5" SSD (Hole Support): Mount 2.5" SSDs directly onto the dedicated holes on the motherboard tray.

Figure 6: Illustration of flexible storage options, showing locations for 3.5" HDD (A), 3.5" HDD or 2.5" SSD (B), and 2.5" SSD x2 (C).
4.4 പവർ സപ്ലൈ ഇൻസ്റ്റലേഷൻ
The power supply mounts at the bottom of the case.
- Slide the power supply into its designated compartment from the rear of the case.
- Secure the power supply with screws from the rear.
4.5 ഫാൻ, റേഡിയേറ്റർ ഇൻസ്റ്റാളേഷൻ
The case supports extensive cooling configurations.
- മുൻഭാഗം: Supports 3 x 120mm fans (pre-installed) or up to a 360mm radiator.
- പിൻഭാഗം: Supports 1 x 120mm fan.
- മുകളിൽ: 2 x 120mm അല്ലെങ്കിൽ 2 x 140mm ഫാനുകൾ പിന്തുണയ്ക്കുന്നു.
- PSU ആവരണം: Supports 2 x 120mm fans for direct GPU airflow.

Figure 7: Depiction of the massive cooling potential, showing support for up to a 360mm radiator in the front.

ചിത്രം 8: ഓവർview of ultimate thermal performance, illustrating fan support locations: 3x120mm front, 1x120mm rear, 2x120mm/140mm top, and 2x120mm above PSU shroud, totaling up to 8 fans.
5. പ്രവർത്തന നിർദ്ദേശങ്ങൾ
5.1 പവർ ചെയ്യുന്നു
After all components are installed and cables are connected, press the Power button on the top I/O panel to turn on your system.
5.2 Controlling RGB Lighting
മുൻകൂട്ടി ഇൻസ്റ്റാൾ ചെയ്ത ARGB ഫാനുകൾ രണ്ട് തരത്തിൽ നിയന്ത്രിക്കാം:
- LED ബട്ടൺ: Press the LED button on the top I/O panel to cycle through various pre-set lighting modes and effects.
- Motherboard Software Synchronization: If your motherboard supports Addressable RGB (ARGB) synchronization, connect the case's ARGB cable to the appropriate header on your motherboard. You can then use your motherboard's RGB software (e.g., ASUS Aura Sync, MSI Mystic Light Sync, GIGABYTE RGB Fusion) to control and synchronize the fan lighting directly.
6. പരിപാലനം
Regular maintenance helps ensure optimal performance and longevity of your computer case.
- പൊടി ഫിൽട്ടറുകൾ: The AZZA CSAZ-290 features dust filters on the top and bottom. Regularly remove and clean these filters to maintain good airflow and prevent dust buildup inside the case.
- കേസ് വൃത്തിയാക്കൽ: ഒരു സോഫ്റ്റ് ഉപയോഗിക്കുക, ഡിamp cloth to wipe down the exterior of the case. For the tempered glass panel, use a glass cleaner and a microfiber cloth to avoid streaks.
- Internal Dust: Periodically use compressed air to blow out dust from inside the case, especially from fan blades and heatsinks. Ensure the system is powered off and unplugged before performing internal cleaning.
7. പ്രശ്നപരിഹാരം
നിങ്ങൾ നേരിട്ടേക്കാവുന്ന പൊതുവായ പ്രശ്നങ്ങളെ ഈ വിഭാഗം അഭിസംബോധന ചെയ്യുന്നു.
7.1 സിസ്റ്റം ഓണാകുന്നില്ല
- പവർ കേബിൾ: Ensure the power supply unit (PSU) is properly connected to the wall outlet and the PSU switch is in the 'ON' position.
- ഫ്രണ്ട് പാനൽ കണക്ടറുകൾ: Verify that the power button cable from the case's front panel is correctly connected to the motherboard's front panel header (usually labeled F_PANEL or similar). Refer to your motherboard manual for exact pinouts.
- പൊതുമേഖലാ സ്ഥാപന പ്രവർത്തനം: Test the PSU independently if possible, or try a known working PSU.
7.2 RGB Fans Not Lighting Up or Responding
- പവർ കണക്ഷൻ: Ensure the fans' power cables are securely connected to the fan headers on the motherboard or a fan controller.
- ARGB കണക്ഷൻ: Verify that the ARGB cables from the fans are correctly connected to the motherboard's 3-pin 5V ARGB header (not 4-pin 12V RGB header).
- LED ബട്ടൺ: If using the case's LED button, ensure it is functioning and cycle through modes.
- സോഫ്റ്റ്വെയർ വൈരുദ്ധ്യം: If using motherboard software, ensure no other RGB software is running that might conflict. Reinstall or update the motherboard's RGB software.
7.3 Poor Airflow or Overheating
- പൊടിപടലങ്ങൾ: മെയിന്റനൻസ് വിഭാഗത്തിൽ വിവരിച്ചിരിക്കുന്നതുപോലെ പൊടി ഫിൽട്ടറുകളും ആന്തരിക ഘടകങ്ങളും വൃത്തിയാക്കുക.
- ഫാൻ ഓറിയന്റേഷൻ: Ensure fans are oriented correctly for optimal airflow (front fans typically intake, rear/top fans exhaust).
- കേബിൾ മാനേജുമെന്റ്: Poor cable management can obstruct airflow. Reroute cables behind the motherboard tray where possible.
- അധിക ആരാധകർ: Consider installing additional fans in available slots, especially above the PSU shroud for GPU cooling.
8. വാറൻ്റിയും പിന്തുണയും
AZZA products are manufactured to the highest quality standards. For specific warranty terms and conditions, please refer to the warranty information provided with your purchase or visit the official AZZA webസൈറ്റ്. വാറന്റി ക്ലെയിമുകൾക്കായി നിങ്ങളുടെ വാങ്ങലിന്റെ തെളിവ് സൂക്ഷിക്കുക.
For technical support or further assistance, please contact AZZA customer service through their official website or the retailer where you purchased the product. When contacting support, please have your product model (CSAZ-290) and purchase details ready.


