JACK A4B Computerized Sewing Machine User Manual
മോഡൽ: A4B
ആമുഖം
This manual provides comprehensive instructions for the safe and efficient operation, setup, and maintenance of your JACK A4B Computerized Sewing Machine. Please read this manual thoroughly before using the machine to ensure proper function and to prevent damage or injury. Keep this manual accessible for future reference.
പ്രധാനപ്പെട്ട സുരക്ഷാ നിർദ്ദേശങ്ങൾ
ഒരു ഇലക്ട്രിക്കൽ ഉപകരണം ഉപയോഗിക്കുമ്പോൾ, ഇനിപ്പറയുന്നവ ഉൾപ്പെടെ അടിസ്ഥാന സുരക്ഷാ മുൻകരുതലുകൾ എല്ലായ്പ്പോഴും പാലിക്കണം:
- ഈ തയ്യൽ മെഷീൻ ഉപയോഗിക്കുന്നതിന് മുമ്പ് എല്ലാ നിർദ്ദേശങ്ങളും വായിക്കുക.
- ചലിക്കുന്ന എല്ലാ ഭാഗങ്ങളിൽ നിന്നും വിരലുകൾ അകറ്റി നിർത്തുക. തയ്യൽ മെഷീൻ സൂചിക്ക് ചുറ്റും പ്രത്യേക ശ്രദ്ധ ആവശ്യമാണ്.
- എല്ലായ്പ്പോഴും ശരിയായ സൂചി പ്ലേറ്റ് ഉപയോഗിക്കുക. തെറ്റായ പ്ലേറ്റ് സൂചി തകരാൻ കാരണമാകും.
- വളഞ്ഞ സൂചികൾ ഉപയോഗിക്കരുത്.
- തുന്നുമ്പോൾ തുണി വലിക്കുകയോ തള്ളുകയോ ചെയ്യരുത്. ഇത് സൂചിയെ വഴിതിരിച്ചുവിടുകയും അത് പൊട്ടിപ്പോകാൻ കാരണമാവുകയും ചെയ്യും.
- Switch the sewing machine off when making any adjustments in the needle area, such as threading the needle, changing the needle, threading the bobbin, or changing the presser foot.
- കവറുകൾ നീക്കംചെയ്യുമ്പോഴോ ലൂബ്രിക്കേറ്റുചെയ്യുമ്പോഴോ ഇൻസ്ട്രക്ഷൻ മാനുവലിൽ പറഞ്ഞിരിക്കുന്ന മറ്റേതെങ്കിലും ഉപയോക്തൃ സേവന ക്രമീകരണങ്ങൾ നടത്തുമ്പോഴോ എല്ലായ്പ്പോഴും തയ്യൽ മെഷീൻ ഇലക്ട്രിക്കൽ ഔട്ട്ലെറ്റിൽ നിന്ന് അൺപ്ലഗ് ചെയ്യുക.
- ഒരു തുറസ്സിലും ഒരു വസ്തുവും ഇടുകയോ തിരുകുകയോ ചെയ്യരുത്.
- വെളിയിൽ ഉപയോഗിക്കരുത്.
- എയറോസോൾ (സ്പ്രേ) ഉൽപ്പന്നങ്ങൾ ഉപയോഗിക്കുന്നിടത്തോ ഓക്സിജൻ നൽകുന്നിടത്തോ പ്രവർത്തിക്കരുത്.
പാക്കേജ് ഉള്ളടക്കം
താഴെ ലിസ്റ്റ് ചെയ്തിരിക്കുന്ന എല്ലാ ഇനങ്ങളും നിങ്ങളുടെ പാക്കേജിൽ ഉൾപ്പെടുത്തിയിട്ടുണ്ടെന്ന് ഉറപ്പാക്കുക:
- തയ്യൽ മെഷീൻ
- ഉപയോക്തൃ മാനുവൽ
- പവർ കോർഡ്

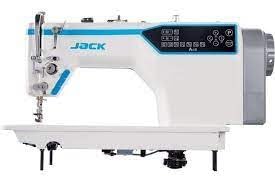
Image: The main unit of the JACK A4B Computerized Sewing Machine, showing its white and blue design with control panel.
സജ്ജീകരണ നിർദ്ദേശങ്ങൾ
- അൺപാക്ക് ചെയ്യുന്നു: Carefully remove the sewing machine and all accessories from the packaging. Retain packaging for future transport or storage.
- പ്ലേസ്മെൻ്റ്: Place the machine on a stable, flat surface. Ensure there is adequate space around the machine for comfortable operation.
- പവർ കണക്ഷൻ: Connect the provided power cord to the machine's power input and then to a suitable electrical outlet. Ensure the power switch is in the OFF position before connecting.
- Foot Pedal (if applicable): Connect the foot pedal to its designated port on the machine.
- പ്രാരംഭ ത്രെഡിംഗ്: Refer to the threading diagrams (not provided in this text, but would be in a full manual) for proper upper thread and bobbin threading.

ചിത്രം: ഒരു വശം view of the JACK A4B sewing machine, highlighting its robust construction and design.
യന്ത്രം പ്രവർത്തിപ്പിക്കുന്നു
The JACK A4B is designed for ease of use, offering a range of features to enhance your sewing experience.
പ്രധാന സവിശേഷതകൾ:
- ബഹുമുഖം: Suitable for a wide range of projects.
- ഉപയോക്തൃ സൗഹൃദ നിയന്ത്രണങ്ങൾ: Intuitive control panel with easy-to-use dials and buttons.
- ക്രമീകരിക്കാവുന്ന തുന്നൽ നീളവും വീതിയും: Customize stitch settings for various fabrics and projects.
- ഓട്ടോമാറ്റിക് നീഡിൽ ത്രെഡർ: ത്രെഡിംഗ് പ്രക്രിയ ലളിതമാക്കുന്നു, സമയവും പരിശ്രമവും ലാഭിക്കുന്നു.
അടിസ്ഥാന പ്രവർത്തനം:
- പവർ ഓൺ: Flip the power switch to the ON position. The control panel will illuminate.
- തുന്നൽ തിരഞ്ഞെടുക്കുക: Use the control panel buttons to select your desired stitch pattern. Refer to the display for current stitch settings.
- ക്രമീകരണങ്ങൾ ക്രമീകരിക്കുക: Modify stitch length and width as needed using the dedicated controls.
- തയ്യൽ ആരംഭിക്കുക: Place your fabric under the presser foot. Lower the presser foot lever. Gently press the foot pedal to begin sewing.
- Stop Sewing: Release the foot pedal to stop. Raise the presser foot lever and remove your fabric.

ചിത്രം: വിശദമായ ഒരു ചിത്രം view of the control panel and needle area of the JACK A4B, showing the digital display and buttons for stitch selection and adjustments.
പരിപാലനവും പരിചരണവും
പതിവ് അറ്റകുറ്റപ്പണികൾ നിങ്ങളുടെ തയ്യൽ മെഷീനിന്റെ ദീർഘായുസ്സും മികച്ച പ്രകടനവും ഉറപ്പാക്കുന്നു.
- വൃത്തിയാക്കൽ: Regularly clean lint and dust from the bobbin case, feed dogs, and tension discs using a small brush or vacuum cleaner. Always unplug the machine before cleaning.
- എണ്ണയിടൽ: Refer to the machine's specific oiling points (if indicated in a full manual) and apply a small amount of sewing machine oil as recommended.
- സൂചി മാറ്റിസ്ഥാപിക്കൽ: Change the needle frequently, especially when working with different fabrics or if the needle shows signs of wear or bending.
- സംഭരണം: When not in use, cover the machine to protect it from dust. Store in a dry, cool place.
ചിത്രം: ഒരു മുൻഭാഗം view of the JACK A4B sewing machine, illustrating its compact and functional design.
പ്രശ്ന പരിഹാരത്തിന് സഹായിക്കുന്ന മാർഗധർശി
നിങ്ങൾ നേരിട്ടേക്കാവുന്ന സാധാരണ പ്രശ്നങ്ങളെ ഈ വിഭാഗം അഭിസംബോധന ചെയ്യുന്നു. കൂടുതൽ സങ്കീർണ്ണമായ പ്രശ്നങ്ങൾക്ക്, ദയവായി ഉപഭോക്തൃ പിന്തുണയുമായി ബന്ധപ്പെടുക.
| പ്രശ്നം | സാധ്യമായ കാരണം | പരിഹാരം |
|---|---|---|
| മെഷീൻ ആരംഭിക്കുന്നില്ല | Power cord not connected; Power switch off; Foot pedal not connected. | Check power connections; Ensure switch is ON; Connect foot pedal securely. |
| തുന്നലുകൾ ഒഴിവാക്കി | Incorrect needle; Bent needle; Improper threading; Fabric too thick/thin. | Use correct needle type/size; Replace needle; Re-thread machine; Adjust tension or use appropriate needle/foot. |
| നൂൽ പൊട്ടൽ | Improper threading; Incorrect tension; Damaged needle; Poor quality thread. | Re-thread machine; Adjust tension; Replace needle; Use good quality thread. |
| തുണി ഊരുന്നില്ല | Presser foot not lowered; Feed dogs obstructed; Stitch length set to zero. | Lower presser foot; Clean feed dogs; Adjust stitch length. |
ഉൽപ്പന്ന സവിശേഷതകൾ
| ഫീച്ചർ | വിശദാംശങ്ങൾ |
|---|---|
| ബ്രാൻഡ് | ജാക്ക് |
| മോഡൽ നമ്പർ | A4B |
| ടൈപ്പ് ചെയ്യുക | കമ്പ്യൂട്ടറൈസ്ഡ് തയ്യൽ മെഷീൻ |
| ഇനത്തിൻ്റെ ഭാരം | 30 കി.ഗ്രാം |
| ഉൽപ്പന്ന അളവുകൾ | 30D x 50W x 35H സെന്റീമീറ്ററുകൾ |
| നിറം | White And Blue |
| നിർമ്മാണ വർഷം | 2023 |
| ഉൾപ്പെടുത്തിയ ഘടകങ്ങൾ | Power Cord, Sewing Machine, User Manual |
വാറൻ്റിയും പിന്തുണയും
For warranty information and customer support, please refer to the documentation provided with your purchase or contact the manufacturer directly. Keep your proof of purchase for any warranty claims.


