1. ഉൽപ്പന്നം കഴിഞ്ഞുview
This manual provides instructions for the installation and maintenance of the Hooke Road Flux Tube Fender Flares Kit, designed specifically for Jeep Gladiator JT models from 2020 to 2025. These fender flares are engineered to enhance vehicle protection and appearance, offering increased tire clearance and defense against trail debris.
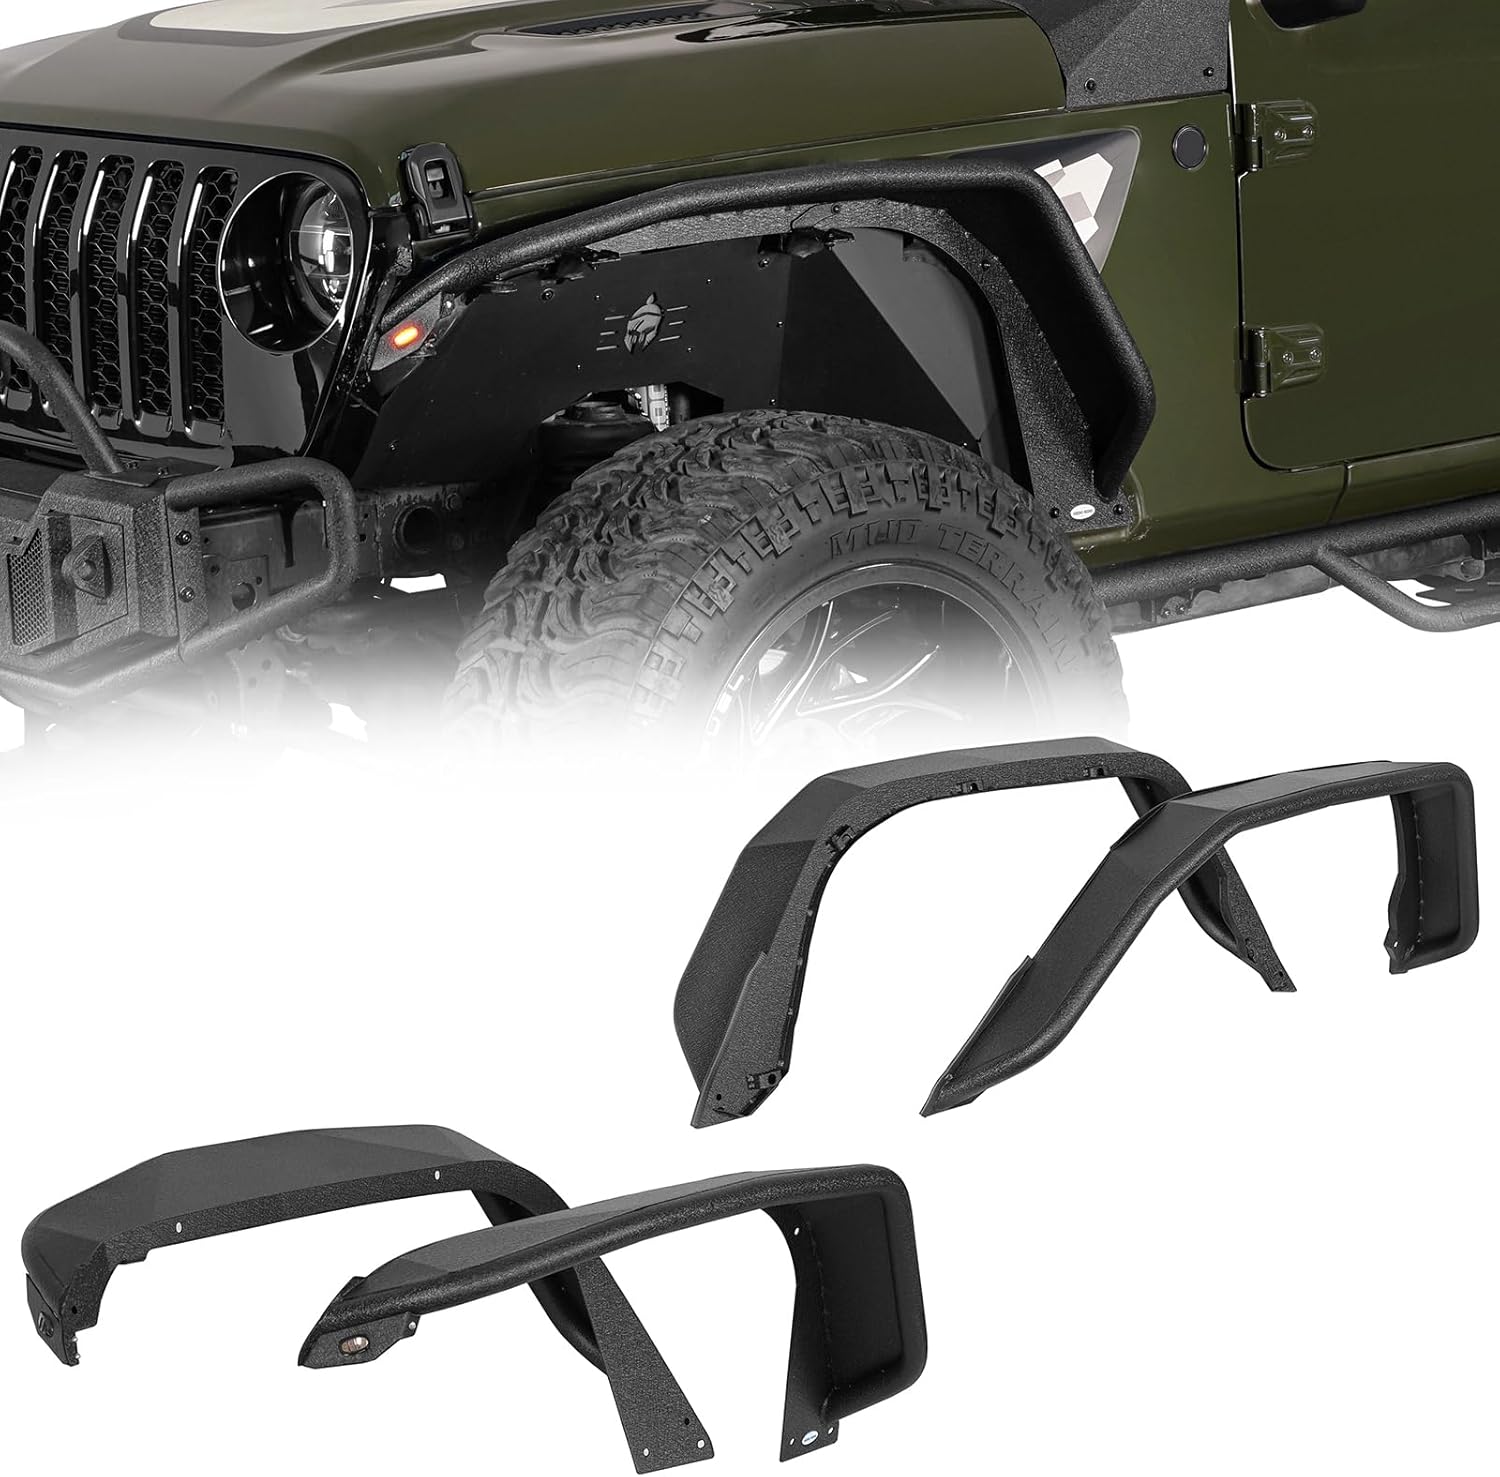
ചിത്രം 1.1: കഴിഞ്ഞുview of the Hooke Road Flux Tube Fender Flares Kit, showing both installed and individual components.
2. പാക്കേജ് ഉള്ളടക്കം
ഇൻസ്റ്റാളേഷൻ ആരംഭിക്കുന്നതിന് മുമ്പ് എല്ലാ ഘടകങ്ങളും ഉണ്ടെന്ന് ഉറപ്പാക്കുക.
- 4 × Fender Flares (2 Front, 2 Rear - Passenger and Driver Sides)
- മൗണ്ടിംഗ് ഹാർഡ്വെയർ കിറ്റ്
- ഇൻസ്റ്റലേഷൻ നിർദ്ദേശ മാനുവൽ

Image 2.1: Front Fender Flares.

Image 2.2: Rear Fender Flares.
3 സ്പെസിഫിക്കേഷനുകൾ
| ഫീച്ചർ | വിശദാംശങ്ങൾ |
|---|---|
| അപേക്ഷ | 2020-2025 ജീപ്പ് ഗ്ലാഡിയേറ്റർ JT |
| മെറ്റീരിയൽ | 1.5" diameter × 0.06" thick steel tube, 16-gauge (1/16 inch) and 11-gauge (1/8 inch) steel plate |
| പൂർത്തിയാക്കുക | Textured black powder coat with E-coating process |
| Front Fender Width | 6.6 ഇഞ്ച് |
| Rear Fender Width | 5.7 ഇഞ്ച് |
| സംയോജിത ലൈറ്റിംഗ് | Amber turn signal lights (front flares) |
| ഏകദേശ ഭാരം | 75 പൗണ്ട് |
| മോഡൽ നമ്പർ | BXG.7021AB-1 |

Image 3.1: Construction details of the fender flares, showing steel tube and plate components.

Image 3.2: Two-stage finish for corrosion resistance, including E-coat and textured black powder coat.

Image 3.3: Fender flare width measurements.
4. ഇൻസ്റ്റലേഷൻ നിർദ്ദേശങ്ങൾ
Professional installation is recommended. Ensure the vehicle is parked on a level surface with the engine off and parking brake engaged. Disconnect the vehicle's battery before starting any electrical work.
- തയ്യാറാക്കൽ: Remove the factory fender flares and the existing inner fender liners from your Jeep Gladiator JT.
- സ്ഥാനനിർണ്ണയം: Carefully position the new Hooke Road Flux Tube Fender Flares onto the vehicle. Ensure proper alignment with the mounting points.
- സുരക്ഷിത മൗണ്ടിംഗ്: Use the provided mounting hardware to bolt the fender flares into place. A hand rivet nut tool is included for inserting rivet nuts into designated mounting holes. Tighten all bolts securely, but do not overtighten.
- Wiring for Turn Signals (Front Flares Only): The front fender flares are equipped with amber turn signal lights. Connect the wiring for these lights to your vehicle's existing turn signal circuit. Consult your vehicle's service manual for specific wiring diagrams if needed. Ensure all connections are secure and properly insulated.
- Inner Fender Liners: These fender flares are designed to fit perfectly with Hooke Road inner fender liners (sold separately). If using aftermarket or factory inner fender liners, ensure they do not interfere with the new flares.
- അന്തിമ പരിശോധന: After installation, verify that all flares are securely attached and that the turn signal lights function correctly.

Image 4.1: Front fender flare with integrated amber turn signal light.

Image 4.2: Front fender flare installed.

Image 4.3: Rear fender flare installed.
5. ഓപ്പറേഷൻ
The primary function of these fender flares is to provide increased tire clearance and protection. The front fender flares include integrated amber turn signal lights. These lights operate in conjunction with your vehicle's existing turn signal system once properly wired during installation.
- Turn Signal Activation: The amber lights will activate when the vehicle's turn signals are engaged, providing additional visibility.
- Off-Road Clearance: The upward-angled design increases tire clearance, which is beneficial for off-road articulation and accommodating larger tires.

Image 5.1: Increased tire clearance provided by the fender flares.
6. പരിപാലനം
To ensure the longevity and appearance of your Hooke Road Flux Tube Fender Flares, follow these maintenance guidelines:
- പതിവ് വൃത്തിയാക്കൽ: Clean the fender flares regularly with mild soap and water to remove dirt, mud, and road grime. Avoid abrasive cleaners or harsh chemicals that could damage the powder coat finish.
- കേടുപാടുകൾക്കായി പരിശോധിക്കുക: Periodically inspect the flares for any signs of damage, such as chips, scratches, or dents, especially after off-road use. Touch up any damaged areas of the powder coat to prevent rust.
- ഫാസ്റ്റനറുകൾ പരിശോധിക്കുക: Regularly check all mounting bolts and fasteners to ensure they remain tight. Vibrations from driving, especially off-road, can cause fasteners to loosen over time.
- ഇലക്ട്രിക്കൽ കണക്ഷനുകൾ: For the front turn signal lights, periodically inspect the wiring connections for corrosion or damage. Ensure they remain secure and waterproof.
7. പ്രശ്നപരിഹാരം
ഇൻസ്റ്റാളേഷൻ സമയത്തോ അതിനുശേഷമോ നിങ്ങൾക്ക് പ്രശ്നങ്ങൾ നേരിടുകയാണെങ്കിൽ, ഇനിപ്പറയുന്നവ പരിഗണിക്കുക:
- Flares Not Fitting Correctly: Double-check that the factory fender flares and inner liners have been completely removed. Ensure the new flares are correctly oriented (front/rear, driver/passenger side) and aligned with the vehicle's mounting points.
- Turn Signal Lights Not Working:
- Verify that all electrical connections are secure and properly wired to the vehicle's turn signal circuit.
- Check for blown fuses in the vehicle's fuse box related to the turn signals.
- Ensure the vehicle's battery is reconnected and fully charged.
- Loose Flares: Re-tighten all mounting hardware. If issues persist, inspect the mounting points on the vehicle and the flares for any damage or deformation.
8. വാറൻ്റിയും പിന്തുണയും
The Hooke Road Flux Tube Fender Flares Kit is backed by a 2 വർഷത്തെ നിർമ്മാതാവിന്റെ വാറന്റി വാങ്ങിയ തീയതി മുതൽ. സാധാരണ ഉപയോഗത്തിലുള്ള മെറ്റീരിയലുകളിലെയും വർക്ക്മാൻഷിപ്പുകളിലെയും വൈകല്യങ്ങൾ ഈ വാറന്റി ഉൾക്കൊള്ളുന്നു.
For warranty claims, technical assistance, or any product-related inquiries, please contact Hooke Road customer support. Lifetime customer support is provided to ensure your satisfaction.
കൂടുതൽ സഹായത്തിന്, ദയവായി സന്ദർശിക്കുക Hooke Road Store.


